Knit Pinwheel Afghan Block 9"/12"
Designed by Margaret Maclnnis c. 2012
Yarn
Vanna's Choice—24 grams Color A, 12 grams Color B, 12 grams Color C (more for 12") Needles—straights or shorter circular, about 4.5-5 mm (Us 7 or 8) or size for gauge Crochet hook for edging-4.5-5.5 mm US G or H/I aim for 16 st in 4 inches with garter stitch, which allows for a small border in croche ORIAL--http://www.ravelry.com/discuss/vannas-choice-fan-club/topics/1206917#2 The Tutorial is written for a 12" block, and involves casting on 20/22 stitches. This pattern is for the 9" block, but the method is identical. Yarn needle, Marker for RS of block (right side marker)
Stitches
W&T—wrap and turn, method shown in tutorial. Method of W&T—bring yarn to front. Slip next st to right needle. Bring yarn to back. Turn. Slip st back to the 'now' working needle, and bring yarn THROUGH to back between the needles, in position to knit again. The stitch is now wrapped, and your work is turned. Do not ‘knit' the stitch.
1st Square--1st triangle
Cast on 16 st. (20 or 22 if you are making a 12" block and adjust counts accordingly or 14 st if you are loose knitter and/or using larger needles) Row 1: k16, turn Row 2: k16, turn Row 3: Mark as RS; k 15, w&t the 16th st (your work is now turned and you will be knitting the 'other' way.) Row 4: k, turn Row 5: k14, w&t the 15th st Row 6: k, turn Carry on, knitting one fewer stitch each second row, w&t, and knit back. When there are two stitches left to work, right side facing: Next row: k1, w&t-- Then k1 on the return row, then, TURN so right side is facing, cut Color A, and join Color B. Weave in end of Color A with the method shown in the tutorial before you proceed, or things will distort. Weave in the Color B end after you have worked 3 rows.
1t Square--2nd triangle
Working with Color B Row 1: k1, w&t the next st; (that st will now have 2 w&t on it, but don't worry about that) Row 2: k back the 1 st, turn Row 3: k1, k next st WiTH its last (top) wrap-ignore the one under it, and w&t the third st. Row 4: k2 back to beg, turn Row 5: k2, k next st WiTH its top wrap, and w&t the fourth st. Carry on, knitting one further along each second row with its wrap, and w&t one further along in that same row, then knitting 'back' along the just knit stitches. On the last one, k15, w&t, knit back Then knit 16, knitting the last st with its wrap, turn, and knit back. Then turn and you have RS facing you. Cut Color B.
2nd SQUARE—1st triangle
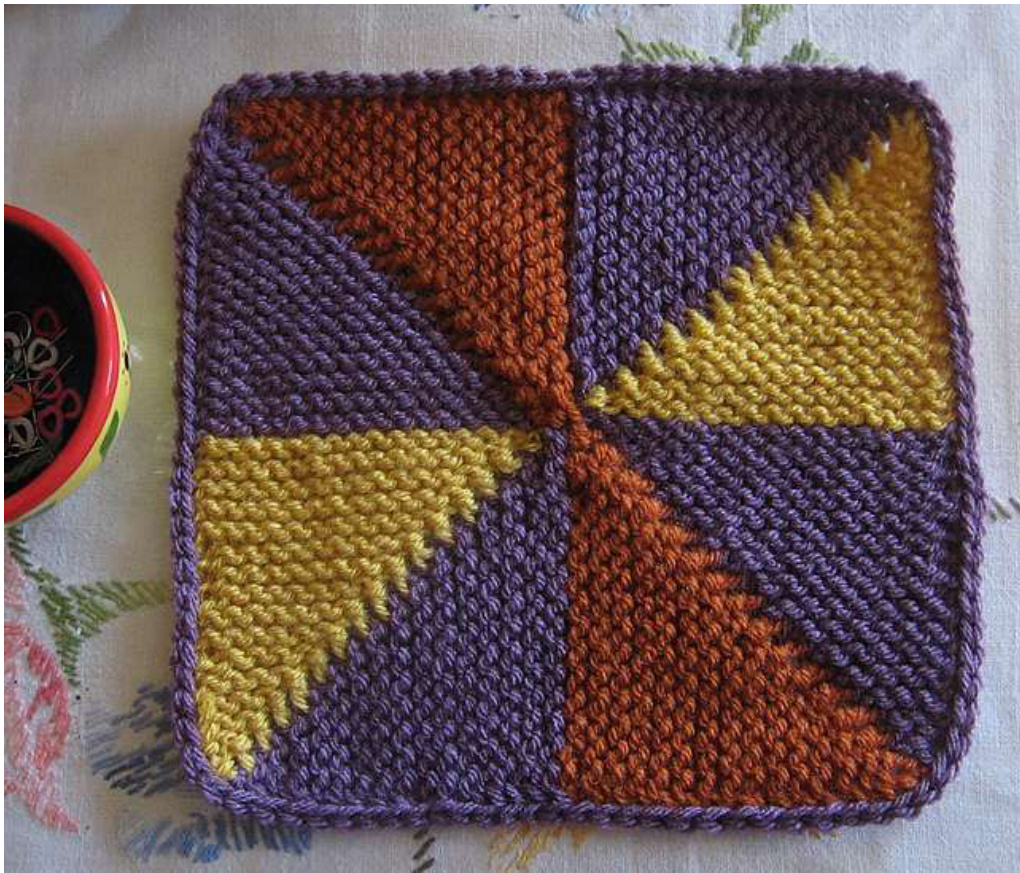
Using the 16 st of the 2nd triangle as your base upon which to work, join Color A. The first triangle of each square will be the same Color throughout to form the Pinwheel Main Color. The second triangle of each square can vary; photo shows Colors B and C. K2 rows, and follow the same steps as the first triangle, from Row 3 to end.
2nd Square—2nd triangle
Work in Color C (or whatever you like)—same method as 1st square, 2nd triangle. 3'd square—1st triangle: Work in Color A, same method as 1st triangle of Square 1. 3'd square—-2nd triangle: Work in Color B, same method as 2nd triangle of Square 1. 4th Square—-1st triangle: Work in Color A, same method as 1st triangle of Square 1 4th Square—-2nd triangle: Same method, Color C. At the end, instead of simply 'Kknitting back', bind off. You will not w&t the last st, but simply knit it, and turn and bind off. The bind off will end on the outside edge. Cut end to 14 inches for sewing, thread yarn needle.
Finishing
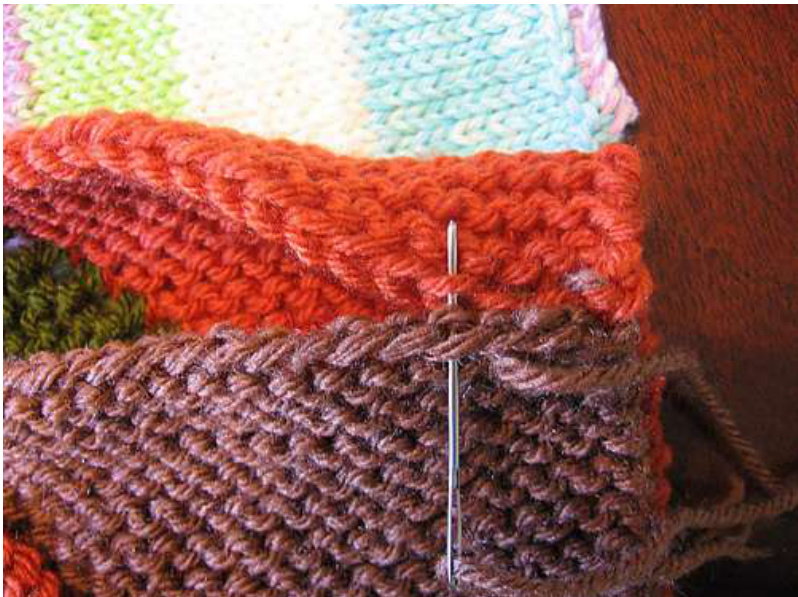
Using the method given in the Tutorial, sew the bindoff edge to the caston edge from the back, matching edges, using full loop of caston edge, and single loop of bindoff edge (as in photo) and a mattress-type back and forth stitch--not overcast stitch:
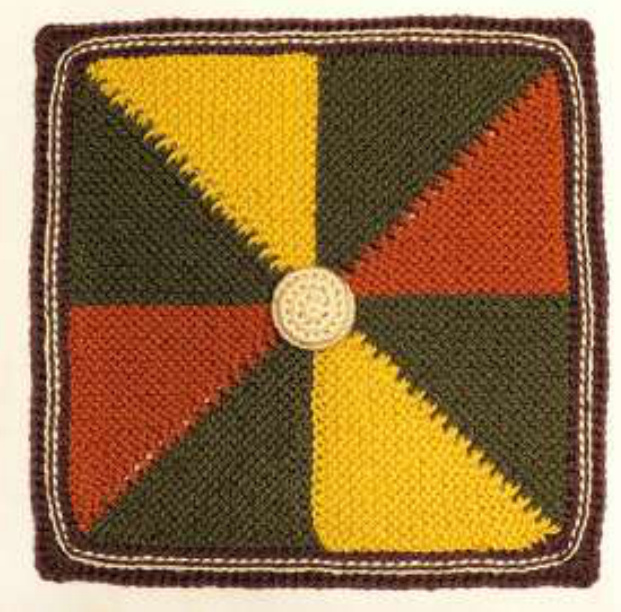
Work your final yarn carefully through the back loops of the center circle, just nipping in the edge, and pull snugly. If it pleases you, sew a yarn covered button there, or crochet one. Knit border—using a 24 inch circular, pick up and knit all the garter edges. Knit one round, working a kfb in st on either side of the cornermost stitches, every second round, depending on how big you want your border to be. Purl the second round. Bindoff in purl if you can. Crochet border—I like to slip stitch an edge through all garter ridge edge sts and create a slipped st edge upon which any border will be based. First photo shows that—-my square was 9" at that point
Creative border solutions by Donna Kay Lacey (this was a 12" block)


