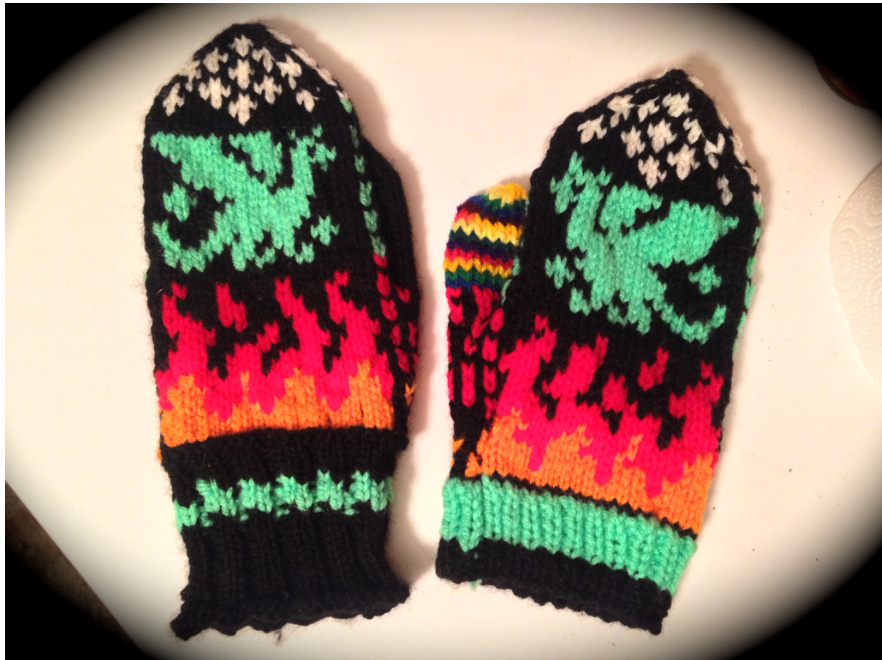
Mr. Dragon goes to Norway Mittens By Skyler Kopko
Supplies:
Yarn of your choice (l used worsted weight): 2-4 different colors Double pointed needles (DPNs) or traditional needles (flat): I used US 5 ? Stitch markers Stitchholder
Abbreviations:
MC: Main color DC: Dragon color // = K2TOG II=SSK
Notes:
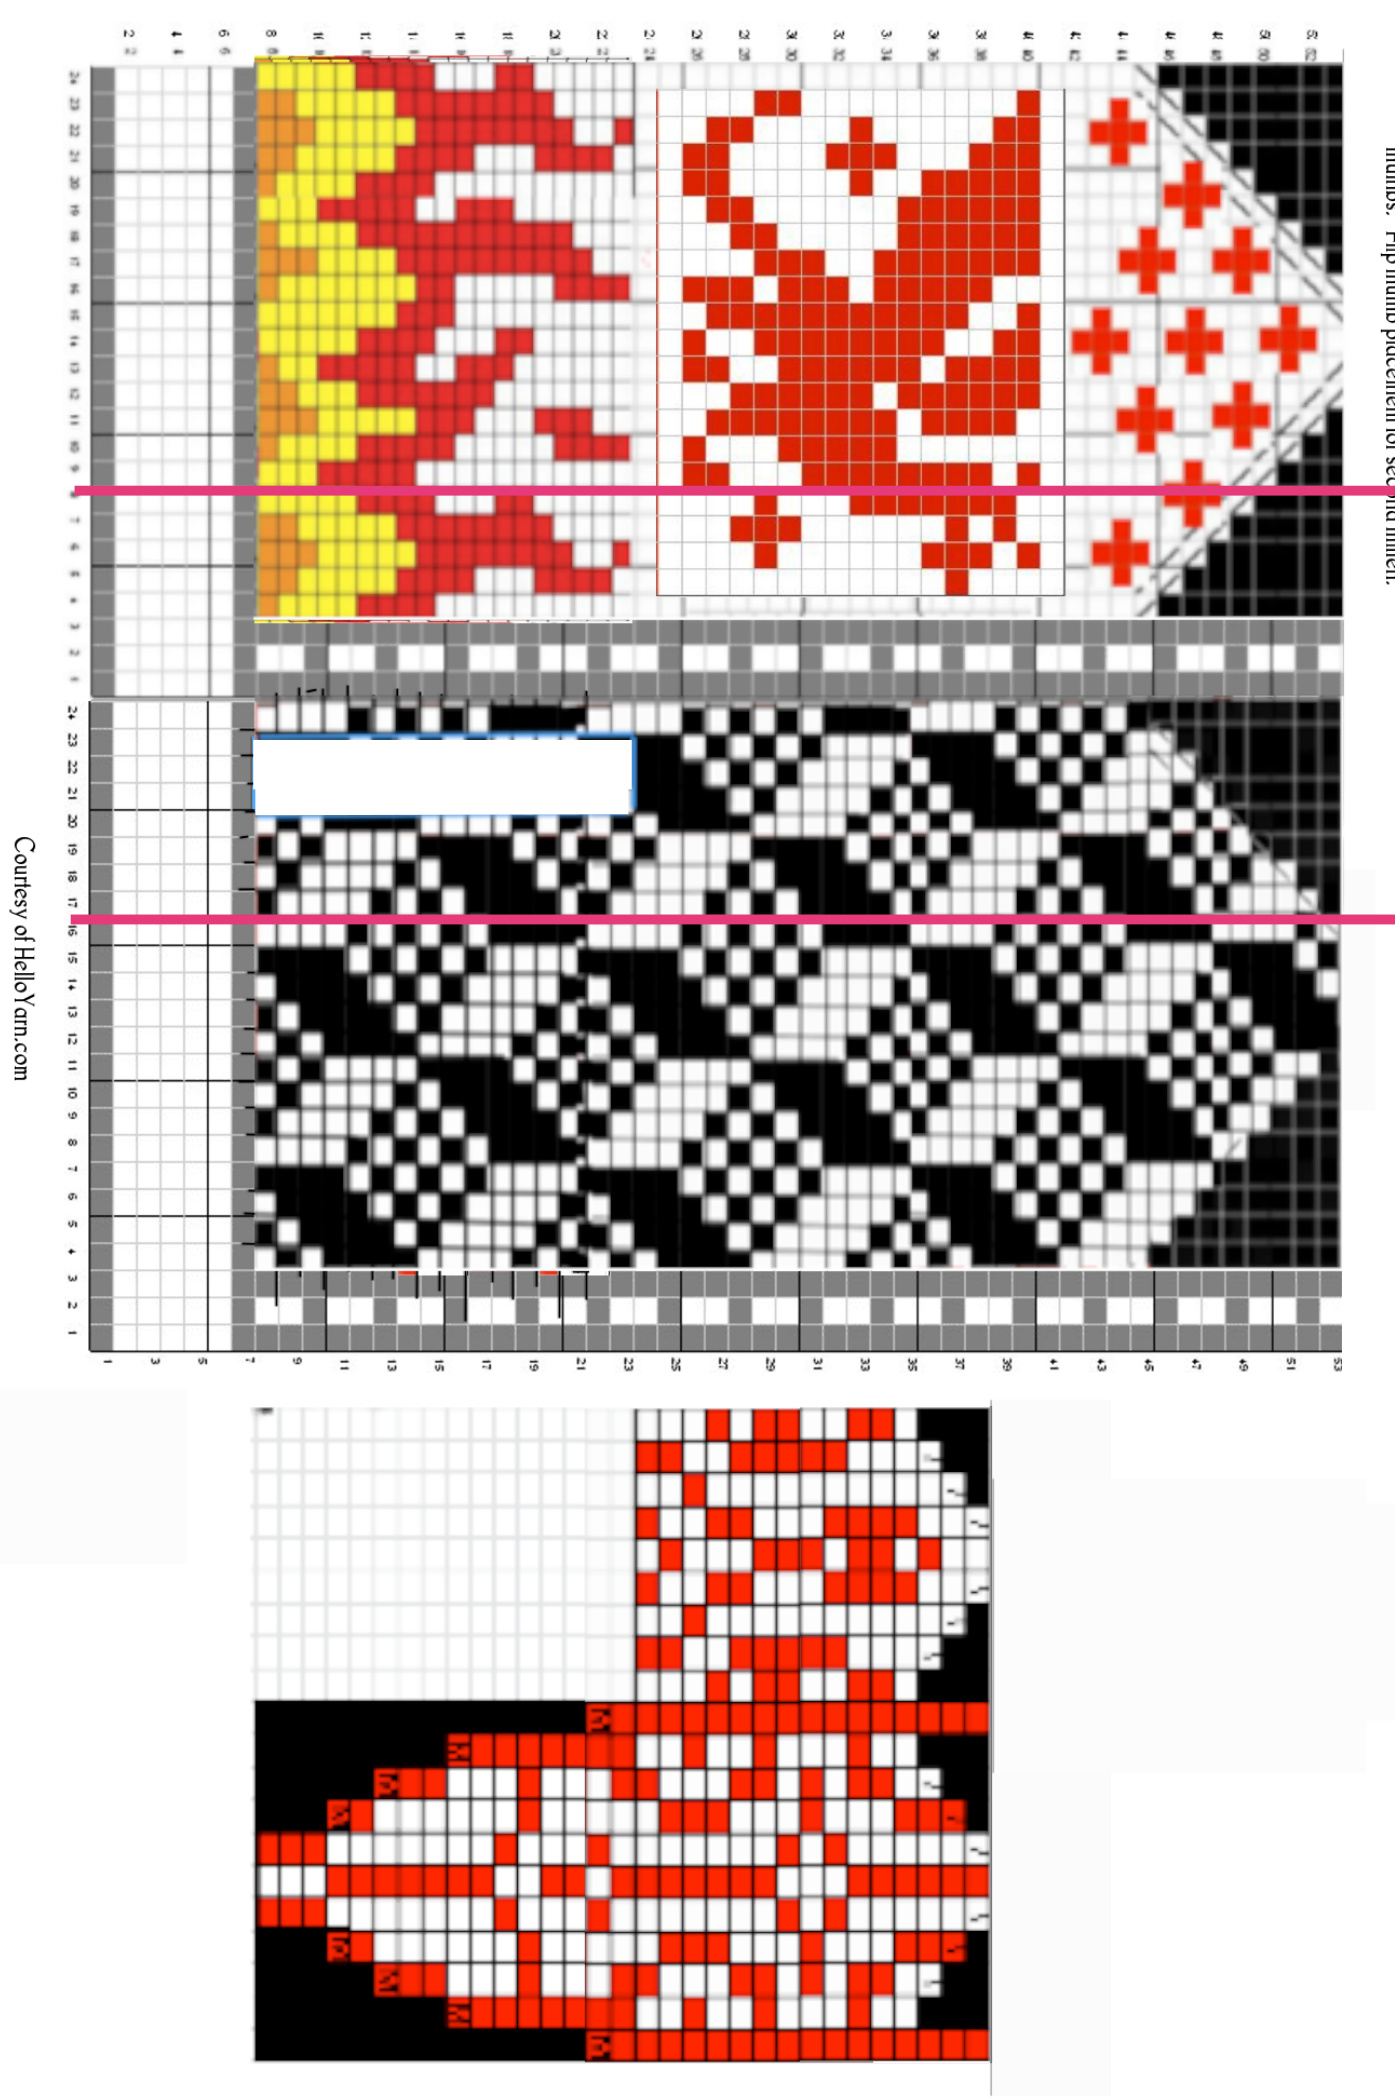
I am fairly certain I did a poor job of correctly aligning each of the color charts within the mitten chart. This actually isn't that horrible of an error, if you think of each chart as it own chart and just follow them accordingly. If you print out the chart and cross off each row as you go, it is VERY easy. While knitting this mitten I switched between circular knitting on DPNs, to knitting back and forth. I did this so that I wouldn't have to anchor the black yarn multiple times across the back of the fire section, which has no black in it. After knitting the fire section, I went back to knitting in the round. This has the advantage of having the parts you need to weave together already aligned. I am REALLY bad at aligning my knitting for weaving, so this was the best option for me. If you are really good at multiple color strand management, please, be my guest and knit in the round the whole time. If you are especially good at weaving, I might suggest to knit the whole mitten flat and then weave the sides together when you are done. I originally made this pattern for my friend with a bunch of different pieces of other people's projects mashed together into a pattern that I liked. Therefore, literally no part of this mitten is my original creation. I didn't plan to post it for that reason, but I think it's too cool to not share . I obtained the dragon chart from Ravelry knitter Sandra Jäger. Here is the original posting for the dragon chart. I obtained the thumbprint and stars from the Ravelry knitter Rebecca Strickland. I knitted her Somerset vs Norway mittens sometime last year and thought the thumb looked really cool, so I just used it in my mitten because I couldn't really think of a way to incorporate the brick design of my mitten into the thumb. The mitten layout is from Hello Yarn. I completely forgot where I got the fire from .
.. Directions:. Dnections:
I suggest doing a gauge swatch for these mittens. You can use almost any yarn you want, if you do the gauge swatch first. The first time I made them I accidentally made a baby mitten because I didn't do the swatch. The next time, I used crappy walmart yarn on size 5 needles, and they turned out correctly. If you want truly Norwegian looking mittens, just use two colors of yarn. I like to make things horrifically complicated, so I used 4 colors.
Body of the Mitten:
· Cast on 48 stitches in MC in your cast-on of choice. I chose to do the ribbed cast on, but anything will work. I used three DPNs, 16 to each needle. On the chart, I indicated which stitches are on which needle with the big pink line. ·I don't have anything in the chart for the wrist, so do whatever you want. I just did my MC then my DC in 1x1 rib for a few rows then went straight into the main chart. Almost the entire fire section is where you are going to want to knit back and forth, if you decide to do that. The pattern is numbered on both sides of the chart, so this is easy to do. See thumb section below for thumb directions! After moving thumb stitches to
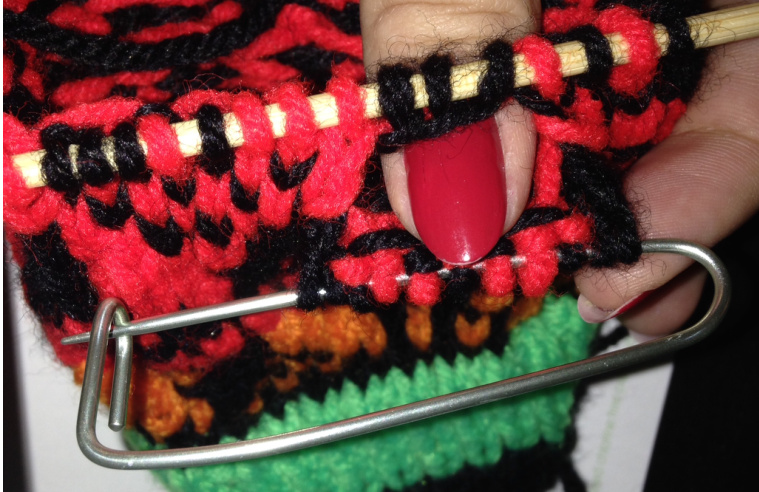
holder, cast on three stitches to your needles to fill in the gap left by moving the thumb stitches. Keep knitting as if nothing happened. See photo: the three black stitches above my nail were twisted on, then I continued to knit the entire row. When you get to the decrease rows, you will need to decrease every round. // means knit these two stitches together and \\ means SSK these two stitches together. Finish the mitten with either a kitchner stitch or the regular loop and tie method with a tapestry needle.
Thumb:
When you knit to the thumb gusset, place a marker on either side. This helps me to not forget to switch to the thumb chart. Once you get to row "23" place the thumb stitches on to a stich holder. Don't think about these stiches again until you finish the rest of the mitten. Once you finish the mitten: Pick up the thumb stitches on the holder. Pick up 9 stiches around the thumbhole (3 new stitches on either side of the 3 stitches you cast on at row 23). If you aren't sure how to do this, watching a tutorial is strongly suggested. Things can get ugly fast! You should have a nice triangle on your DPNs around the thumb-hole. Knit this according to the chart, then finish with either a kitchner stitch or the threaded loop method (take a tapestry needle and thread it through the remaining stitches, then tie tight).