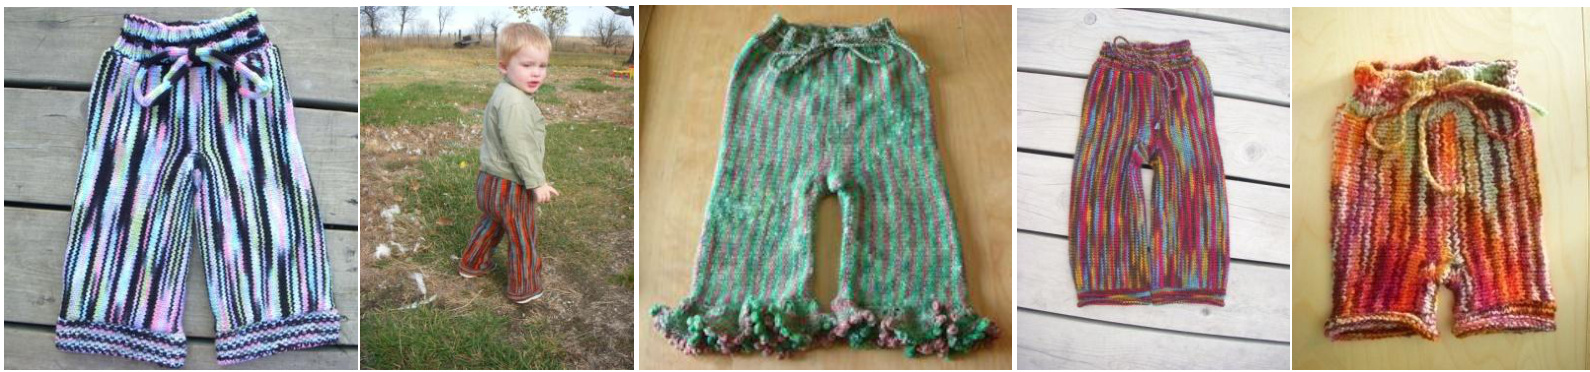
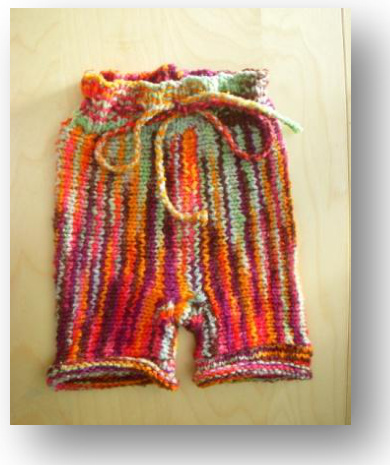
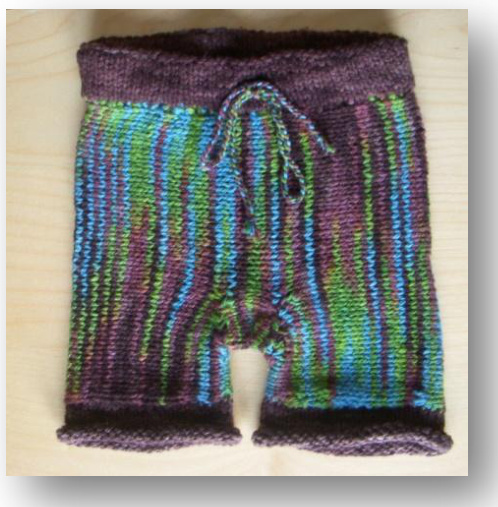
Sideways BritCheS by Melanie Hoffman Wide version
Materials:
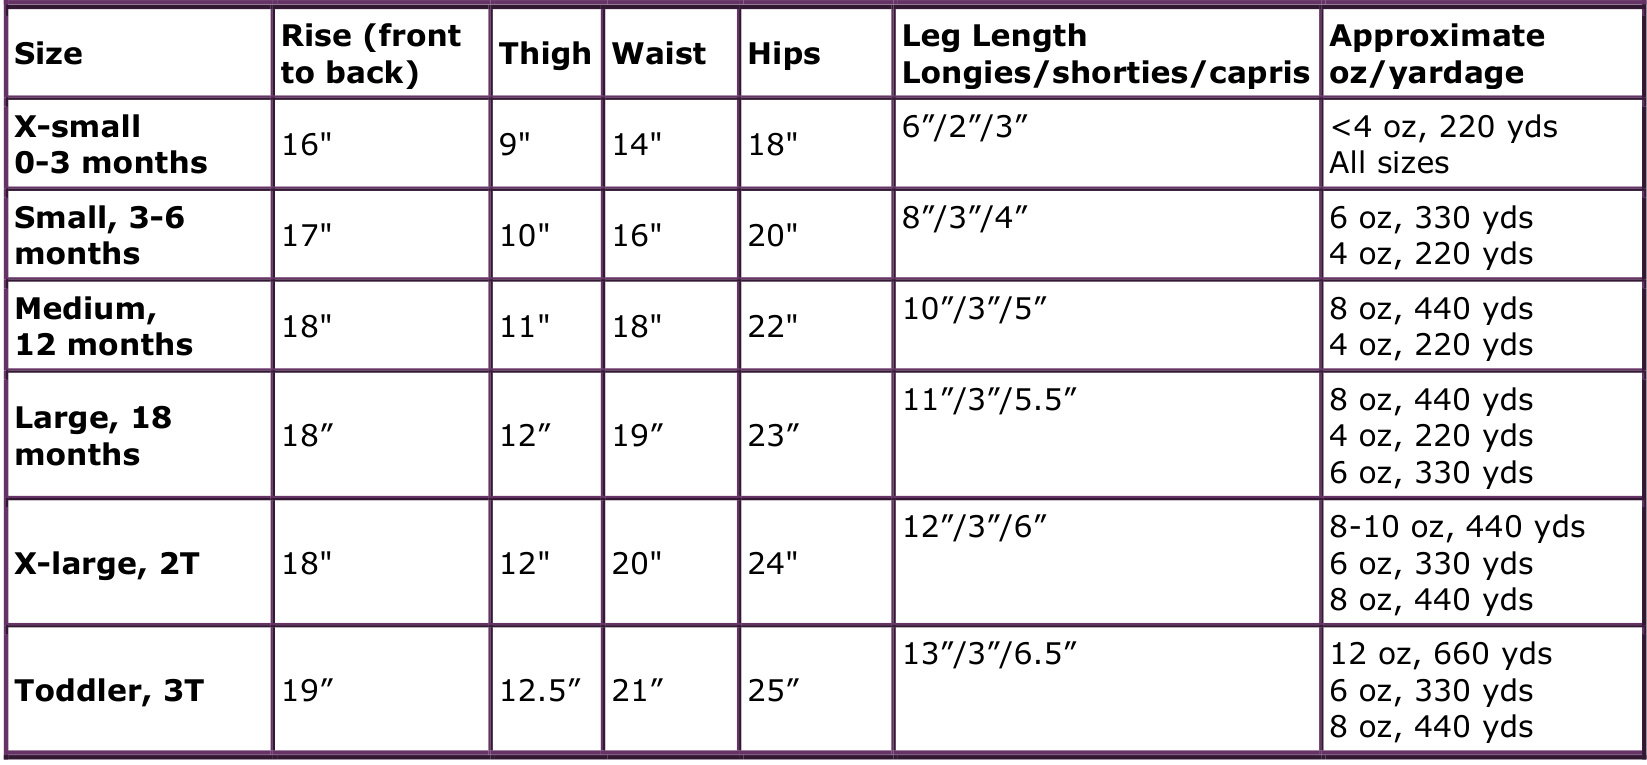
Worsted weight wool, Doodlebirds.com BFL or Nifty wool is recommended. See chart below for amount. US #5 and #7, $32^{\prime\prime}$ circular needle or size needed to obtain gauge. Also a US #3 (or needle 4 sizes smaller than largest) is needed if doing the 1x1 ribbed waistband. 2 stitch markers and tapestry needle. I like to use removable stitch markers for ease of use. Gauge: on larger needle 20 sts $\times\,28$ rowsper $4^{\prime\prime}$ $:10\,\mathsf{c m}_{i}$ square. Row gauge is very important, but hard to get exact. Get as close as you can, you'll measure your piece as you go to make sure the size is right. Special Sts: ssp: slip 1 knitwise, slip 1 knitwise, purl slipped stitches together from the back. Longies Measurements: x-small (small, medium, large, x-large, toddler)
Customizing instructions
The sizing may be adjusted a little bit. To adjust the rise, add or subtract stitches from the cast on total and move your stitch marker for the bum shaping to reflect the amount that you added or subtracted. To adjust the inseam, do the same as for the rise, making sure to move the marker in the right direction. To adjust the hips/waist, find the size that best matches the width and follow the directions for measuring at that size.
Begin
This initial provisional CO is at the center ofthe back side of the britches. Instructions for provisional cast can be found on page 8. Shorties: Provisional C0 41 (49, 51, 51, 51, 54) sts. Capris/Board Shorts: Provisional CO 46 (51, 58, 61, 63, 69) Longies: Provisional C0 58 (70, 78, 83, 88, 95) sts. Beginning with a purl row, work in stockinette st for 15 (19, 21, 23, 25, 27) rows. \*\*ouiuiltulahd
Bum shaping, Left Side
1. Knit 29 (32, 34, 34, 34, 37) sts, k2tog, place marker, knit to end. 2. Purl even. 3. Knit to 2 sts before the marker, k2tog, slip marker, knit to end. 4. Purl even. 5. Repeat 3 and 4, 4 more times for a total of 6 decrease rows, 12 rows total. You will now have 25 (28, 30, 30, 30, 33) sts before the stitch marker. Counting the initial cast on row, there should be 28 (32, 34, 36, 38, 40) rows. 6. Knit even. 7. Purl even.
8. Repeat 6 and 7 until you have 56 (64, 70, 74, 78, 80) rows total. At this point, measure how long your piece is to double check your gauge. Your piece should measure $8^{\prime\prime}\,(9^{\prime\prime},\,10^{\prime\prime},\,10.5^{\prime\prime},\,11^{\prime\prime},\,11.5^{\prime\prime})$ . You want it to be as accurate as possible. If it is too short, continue in stockinette stitch until it measures correctly. If it is too wide, work less rows in step 5 of the following section.
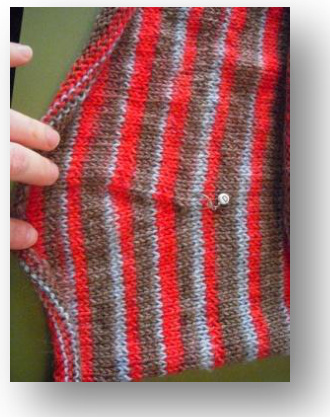
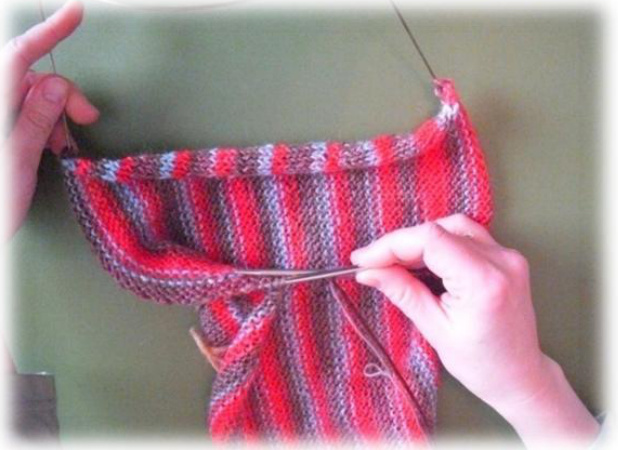
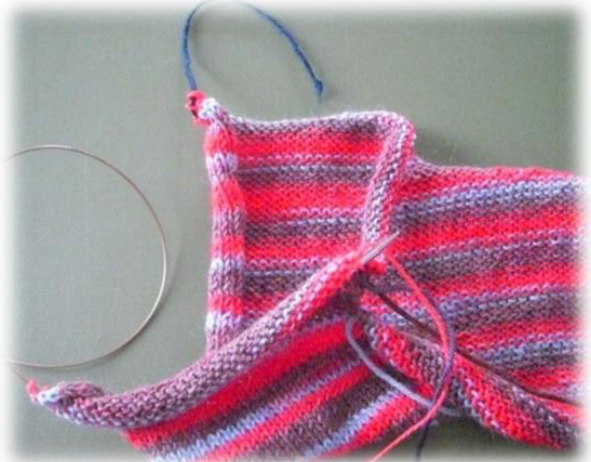
Gusset
At this point, the gusset will be a flap connecting the front to the back. 1. Knit to the stitch marker, which should be after 25 (28, 30, 30, 30, 33) sts, place remaining stitches (these will be your leg) on a piece of waste yarn. 2. Put the first 31 (34, 36, 36, 36, 39) sts from the cast on edge onto the other side of your circular needle. Remove waste yarn from these stitches. 3. Place a stitch marker, provisional cast on 10 stitches. 4. Now bridge the front of the britches to the back by beginning to knit the back stitches after the provisional cast on. Place a stitch marker between the gusset stitches and the back stitches.
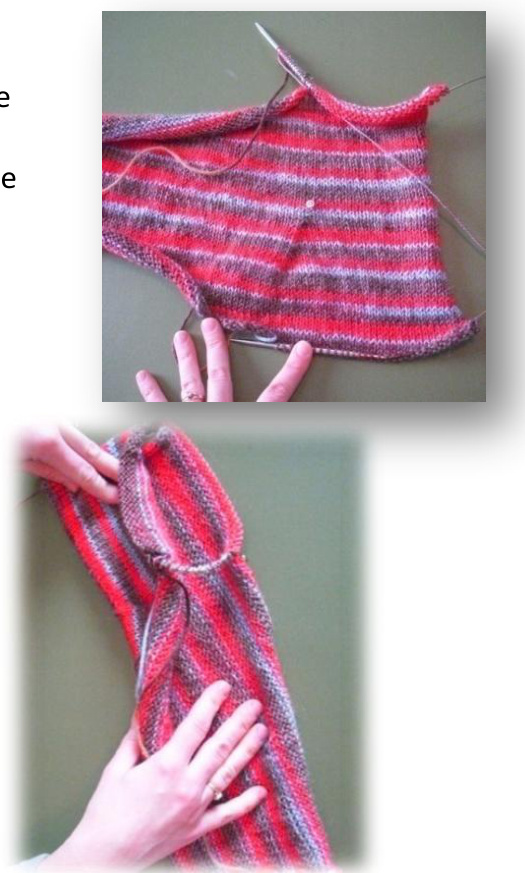
5. Knit stockinette stfor 7rows. If you need to knit more or less rows, work an odd # of rows. You'll end having just worked a knit row. You willbe on the back side of the britches. 6. Purl to the stitch marker on the back. Place the 10 gusset stitches and the next 25 (28, 30, 30, 30, 33) sts of the front body onto a piece of wasteyarn. 7. Right Leg, place a stitch maker and then provisional cast on, Shorties: 10 (15, 15, 15, 15, 15) sts. Capris: 15 (17, 22, 25, 27, 30) sts. Longies: 27 (36, 42, 47, 52, 56) sts.
8. Work in stockinette st for 15 (19, 21, 23, 25, 27)) more rows. You will have a total of 16 (20, 22, 24, 26, 28) rows from the provisional cast on edge. You will end having just knit a row.
Bum Shaping, Right Side
1. Purl to stitch marker, ssp, slip marker, purl to end. 2. Knit even. 3. Repeat 1 and 2,5 more times fora totalof6 decreases, 12 rows.Total. 25 (28, 30,30,30,33)sts afterthe st marker. 4. Purl even. 5. Knit even. 6. Repeat 4 and 5 until you have 55 (63, 69, 73,77,79) rows total, or1 row less than you knit on the left side. If you had to adjust on the left side, make sure to knit the same amount of rows as you did on the left leg. End having just worked a wrong side row. 7. Knit to the stitch marker,cut yarn leaving at least an $18^{\prime\prime}$ tail. You will use this tail to graft the rise stitches. 8. Place the inseam stitches on hold. 9.Using the $18^{\prime\prime}$ tail,graft the 25 (28, 30, 30, 30, 33) sts before the stitch marker together with the 25 (28, 30, 30, 30, 33) sts held from step 6 under "Gusset".
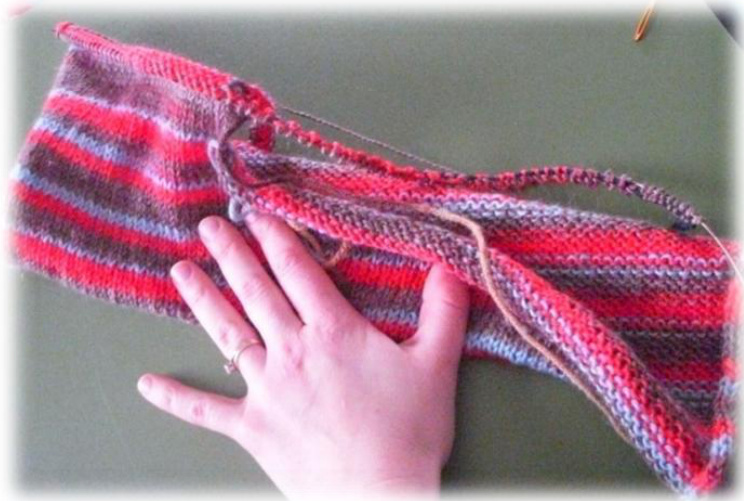
Finishing Right Leg
Placethe inseam stitchesfromthefront right leg onto your needle. Placeastitch marker onyour needle. Place the nearest 10 gusset stitches onto your needle next and place a second stitch marker on your needle. Place the remaining inseam stitches from the back right leg onto your needle. 1. Purl even along the first set of inseam sts, along the 10 gusset stitches and down the second set of inseam sts. 2. Knit to 2 sts before the first marker, ssk, slip marker, k2tog, knit to 2 sts before the second marker, sk, slip marker, k2tog, knit to end. Repeat 1-2 until there are only 2 stitches between markers 1 and 2. You will be decreasing 4 stitches on every other row. Graft inseam stitches together or 3-needle BO the first half of the stitches to the second half.
Finishing Left Leg
Same as for the right leg.
HOLES!
It's nearly impossible to avoid, but you'llsee 4 holes at the corners of your gusset. These can be easily sewn closed with a small piece of yarn. Some people also willsee gaps where the gusset decreases were done. This area can be reinforced as well by working a duplicate stitch over the gap on the wrong side of the fabric.
Waistband Options:
I find i easiest to place safety pins at the $\%$ way points; back center, lft side, front center and right side all spaced evenly. This will help you pick up the waistband stitches evenly.
2X2 Ribbed Drawstring waist
With US #5 needle, pick up and knit 72 (80, 88, 96, 104, 104) sts along the waist. This will be 18 (20, 22, 24, 26, 26) between each of the % way markers. Rd 1: K1, $^{*}\mathsf{P}2$ , K2; repeat from \* to last stitch, end k1. Rds 2-6: Repeat round 1, 5 more times. Rd 7, eyelet round: K1, \*p2tog, yo, k2; repeat from \* around to last stitch, end k1. Rds 8-12: Repeat rounds 1-6. Bind off using a stretchy sewn bind off.
1x1 Ribbed waist
With a US #3 needle, pick up and knit 64 (74, 84, 90, 94, 100). You'll want this ribbing to be as tight as possible to help keep its shape. Rd 1: K1, p1 Rd 2: Repeat Rd 1 until ribbing measures $z^{\prime\prime}$ Bind off using a stretchy sewn bind off. To help the ribbing keep its shape, you can sew elastic thread through the inside of the waist band.
Enclosed Elastic/drawstring
With the smaller needle, pick up and knit 70 (80, 90, 94, 100, 104) sts along Rds 1-3: Knit. Rd 4 (enclosed drawstring only): K33 (38, 43, 45, 48, 50) sts, yo, k2tog, ssk, yo, k33 (38, 43, 45, 48, 50). Rds 5-7: Knit. Rd 8: Purl. Rds 9-15: Knit. Fold at the purl ridge and sew into place leaving a hole to insert your elastic. Cut a piece of elastic about $1^{\prime\prime}$ longer than the waist. Put a safety pin on one end and secure the other end to the fabric near the hole. Feed the elastic through the waistband. Overlap the extra inch and sew securely. Close up remaining hole.
Leg Finishes
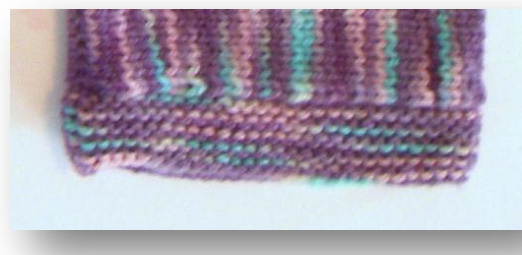
Garter Stitch
With smaller needle, pick up and knit 48 (54, 58, 62, 64, 66) stitches. Rd 1: Purl Repeat round 1 and 2 until you have 6 ridges (should be 11 rounds), end having just worked a purl round. Bind off loosely knitwise.
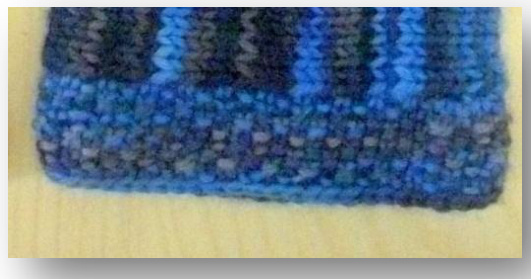
Seed Stitch
With smaller needle, pick up and knit 48 (54, 58, 62, 64, 66) stitches. Rd 1: k1, p1 around. Rd 2: P1, k1 around. Repeat rounds 1 and 2 for 10 rows total. Bind off loosely in pattern.
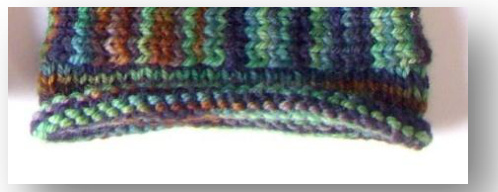
Rolled Edge
With smaller needle, pick up and knit 48 (54, 58, 62, 64, 66) stitches. Knit even for 14 rounds. Bind off loosely.
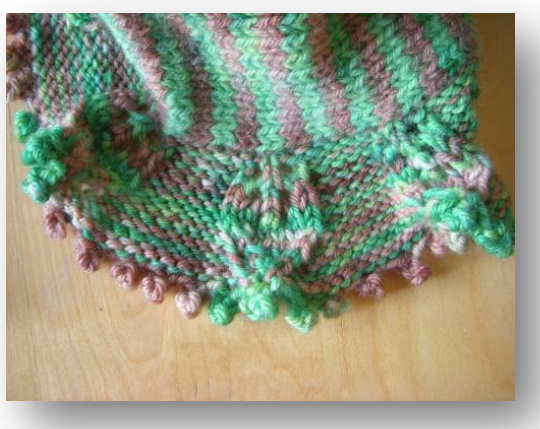
Leaf Ruffle
Pick up and knit 48 (54, 60, 60, 66, 66) Row 1: $\tt{*p5}$ , k1; repeat around. Row 2: $\tt{*p5}$ , yo, k1, yo; repeat around. Row 3: $\tt{*p5}$ , k3; repeat around. Row 4: $\tt{*p5}$ , k1, yo, k1, yo, k1; repeat around. Row 5: $\tt{*p5}$ , k5; repeat around. Row 6: $\tt{*p5}$ , k2, yo, k1, yo, k2; repeat around. Row 7: $\tt{*p5}$ , K7; repeat around. Row 8: $\tt{*p5}$ , M1 purlwise, sk, k3, k2tog, M1 purlwise; repeat around. Row 9: \*p6, M1 purlwise, k5, M1 purlwise; repeat around. Row 10: \*p7, M1 purlwise, ssk, k1, k2tog, M1 purlwise; repeat around. Row 11: \*p8, M1 purlwise, k3, M1 purlwise; repeat around. Row 12. \*p9, M1 purlwise, slip one as ifto knit, k2tog, psso, M1 purlwise; repeat around. Picot Bind Off: Bind off 2sts, \*place stitch from right needle back onleft needle, cable cast on 2 sts, bind off5sts; repeat untilall stitches have been bound off.
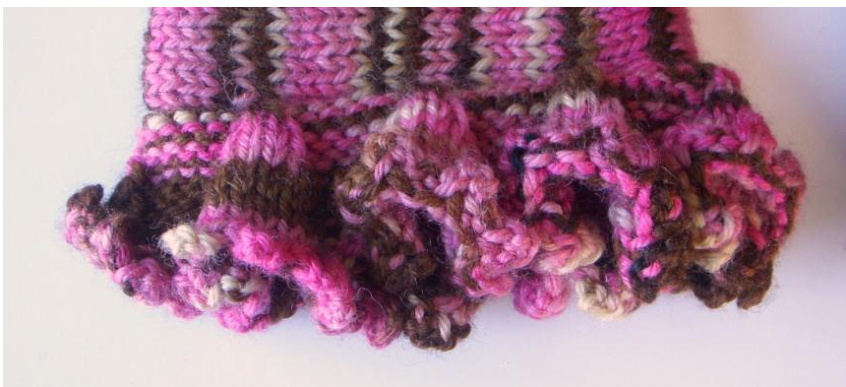
Ruffle
With smaller needle, pick up and knit 48 (54, 58, 62, 64, 66) stitches. Kfb in each stitch for the next 2 rounds. Knit even until desired length. Purl last round. Bind off knitwise.
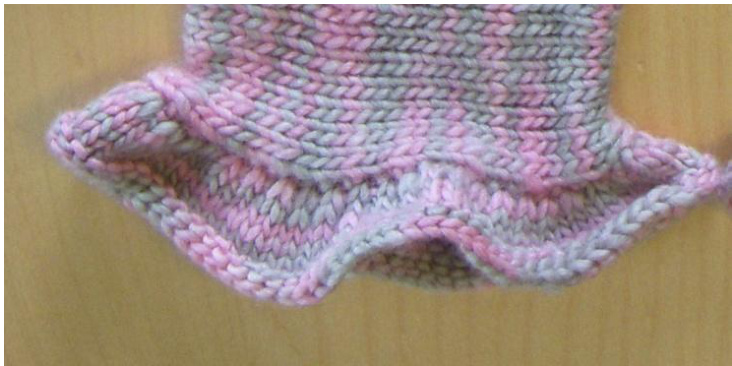
Gentle Ruffle
With smaller needle, pick up and knit 48 (54, 58, 62, 64, 66) stitches. Kfb in each stitch for the next round. Knit even until desired length. Purl last round. Bind off knitwise.
Bell Ruffle
With smaller needle, pick up and knit 48 (54, 60, 60, 66, 66) stitches. Rd 1: \*P5,k1; repeat across. Rd 2: \*P5, M1, k1, M1: repeat across. Rd 3: \*P5, k3; repeat across. Rd 4: \*P5, M1, k3, M1; repeat across. Rd 5: \*P5, K5; repeat across. Repeat in like manner until brim is about $2"$ long or desired length. Bind off 2, \*place stitch from right needle back onto left needle, cable cast on 3, bind off 5; repeat from \*across. A regular bind off looks very nice as well
Provisional Cast On
1. Hold waste yarn in your left hand along with the working yarn. 2. With yourright needle,go in front of and under the waste yarn and pickup the working yarn,bring your nedleto the front and up. 1 stitch created. 3. Bring the working yarn in front of and over needle. 4. Repeat b and c until you have 10 stitch on your needle (you should also have 10 sts on your waste yarn).
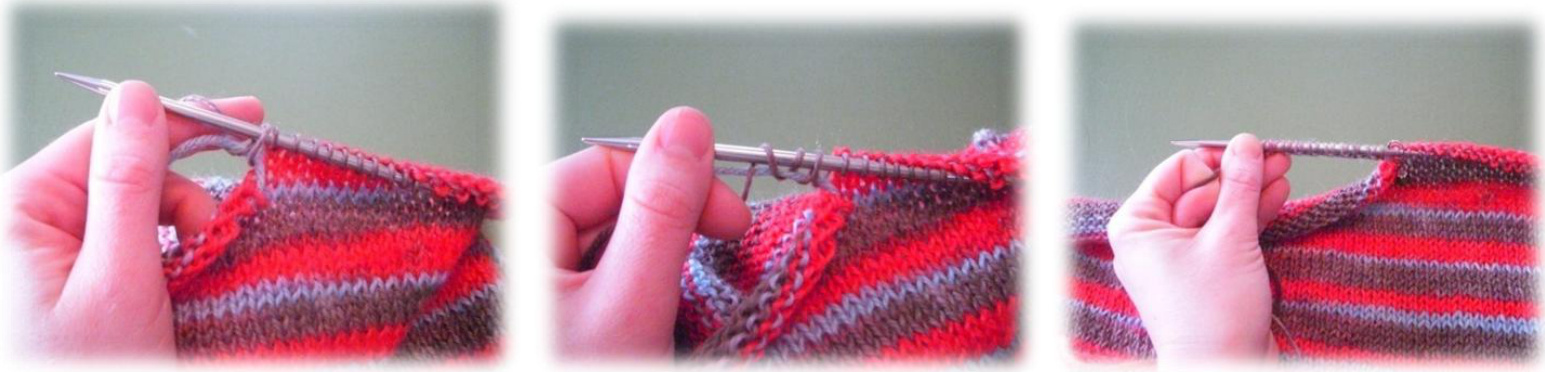
A video for the provisional cast on can be found at www.knittinghelp.com.


