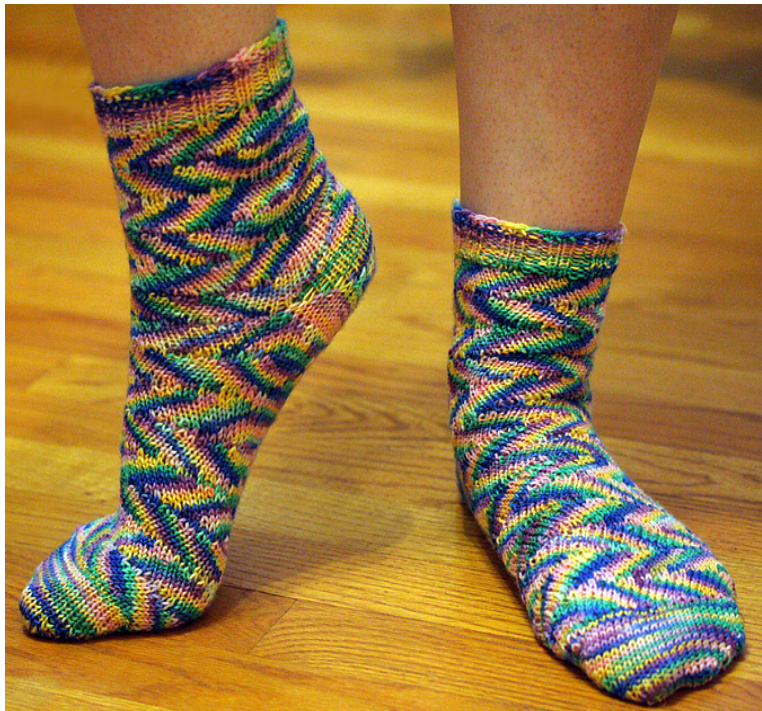
Tilt-A-Whirl Socks
Materials:
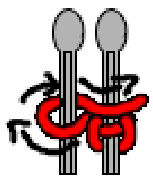
Fine gauge (5/16" from center of one peg to center of the next) sock knitting loom or adjustable knitting loom 100g of weight 1 (fingering weight) sock yarn. Multicolored (but not self-striping) yarn will work best for this pattern. Sample socks were knit in Mulberry Fibers' Twisted Sock in the Alison colorway. Loom knitting hook Fabric measuring tape TapestryNeedle Two size 1 Double-Pointed Needles (DPNs) Three stitch markers (anything you can use to mark specific pegs is fine) 4 stitches and 6 rows = 2 inches in leg/foot pattern (measured across short rows Size: Sample knit for an 8 1/2" foot circumference, but this pattern can be adjusted for any foot size. To calculate the number of pegs you will need, use the following steps: 1. With your foot flat on the floor, measure around the ball of your foot with a fabric measuring tape. 2.Multiply the measurement (in inches) by 7. 3. Multiply the resulting number by .8 (normally you would use .85, but this sock knits up a bit looser than most, so it is knit on less pegs). 4. If your result (ignoring any decimals) is an odd number, add 1. (My 8.5" foot gave me a final result of 47.6, which became 48) Pattern abbreviations and techniques: K - Knit. Use either the knit stitch, the u stitch, or the flat stitch here, whichever works best for you (all three give the same end stitch, in different levels of snugness). DO NOT use the e-wrap stitch. P- Purl W&T - Wrap & Turn. Bring the yarn in front of the peg, wrap it around to the back, bring it back through between the wrapped peg and the previously knitted peg, and resume knitting back in the direction you just came from. (See image) Leave wrap on peg. When you reach a previously wrapped peg that needs a knit stitch, knit all loops as one.
Pattern Directions
Place your three stitch markers on your first peg, your last peg, and the peg on the first-half side of the halfway mark (for my 48-peg sock, the markers went on peg 1, peg 48, and peg 24). 1 an even number of stitches using either the crochet cast on or the cable cast ol Cuff: K2, P2, until cuff measures 1" (approximately 10 rows). K one row Leg: (Note - for pattern purposes, each back-and-forth short-row stripe will count as 1 row) Row 1 - [K 8, W&T, K6, W&T] Repeat until the second W&T is performed on your last peg. This row will creep "forwards" around the loom in the same direction you cast on. Row 2 -K all pegs Row 3 - [K 6, W&T, K8, W&T] Repeat until the second W&T is performed on your last peg. This row will creep "backwards" around the loom in the opposite direction of your cast on. Row 4 -K allpegs Repeat rows 1-4 three times (you can add more or less repeats for a shorter or longer sock, but be sure to end onrow4). Heel: This will be worked over half your pegs. Decrease rows - K all pegs up to the center peg you placed your stitch marker on. Lift the stitch off of that peg, W&T, and replace the stitch above the wrapped loop. K back in the opposite direction up to peg 1 Lift the stitch off peg 1, W&T, and knit back again. Continue the W&T, back-and-forth process, wrapping the last unwrapped peg in the row each time, until 2/3 of your heel pegs are wrapped (if your heel peg count doesn't divide perfectly by 3, round to the nearest whole number to figure out how many wrapped pegs you need on either side - 25 heel pegs would have 8 wrapped on either side and 9 unwrapped in the middle, and so on). Your final W&T will be in the Peg 1 section of wraps. Increase rows - Once you've got all your decrease wraps done, K to the first wrap in the wrapped section that includes your center peg. K all loops of that peg as one, W&T the next peg (no lifing required this time), and K your way back in the other direction. Continue working back and forth, knitting off one wrapped peg at the end of each row, until all heel pegs have one loop (when you knit off the loops on your marked center peg and on peg 1, lift off the next peg and W&T, to avoid holes at the corners of your heels). Foot: Resume working the pattern repeat as written in the leg instructions. Continue repeating rows 1-4 until the sock measurement from the back of the heel to your current row is approximately 1 1/2-2" less than the length of your foot (tip of big toe to back of heel). Toe: Repeat the heel instructions. After completing decrease & increase rows, K 1 full row, then transfer all stitches to your two DPNs. All stitches from peg 1 through your marked center peg go on the first needle, and all stitches from the unmarked center peg through the last peg go on the second needle. Cut your yarn, leaving an 18-24" tail to graft the toe. tapestry needle, use the Kitchener stitch to close the toe. Weave in all yarn ends


