Gaveth David-Lloyd Big and Cuckly
from
pixelatedmushyoom.Ulogspot.com
Design $\circledcirc$ 2010NyssParkes. Creative Commons Attribution-NonCommercial-ShareAlike 3.0 License Australia ( http://creativecommons.org/licenses/by-nc-sa/3.0/au/ ) Feel free to make them for yourself, friends or charity, but please do not sell finished plushies

Hello and welcome
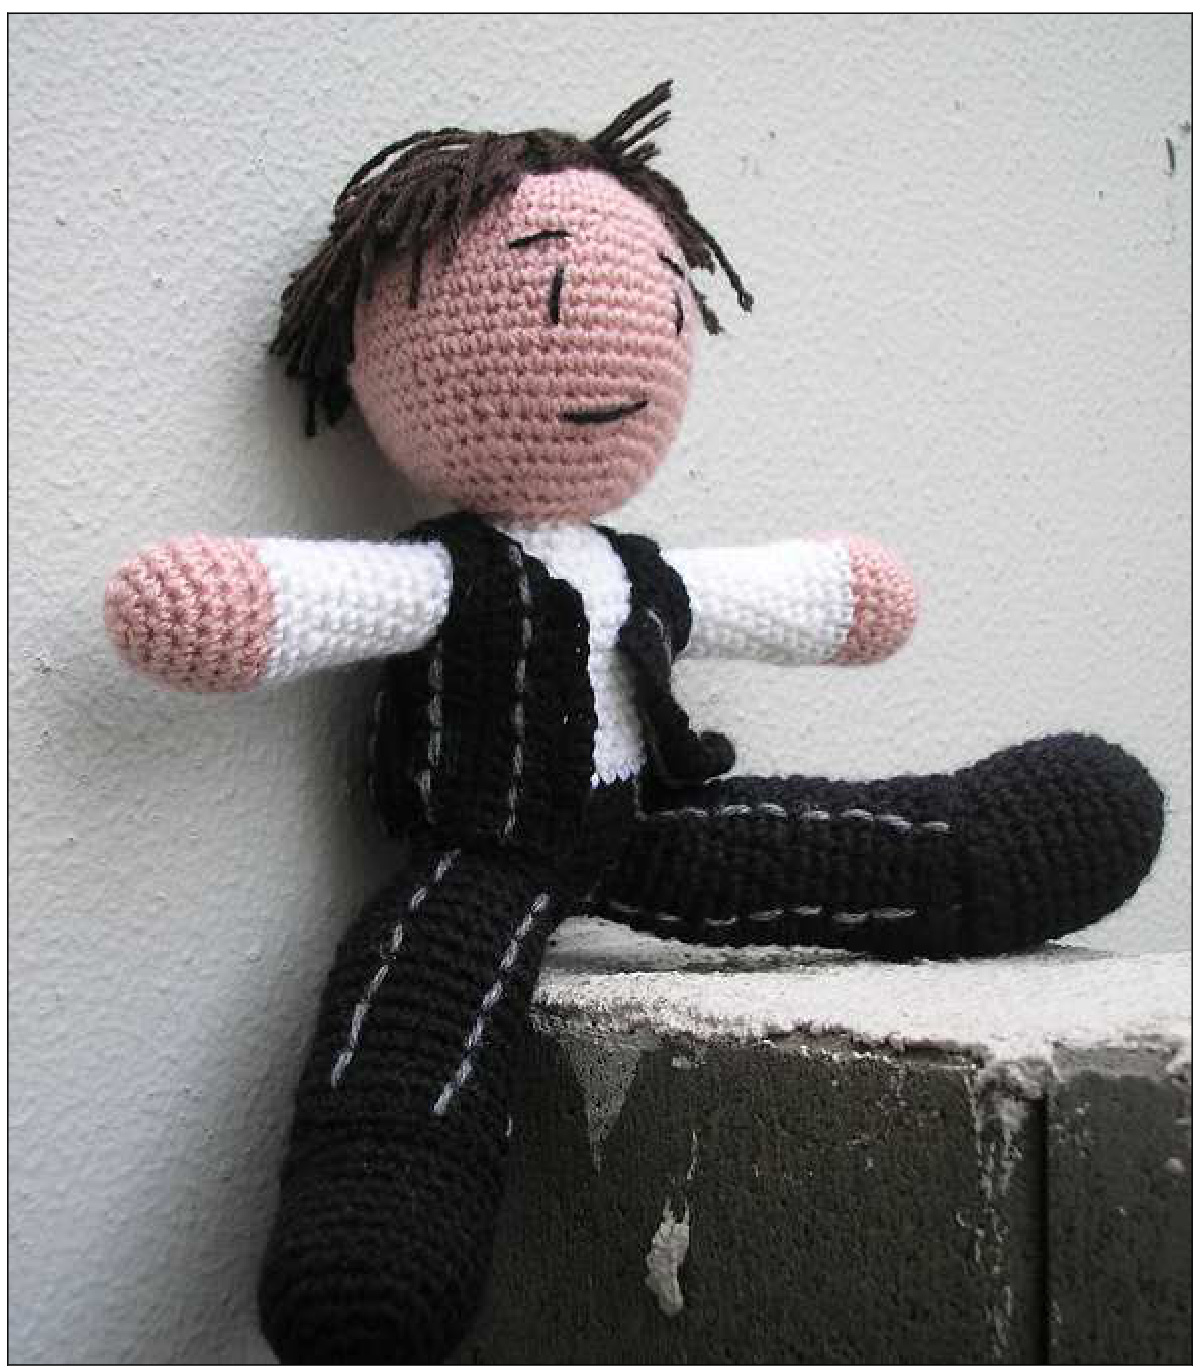
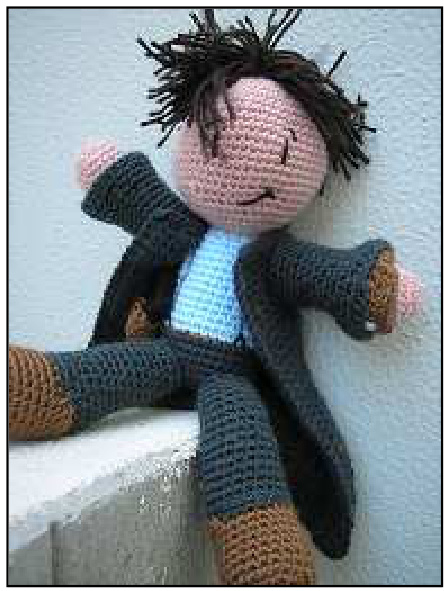
This is an easy crochet pattern to make a cuddly Gareth David-Lloyd plushie! He is wearing his smartest Ianto Jones pinstripe suit and carries his gun (removable) in a holster at his waist. He measures 30cm tall, with an arm span of 25cm (average, will vary quite a bit depending on yarnchoice) Hope you enjoy creating him, and I would love to see any photos of your finished plushie you would like to send it to me. Feel free to contact me if you have any worries or questions. For the latest version of the pattern, see the patterns page on my blog: http://pixelatedmushroom.blogspot.com/p/knittingcrochet-patterns.html
Materials
Crochet hook (3mm) Sharp needle with large eye Stuffing 8ply yarn in colours: Pink (pale for skin) White (shirt) Very dark grey (vest, pants and optional overcoat) Mid brown (belt, gun holster) Dark brown (hair) Black (shoes, face, gun) Light grey (pinstripes on vest and pants) [It's best to find these colours in the same brand of wool if possible]
Stitches Needed
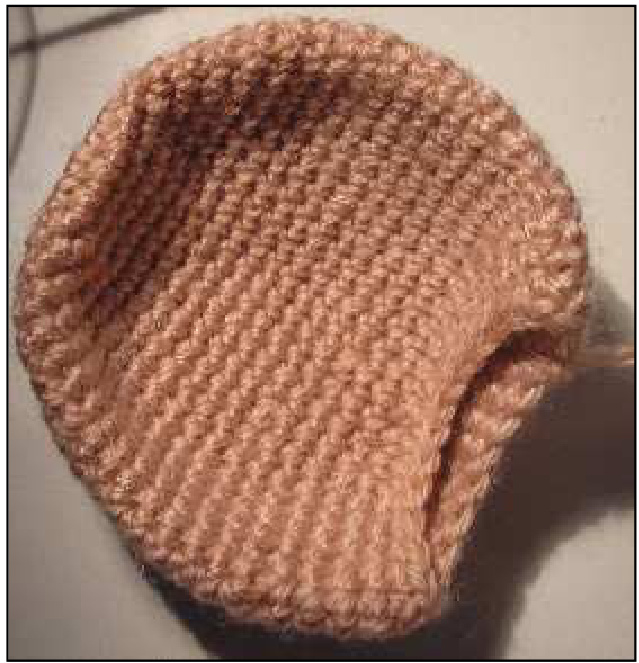
Magic circle ( http://www.youtube.com/watch?v $=$ FHYVutk2iYY) Chain Sc $=$ Single crochet Inc $=$ Increase Dec $=$ Decrease Hdc $=$ Half-double crochet (www.youtube.com/watch?v=LxA2osb5Qfk ) Dc $=$ Double crochet Arms (make 2) Using PINK 1) magic circle 6 2) inc every st $=~12$ 3) inc every 2nd $=18$ 4) inc every 5th $=21$ 5) sc 6) sc Change to WHIT0045 7) dec every 4th $=~17$ 8) sc 9) sc 10) dec every 4th $=~14$ 11) dec every 6th $=~12$ 12) sc 13) sc 14) sc 15) sc 16) sc 17) sc Break off yarn leaving a long tail and thread end through loop on hook
Head
Using PINK 1) magic circle 6 2) inc every st $=~12$ 3) inc every $2{\mathsf{n d}}\,=\,18$ 4) inc every $3\mathsf{r d}\,=\,24$ 5) inc every 4th $=30$ 6) inc every 5th $=36$ 7) inc every 7th $=41$ 8) inc every $\protect10\t h=45$ 9) sc 10) sc2, inc1, inc every 11th $=49$ 11) sc 12) inc every 12th $=53$ 13) sc 14) sc 15) sC 16) sc 17) dec every $12\mathrm{th}\,=\,49$ 18) sc 19) sc2, dec1, dec every 11th $=45$ 20) sc 21) dec every $10^{\mathrm{th}}\,=\,41$ 22) dec every $7^{\mathrm{th}}=36$ 23) dec every $5^{\mathrm{th}}=30$ 24) dec every 4th $=24$ Break o
Body
Using DARK GREY 1) magic circle 6 2) inc every st $=~12$ 3) inc every $2{\mathsf{n d}}\,=\,18$ 4) inc every $3\mathsf{r d}\,=\,24$ 5) inc every 4th $=30$ 6) inc every 5th $=36$ 7) sc 8) sc 9) sc 10) sc Change to WHITE 11) dec every 15th $=34$ 12) sC 13) dec every 8th $=31$ 14) sc 15) sc 16) sc 17) sc 18) sc 19) sc 20) sc 21) dev every 4th $=25$ 22) dec every $3\mathsf{r d}\,=\,19$ 23) dec every 2nd $=\,13$ 24) sC Cut off leaving a long tail and thread end through loop on hook. Firmly stuff head and body, and sew together. Sew arms to either side of body.
Legs (make 2)
Using BLACK 1) magic circle 6 2) inc every st $=~12$ 3) inc every 2nd $=\,18$ 4) inc every : $3\kappa d=24$ 5) sc 6) sc 7) sc 8) sc 9) sc 10) sc 11) sc 12) turning ch1, sc14 13) turning ch1, sc14 Change to DARK GREY 14) sc the outside loop of each st $=\hphantom{000}24$ (creates a raised ridge) 15) sc the inside loop of each st 16) sc15, dec2, ${\mathsf{s c}}5\,=\,22$ 17) sc 18) sc15, dec1, ${\sf s c5}=21$ 19) sc14, dec1, $\mathsf{s c}6\,=\,20$ 20) sC 21) sC 22) dec every 9th = 18 23) sC
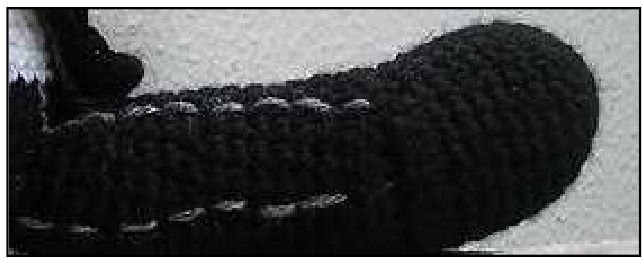
leg with added pinstipes 24) dec every 8th $=~16$ 25) sC 26) sC 27) sC 28) dec every $7\mathrm{th}\,=\,14$ Cut off leaving a long tail and thread end through loop on hook Stuff legs and sew to base of body, towards the front, so that he can easily sit down.
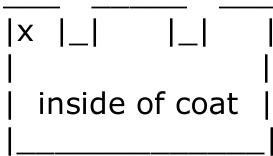
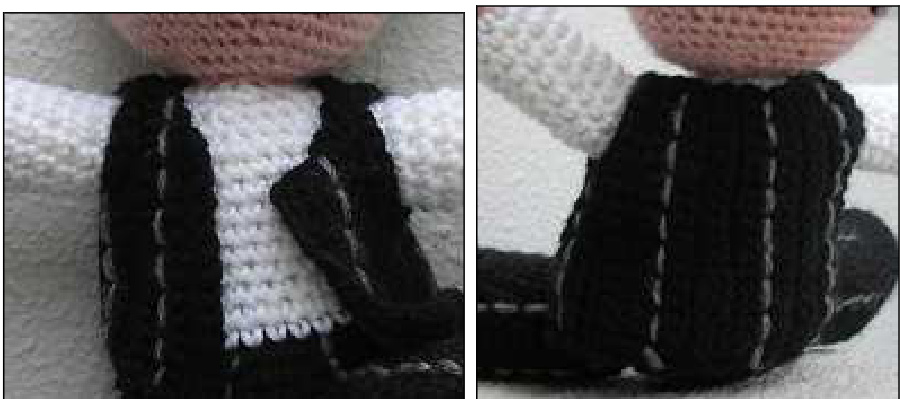
Vest
Using DARK GREY and working from the top of the right lapel downwards (x) (v and ^ just help to indicate direction, down and up) |x l_l inside of vest 1) chain 14 V 2) turning ch1, sc > 3) turning ch1, sc V 4) turning ch1, sc14, $\mathsf{i n c1}=15$ 5) turning ch1, sc15 V 6) turning ch1, sc13, $\mathtt{i n c2}=17$ 7) turning ch1, inc1, $\mathtt{s c16}=18$ V 8) turning ch1, $\mathtt{s c11}=11$ (armhole starts) ^ 9) turning ch1, sc11 V 10) turning ch1, sc11 11) turning ch1, sc6, hdc5 V 12) turning ch1, sc10, inc1, ch7 13) turning ch1, sc18 V 14) turning ch1, sc16, ${\mathsf{d e c1}}=17$ > 15) turning ch1, sc V 16) turning ch1, sc15, ${\mathsf{d e c1}}=16$ 17) turning ch1, sc V 18) turning ch1, sc $\hat{}$ 19) turning ch1, sc V 20) turning ch1, sc15, $\mathsf{i n c1}=17$ 21) turning ch1, sc V 22) turning ch1, sc16, inc1 = 18 23) turning ch1, sc V 24) turning ch1, $\mathtt{s c11}=11$ (armhole starts) ^ 25) turning ch1, sc11 V 26) turning ch1, sc11 27) turning ch1, sc11 V 28) turning ch1, sc11, ${\mathsf{c h}}7\,=\,18$ 29) turning ch1, sc V 30) turning ch1, sc16, dec1 = 17 > 31) turning ch1, sc 32) turning ch1, sc13, ${\mathsf{d e c}}2=15$ 33) turning ch1, sc V 34) turning ch1, sc
Cut off leaving a tail and pull through remaining loop on hook. With BLACK again, start at one lapel top and sc all across the top of the vest to make a neat edge, stopping at the top of the other lapel. When you come to the arm hole simply sc into the next stitch on the other side. There will be no clear chain to work into, just estimate and pick up stitches as you go. After trying on vest sc one more row if you feel it needs the extra height.
Gun
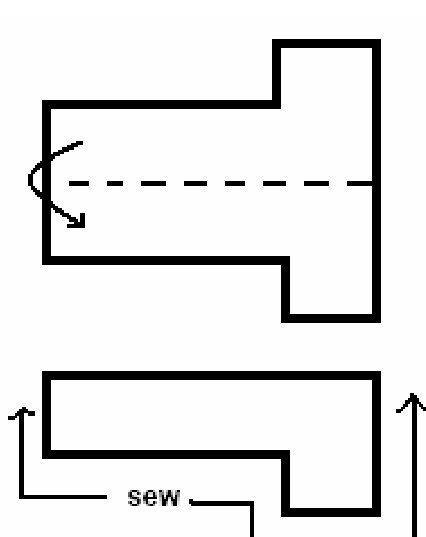
Using BLACK (leave a long tail here) 1) chain 8 2-7) turning ch1, sc (6 rows of this) 8) turning ch1, sc8, chain 3 extra sts $=11$ 9) turning ch1, sc11, chain 3 extra sts $=14$ 10) turning ch1, sc 11) turning ch1, sc 12) turning ch1, sc7 Cut off leaving a tail and pull through remaining loop on hook. Fold piece down the centre (see image on next page, and sew around indicated edges to complete gun shape. Weave in ends.
Gun Holster
1) magic circle 6 2) inc every st $=$ 12 3-7) sc (5 rows) turn work 8) turning ch1, sc 4, slip 1 stitch Cut off leaving a tail and pull through remaining loop on hook Sew to belt on right side of body, and put gun into holster, it should fit snugly.
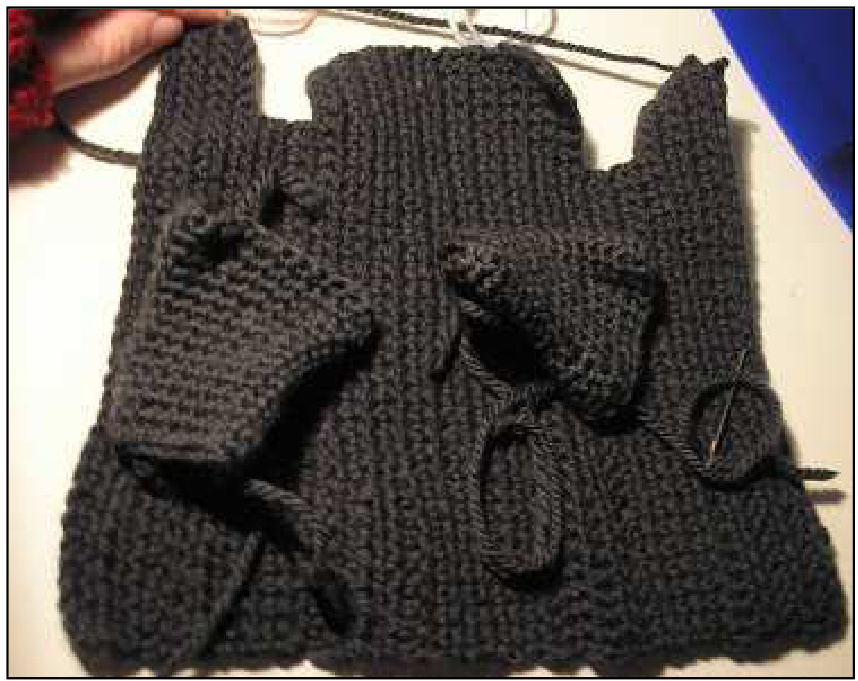
Overcoat Body
I didn't make one of these but if you think he might get cold then it could be a good idea :p Using BLACK and working from the top of the right lapel downwards (x) (v and ^ just help to indicate direction, down and up)
1) chain34 V 2) turning ch1, sc > 3) turning ch1, sc26, hdc8 4) turning ch1, sc 5) turning ch1, sc23, dc11 6) turning ch1, sc > 7) turning ch1, sc26, hdc8 V 8) turning ch1, ${\mathsf{s c}}28\,=\,28$ (to make armhole) 9) turning ch1, sc28 $\mathsf{v}$ 10) turning ch1, sc28 $\hat{}$ 11) turning ch1, sc28 V 12) turning ch1, sc28, $c{\sf h}6=34$ 13) turning ch1, sc23, dc11 v 14) turning ch1, sc > 15) turning ch1, sc26, hdc8 v 16) turning ch1, sc > 17) turning ch1, sc23, dc11 v 18) turning ch1, sc 19) turning ch1, sc V 20) turning ch1, sc 21) turning ch1, sc V half way point 22) turning ch1, sc 23) turning ch1, sc V 24) turning ch1, sc 25) turning ch1, sc V 26) turning ch2, dc11, sc23 ^ 27) turning ch1, sc V 28) turning ch2, hdc8, sc26 ^ 29) turning ch1, sc V 30) turning ch2, dc11, sc23 ^ 31) turning ch1, sc V 32) turning ch1, ${\mathfrak{s c}}28\,=\,28$ (to make armhole) $\hat{}$ 33) turning ch1, sc28 V 34) turning ch1, sc28 $\hat{}$ 35) turning ch1, sc28 V 36) turning ch2, hdc8, sc20, ch6 = 34 37) turning ch1, sc V 38) turning ch2, dc11, sc23 ^ 39) turning ch1, sc V 40) turning ch2, hdc8, sc26 ^ 41) turning ch1, sc V 42) turning ch1, sc > Cut off leaving a long tail and thread é hook
Overcoat Sleeves (make 2)
example of overcoat on Jack Using BLACK 1) chain 25 and join row end to make a circle 2) sc 3) sc 4) dec every $10\mathrm{th}\,=\,23$ 5) sc 6) dec every 5th $=20$ 7-16) sc [10 rows of sc] Cut off leaving a long tail and thread end through loop on hook. Sew sleeves to the armholes of the coat. Try the coat on by pulling the arms into the coat sleeves. With BLACK again, start at one lapel top and sc all across the top of the coat to make a neat edge as you did with the vest. After trying on coat sc one more row if you feel it needs the extra height.
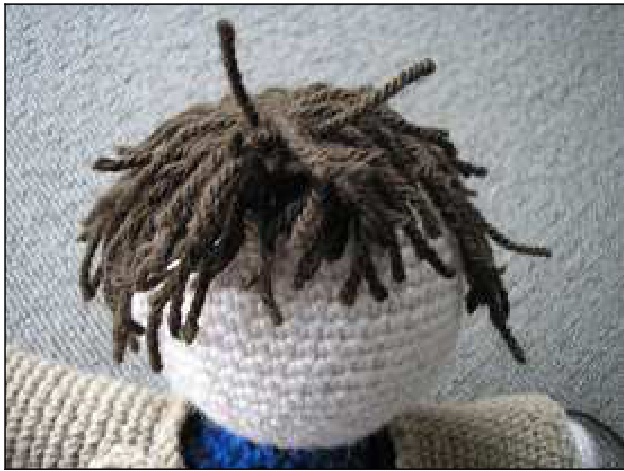
Hair
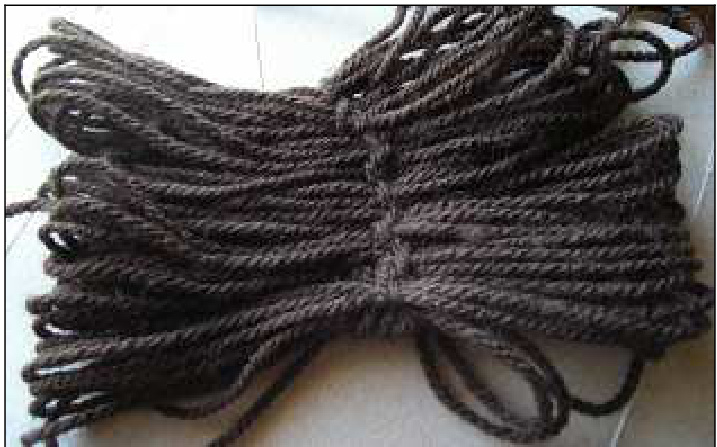
I have described this using the same way as for my David Tennant pattern as they have somewhat similar hair. Trimming the front strands shorter for Ianto at the end of these instructions, as well as leaving the sideburns longer I'll tell you how I went about it - but you may have different or better ideas of how you want it to look. I took a piece of card measuring about 15cm in width across the middle, and wound my brownwoolaround andaround it
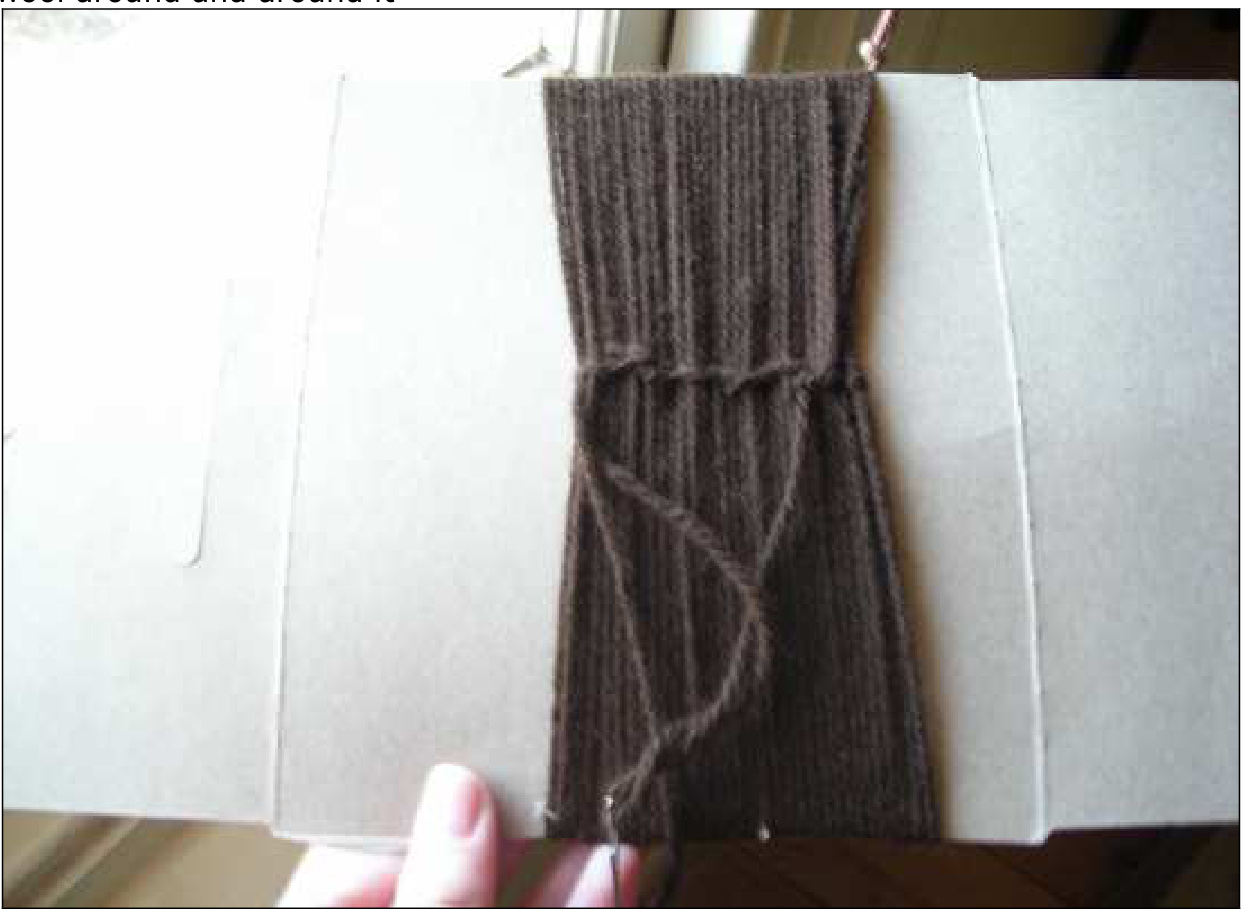
I then took a sharp needle with a large eye and backstitched across the centre a few times, binding the threads together like a hair-part. (The reason the needle needs to be sharp is that it can go through the centre of threads, not only around them, making it more strongly bind together) I then carefully removed the cardboard, holding the threads in place, and stitched the loose back threads to the front threads along the part again, so now you have a little wig ^_^
Place the hair on the head with the part running side to side (not front to back). Tilt the hair to a slight angle so that one side will be overlapping the right eye. Sew the part securely to the head using back stitch. With scissors, cut the loops to free the ends of hair
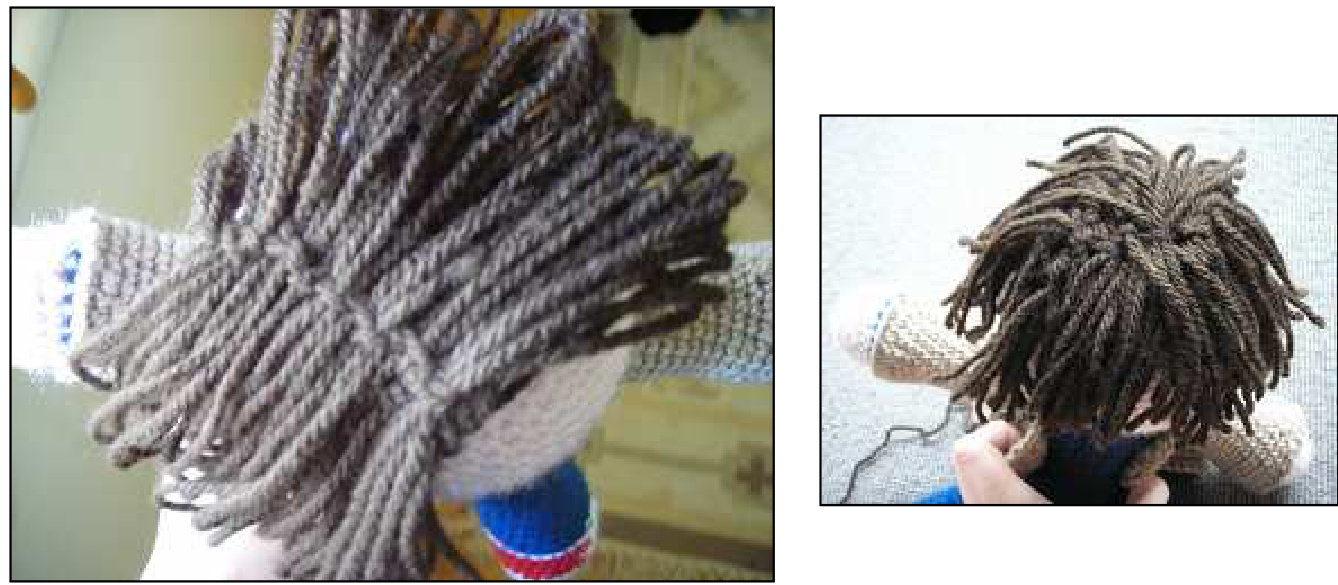
Hair positioned on head Take hold of a chunk of hair at the front, using some from either side of the part
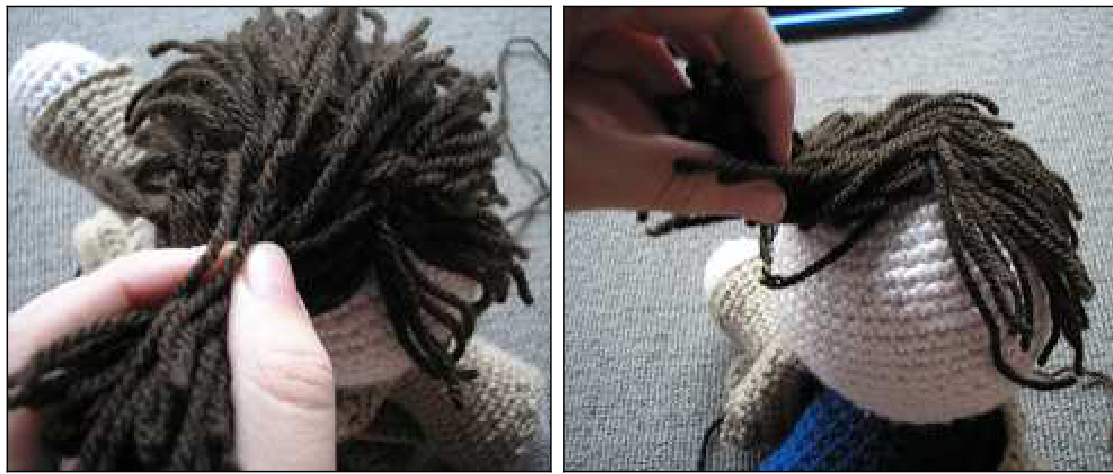
Use your sharp sewing needle and a length of brown wool to sew through the base of this chunk, back and forth, entering and exiting at random points to bind the bunch of hair together. Once the portion of hair seems firmly held, use scissors to cut some shorter strands over where the ears would be (creating little sideburns)
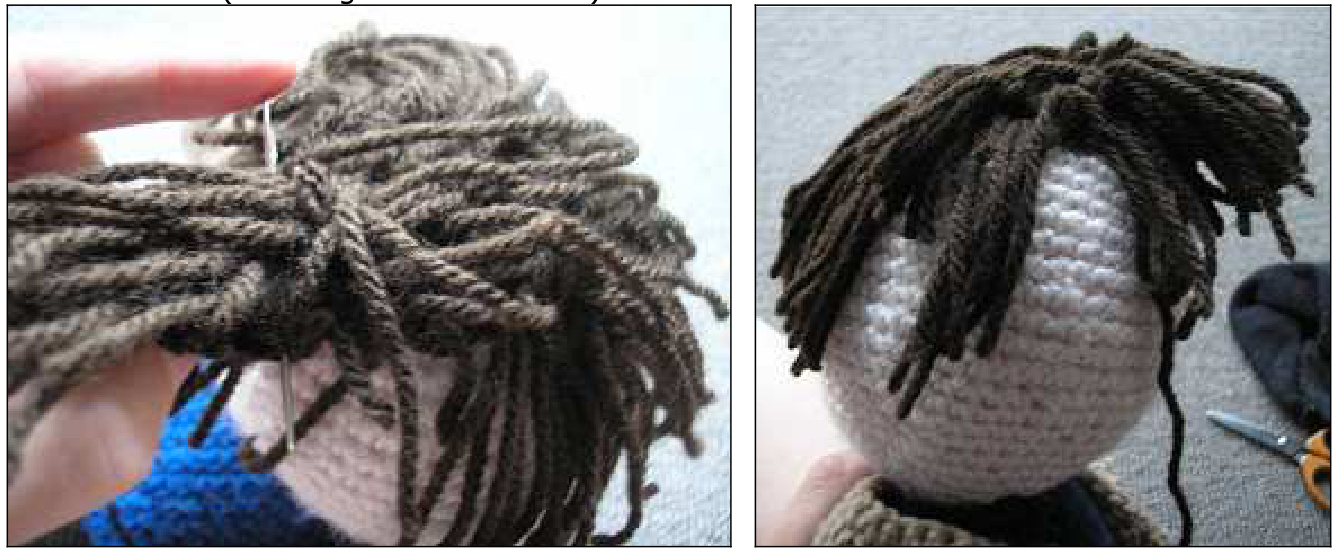
Give the strands of hair a little trim so they don't all look the same length
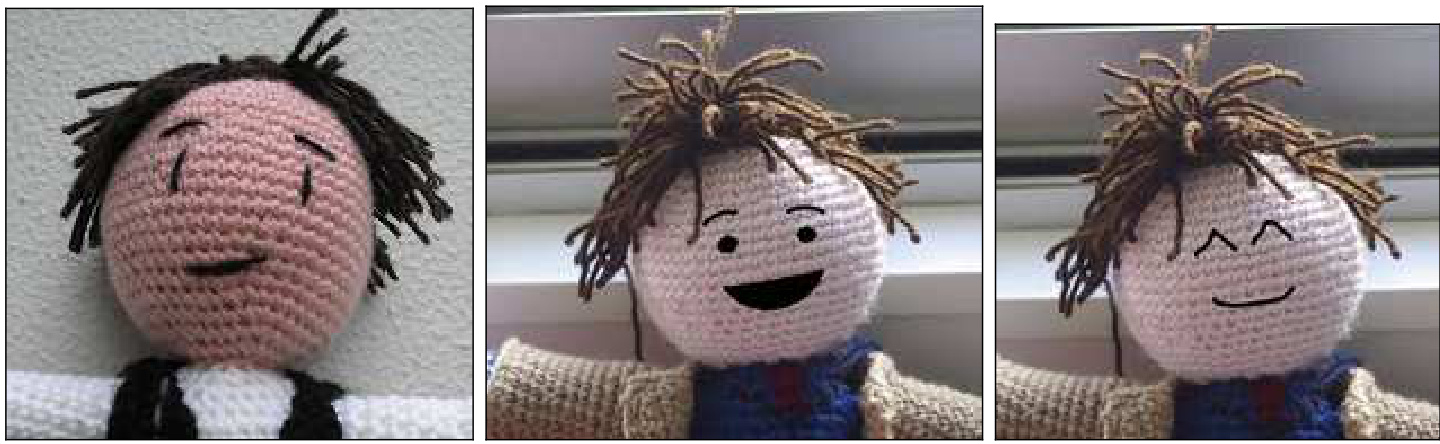
Face
I tried a few options on photoshop - some might be useful for your own plushie. I used black yarn and carefully sewed on the features
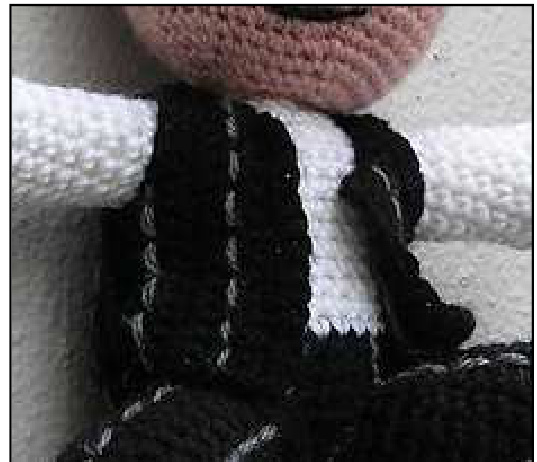
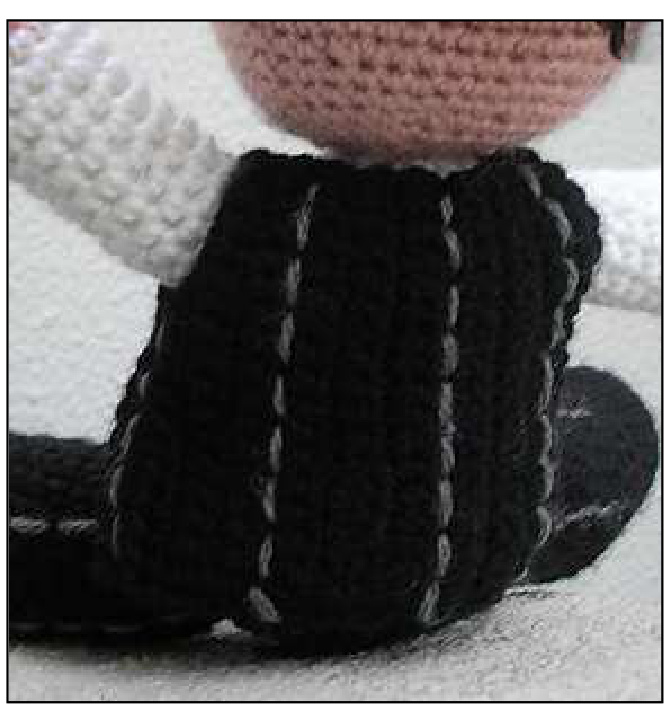
Vest and Pants Details
Using a long strand of LIGHT GREY yarn, stitch vertical stripes on the vest and pants. Make sure you match the stripes running up the legs carefully so that they fit when they reach his waist. Put his vest on and sew it closed at the front.
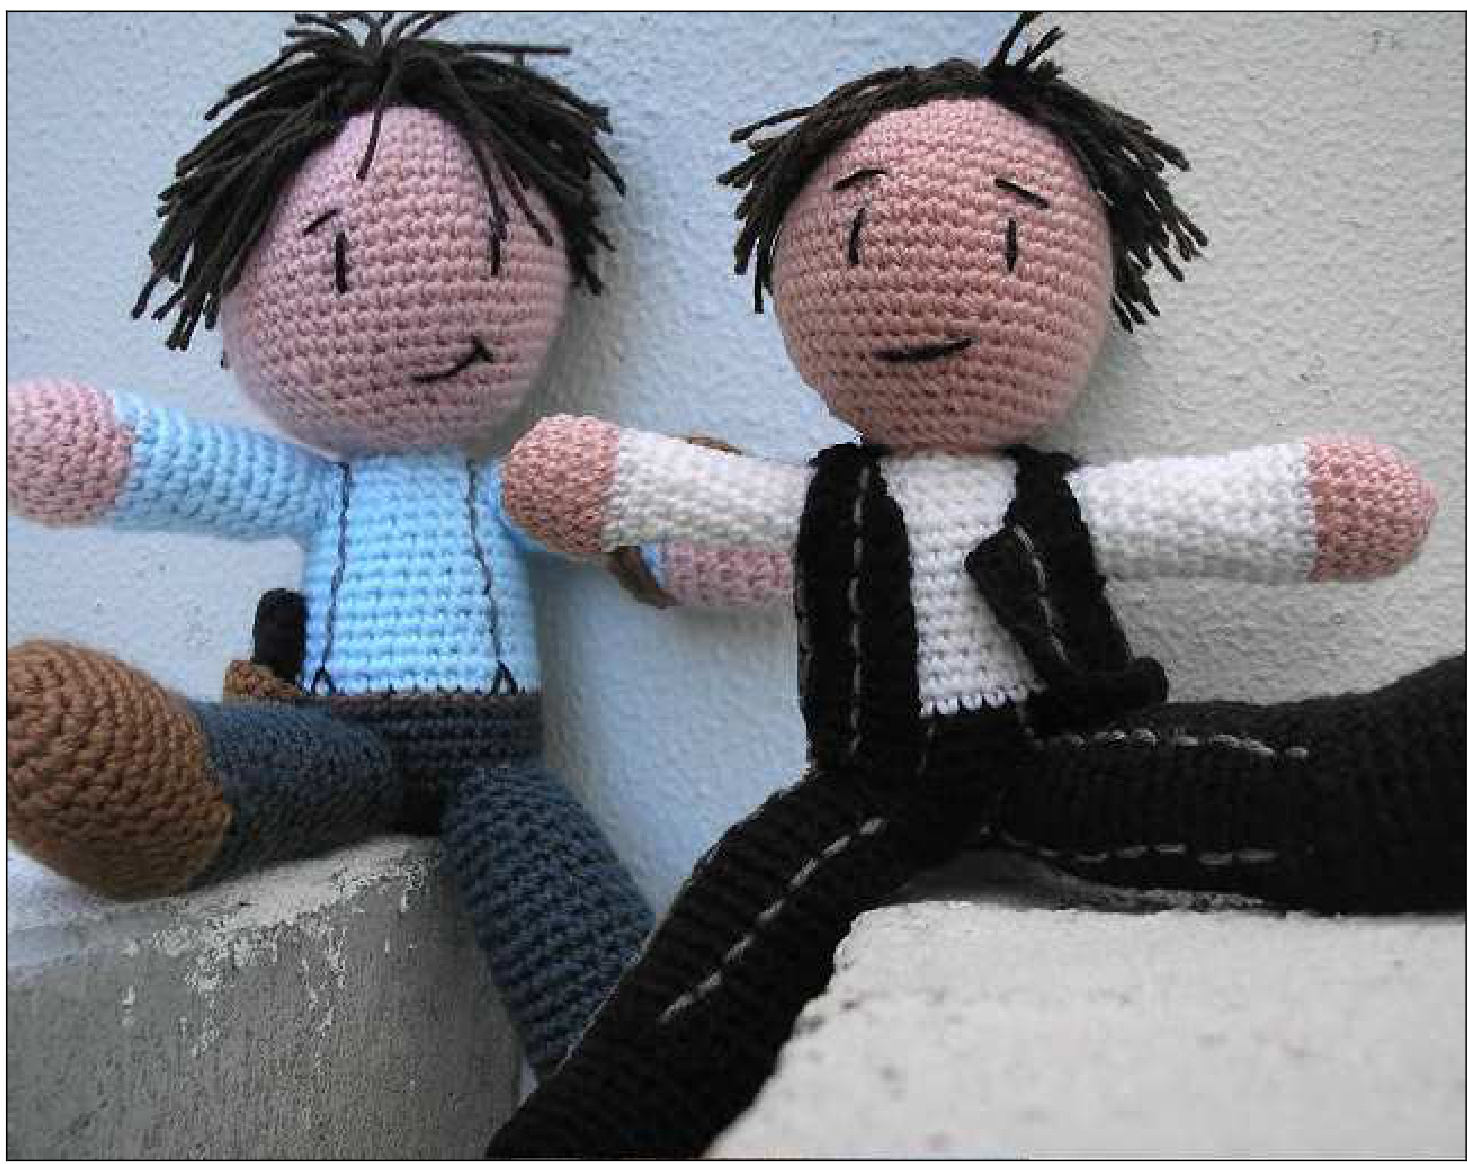
Jack and Ianto can now hang out together :)
Please send any images or comments to pixelatedmushroom@gmail.com


