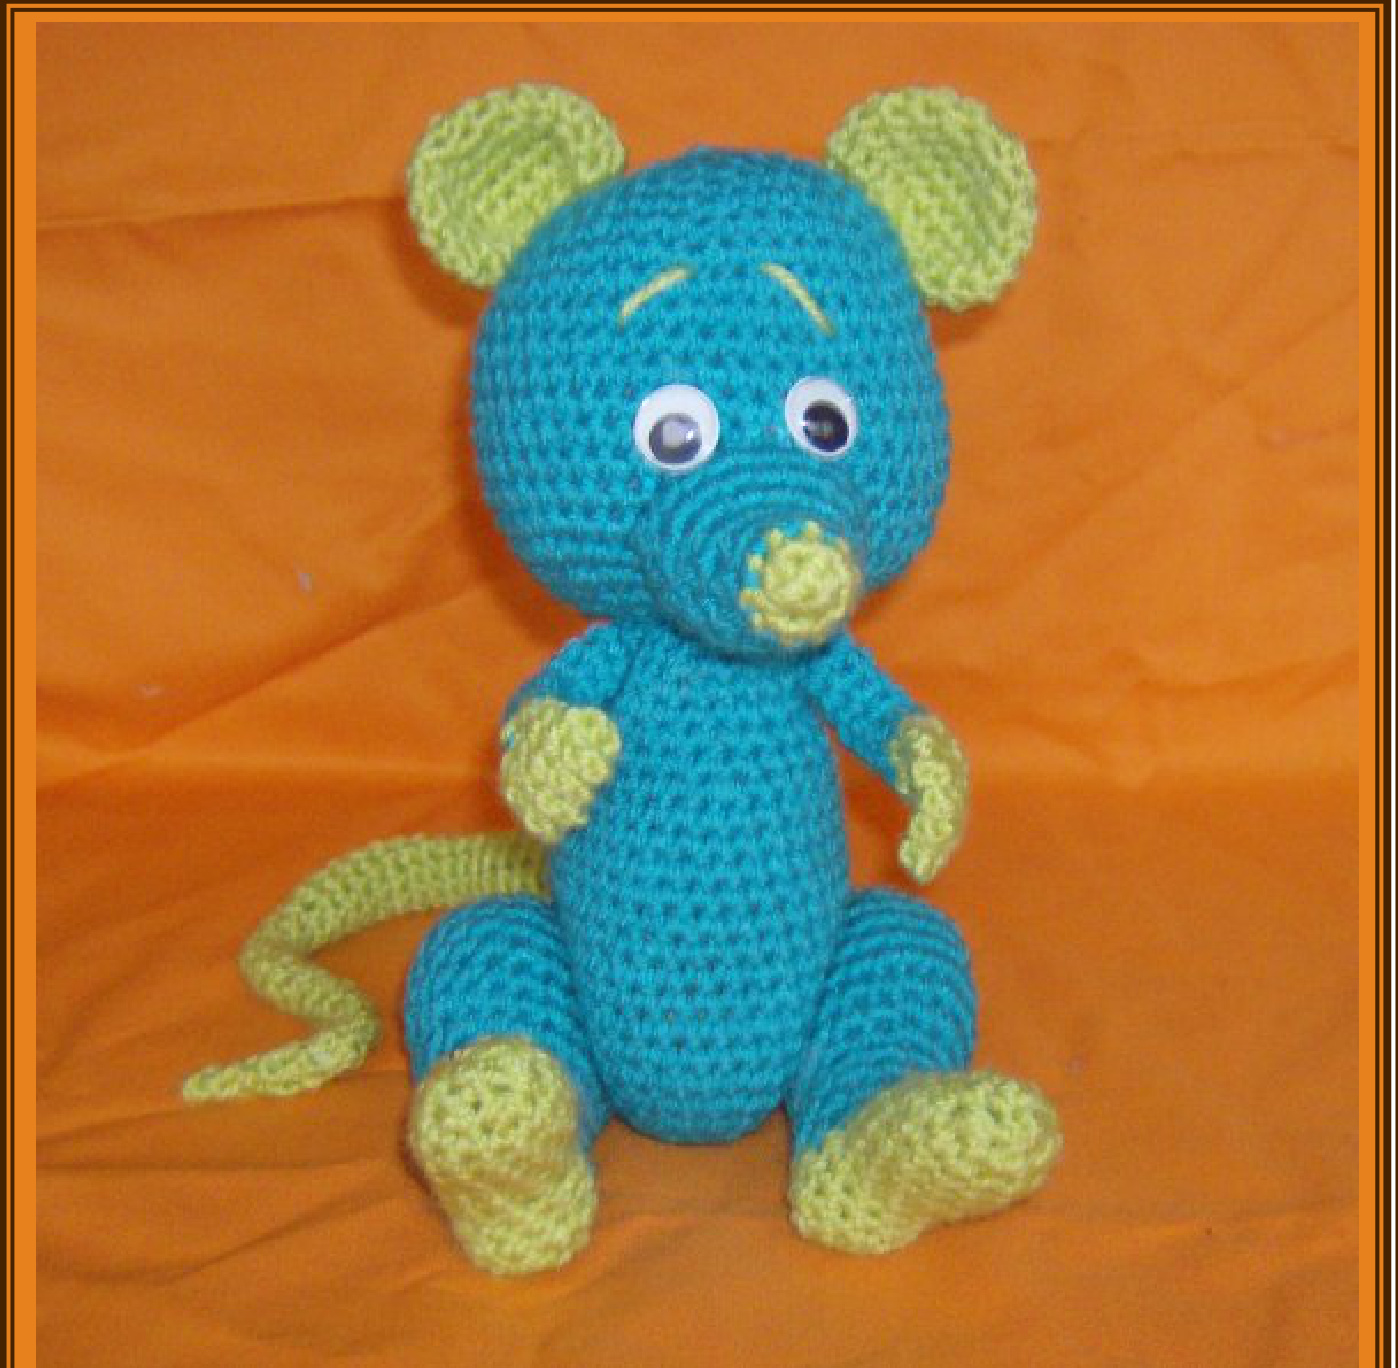
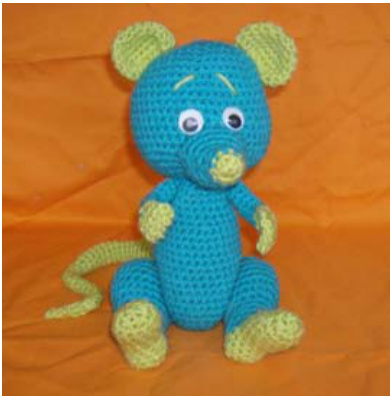
Macey Mouse
Macey Mouse
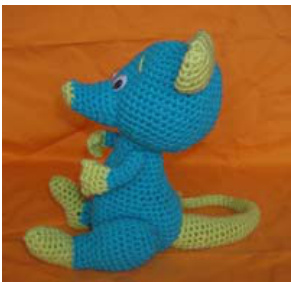
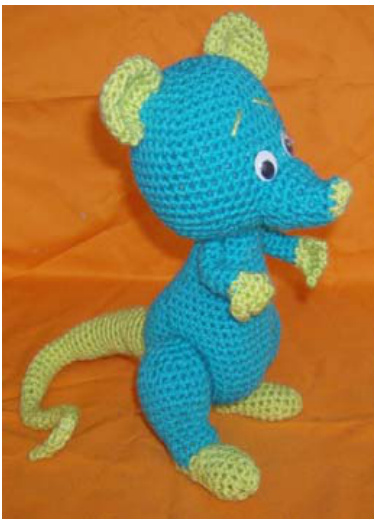
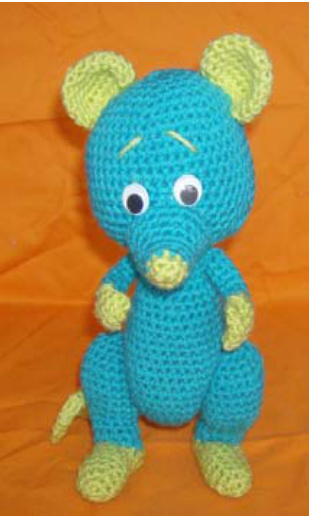
This mouse started out as a teddybear, but since there are millions of bears around AND the ears turned out a little too big,I decided to transform her into a mouse. Macey Mouse has moveable legs, bendable arms and tail, and heavy stuffing to enable her to stand up and sit. If you wish to make her for a small child to play with, I recommand using only soft stufing likeFiberil.
Materials :
1 skein of color A (l used blue) 1 skein of color B (I used green) Crochet hook 4 mm Stuffing (fiberfill and, optionally, dried peas, beans or lentils, or plastic pallets.) 2 wiggly eyes (you can use any eyes you like, or embroider the entire face) and glue Several pipecleaners to make arms and tail bendable 1 large, blunt needle for assembly Scissors
Stitches used :
SC : Single crochet in the round without closing rounds (Amigurumi-technique) HDC : Half double crochets (yarn over, draw loop, pull through all 3 loops on neelde) CH : Chainstitch SL : Slipstitch Magic loop : turn yarn around finger and close the ring with a single crochet. Make mentioned number of stitches (usually 6) around the ring, and pull the loose end of yarn to close the ring. Finish off firmly to prevent it from getting loose later on. If you can't work with a magic loop, use the alternate set-up : chain 2, make 6 (or mentioned number) of stitches in the first ch (second from hook).
Directions for color-changing :
Since you work in continuing rows, you may see a 'step'in the places where you change color. To prevent this, finish the row in the first color. Attach second color a few stitches further on, and continue in the second color. Count your stitches ; you may have to smuggle 1 or 2 !
HEAD :
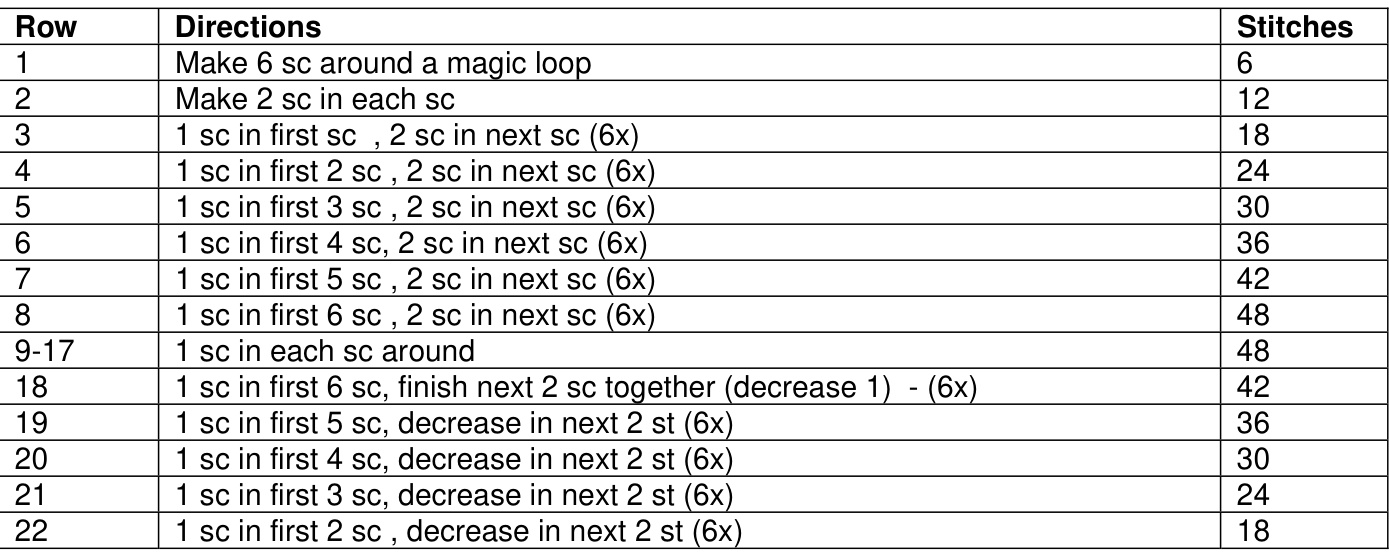
Finish off and leave a long thread for assembly. Stuff head firmly with soft stufing.
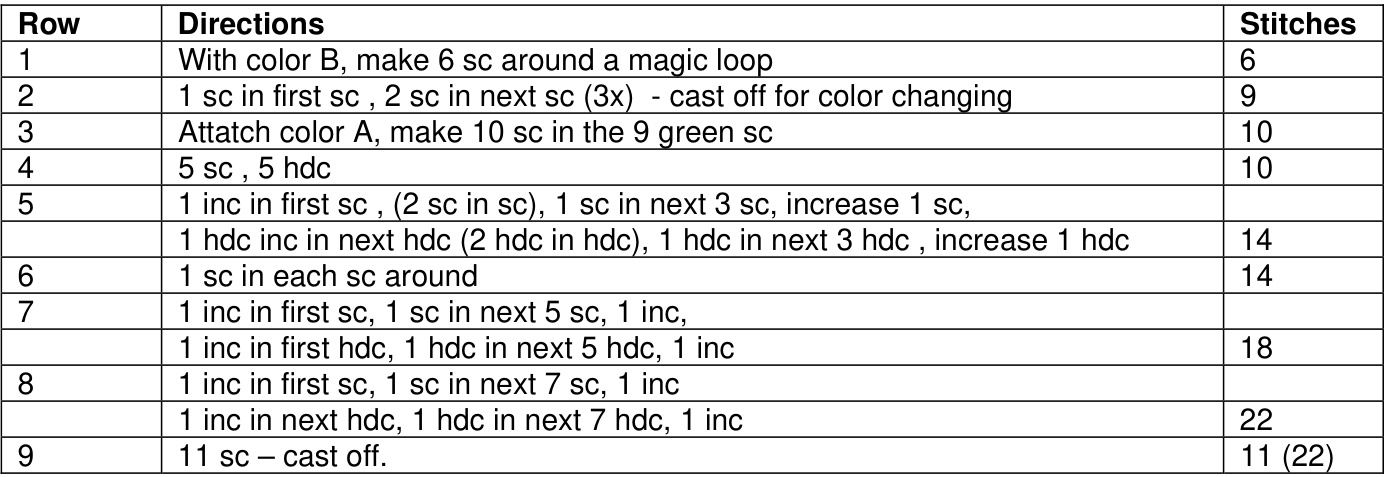
EAR : (Make 2)

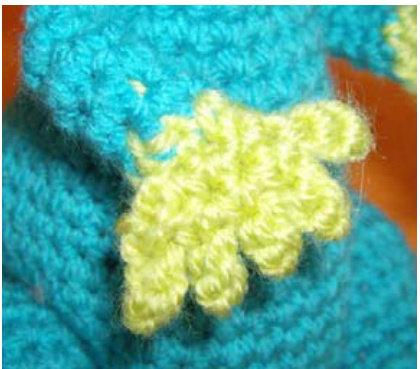
Finish off and leave a long end for assembly. Fold the ears double, and weave the thread-end through the inner loops of all opposite stitches. Puli firmly to make the ear bend, and attach to head (about 3 rows form the center - see image)
Finish off all threads and stuff muzle firmly. The side with the hdc is the lower part. Sew muzzle to lower part of head, about 2 rows from the opening. You can mold it a little to make the tip tilt upwards a little to give it a cute look. You can finish the face now if you like, by glueing on the eyes and embroidering the eyebrows, or do that later. You can use a few loose threads and full them through the tip of the nose to make whiskers if you like.
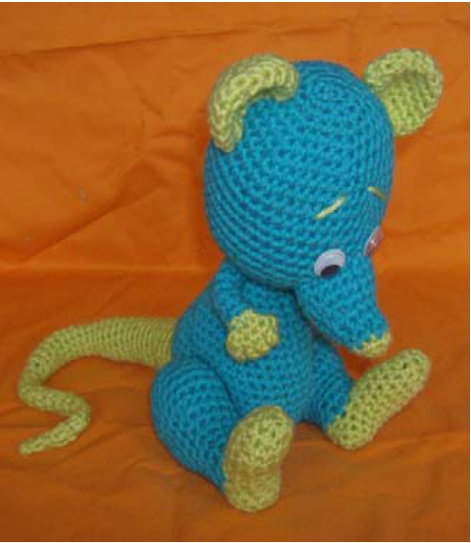
Finish off and weave in thread-end. You should now have a pear-shaped body with a flat front and a big bottom. Stuff the lower half with heavy stuffing and soft stuffing in the top-half. Attatch head to body, wit, ofcourse, the bottom on the backside.
ARMS : (Make 2)
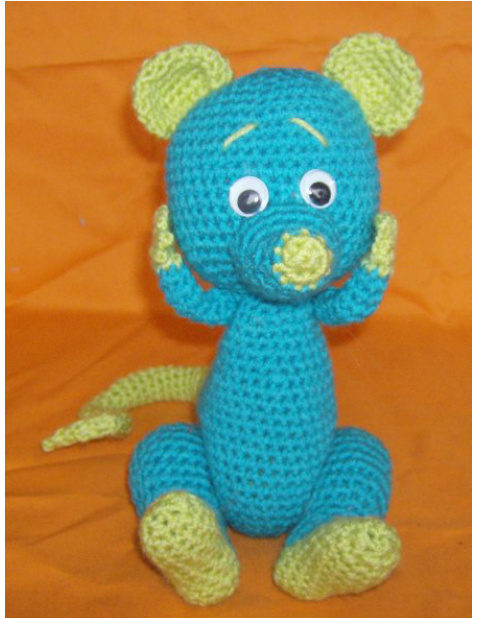
Make 6 sc around a magic loop. Don't pull it too tight, because you need to work in a piece of pipecleaner through this little hole later on. Work 7 rows of 6 sc in the round and finish off color A. Attach color B and work 8 sc in the 6 sc-row. Next row, increase to 10 sc. You can make these increases by working 2 sc in 2 opposite sc-stitches. Now, push the ‘hand' flat so that the stitches are opposite eachother. Chain 3 and make 2 slipstitches in the second and $3^{\mathsf{r d}}$ chain from the hook to make a finger. Make a slipstitch in the next 2 opposina stitches and chain 3 again for the next finger. Make 2 slipstitches to make the finger, and continue on this way untill you have 5 fingers and finish of with a slipstitch. Weave in all ends, of the pipecleaner all the way through the top of the body, and attach the arm with a few stitches. Make the next arm, and after finishing, shove the arm over the other end of pipecleaner, attach the arm with a few stitches and cut the pipecleaner to the right size to go though both arms and body. . This way, you have bendable arms, and they don't need further stufing.
LEGS : (Make 2)
Finish off and weave thread through last 5 stitches to close toe. Weave in ends. Now, switch to color A, and make sc in the gap you got by making the 5 ch and work your way up from here
Finish off and weave thread through remaining 6 stitches and weave in thread. Come ot in the top center part of the leg, to attatch it to the body. Draw needle through body to the other hip', pullfirmly and go back and forth several times. Do the same with the other leg. Attach firmly, but stay in a small area, so the leg willstill be able to bent into a sitting position.
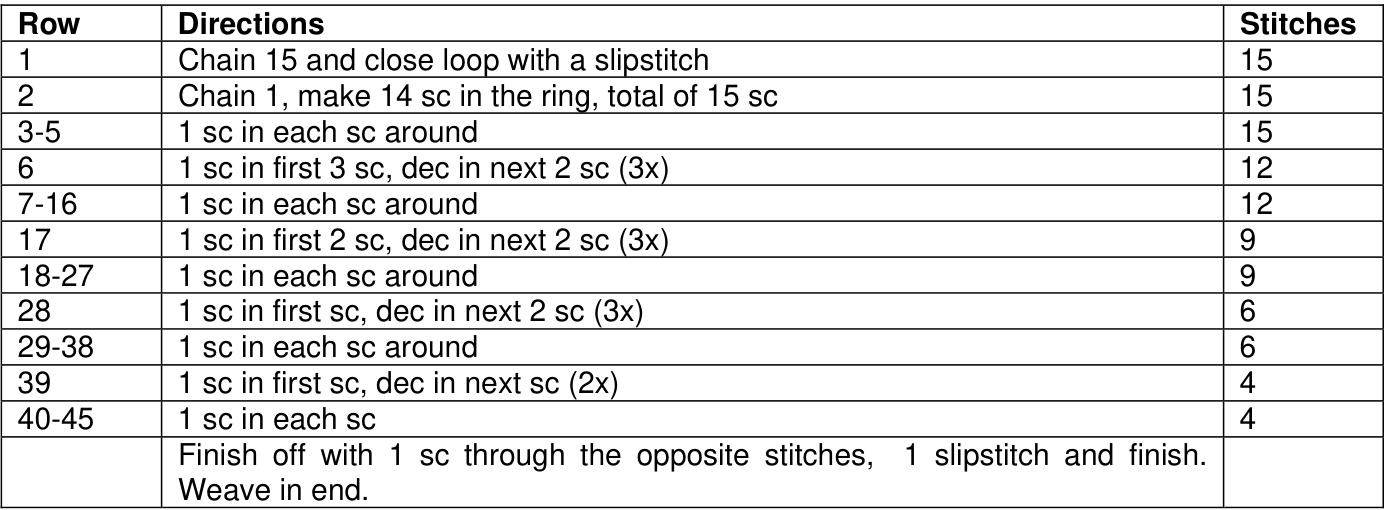
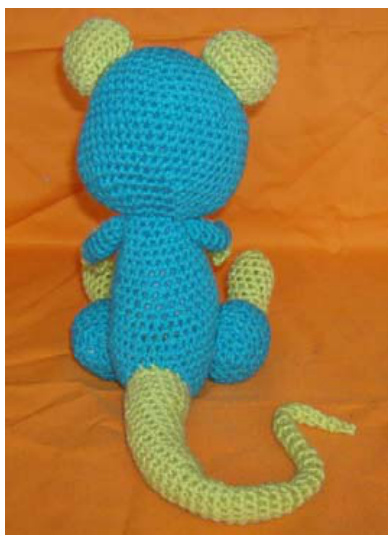
Now., stuff two pipecleaners into the thinner part of the tail to make the tip and bottom half bendable. Next, stuff the tail as far as possible with heavy stuffing, and stuff the last half inch or so with cotton filling. Sew tail to the lower part of the bottom (see image) so it can be bent and positioned to support the bodyeweight and give balance if you wish to have your mouse standing up.
Finish all ends you might have left over, embroider the face and stick on eyes if you have not yet done so, an enjoy your adorable little mouse.
Instead of sewing on the legs to the hips, you can ofcourse also choose to use a sort of joint (or an eye) especially made for this purpose, which is more firm but also more expensive. If you wish to use these joints', make the legs first and attach them to the body after finishing and begore stuffing the lower body part.
I hope you have as much fun making this little creature as I had designing it. Thank you for choosing one of my patterns ! If you have any more questions or remarks, please do not hesitate to contact me through L33ntje@gmail.com PLEASE NOTE : This pattern is sold for personnal use only. It may not be shared, distributed or sold without my permission. Designing objects and working out patterns is a serious job ; please respect my copyright. The finished product, however, can be sold for charity.


