EASY SLOUCH HAT By GloriaMcMullen2014
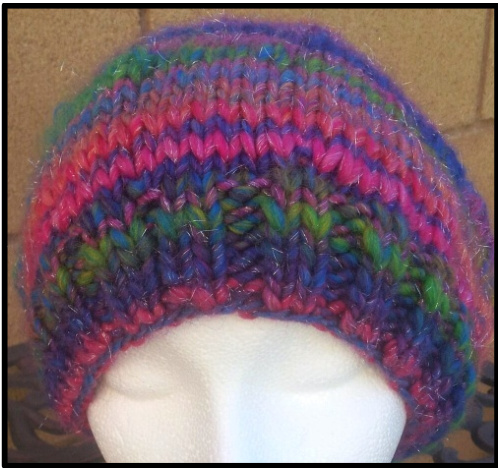
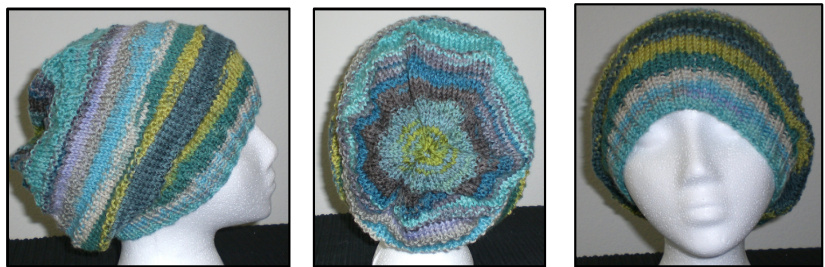
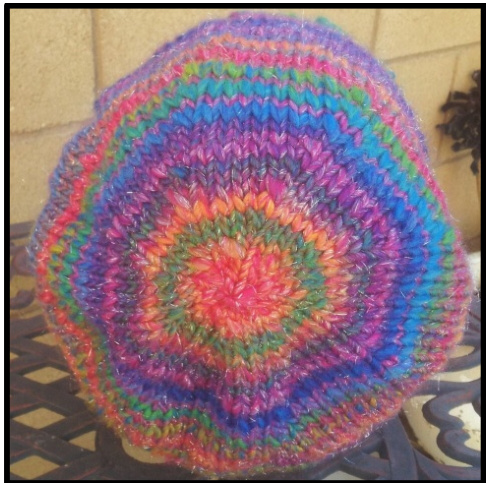
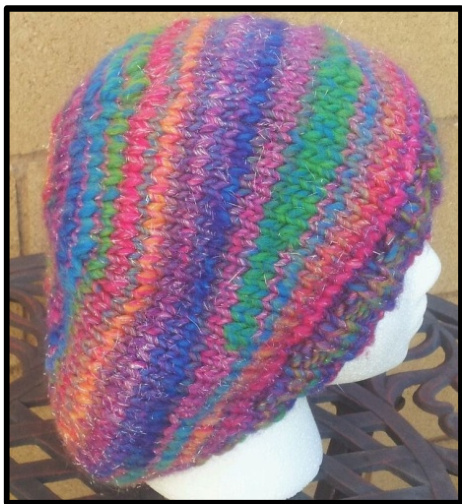
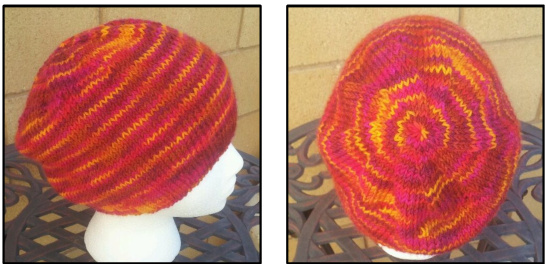
This is a quick knit that shows off your special yarn to its best advantage. Knit in the round on 16' needles. Use short-rows around the crown to tilt the hat backward, causing a nice slouch. Yarn used: Berroco Brio in Riot (super bulky) for the multicolored hat and Knitting Ewe First Light (worsted) for the Red-Orange hat and Liberty Wool for the Blue Hat.
Supplies:
Bulky or Super Bulky yarn 100 to 120 yards Size 10 - 16" round needles Size 10-1/2 16" round needles Size 10=1/2 - DPNs Worsted or DK Yarn 160 to 200 yards Size 7 = 16" round needles Size 8 = 16"round needles Size 8 DPNs 1 Red Marker 1 White Marker 2 Blue Markers (or any 3 different color markers of your choice) Darning Needle
Abbreviations:
CO - Cast on K = Knit P = Purl SS = Stockinette stitch Kf&b = Knit front and back SSK = Slip, Slip Knit W&T = Wrap and Turn OR JSR = Japanese Short Rows DPNs - Double-Pointed Needles SWM = Slip WHITE marker PBM = Place BLUE marker RBM = Remove BLUE marker Video Instructions W&T: http://www.youtube.com/watch?v=VS7uXJw91lA JSR: http://www.youtube.com/watch?v=qR6lgBRcV5Y
Instructions:
Begin with smaller round needles With Bulky or Super-Bulky yarn, CO 88 stitches (With Worsted or DK yarn, CO 120 stitches) PlaceREDMarker Note: Instructions for worsted or DK yarm appear in parentheses throughout the pattern. If no separate instructions appear, follow I used long-tail cast on, but any stretchy cast on is fine. K2, p2 around until your work measures 1" to 1-1/2" from cast-on row. 88 (120) K11, Kf&b around 96(132) K around in SS for about 1"
Begin Short Rows
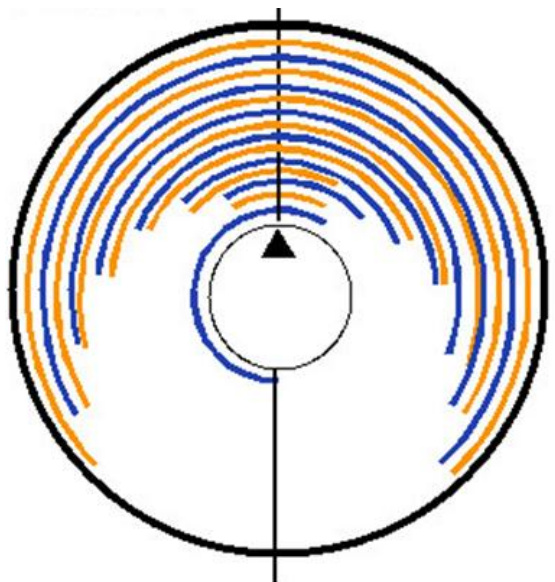
This may sound confusing, but if you follow the directions, it will soon make sense. Also see graphic below. ? The triangle represents halfway around from the beginning of a row. The blue colored line represents knit stitches The amber lines represent purl stitches. The black circle represents the regular knitting in the round stockinette stitches.
Summary of knitting the short-rows
Knit halfway around [48, (66) stitches] and place second color marker (WHiTE),thenknit an additional 6 stitches, Wrap & Turn, place third color marker (BLUE). Purl to the WHITE marker, slip marker, purl an additional 6 stitches, W&T. Place another BLUE marker. Knit to next BLUE marker, remove marker and knit an additional 6 stitches, picking up wrapped stitch along the way. K&T, place BLUE marker. Purl to the next BLUE marker, remove marker, purl 6 more stitches, W&T, place BLUE marker. Continue in this manner, knitting and purling back and forth, adding 6 more stitches before you wrap and turn on each row. Finish the short rows when you have 6 or fewer stitches remaining at the end of a purl row. Wrap and turn and continue regular knitting in the round for 2" (or more) if you want a slouchier beanie.
Decrease Rows:
(Switch to DPNs when work gets too tight to work with the round needles) Row 1: Knit 10, SSK around 88(120) Row 2: K around Row 3: K9, SSK around 80(110) Row 4: K around Row 5: K8, SSK around 72(100) Row 6: K around Row 7: K7, SSK around 64(90) Row 8: K around Row 9: K6, SSK around 56(80) Row 10: K around Row 11: K5, SSK around 48(70) Row 12: K around Row 13: K4, SSK around 40(60) Row 14: K around Row 15: K3, SSK around 36(50) Row 16: K around Row 17: K2, SSK around 24(40) Row18: K around Row 19: K1, SSK around 16(30) Row 20: K around Row 21: SSK around 8(20) For Bulky/Super Bulky Yarn, end here and go to finishing. Row 20: K around Row 21: SSK around (10) For Worsted Yarn, end here and go to finishing.
Finishing:
Cut yarn leaving a few inches to thread through darning needle. Sew through all remaining stitches in the round twice, pull tight and knot, Weave in ends. I hope you enjoy this pattern. You may freely distribute this pattern, however, please give me credit and leave me a comment on my my Ravelry page: http://www.ravelry.com/stores/glory-knits
EASY SLOUCH HAT