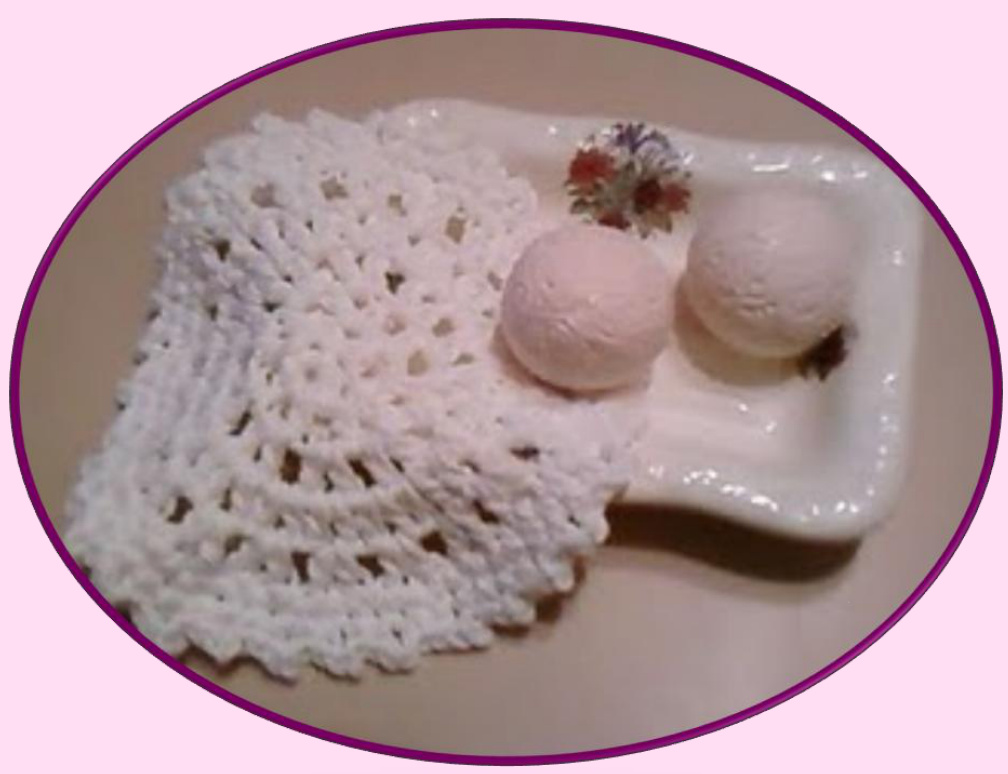
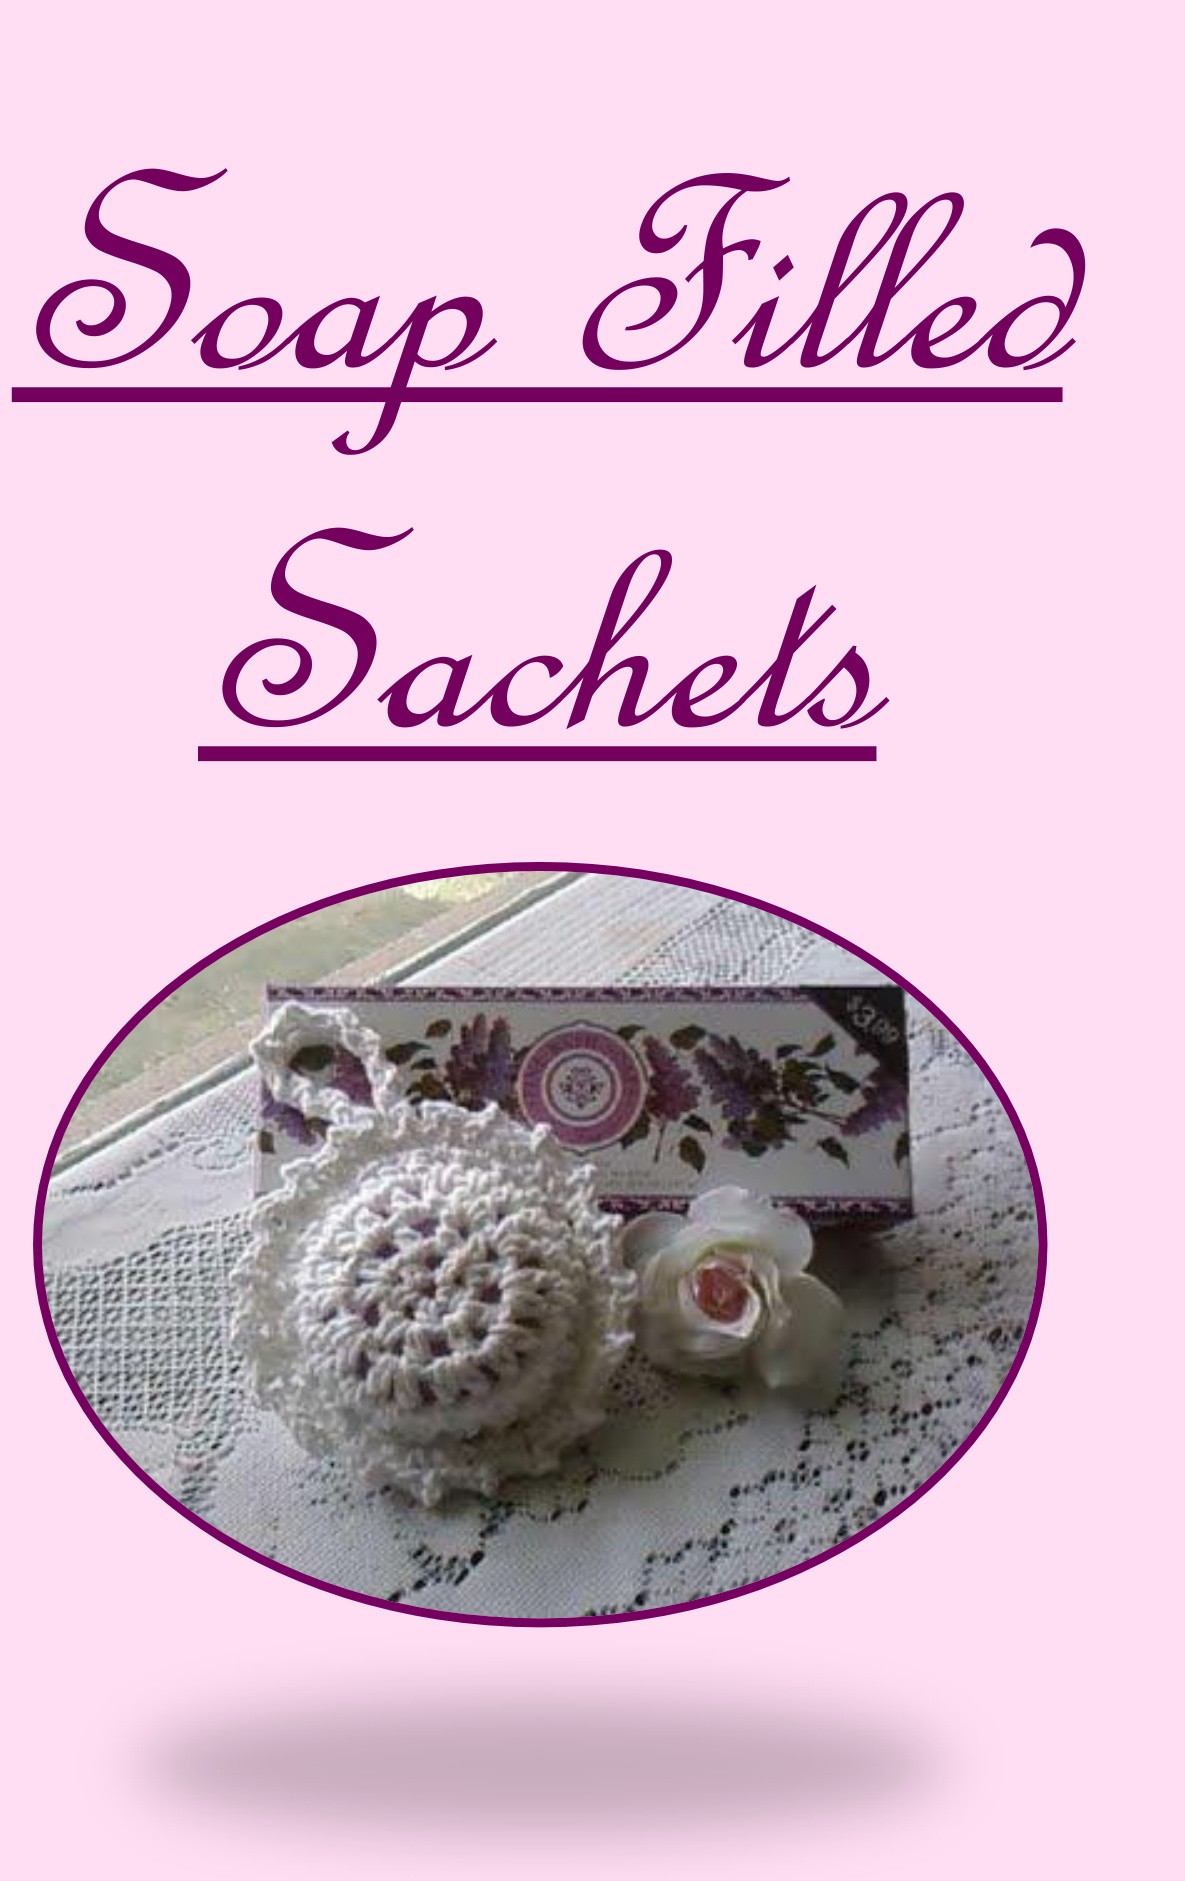
Circular Cotton
Soap Filled These simple, elegant items work up quickly and easily for the advanced beginner crocheter. Add that extra touch for a special Houseguest, or work up a Number of these quick and elegant items to Give as a set for a special wedding gift, Housewarming gift, or any other occasion that you wish to Show purposeful, deliberate care in saying “you are special".
Stitches & Techniques Used
Chain Stitch (ch), Slip Stitch (sl st), Single crochet (sc), Half Double Crochet (hdc), Single Crochet Two Together (sc2tog), Magic Circle. Chain Stitch (ch): Yarn over, pull through loop. Slip Stitch (sl st): insert hook in indicated space, yarn over, pull through stitch and loop, ending with one loop on hook. Single Crochet (sc): Insert hook in indicated space, yarn over, pull through space (two loops on hook), yarn over, pull through both loops. Half Double Crochet (hdc): Yarn over, insert hook in indicated space, yarn over, pull through space (three loops on hook), yarn over and opull through all three loops on hook.
Single Crochet Two together (sc2tog):
(This stitch is a decrease stitch. It takes two stitches in one row and combines them, creating one new stitch, thus decreasing the full number of stitches in the row by one each time it is worked.) Insert hook in indicated stitch, yarn over, pull through space (2 loops on hook), insert hook into next stitch, yarn over, pull through space (3 loops on hook), yarn over, pull through all three loops .
Magic Circle:
(The magic circle is a way to begin crocheting in the round by crocheting over an adjustable loop and then pulling the loop tight once the required number of stitches is created in it. The advantage of the magic circle is its flexibility for use (it can hold as many or as few stitches needed neatly and easily), it's stability (the integrity of the beginning loop is not compromised or weakened due to overstretching to make room for the required beginning stitches to all fit within a single chain), and it's overall appearance is neat and clean, as the size of the loop is adjustable and is tightened and secured only once all the stitches are completed in that round. 1. Holding the yarn a few inches from the end in your left palm with the tail facing down, make a loop up, over, down, and around your index and middle fingers. As you bring the yarn back up towards the top of your index finger for the second time to create a loop, crossing the yarn over from right to left as you overlap. Continue to wrap the strand of yarn to the left of the loop over the outer sides of the fingers, and leave the strand of yarn hanging down the left side of your middle finger. 2. Still holding the yarn in position, tilt your hand so the back of your left hand is facing upward. There should be two strands of yarn side by side seen from the top view of your fingers: the strand on the right, closer to your finger tips should be the loop strand, the strand on the left, your “free” working strand. 3. With your other hand, pick up your crochet hook. Insert the hook, from right to left, under the loop (the first strand), and grab with the hook from the top the working strand. Pull it back through to the right, under the loop, and turn the hook to face upward. You have just created a loop on your hook. Carefully remove the yarn from off your left fingers now, being sure to keep your magic circle and the loop on your hook intact. The tail end of your yarn should appear wrapped around your magic loop strand one or two times. That is fine. 4. Keeping the magic circle intact, take hold of the working strand of yarn in your left hand, yarn over your crochet hook, and pull through the loop on your hook. NOTE: This does not count as your first stitch. 5. Work your first single crochet in loop: Insert hook into the magic circle so you are crocheting over the loop AND the yarn tail, yarn over, and pull back through magic circle. (You will have two loops now on your hook). Yarn over, and pull through both loops. This will count as your first single crochet for this row. Continue to work your single crochet in this manner over the loop and the yarn tail until you have the number of stitches required. 6. Close up the circle: Grasp the yarn tail and pull it, to draw the center of the ring tightly closed. Join with a slip stitch to the first single crochet.
Materials:
Lilly's Sugar n Cream Cotton Yarn in white or your choice Size g crochet hook Tapestry needle Your choice of approximately 3 1/2" diameter scented circular soaps
Approximatefinished sizes:
Face cloth measures 6 1/2" in diameter Sachet measures 5"in diameter
Cinculan Cotton
Face Cloth
Design & by: Uicki Plunkelt Row 1: ch4, (hdc, ch1 in first ch) 4 times. Join with sl st in the 3rd ch in beginning ch 4. Row 2: sl st over into the 1st ch1 sp of row 1, ch3, hdc in same ch1 sp, ch1, (hdc, ch1, hdc, ch1) in next ch1 sp 4 times. Join with sl st in the 2nd ch in begining ch3 of row. Row 3: sl st over into 1st ch1 sp of row 2, ch3, hdc in same ch1 sp, ch1, (hdc, ch1, hdc, ch1) in next ch1 sp 9 times. Join with sl st in 2nd ch in beginning ch3 Ofrow. Row 4: sl st over into 1st ch1 sp of row 3, ch3, hdc in same sp, (hdc, ch1, hdc) in next ch1 sp 19 times. Join with sl st in 2nd ch in beginning ch3 of row. Row 5: sl st over into 1st ch1 sp of row 4, ch3, hdc in same sp, ch1, (hdc, ch1, hdc, ch1) in next ch1 sp 19 times. Join with sl st in 2nd ch in beginning of row. Row 6: ch1, sc2tog in same sp and next sp, (1sc in next 4, sc2tog) around to end.Join with sl st to 1st sc2togsp. Edging: ch1, sc in same sp, ch2, sc in next sc, (sc in next sc, ch2, sc in next sc) around. Join w/ sl st in 1st sc.Finish off.
Design by: Uicki Plunkelt
Begin
Following rows 1-4 of the Circular Cotton Face cloth, make 2. Finish off both.
Join
To join both pieces, with wrong sides together, attach with a joining sc in any ch1 sp through both pieces. (Ch1, sc in next ch1 sp) around, placing soap inside sometime before closing up the space completely. Join with sl st to 1st stitch of row. Do not finish off.
Handle
(ch2, sc in 2nd ch from hook) 10 times. Join with sl st to joining stitch of previous joining row. Do not finishoff.
Edging
(sc in next sc, ch2, sc in next sc) around. Join to first sc of row. Finish off.
Variations
center for both items, and/or a slight variation in a few rows of the stitching can be used for the face cloth to create a slightly tighter weave in the outer rows and an ever so slightly smaller, a bit less “ floppy" finished cloth.
Foundation Row Variation
In a magic circle, sc9, join. Row 2: ch3, hdc in next sc, ch1, (sk next sc, hdc, ch1, hdc, ch1) 4 times. Join with sl st to ch2 of beginning ch3. Row 3&4: Work as indicated in original instructions.
Face Cloth Variation
Row 5: sl st over into 1st ch1 sp of row 4, ch3, hdc in same sp, ch1, (hdc, ch1, hdc) in each ch1 sp around. Join with sl st to ch2 of beginning ch 3. Row 6: ch1, sc in same sp, sc in ea st around. Join in 1st sc of row. Work edging as indicated in original instructions. )e Creations by Vicki" thanks you for your purchase As always, I offer full 1oo% support on all my patterns. Please direct any inquiries to vsplunkett66@yahoo.com This work is all original work, and patent is pending for these patterns. Please feel free to make and sell what you create, but please do not pass these patterns along or sell to others. Thank you!


