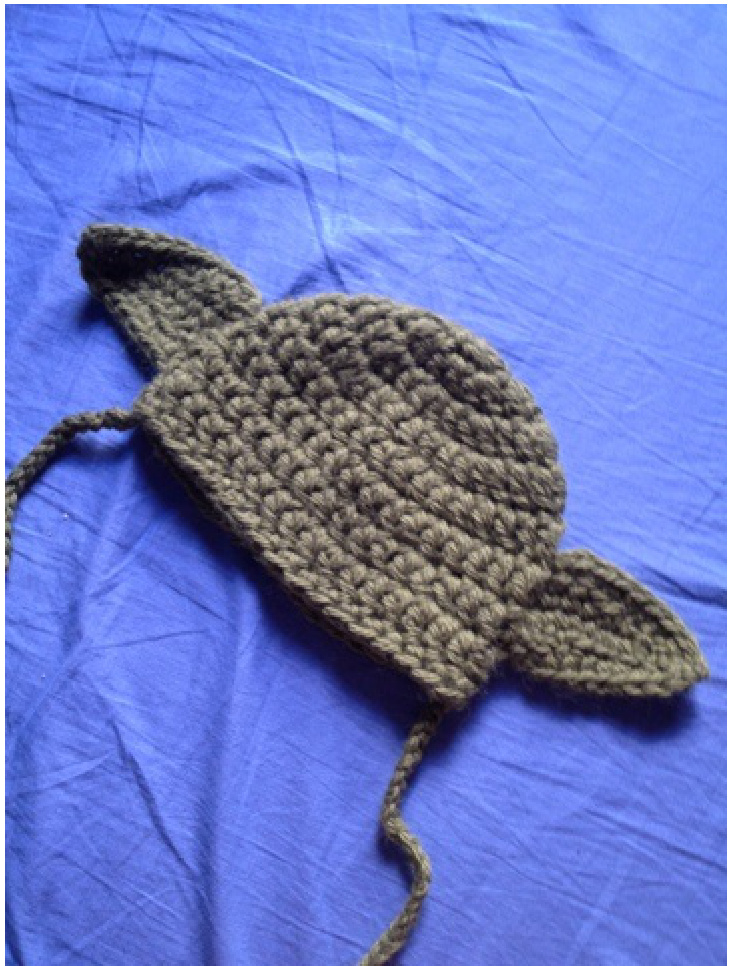
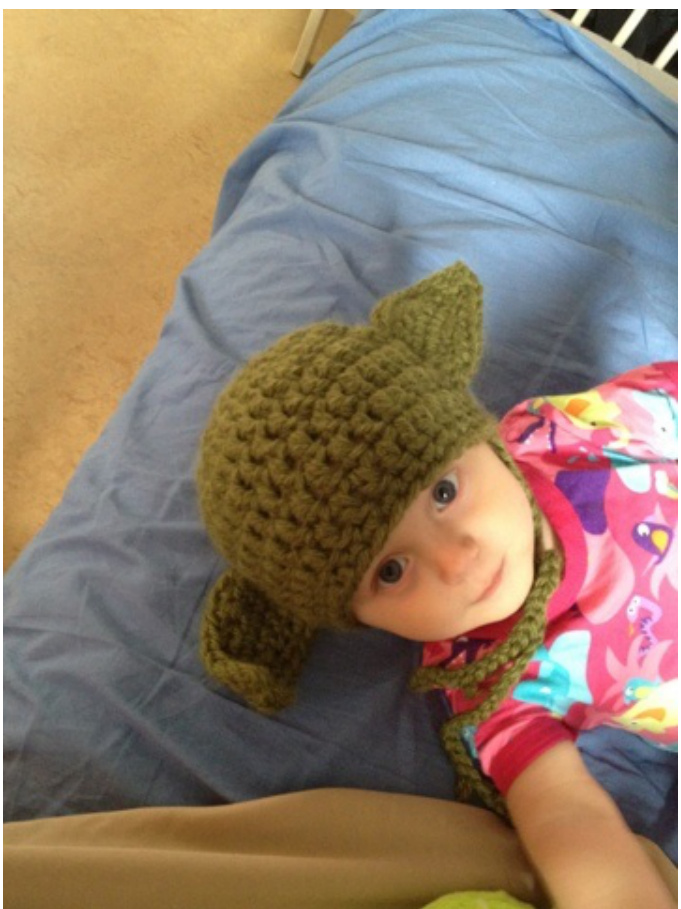
WARM YODA
BABYHAT
ABBREVIATIONS:
The hat is crocheted using Aran weight/10 ply yarn held double and a size 8 hook (US size L11). So far I have only made this pattern one size, approximately for a 6 months old baby, but it is easily adaptable for older or younger children. The hat is also very stretchy, so it should fit your child for quite a long time. I use american terminology throughout the pattern. Dc - double crochet Sl st - slip stitch Ch - chain Cl - cluster (2dc in the same stitch) Hdc - Half double crochet Sc - Single crochet Magic ring - There is a great tutorial for this at Crochet Spot: http://www.crochetspot.com/how-to-crochet-the-magic-adjustable-ring/ In the beginning of each row, always replace the first dc with 3 ch or the first sc with 1 chain. In the end of each row, always finish with a sl st in the first stitch.
THE HAT:
The hat starts from the top: Begin by makinga magic ring. Row 1: 10 dc inthe magic ring. Join with 1 sl st in the first dc. Row 2. Increase by making a cl in every dc from the previous row. Row 3. [1cl, 1dc] Row 4: [1 cl, 5dc] Row 5: [dc] Repeat row 5 until the hat is large enough.
THE EARS:
Row 1: 10 ch,turn. Row 2: 1 dc in the 3d ch, 1 dc, 2 hdc, 3 sc, 2 ch. Turn and continue on the bottom side of the chains from row 1 (this is the tip of the ear). Make 3 sc, 2 hdc, 3 dc.
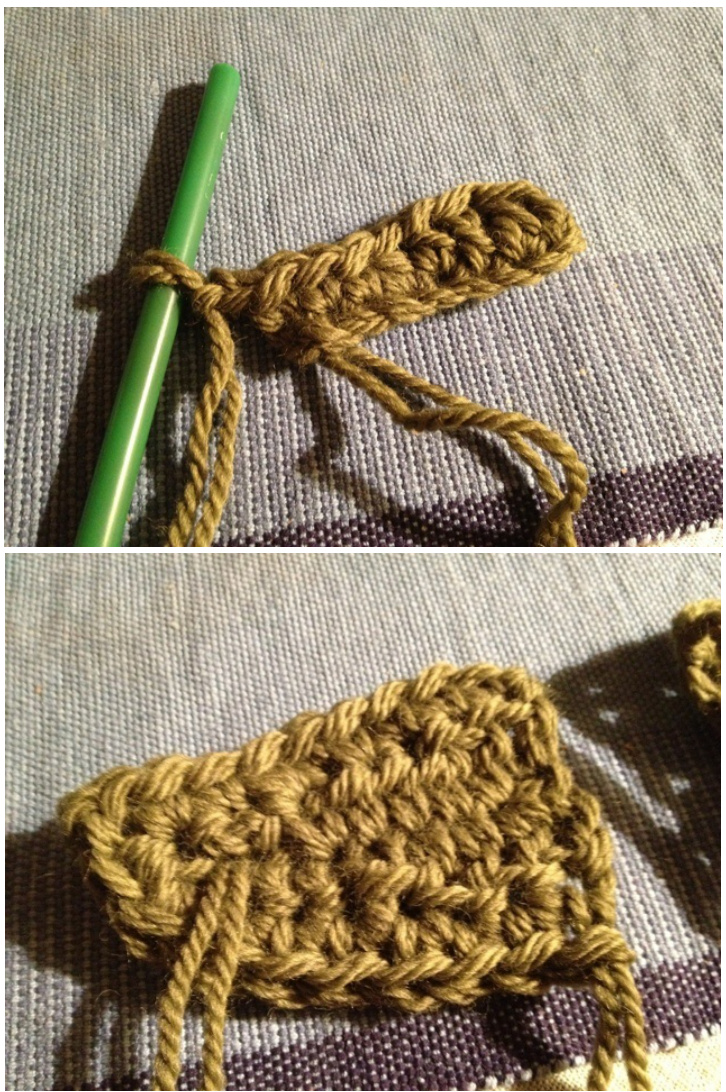
Row 3: 1 sc in each stitch until you get to the two ch at the tip of the ear. Make 1 sc in the first ch, 3ch, sc in the same stitch. Skip the second ch from the last row and then keep making sc in each stitch along the bottom. Finish it off, but leave a long piece of yarn to use for when you attach the ear to the hat.
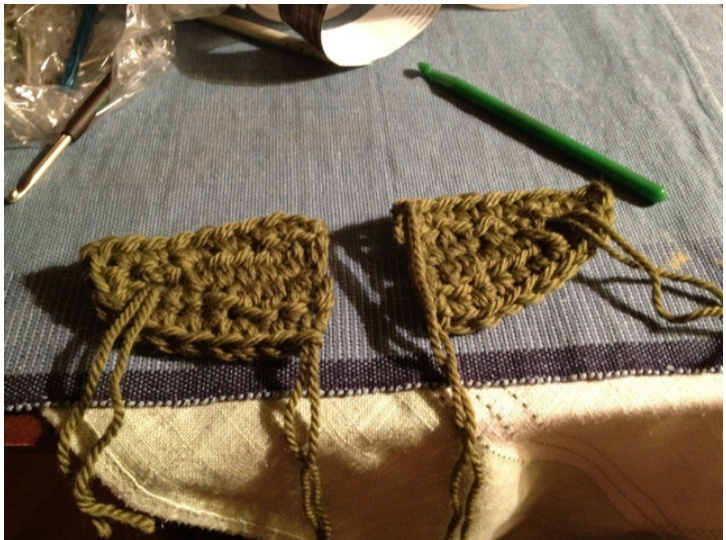
THE SECOND EAR:
The second ear is made exactly like the first one, except that in row 3 you skip the first ch instead of the second. This makes the ear tilt the other way
FINISHING:
Attach the ears using the long pieces of yarn and fasten all the threads. I have made a ribbon of 30 ch to tie the hat onto the baby's head, but that is of course optional (if your baby does not love tearing hats off and waving them around, like mine does).