One to Ten
by Julia Sull
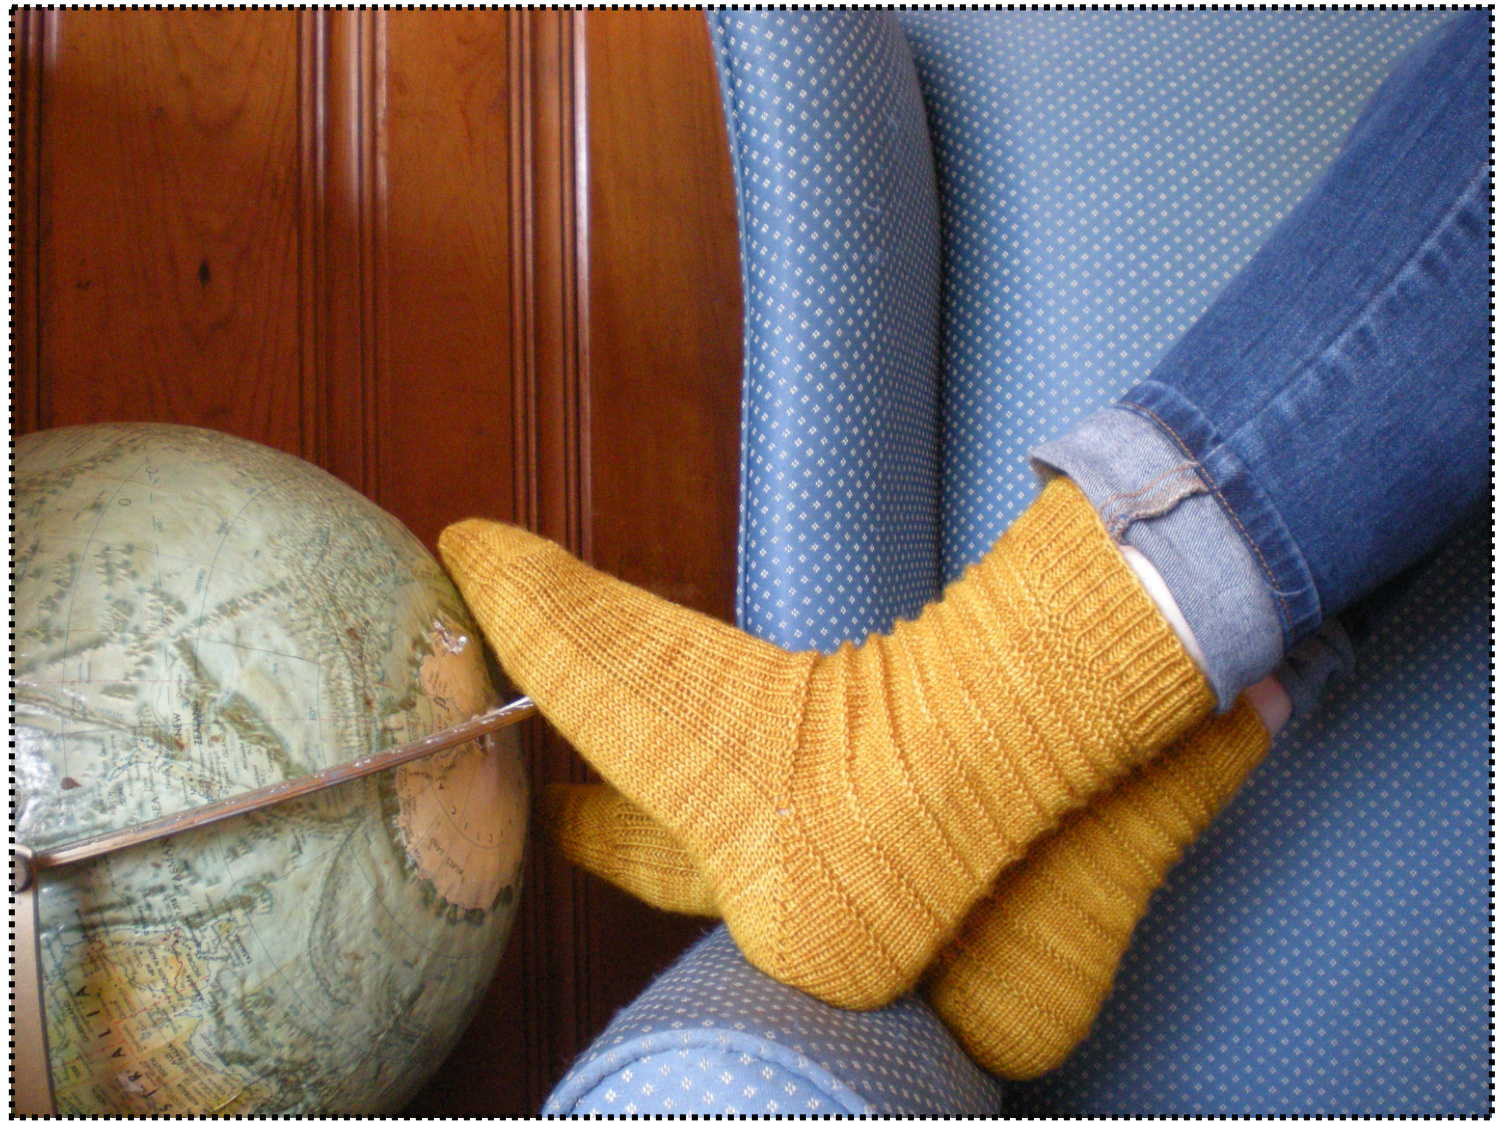
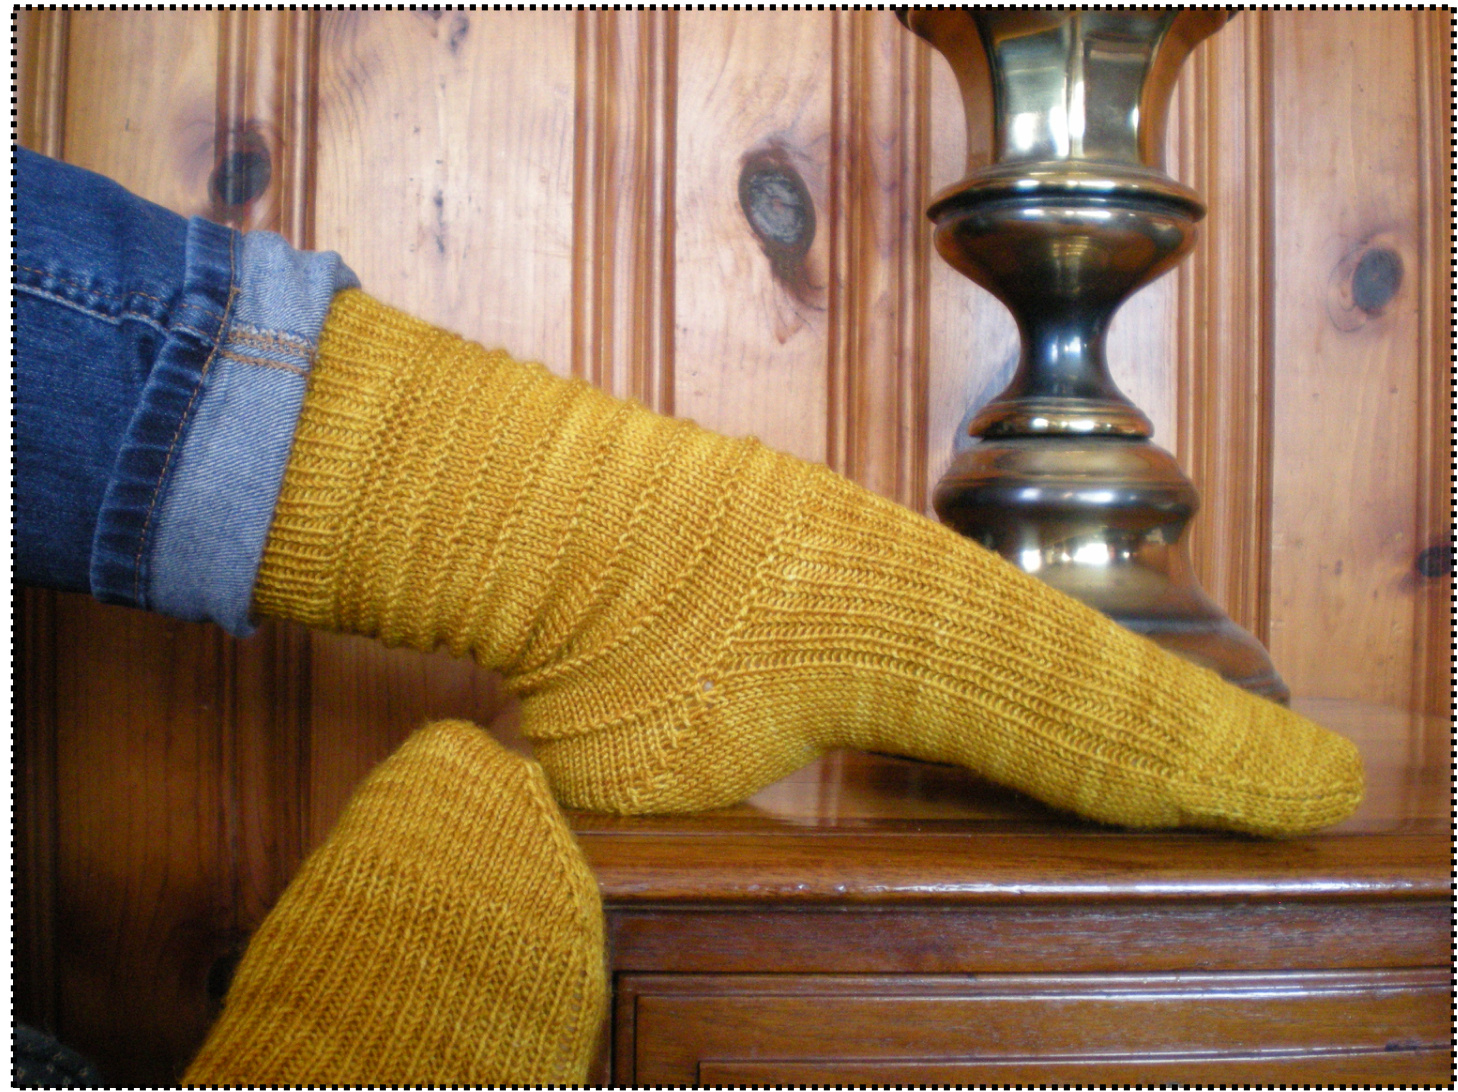
Vertical lines are set against horizontal in these One to Ten socks. The leg is knit in stockinette and punctuated by purl ridges, which become less and less frequent as you make your way from ribbed cuff to short-row heel. The sock is ribbed along the foot for a snug fit and a pleasing look.
Finished size:
One to Ten are likely to fit most adult women's feet. > Foot circumference: 6 /2" unstretched, 8" when gently stretched. > Foot length: 9 %4" from the back of the heel to the tip of the toe, but easily adapted by lengthening or shortening the section between the heel and toe that makes up the bulk of the foot. @ Julia Sull, 2011. All rights reserved. For personal, non-commercial use only.
You'll need:
> Size 1 (2.25 mm) and 2 (2.75 mm) double pointed needles, or size needed to obtain gauge and one size larger. The larger needle will be used only at the cast-on, allowing the cuff of the sock to stretch comfortably over the foot. > 1 skein of Colinette Jitterbug yarn (100% merino wool, 150 grams, 400 yards), shown ir color "Vincent's Apron."
Gauge:
8 stitches per inch in stockinette stitch, using size 1 (2.25 mm) needle
Leg:
CO 64 stitches on size 2 needle, then divide them equally onto 4 size 1 double points, with 16 stitches on each needle. Join to knit in the round. \*Knit 1, purl 1; repeat from \* to end of row. Continue this 1x1 ribbing as established for 14 rows, then begin One to Ten pattern.
One to Ten
Knit 1 row, purl 1 row. Knit 2 rows, purl 1 row. Knit 3 rows, purl 1 row. Knit 4 rows, purl 1 row. Knit 5 rows, purl 1 row. Knit 6 rows, purl 1 row. Knit 7 rows, purl 1 row. Knit 8 rows, purl 1 row. Knit 9 rows, purl 1 row. Knit 10 rows, purl 1 row. Knit across the next three needles, or 48 stitches.
Short-row heel:
Back
Row 1 (right side) : Knit 31 of the stitches across the next two needles, leaving one on the left hand needle. Turn your work. Row 2 (wrong side) : YOB, then purl 29 stitches across those same two needles, leaving one stitch on the left hand needle. Turn your work. @ Julia Sull, 2011. All rights reserved. For personal, non-commercial use only. Row 3: YO, then knit across your heel stitches until the paired stitches made by the YO and the stitch to the right of it in the previous row. There should be 3 stitches on your left needle. Turn your work. Row 4: YOB, then purl across your heel stitches until the paired stitches, leaving 3 on the left needle. Continue working short rows in this manner, repeating rows 3 and 4. Your short rows will get shorter and shorter as the back of the heel takes on a triangular shape. Stop on the right side when there are 12 stitches between your YOs, the outermost 2 of which are paired with said YOs. Knit across those stitches until the paired stitches, but don't turn your work.
Base
Row 1 (right side) : Knit the first stitch of the pair, then correct the mount of YO in the following manner: slip the YO purlwise, then move it back to the left needle again by slipping the left needle into the YO from front to back. K2tog, then turn your work. Row 2 (wrong side) : YOB, then purl all the way to the next YO, including the stitch that it's paired with. Slip the next 2 stitches knitwise, place them back onto the left needle, then, with your right needle in back of your left, P2tog through the back loops. Turn yourwork. Row 3: YO, knit across to the next 2 YOs, then correct the mount of each one as you did in row 1. K3tog, then turn your work. Row 4: YOB, purl across to the next 2 YOs, then slip the next 3 stitches knitwise and place them back onto the left needle to P3tog through the back loops. Turn your work. Continue working short rows in this manner, repeating rows 3 and 4. Your short rows will get longer and longer, and eventually all the YOs you made in the back of the heel will be consumed. The last turn of your work will bring you to the right side. YO and knit across all 32 stitches of the heel until you reach the YO from the previous row. Slip this YO onto the next needle, where the instep begins, and K2tog. Knit in 1x1 ribbing across the instep to the stitch before the last remaining YO. Place that YO onto the second instep needle and SSK. You should now have 16 stitches on each of your four needles, 64 stitches total.
Foot:
Working the sole stitches in stockinette and the instep in 1x1 ribbing, continue until the foot measures 7.5" from the back of the heel. Stop at the end of the sole stitches, just before the instep stitches.
Toe:
Row 1: Knit all stitches. Row 2: Knit 1, SSK, knit to last 3 stitches of instep, K2tog, knit 1. Repeat this process across the sole stitches. @ Julia Sull, 2011. All rights reserved. For personal, non-commercial use only. Repeat rows 1 and 2 until 24 stitches remain. Place the 12 instep stitches on one needle and the 12 sole stitches on another. Cut the yarn, leaving a tail about 12" long, then graft the instep stitches to the sole stitches using kitchener stitch. Weave in ends to complete.
Abbreviations used:
CO: Cast on K2tog: Knit 2 stitches together K3tog: Knit 3 stitches together P2tog: Purl 2 stitches together P3tog: Purl 3 stitches together SSK: Slip 2 stitches knitwise, then place them back on left needle and K2tog through back loops YO: Yarn over, bringing yarn forward and wrapping around right needle from beneath YOB: Yarn over backwards, bringing yarn forward and wrapping around right needle from above
Questions? Find me on Ravelry: juliaemily @ Julia Sull, 2011. All rights reserved. For personal, non-commercial use only.


