
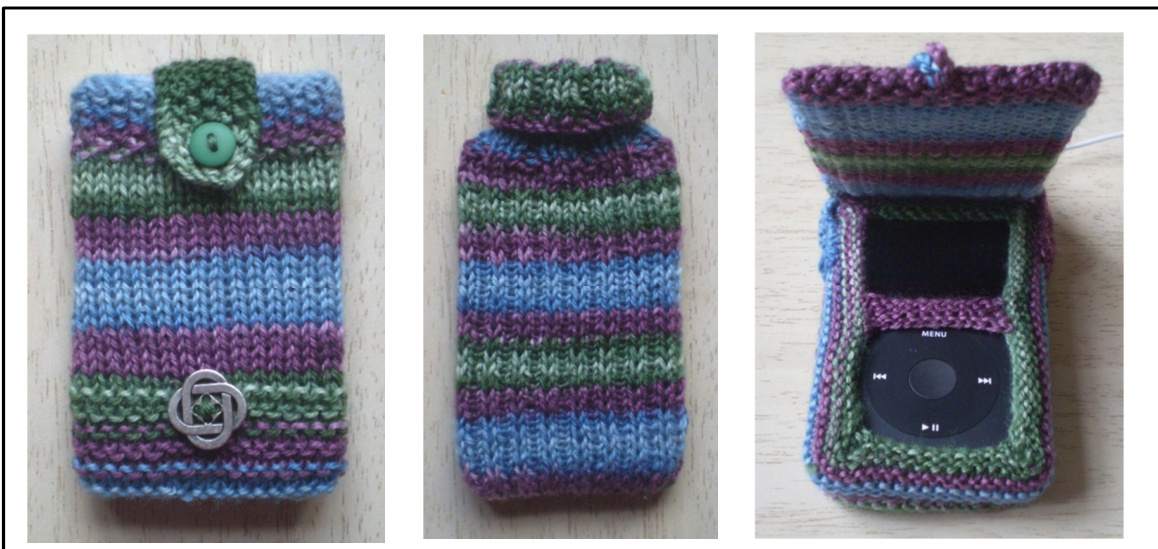
Every iPod needs a knitted case - or three. These cases are made to fit an iPod Classic measuring 6.25cm wide, 10.25cm tall and 1cm deep (or 21/2" × 4" x %") and they use between 10 and 25g of 4 ply yarn.
A Note on Tension
If these cases are to fit snugly it is important to work to the right tension, although this is less vital with the first two cases than with the third. I used a hand-dyed 4 ply yarn (Félix self-striping, 334m / 100g) from www.biscottecie.com and 3.25mm / US size 3 needles unless otherwise stated. More information on tension is given with the individual patterns.
The First Case: the straightforward one.
This is the easiest of the three cases to knit; it uses only simple stitches and takes about 15g of yarn.
Tension
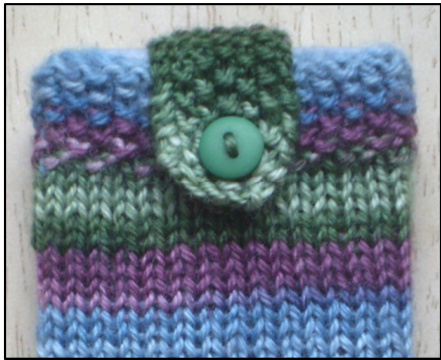
14 sts and 18 rows = 5cm / 2"2, working in stocking stitch on 3.25mm needles. As long as you get the right number of stitches for the given tension, the number of rows is less important. I have given both the number of rows worked and the measurement for each stage so, if your row tension is different to mine, just make sure these measurements match. Using the cable method cast on 35 sts. Knit 1 row. ork 8 rows in moss stitch for the top of the case (2cm from start) Moss stitch: Every row: K1, \*P1, K1, repeat from \* to end. Now work 20 rows in stocking stitch (5.5cm / 7.5cm from start). Knit 11 rows (2.5cm / 10cm from start). Cast off knitwise and join the bottom and side seam. Closing Tab Cast on 7 sts. Work in moss stitch for 12 rows (3cm) Next row: K1, P1, K1, cast off 1 st, P1, K1. Next row: K1, P1, K1, cast on 2 sts, K1, P1, K1. Next row: (K1, P1) twice, K2tog, P1, K1. Next row: K2tog, (K1, P1) twice, K1. Next row: K2tog, (K1, P1) twice. Cast off in pattern. Sew the tab to the middle of the back edge and add a button to the front.
Headphone Pocket
Cast on 20 sts. Work 20 rows in K1, P1 rib (5cm). Now work 5 rows in K2, P2 rib and then make the buttonhole. This is optional, if you don't want to close the pocket with a button just work 10 rows of K2, P2 rib instead of 5 and then cast off. Next row: (K2, P2) twice, K1, cast off 2 sts, (K2, P2) twice. Next row: (K2, P2) twice, K1, cast on 3 sts, P1, (K2, P2) twice. Next row: (K2, P2) twice, K2, P1, P2tog, (K2, P2) twice. Work 2 more rows in K2, P2 rib. Cast off in rib and sew the pocket to the back of the case, adding a button if needed.
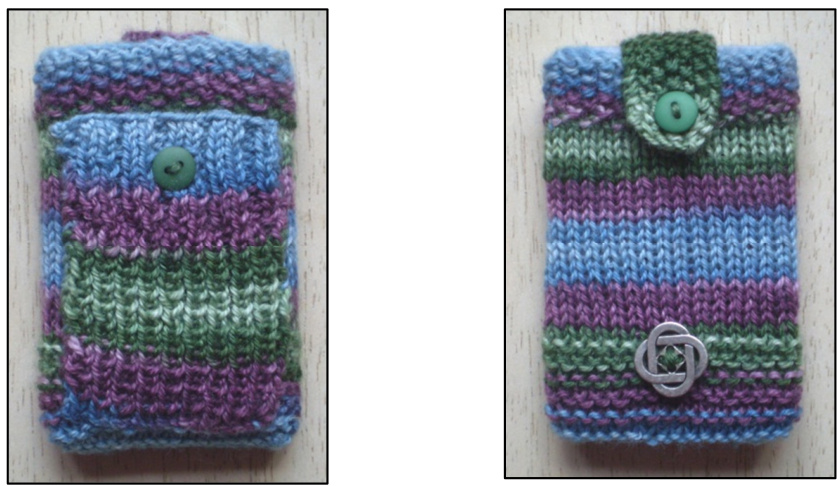
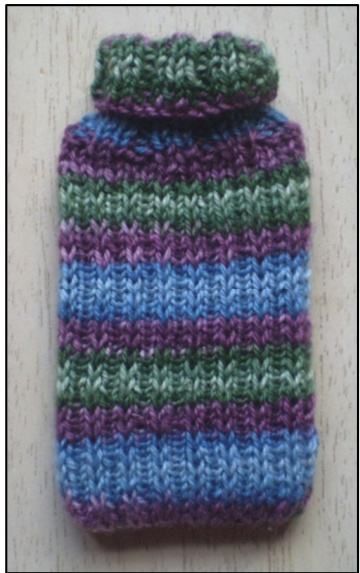
For a final touch, sew a button to the front of the case over the play / pause button (at the top of the garter stitch panel) so that you can press it without taking the iPod out of its case. ① Frankie Brown, 2011. This case uses heel stitch for the main body which, as it is a slip stitch pattern, makes a slightly padded fabric for extra protection.
Tension
16 sts and 24 rows = 5cm / 2"2, worked in heel stitch on 3.25mm needles. This is an unstretched measurement, the case will stretch when put on the iPod. Using the long tail method, cast on 37 sts. Purl one row. Work in heel stitch for 50 rows (10.5cm from start) Heel stitch Row 1: K1, \*sl 1 pwise wyif, K1, repeat from \* to end. Row 2: Purl. Now decrease for the top of the case. Next row: K3, K2tog, \*K5, K2tog, repeat from \* to last 4 sts, K4 (32 sts). Work 20 rows in K2, P2 rib. Cast off in rib and join the bottom and side seam. This case uses only 10g of yarn and is really quick to knit.
① Frankie Brown, 2011.
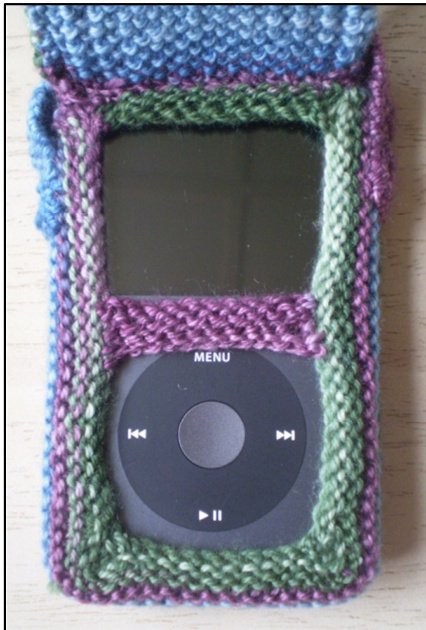
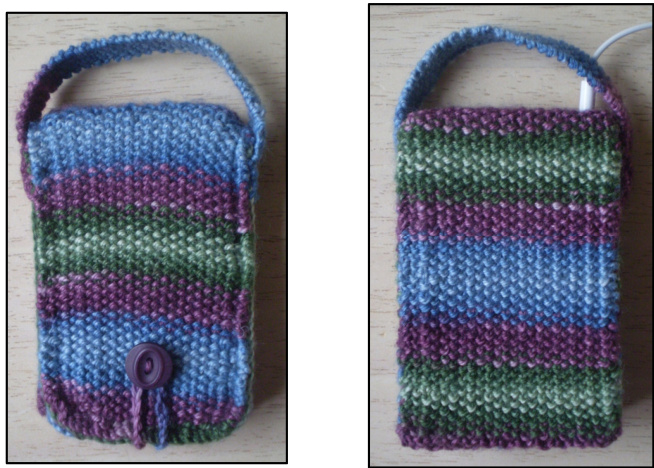
The Third Case: the complicated one.
This may be more tricky but just look at it -- it has a reinforced cover to protect the screen and you can get to all the controls without taking the case off. What more could you want?
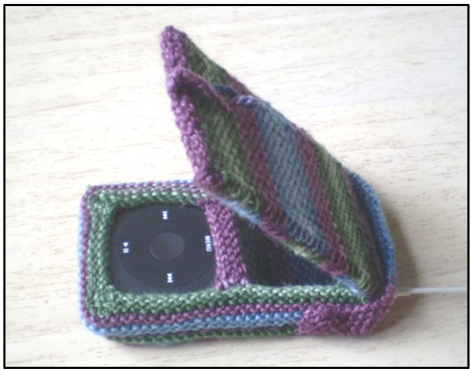
This case takes about 25g of yarn and you will also need a piece of stiff plastic canvas to reinforce the front cover. I used ultra stiff canvas with 7 bars to the inch and my piece was 18 x 28 bars. Trim the corners to stop the points poking through the knitting. If you can't get any plastic canvas, you could try using a piece of card measuring 21/2 x 4" instead.
Tension
It is easiest to measure this by starting the pattern as instructed and measuring the width of your knitting after about ten rows or so. It should be 7cm. So, using 3.25mm needles and the cable method, cast on 25 sts. Work in fabric stitch until your knitting is 10cm / 4" long. Fabric stitch Row 1: K1, \*sl 1 pwise wyif, K1, repeat from \* to end. Row2: K1, P1, \*sl 1 pwise wyib, P1, repeat from \* to last st, K1. Make a note of how many rows you worked for your 10cm as you will need to repeat this again (and again). That's the back of the case knitted. Now work the top of the case, including the hole for the headphones. Row 1: Knit. Row 2: P20, cast off 2 sts, P to end. Row 3: K3, cast on 3 sts, K to end. Row 4:P22, P2tog, P to end. Change back to fabric stitch for the front cover and work another 10cm. Knit one row and then purl one row for the fold at the bottom of the front cover. Work yet another 10cm in fabric stitch for the inside of the front cover. Cast off knitwise. This will give an uneven edge but this is going to be sewn down so it doesn't matter. Fold the front cover in half and sew the cast off edge to the top (just below the section in stocking stitch). Join one side seam, insert the plastic cover and then close the remaining side seam. That's the bulk of the knitting done. Now you have to make the side section and the straps that hold the iPod in place. Side Section This is knitted in garter stitch on 2.25mm / US size 1 needles, working to a tension of 8 sts and 16 rows to 1"2 in garter stich. Don't worry if it looks a bit small as you're knitting it, it needs to stretch to fit well. It will be sewn along the two sides and bottom of the back. Using the cable method, cast on 63 sts. Row 1: Knit (this will be the wrong side). Row 2: K25, m1, K1, m1, K11, m1, K1, ml, K25. Row 3: Knit. Row 4: K26, m1, K1, m1, K13, m1, K1, m1, K26 Knit 8 more rows and cast off knitwise. The increased stitches shape the sides to fit round the bottom corners Of the iPod. With the wrong sides facing, pin the back of the cover and the side section together, making sure that the corners match. You will need to stretch the side section to fit. Now sew the two pieces together, using a small running stitch and working just in from the edge to give a raised seam. At the top of each side sew the edge of the side section to the side of the top of the case. A few stitches will pull the bottom corners together to tighten them if necessary. The Straps (make two) Using the cable method and 2.25mm needles cast on 11 sts. Knit 3 rows. Cast off purlwise. Make sure you don't cast off too tightly, you might like to use a bigger needle just to cast off. The top strap should be sewn between the tops of the two sides. The long edge of the strap can then be sewn down to the edge of the inside front cover.
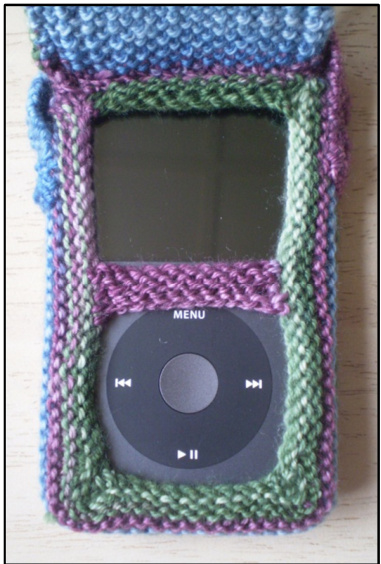
The middle strap should be sewn so that its top lines up with the bottom of the screen, 4cm below the bottom of the top strap. To fasten the case I used a 2.5mm crochet hook to make 25 chain which I sewed to the edge of the front cover. I then sewed a button on the back of the case.
Carrying Handle
Using 3.25mm needles cast on 5 sts. Work in fabric stitch until your handle is as long as you want it to be (mine is 15cm) and then cast off. Sew the ends of the handle to the sides of the case.
Abbreviations
st / sts stitch / stitches Kknit Ppurl K2tog knit two stitches together P2tog purl two stitches together kwise knitwise pwise purlwise sl1 slip one stitch wyif with yarn in front (as if to purl) wyib with yarn in back (as if to knit) m1 make 1 by lifting the thread before the next stitch and knitting into the back of it Frankie Brown, 2011. My patterns are for personal use only and should not be used to knit items for sale.


