Princess Morgan Frilly Jumper
@ 2014 Susan Elston / Yarncraft by Susan. Allrights reserved. Pattern may not be copied or redistributed, in whole or in part, without express written permission. You may sellitems you make from this pattern. Please include pattern design credit to Susan Elston / Yarncraft by Susan / http://yarncraftbysusan.blogspot.com. After seeing some cute, fun knit dress designs for little girls that utilize ruffled scarf yarn in the skirt, I wanted to knit a jumper for my grand niece, Morgan. However, since none of the dress designs I had seen were quite what I had in mind to make for her, I started working freehand, from the bottom hem of the skirt upward. The skirt and the bodice part of the jumper were totally straightforward, so I had no trouble improvising them. But I knew I was going to be in trouble when it came to making armholes and a yoke because I had never done anything like that before from the bottom up. So I started scouring through Ravelry patterns in the hope that I would find a bottom-up little girls top pattern with a yoke design that would be close enough in garment size, needle size, and yarn weight that I could use its yoke to finish the jumper I wasworking on. The yoke of Kristy Demoe's gorgeous Arrowhead Lace Topper fit the bill EXACTLY. After finishing my prototype for the Princess Morgan Frilly Jumper pattern, I approached Kristy to ask her permission to use her work as part of this free pattern, and she agreed. Therefore, to complete this dress pattern, you will need to also download a copy of Kristy's free pattern at the link above. Princess Morgan Frilly Jumper knits up quickly in aran or worsted weight yarn on circular needles and is easy enough for an advanced beginner. This pattern is free because it is ONLY being released in little girls' size 4. The skirt is a simple garter stitch in the round. Ruffles are added on alternating rows by holding the main and scarf yarns together. The bodice is a very stretchy twisted rib. And it is all elegantly topped off by Kristy's Arrowhead Lace yoke. Instructions for an optional button-on flower are included.
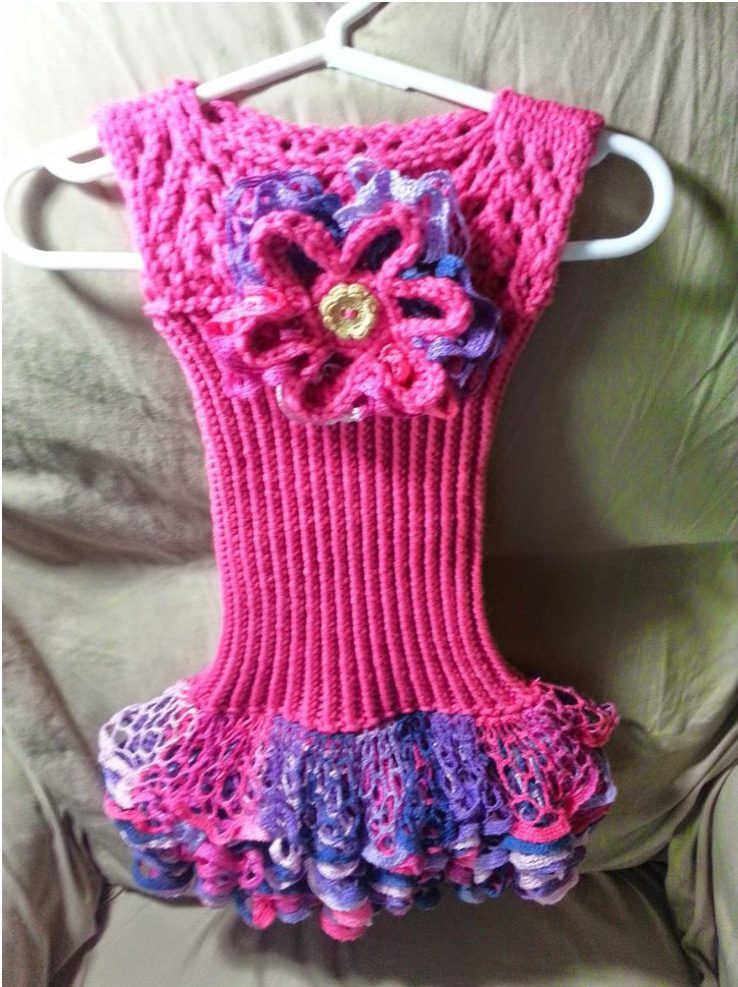
Dress sample shown in the photos is made with Red Heart With Love Candy Pink 100% acrylic yarn and Rozetti Yarns Marina Multi 100% acrylic ruffle scarf yarn.
Approximate finished dimensions:
Dress circumference: 24 inches. Hem to neck length: about 21 inches.
Supplies needed:
Size 9 (5.5 mm) circular needle, 24 inches long Color A: Aran or worsted weight yarn, 1 skein, at least 300 yards Stitchmarkers Color B: Ruffle scarf yarn or ribbon yarn, 1 skein, about 31 yards Tapestry needle
Abbreviations/Skills/Stitches used:
Knitted cast on K (knit), P (purl) Garter stitch in the round YO (yarn over to increase by one stitch) PM/SM (place stitch marker on needle/slip marker to other needle) Twisted ribbing stitch (K1tbl, P1) in the round Working flat (side to side) Joining to work in the round K2tog (knit two stitches together to decrease by one stitch) Stretchy cast off method Sl (slip first stitch as if to purl) If you aren't familiar with a particular skill, I've embedded links above to some YouTube videos that teach how to do them. (These are not videos made by me. Most of the links are to videos by Planet Purl, which have helped me a lot in the past. If you don't like the videos I've linked to, feel free to search on YouTube or Google for other tutorials.)
Ruffle skirt: Work in the round
In color A, cast on 72 stitches. Being careful not to twist the stitches, place a marker on the needle to denote the beginning of the round and join stitches to work in the round. Work 4 rounds in regular garter stitch in the round, ending on a P round. (You will probably need to work using the magic loop method at first, until the skirt has grown enough to stretch comfortably around the circular needle.) Regular garter stitch in the round is a two-round repeat of: Round 1) K each st around; and Round 2) P each st around. Now add color B (the ruffle or ribbon yarn) and work in ruffle garter stitch until you don't have enough of the ruffle/ribbon yarn to complete another round. Ruffle garter stitch in the round is a two-round repeat of: Round 1) Place the next loop or hole from the top edge of color B onto the left needle beside the next color A stitch. K the st through both yarns. Repeat for each st around. Round 2) DROP color B (DO NOT BREAK OR CUT RUFFLE/RIBBON YARN) and P each color A st around. Pick up color B at beginning of next round, and repeat rounds 1 and 2. (In short, only include color B on the K rounds; exclude color B c theProunds.) I included a round of purl stitches for the second step of the ruffle garter stitch because this adds height between the ruffle/ribbon yarn rounds and makes the skirt's ruffles more defined.
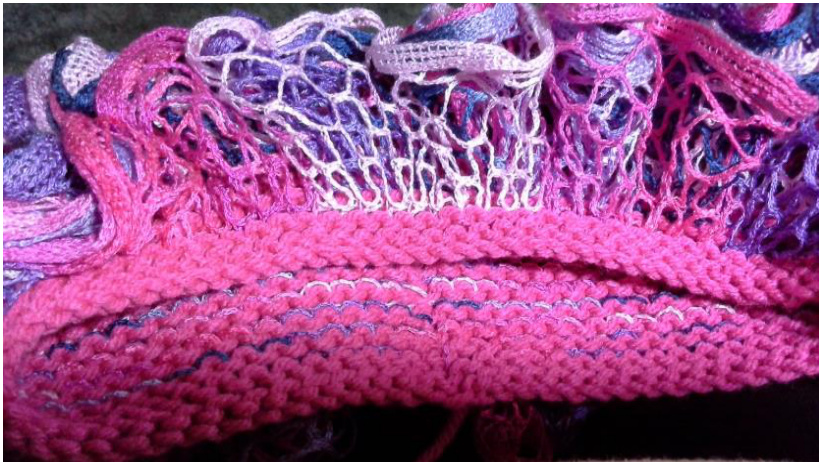
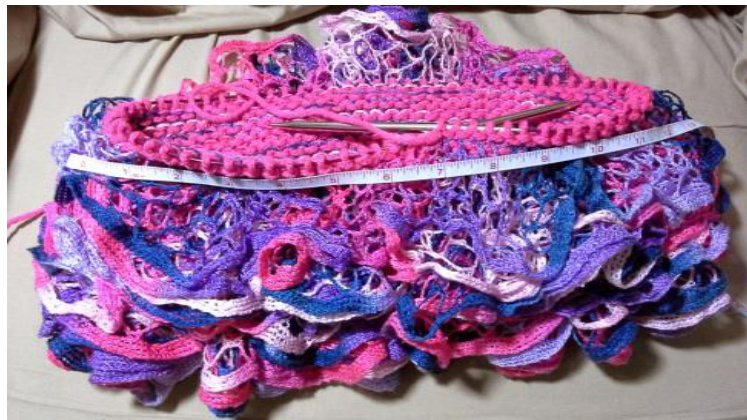
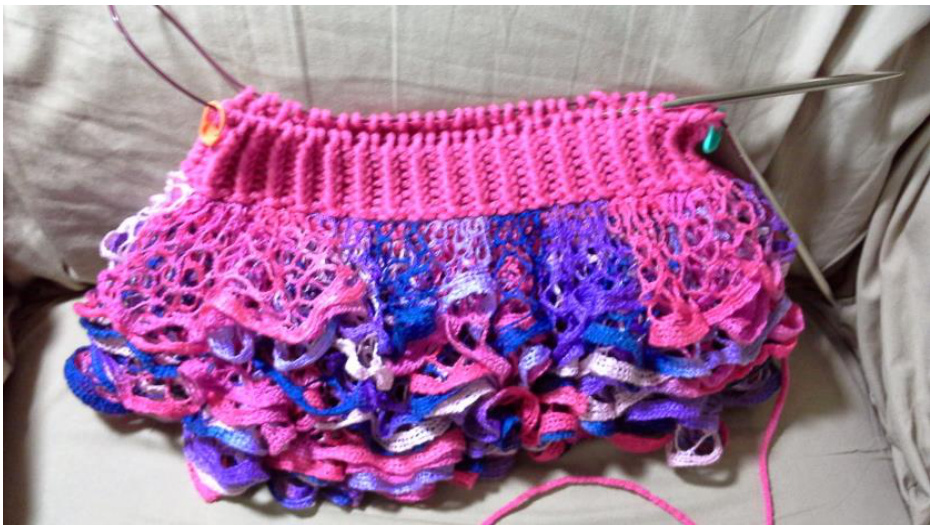
Bottom rounds of skirt are plain garter stitch in the round in color A. After 4 rounds, begin ruffle garter stitch.
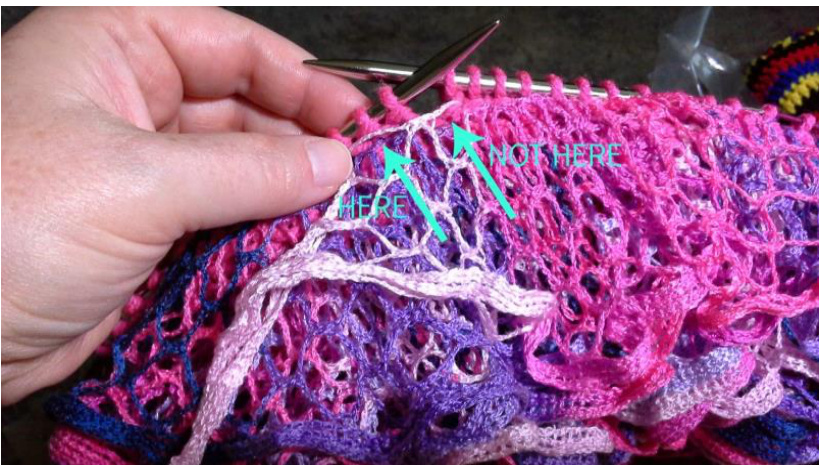
Arrows indicate where the next color B (ruffle yarn) stitch is relative to your needles. Be sure to work into the NEXT loop, not the SAME loop as thepreviousstitch. Repeat ruffle garter stitch in the round until you don't have enough of color B to complete another round. Cut color B. Be sure to end ruffle garter stitch section after working a P round. On the prototype piece in the photos, the 33-yard Rozetti ruffle yarn allowed for 12 complete rounds on the jumper with about 2 yards left over The leftover ruffle can be used for an optional button-on flower type of embellishment, which I will describe later.
Bodice: Work in the round
Now you will work in twisted ribbing stitch until dress length measures 17-18 inches from bottom hem, or until height of bodice reaches to just beneath the wearer's arms. Measure your child for best fit! PM after 36 sts to mark halfway point in round. Return to magic loop method as the ribbing shrinks the total circumference of the bodice and the stitches no longer comfortably stretch around the circular needle.
Twisted ribbing stitch is a two-stitch repeat of: K1tbl and P1 around.
When bodice reaches desired length, P for 1 round then begin yoke.
Begin working bodice in twisted ribbing stitch in color A after the final P round of rufflegarter stitch.
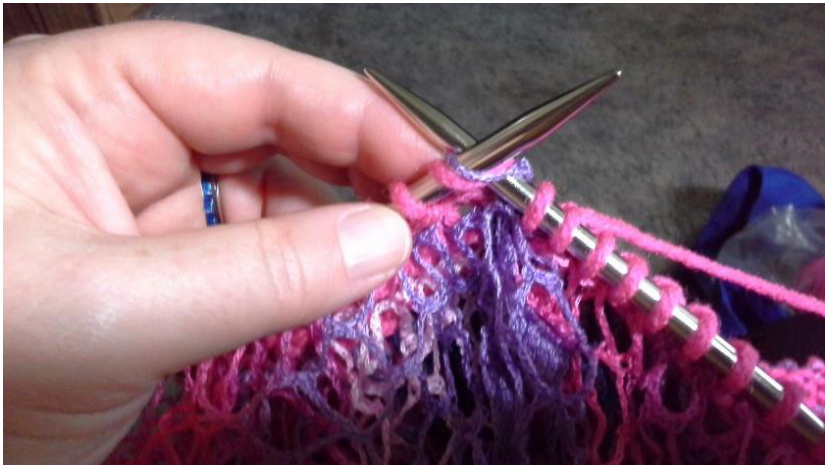
Knit colors A and B together on K rounds of ruffle garter stitch.
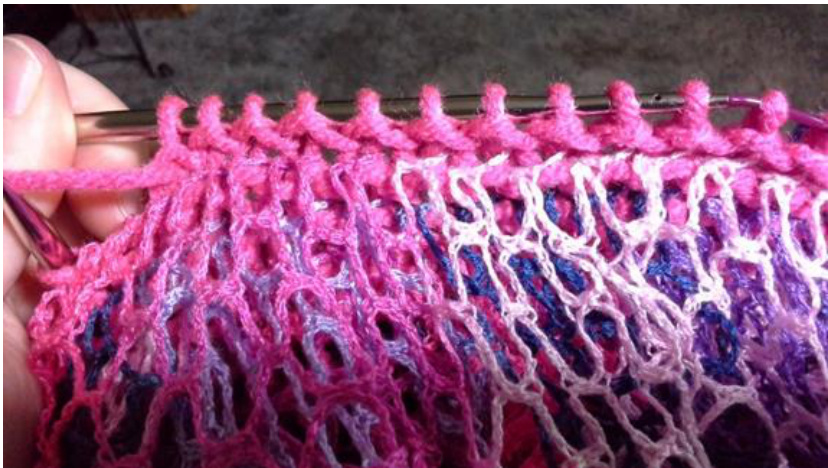
When working ruffle garter stitch, drop color B for the P rounds and work only incolorA.Pickup colorBfortheK rounds.
Top yoke: Work flat
Work the Arrowhead Lace top yoke section of Kristy Demoe's free Arrowhead Lace Topper to finish the jumper. You will begin the Arrowhead Lace instructions by binding off 3 stitches on each side for the armholes, which divides the remaining 66 stitches on the jumper into a front and a back panel of 33 stitches each. Your stitch markers at the beginning and middle of the round denote where the sides of the garment are. The lace instructions say to place the back panel stitches onto a stitch holder or waste yarn, and then work the front lace panel. After placing the back panel stitches onto a holder, I recommend threading a rescue line (seen in my photo as a strand of neon green yarn) through your live front panel stitches before beginning the lace, just in case something goes wrong and you need to rip the section out and start over. Having the rescue line there makes it exponentially easier to rip back without inadvertently dropping a stitch. With the rescue line in place, work four repeats of the Arrowhead Lace design for the front panel. Because the original lace pattern is based on a different stitch count, work the instructions with the following changes: On each RS row (rows 1 and 3 in the lace pattern), sl 1, K1, and then begin the instructions as written starting AFTER the first written sl 1. K1 at the end of each RS row on the remaining stitch leftover after working the lace pattern. After working four complete lace repeats, work the shoulders and front neckline by K8, bind off 17, and K8. Repeat process with the above changes from the written pattern for the back lace panel.
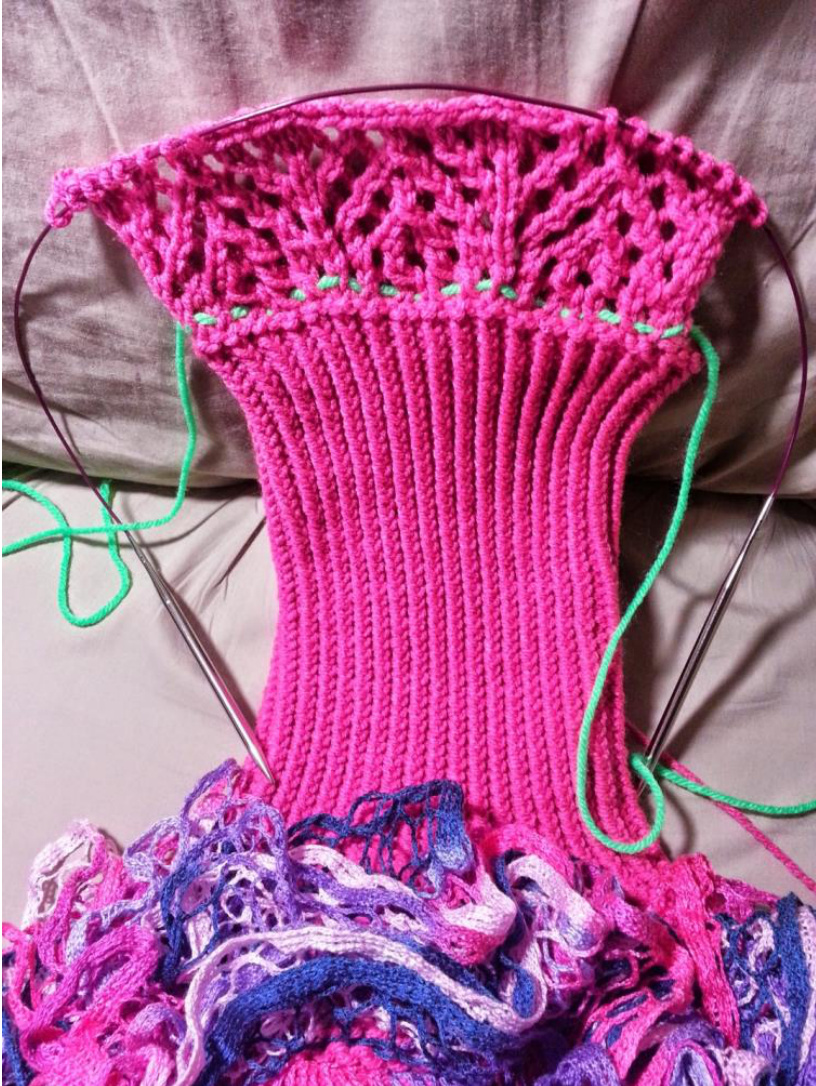
Arrowhead Lace yoke withgreen rescueline,just incase. Remove rescue lines, weave in ends, and then if you like, make the optional button-on flower embellishment described below.
Optional button-on flower: Crochet
In color A and using an H (5 mm) crochet hook, make one of Louis Mensinger's Crocheted Button-on Flower, pattern here, leaving a yard-long tail of color A after cutting the yarn. Thread color A tail onto a tapestry needle. Working in the loops on the back of the flower petals, but close to their outer edges, use a loose running stitch to sew a loop of color B to about every-other stitch in each flower petal. When you have attached color B all the way around, work a final stitch of color A over both ends of color B to fasten them down, then knot color A and finish off, weaving in ends. Trim ends of color B to neaten as needed. Sew a 7/8- or 1-inch button to the top center front of the jumper bodice (or off to one side, whichever you prefer) and attach flower to button. I suggest taking the completed flower with you to your notions store and buttoning it to the buttons on their display cards to check for the best fit before buying. Alternatively, if you have enough color A yarn left over, you could make a coordinating headband or hat and button the flower embellishment to that. Now your frilly ruffle jumper is ready to be worn by the princess in your life!
Afterword
SUPPORT INDIE DESIGNERS! Please remember, this pattern is copyrighted and may not be copied or redistributed, in whole or in part, without express written permission of Susan Elston. Email Susan Elston at yarncraftbysusan@gmail.com. You may sell items you make with this pattern if you include pattern design credit to Susan Elston / Yarncraft by Susan / http://yarncraftbysusan.blogspot.com and KristyDemoe.
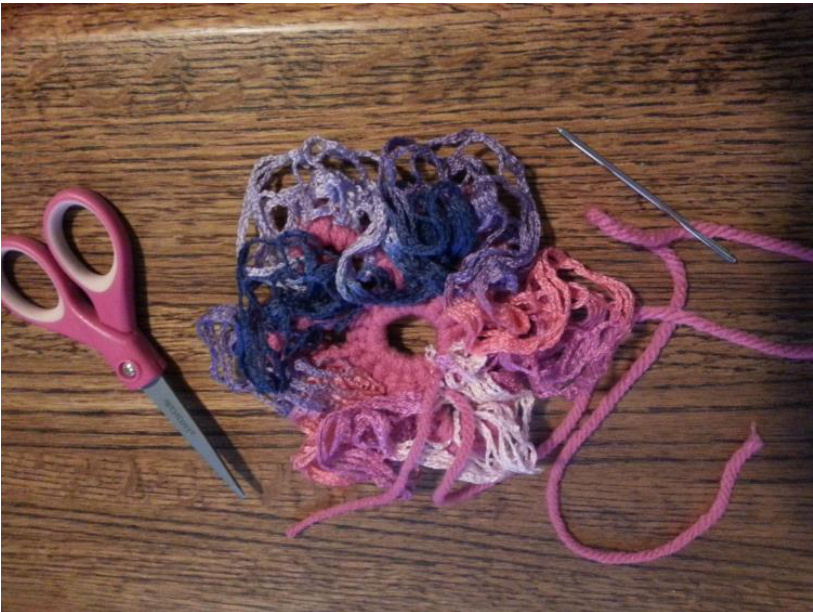
Backviewof optional button-on crochetflower.Color B ruffleyarn is attachedwithlooserunningstitch incolor A.
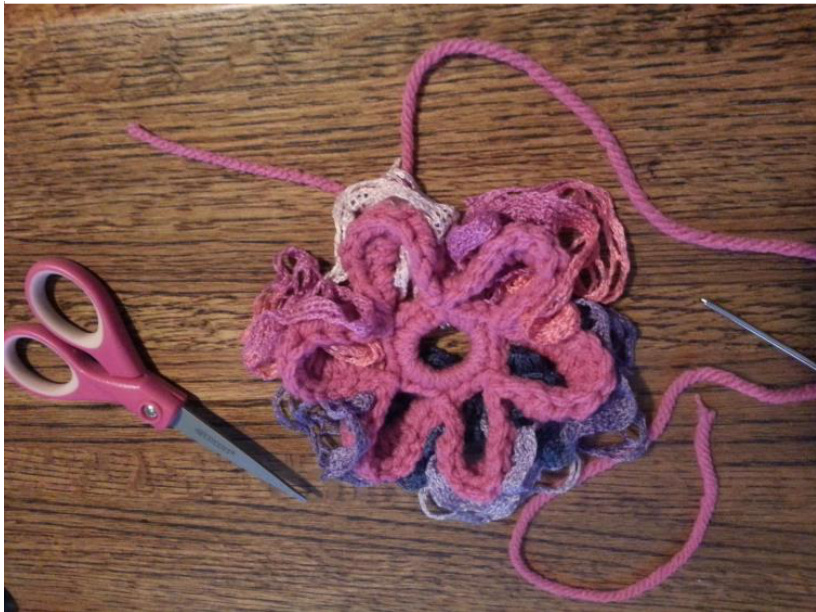
Front view of optional button-on crochet flower.


