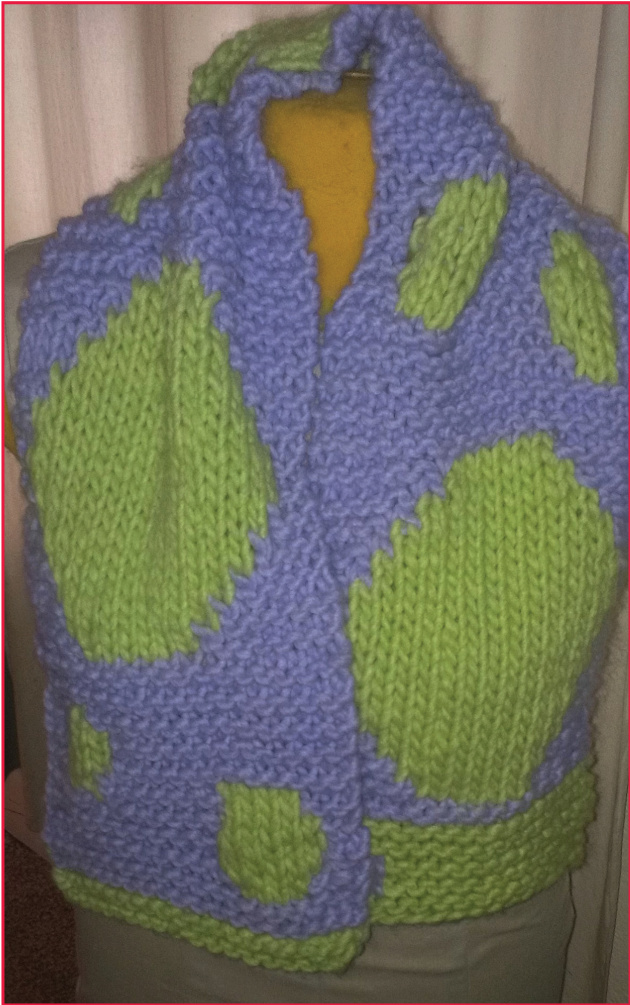
Polka Dot Scarf
A scarf for a girl who's not a teenager yet, but outgrowing the little princess frou frou. Polka dots and big stitches from a chunky yarn strike a good balance for a girl who's growing, but not growing up too fast. It's a very quick knit, even though it does involve basic intarsia. In fact, if you're new to intarsia, this is a great project to start learning!
Finished Measurements
47 %" long by 10" wide
Gauge
8 sts and 14 rows (7 garter ridges) = 4" in garter st
Yarn & Needles
US 17 straight needles 220 yds of super bulky yarn (shown in Zumie by Hikoo 30% wool/50% acrylic/20% nylon, 200 g, 110 yds) Color A: Wisteria #111 Color B: Pistachio #108
Pattern Notes
- This pattern is worked in intarsia from color charts. It is recommended to wind each skein into two balls. - Each row of the color charts is two rows of knitting. The body of the scarf is worked in garter st, and the dots are worked in St st (k right side, p wrong side). - This pattern uses ALL of Color A. Be conservative with yarn as you break or attach balls. If you find you are running out of a color, switch Colors A and B for added polka dot fun . If you prefer to work the pattern to the end without switching colors, buy two balls of Color A to make sure you have enough!

Scarf
With Color B, CO 20 sts. Knit four rows (2 garter ridges). Break Color B. Join Color A and begin working Body Color Chart. As mentioned in the Pattern Notes, work the body of the scarf in garter st, and the dots in St st. When you reach the dots, join in Color B, using the intarsia technique, and break the yarn when the dot is completed.
Finishing
For the measurements listed, the Body Color Chart was worked one and one half times (stopping after the largest dot). A garter ridge (knit two rows) was worked in Color A, and the scarf was finished by working the Edging Color Chart once. However, as long as you have a sufficient amount of yarn, you may increase the length of the scarf by working the entire Body Color Chart twice and then finish with the Edging Color Chart or simply with two garter ridges in ColorB. BO and weave in ends. Block to measurements.
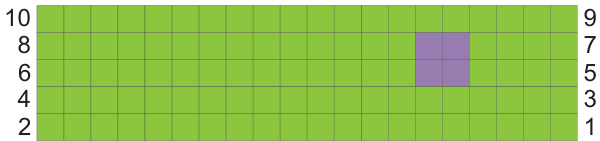
Edging Color Chart
Body Color Chart
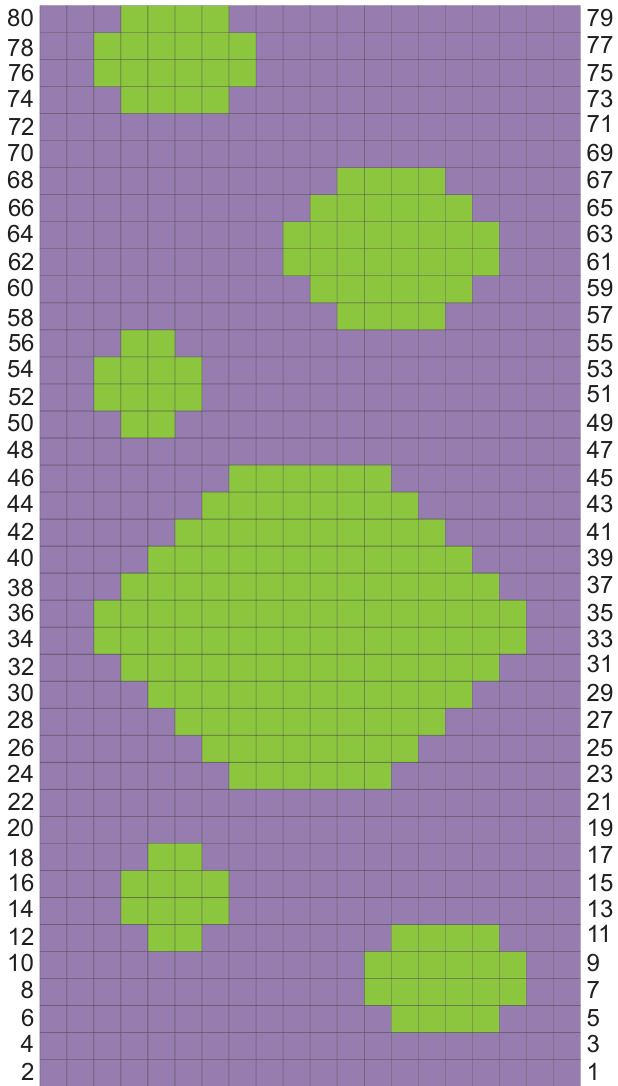
When working color charts, it is helpful to keep track of rows by using highlighter tape. Move the tape each time you start a right side row.


