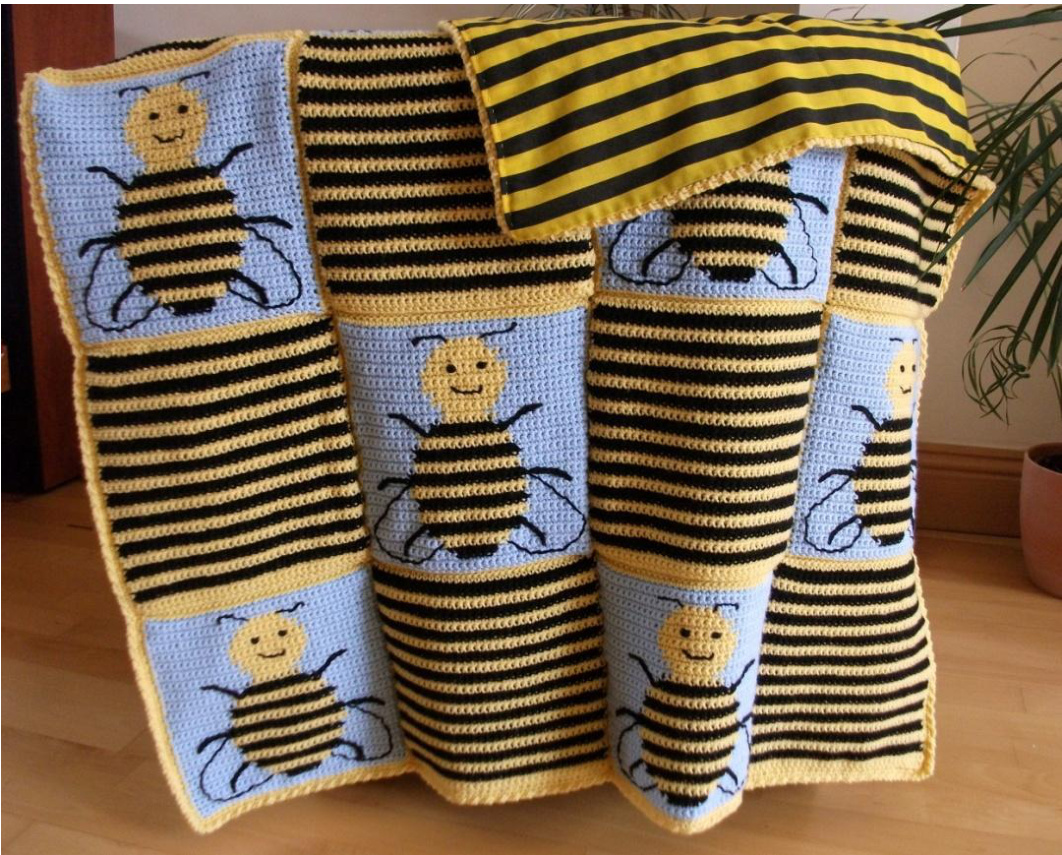
Bee Squares Blanket
Abbreviations:
sc = single crochet ch = chain Note:This pattern uses US crochet terms
Material:
Sport weight or light DK yarn in: Yellow: 250 g (appr. 850 m or 925 yards) Black: 175 g (appr. 550 m or 600 yards) Light blue (or cream or white): 175 g (appr. 550 m or 600 yards) Import note on yarn: Black and light colors make a dangerous combination, so before you start the blanket, crochet a striped test patch, not too small, and wash it to see if the black color runs into the lighter colors. If it does, you can pre-wash the black yarn until the color stops running (this is tricky and labour-intensive), or cut your losses and make something else. For the same reason, light blue is a safer bet than cream or white - blue will hide a minor color run that would ruin a white background. The sample blanket is crocheted in Wendy Peter Pan, and I had major difficulties with the black yarn running, though I don't know if this is a general problem or if I was just unlucky to have a dodgy dye lot. E/3.5 mm crochet hook Yarn needle Optional: Fabric for lining. I recommend lining the blanket as it doesn't look nice from the wrong side. As a novice sewer, I find polar fleece easy to handle. The blanket in the photo is lined with a bee-striped cotton fabric.
Gauge/Tension:
17 stitches x 20 rows = 10 cm x 10 cm (or 4" x 4") in sc. With this tension, the finished blanket measures about 90 cm x 110 cm (35" x 43"). If your tension is different, you can use a different-size hook, or ignore it and simply make the blanket bigger or smaller. But keep in mind that if your gauge is much bigger, you will need more yarn.
Striped squares (make 10)
With yellow, chain 36 (for 35 sc plus 1 turning chain). Work in stripes of 2 rows yellow, 2 rows black, for 40 rows (20 stripes - 10 yellow, 10 black). Then work a row of single crochet all the way around the square, working 3 sc into the corners. On the vertical, you can work 1 sc into every row, keeping them tight- this means you have 40 sc instead of 35 as it should be, but it is more important to have an even look to the edging. Weave in all ends.
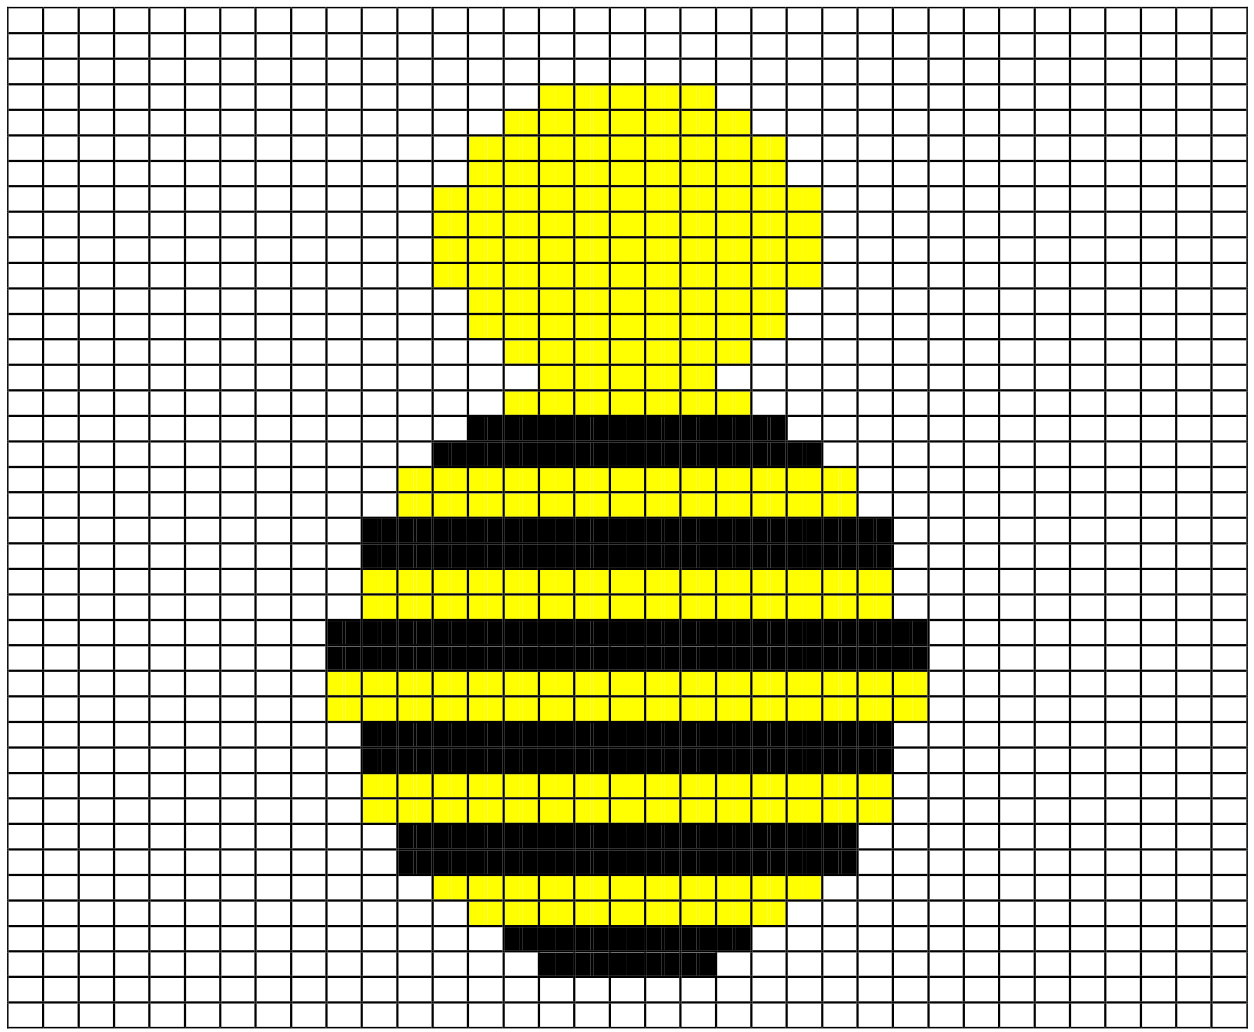
Squares with bee pattern (make 10)
With light blue, chain 36 (for 35 sc plus 1 turning chain). Work in tapestry crochet using the bee chart. At color changes, always start the new color when you pull the yarn through the 2 loops of the previous single crochet. After finishing the chart, work a row of single crochet in yellow all the way around the square, working 3 sc into the corners, as on the striped squares. Weave in all ends.
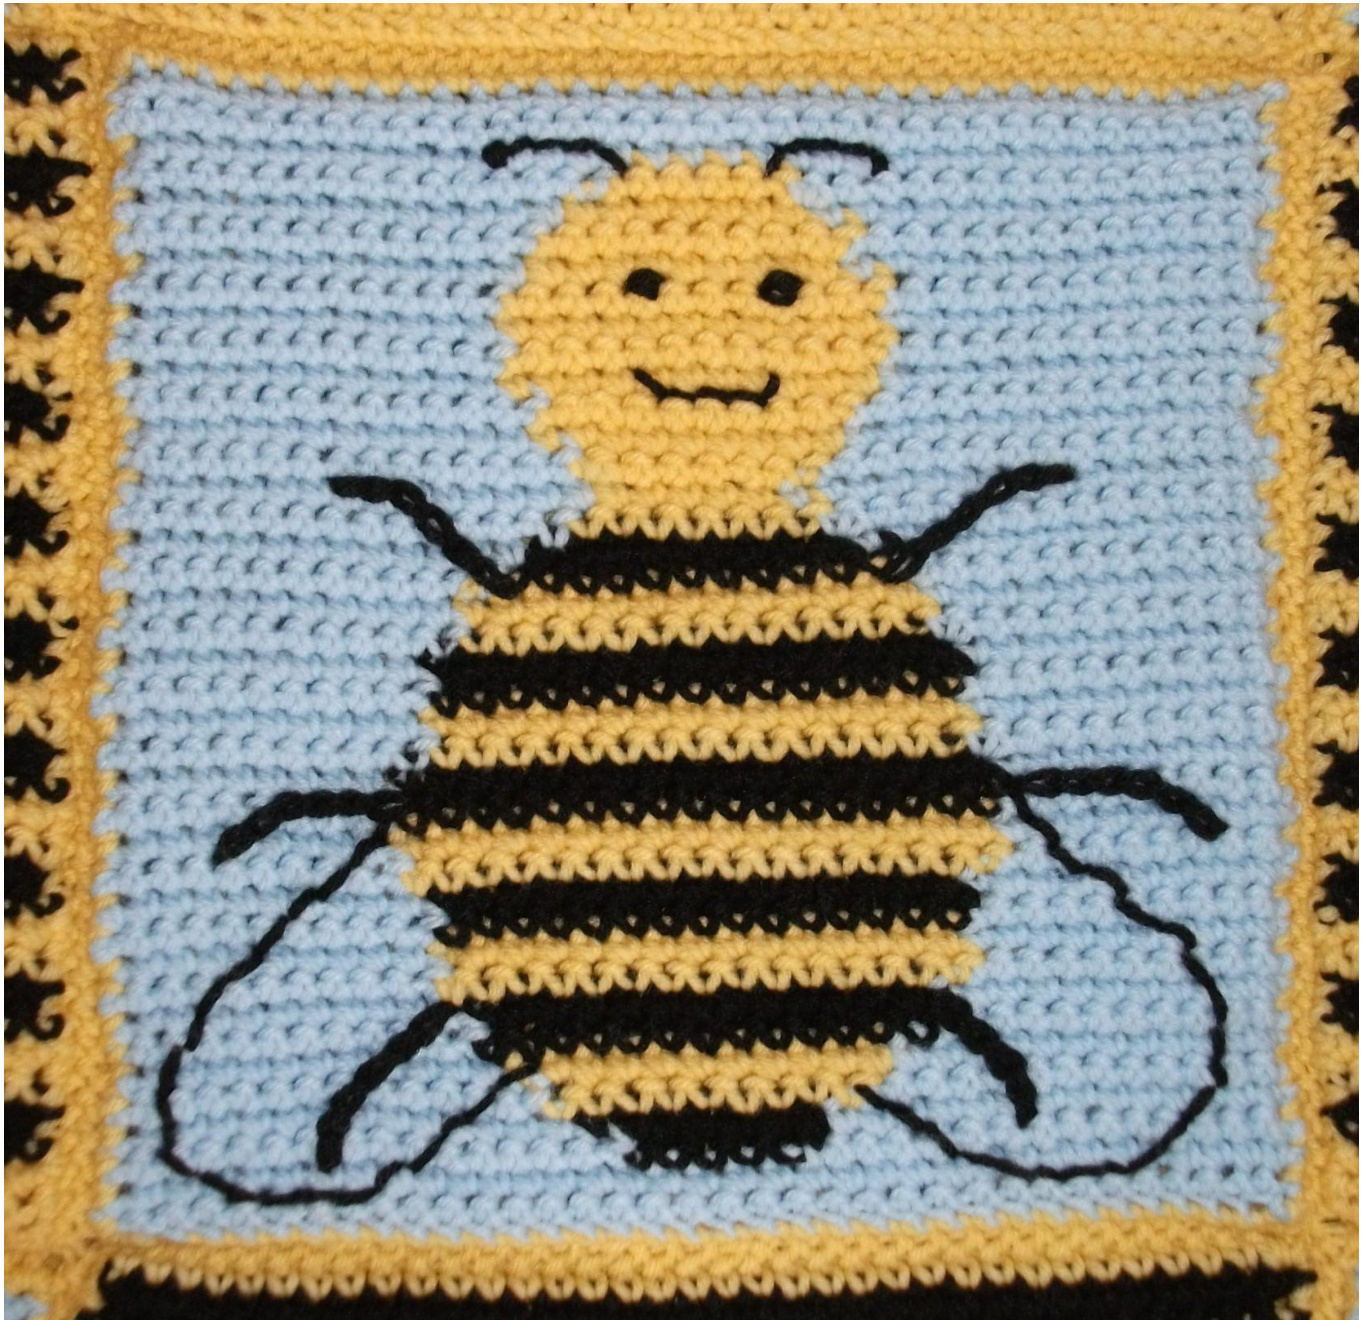
Legs: The legs are added by crocheting slip stitches directly through the square. Hold the yarn under the blanket and, starting at the bee body, insert your hook from above through the blanket and pull a loop through the blanket. Insert your hook through the next stitch (vertically, horizontally or diagonally, depending on where you want the legs to be) and pull a loop through the blanket and through the loop on the hook. Continue in this manner, changing direction as needed to shape the leg. At the end of the leg, pull the loop up reasonably long, cut the yarn (under the blanket) and pull through. Using a yarn needle, pull the end through to the wrong side of the blanket (not through the last slip stitch, or it will unravel) and weave in. Use the close-up photo of the bee square as a guide, and don't worry if they all turn out identically - your bees are individuals! Antennae, eyes, mouth and wings: These are embroidered on using simple flat stitches and french knots (for the eyes and the end of the antennae). Again, use the close-up photo as a guide and vary each bee a little! Weave in all ends securely.
Joining the squares
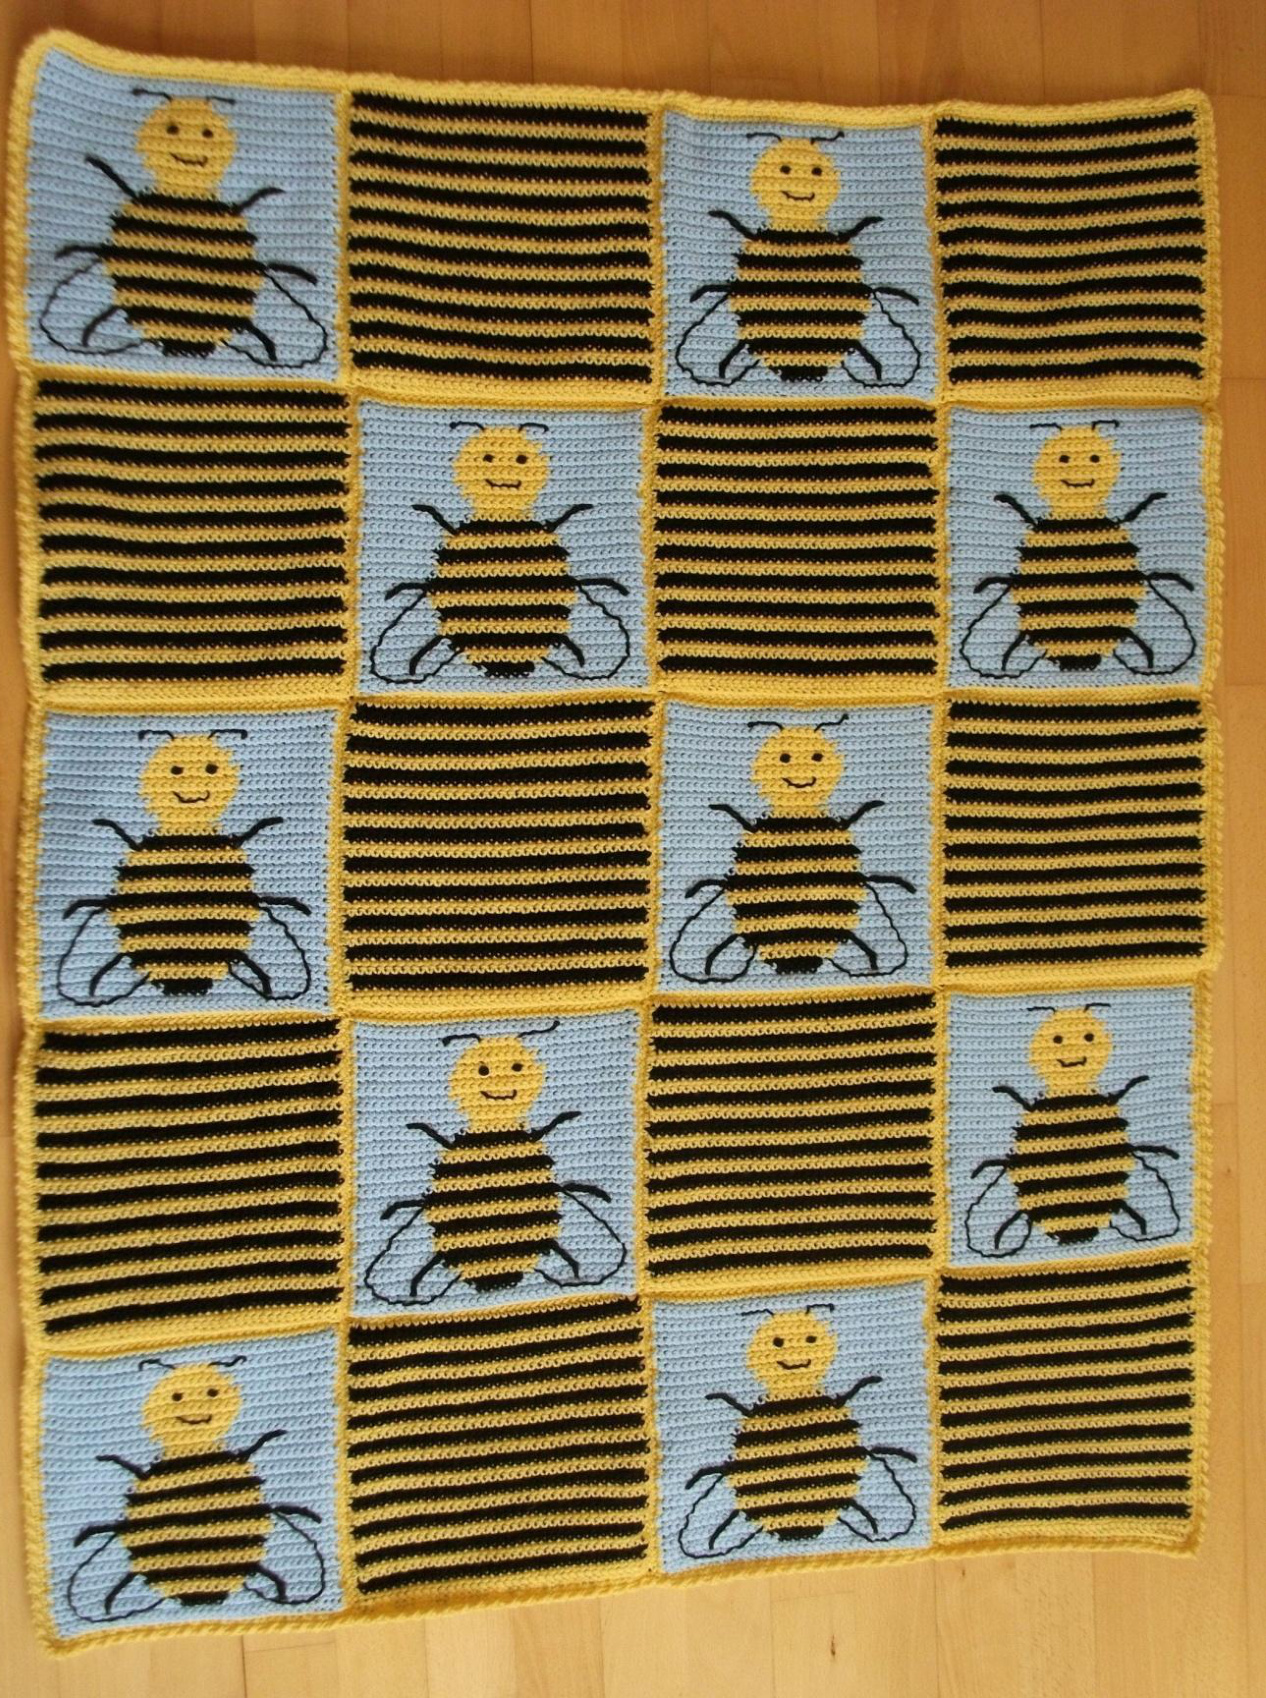
With yellow, crochet the squares together with slip-stitches: Put 2 squares together with the right sides touching, then work slip-stitches into the back loop of the square in front and the front loop of the square at the back. Join the squares beginning at one corner and work diagonally towards the other corner, like steps on a staircase. Join all the squares in this way, alternating striped with bee squares, using the photo of the whole blanket as a guide.
Edging
Round 1: Work one row of sc around the outside of the blanket, working 3 sc into the corners. End with slip stitch into the first sc. Round 2: Do not turn. 1 reverse sc (sc worked from left to right), ch 1, skip 1 stitch; repeat all around, working two repeats into the corners.
Finishing
Weave in all remaining ends. Line blanket if desired. Copyright @Meike Beumers 2011. For personal use only.


