Snowman cup cozy created by: Janet Gontscharow I used an H hook, I love this yarn (but use what you like best) except for hat/scarf on far right. I bought that yarn at Michael's about 1 year ago called bubble gum believe.
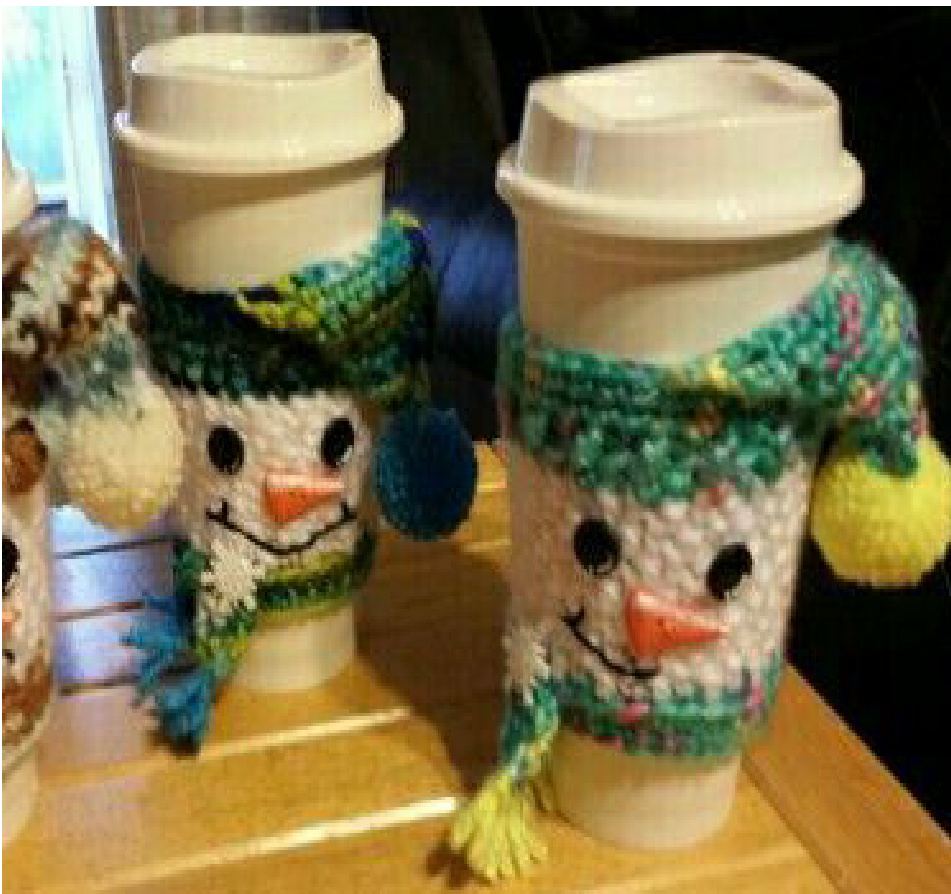
nose so it wasn't so pointy and then painted it with orange enamel paint. Buttons on scarf can be found anywhere. Nose/eyes are from Joann Fabrics and I used a little paint on eyes and noses plus I filed done the end of I chained 32 chains ( I crochet a little tight) have the cup you want to go around mine is from Starbucks chain enough to go around snugly making sure it is an even count. Join with sl st be careful not to twist chain ch1 Row 1-2 sc in every st around join with sl st, change to white ch1 after every round. ( if using a thinner yarn you can repeat this row 1 more time. Row 3: you will be working in blo for this row only. Sc in first st, dc in next, sc, dc repeat this pattern around. Join with sl st, ch1 Row 4: work through full st from now on. Dc in first sc in next, dc, sc repeat around ( in every sc of previous round do a dc and every dc put a sc) join with sl st, ch1 Row 5: sc in first st, dc in next sc, dc repeat around join with sl st, ch1 Row 6-11 repeat rows 4&5 alternating. With joining with sl st at end of each row and chaining 1. At end of row 11 change to hat color ch 1 Row12: this is beginning of hat sc in each st around join with sl st ch1 Row13: (for hats in center and on the right you will hdc in each st around join with sl st. Ch 1 Row 14: hdc in front, hdc in back post in next st alternate this around join with sl st, ch 1 Row 15-17: Sc in every st around join with sl st. Ch 1 at end of row 17 f.o. Row 18: count over 6 st from where you joined in the back. Join with a sc in that st with hat color. Sc 11 more times for a total of 12 st. Ch1 and turn Row 19: sc first 2 at together and sc in next 8 st, sc last 2 st together, ch 1 turn Row 20: sc in every st across ch1 turn ( 10 sc ) Row 21: sc first 2 st together, sc in next 6, sc last 2 st together, ch1 turn Row 22: sc in every st across, ch1 turn Row 23: sc first 2 st together, sc in next 4, sc last 2 together ch 1 turn (6 sc) Row 24: sc in each st across ch1 turn (6 sc) Row 25: sc first 2 st together, sc in next 2 st, sc last 2 st together ch 1 turn Row 26: sc in each st across (4sc) Row 27: sc first 2 st together and last 2 together (2sc) Row 28: sc together f.o Go back to row 3 in FLO attach with sc scarf color anywhere on left side you like. Sc in next 2 sc, ch 1, turn sc in every st ,ch 1 turn sc in every st, repeat for 1 more row if you would like f.o. now go 1 st to right of first scarf end join with sc and then sc in between the next 2 sc of previous scarf end ch 1 turn sc across, ch 1 turn sc across, ch 1 sc across f.o. attach fringe and enjoy. You may sell the product you make from the pattern, however you may not sell or share my pattern. The yarn used for scarf and trim on hat is Yarn Bee snowflake wool blend apple blossom. For top hat follow snowman pattern until row 11. At end of row 11 switch to black yarn ch 1 Row 12: sc in BLO around, join with sl st, ch 1 Row 13: sc in BLO around, join with sl st, ch 1 Row 14-17: sc around in full stitch, join with sl st, ch 1. At end of row 17 f.o. Go back to row 12 in FLO join with sc using black yarn in back seam, sc around join with sl st, ch1. Sc in first st, 2 in next st, sc in next 2 in next repeat around join with sl st and f.o. (48 sc) Go back to row 13 working in FLO join with scarf color in back seam using sc and sc around, join with a sl st, ch1. Sc around and join with a sl st, f.o. leaving about 20-25" tail to tack down flat to hat. I used embroidery split stitch around to tack down, f.o. and tucked in tails. For scarf refer back to original snowman pattern. Sew on snowflake to hat. I used A good site for the embroider slip stitch is sublimestitching.com. Embroidery How To - Split Stitch | Sublime Stitching by Jenny Hart


