Page 1 of 7
All TARRGLeD GUp
CATERPILLAR RATTLE
Page 2 of 7
Thank you for purchasing my pattern! I hope you enjoy your pattern and making your creations with it. Please feel free to contact me with any questions or concerns at byangelab@ gmail.com. 1 always strive to make my pattern easier to understand so constructive criticism is always welcome. Please note that this pattern and my pictures are copyrighted. I worked very hard to create this pattern and I would appreciate if you honor that by not sharing or posting your copy of my pattern anywhere. You are free to sell the finished product you create, but you have to use your own pictures, not mine to represent it. It is appreciated that when you post your finished product online that you include a link back to me, but not required.
Materials:
\*4 mm / G crochet hook & 3.25 mm / D hook \* Less than 1 skein of worsted weight yarn for the body (I used red heart super saver cherry for the head & I Love This Yarn in jelly bean and lime for the body) \*Yarn Needle \*Scissors \*Optional Stitch Markers Gauge: 9 sc and 10 rows = 2” square To obtain gauge use G hook. I crochet REALLY tight so don't be surprised if you have to go down a hook size or 2 to obtain my gauge. Ch to a little over 2 inches, sc in 2"d ch from the hk and sc across. \*ch 1 turn, sc across\* repeat until a little over 2 inches high.
Pattern Notes:
The whole piece will be worked as a spiral so no sl st to join unless it says to. st markers will be helpful. You'll notice that I work the increases a little different than normal. I find that by doing it this way you don't get the hexagon look that the normal method of increasing gives you, but a more circle look. This link explains it a little better. http://monkeyhousefull.blogspot.com/2010/03/is-it-circle-or-hexagon.html
Abbreviations:
ch = chain hk = hook st(s) = stitch(es) ss = slip stitch sc = single crochet sc2tog = single crochet two stitches together (decrease) hdc = half double decrease fo = fasten off mc = magic circle @ 2013 All Tangled Up by Angela Bergeron
Page 3 of 7
If you don't know how to do a magic circle here is a great video from Mikey. https://www.youtube.com/watch?v=GEsPB3Rdkic I prefer this method for the sc2tog decrease from Planet June. http://www.planetjune.com/blog/amigurumi-help/invisible-decrease/
Head
Using G hook 1. Using mc OR ch 2 and 6 sc in the 2nd ch from the hk. (6) 2. sc 2 in each st. (12) 3. \*1 sc, sc 2 in the next st\* repeat around. (18) 4. 1 sc, sc 2 in the next st, \*2 sc, sc 2 in the next st\* repeat 6 more times, 1 sc. (24) 5. \*3 sc, sc 2 in the next st\* repeat around (30) 6-12. sc in each st around (30) 13. \*1 sc, sc2tog\* repeat around. (20) 14. \*2sc, sc2tog\* repeat around (15) Change to dark green by pulling through the last yarn over of the last sc2tog. Also skip down and make the eyes, antennae and nose and attach them to the face before moving on or stuffing.
Start of 1"′ segment
1. \*2 sc 2 in the next st\* repeat around. (20) 2. \*1 sc, sc 2 in the next st\* repeat around. (30) 3-6. sc in each st around (30) 7. \*1 sc, sc2tog\* repeat around. (20) 8. \*2sc, sc2tog\* repeat around (15) Change to lime green by pulling through the last yarn over of the last sc2tog if you're changing.
Start of 2"d segment
1. \*2 sc 2 in the next st\* repeat around. (20) 2. \*1 sc, sc 2 in the next st\* repeat around. (30) @ 2013 All Tangled Up by Angela Bergeron
Page 4 of 7
3-6. sc in each st around (30) 7. \*1 sc, sc2tog\* repeat around. (20) 8. \*2sc, sc2tog\* repeat around (15) Change to dark green by pulling through the last yarn over of the last sc2tog if you're changing.
Start of 3rd segment
1. \*2 sc 2 in the next st\* repeat around. (20) 2. \*1 sc, sc 2 in the next st\* repeat around. (30) 3-6. sc in each st around (30) 7. \*3sc, sc2tog\* repeat around. (24) 8. \*2sc, sc2tog\* repeat around. (18) 9. \*1 sc sc2tog\* repeat around. (12) 10. sc2tog 6 times and fo (6) Stuff tight to keep it from tamping down after awhile of playing with it and fill with a bell or other noisemaker to turn it into a rattle. I use the ultimate finish for amigurumi from Plant June to finish of the bottom. http://www.planetjune.com/blog/the-ultimate-finish-for-amigurumi/ If you want to make it shorter just skip the 2nd segment and move on the 3rd. Antennae (make 2) With D hook work in a spiral, no sl st. Row 1: MC with 8 sc and tighten Row 2-3: sc in each st. (8) Row 4: 2 sc, sc2tog, 2 sc, sc2tog. (6) Row 5-6: sc in each st around (6) Row 7: sc, sc2tog, sc, sc2tog (4) Row 8: sc in each st around (4) sl st in the next st and fo leaving a long tail to sew on. 2 options to choose from. I prefer option A, but it's up to you. Option A With D hook and yellow @ 2013 All Tangled Up by Angela Bergeron
Page 5 of 7
Outer eye
with yellow ch 4 Row 1: sc 2 in the 2nd ch from the hk, 1 sc, 3 sc in the next st, now working down the other side, 2sc. sl st to join and fo leaving a long tail to sew on. (7)
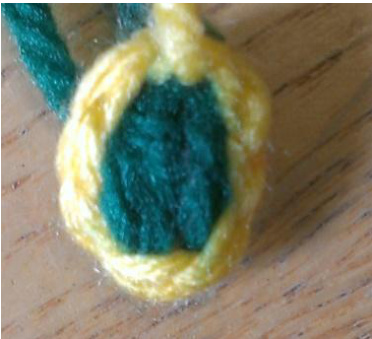
Inner Eye
Now with green yarn sew an oval inside yellow oval to look like this picture. Fo and weave in ends.
Option B
Eyes (make 2) With D hook and green Ch 5 1. sc 2 in 2nd ch from the hook, 2 sc, sc 3 in the last ch. Turning to work down the opposite side, 2 sc, sc 1 in the last ch that already has 2 sc in it. sl st to join. fo and weave in ends. (10) Attach yellow yarn with a sl st. 2. Sc 2 in the same st, sc 2 in the next st, 2 sc, sc 2 in the next 3 sts, 2 sc, sc 2 in the last st. sl st to join and fo, leaving a long tail to sew on. (16)
Nose
With D hook MC with 4 sc. tighten, sl st to join and fo leaving a long enough tail to sew on. (5)
Optional Feet (make 6)
@ 2013 All Tangled Up by Angela Bergeron
Page 6 of 7
With F hook and brown Row 1: hdc 2 in the 2"d ch from the hook, 3 hdc, hdc 5 in the last st, now working down the other side, 3 hdc, hdc 3 in the last st that already has 2 sts from the 1" 2 hdc's and sl st to join. (16) Row 2: ch 1 turn and sc in back loop only of each around. sl st to join. (16) Row 4: ch 1 turn, 2 sc, sc2tog 4 times, 2 sc, sl st to join. (8) Row 5-7: ch 1, but DO NOT TURN, sc in each st around, sl st to join. (8) FO and leave a long enough tail to sew on. You can stuff them and sew them shut or just sew them on like this.
Assembly:
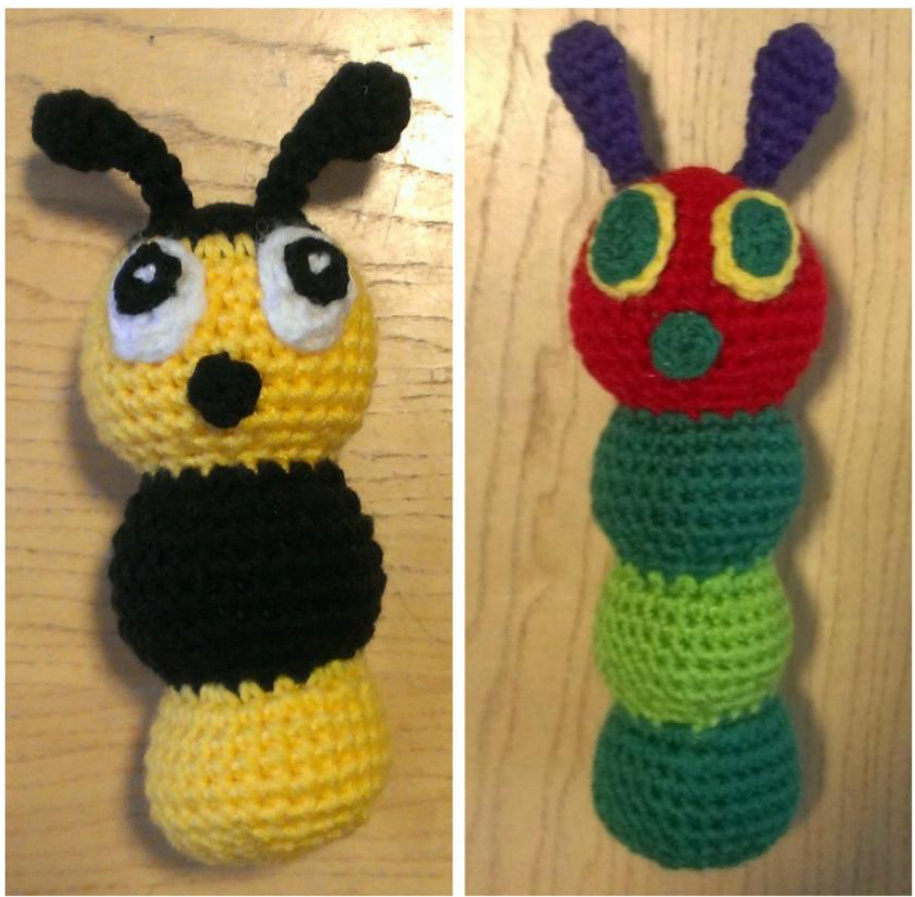
You can use the photo as a guide. (If you chose option A for eyes) Sew the inner eye onto the outer eye and then sew that Onto the head. Sew eyes on 1s"t with the bottoms around row 9, so you can center the nose below them. Line up the nose in between the eyes between rows 10-13. Attach antennae between rows 2 and 3 in the middle of the head.
For Bee option:
Do the head the same, but the 4st 4 rows in black and then switch to yellow for the rest of the head, then change to black for the 1"t segment, yellow for the 2"d and black for the 3rd. Do the nose and feet the same, but in black or other color of your choice.
Antennae (make 2)
With D hook and black work in a spiral, no sl st. Row 1: MC with 8 sc and tighten Row 2-3: sc in each st. (8) Row 4: 2 sc, sc2tog, 2 sc, sc2tog. (6) @ 2013 All Tangled Up by Angela Bergeron
Page 7 of 7
Row 5: sc, sc2tog, sc, sc2tog (4) Row 6-8: sc in each st around (4) sl st in the next st and fo leaving a long tail to sew on. Eyes (make 2 of each part)
Outer Eye
With D hook and white Ch 5 1. hdc 2 in 2"d ch from the hook, 2 hdc, hdc 5 in the last ch. Turning to work down the opposite side, 2 hdc, hdc 3 in the last ch that already has 2 sts in it. sl st to join. fo and weave in ends. (14)
Inner Eye
With D hook and black. 1. 4 sc in a mc or ch 2 and do 4 sc in 2nd ch from the hk. Tighten and sl st to join. fo and leave a long enough tail to sew on to the outer eye. (4) Sew the inner eye onto the outer eye and then attach that to the head. You can also just use black yarn and sew that on the outer eye to create a circle kind of like I did for the caterpillar eye. I also like to add an eye glisten with the white. All Tangled Up Wicked cute creations www.facebook.com/alltangledupbyangela byangelab @ gmail.com


