2X2 by Ida Wanstedt A classic beanie from your favorite sock yarn

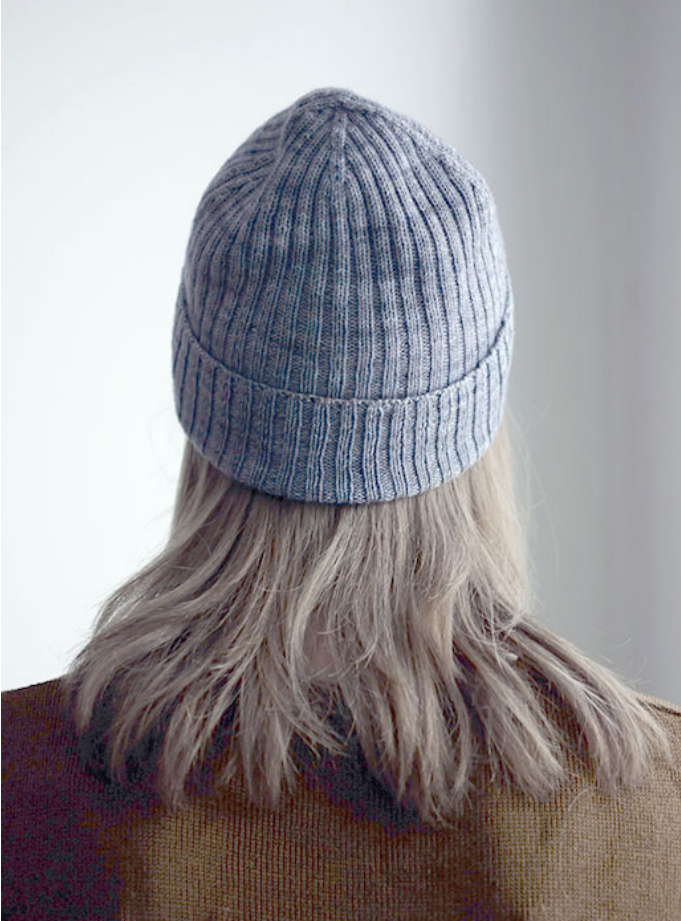
This beanie is clean and classic, nothing fancy in itself but perfect for showing off your fancy hand-dyed yarn. It has a wide cuff for extra warmth over the ears and is stretchy enough to fit most adult heads. I made mine out of Hedgehog Fiber Sock in the color way 'Concrete'. But I'm sure it will turn out beautifully from other fingering weight yarns as well.
FINISHED DIMENSIONS
One size
Finished blocked circumference 51 cm (20") Total length 27cm (10 3/5") Cuff 7cm (2 3/4")
MATERIALS
Yarn:
230m (250 yards) of Hedgehog Fibers Sock or corresponding fingering weight yarn
Needles:
2mm (Uso) double pointed needles
Notions:
4 stitch markers Tapestry needle
GAUGE
37 sts, 50rows / 10cm (4") in 2x2 ribbing (blocked)
TECHNIQUES
Long-tail cast on Kitcheners stitch
ABBREVIATIONS
k - knit p -purl k2tog - knit 2 sts together k3tog - knit 3 sts together (double decrease) ssk - slip, slip, knit sssk - slip, slip, slip, knit (double decrease) PM - place marker st(s) - stitch(es)
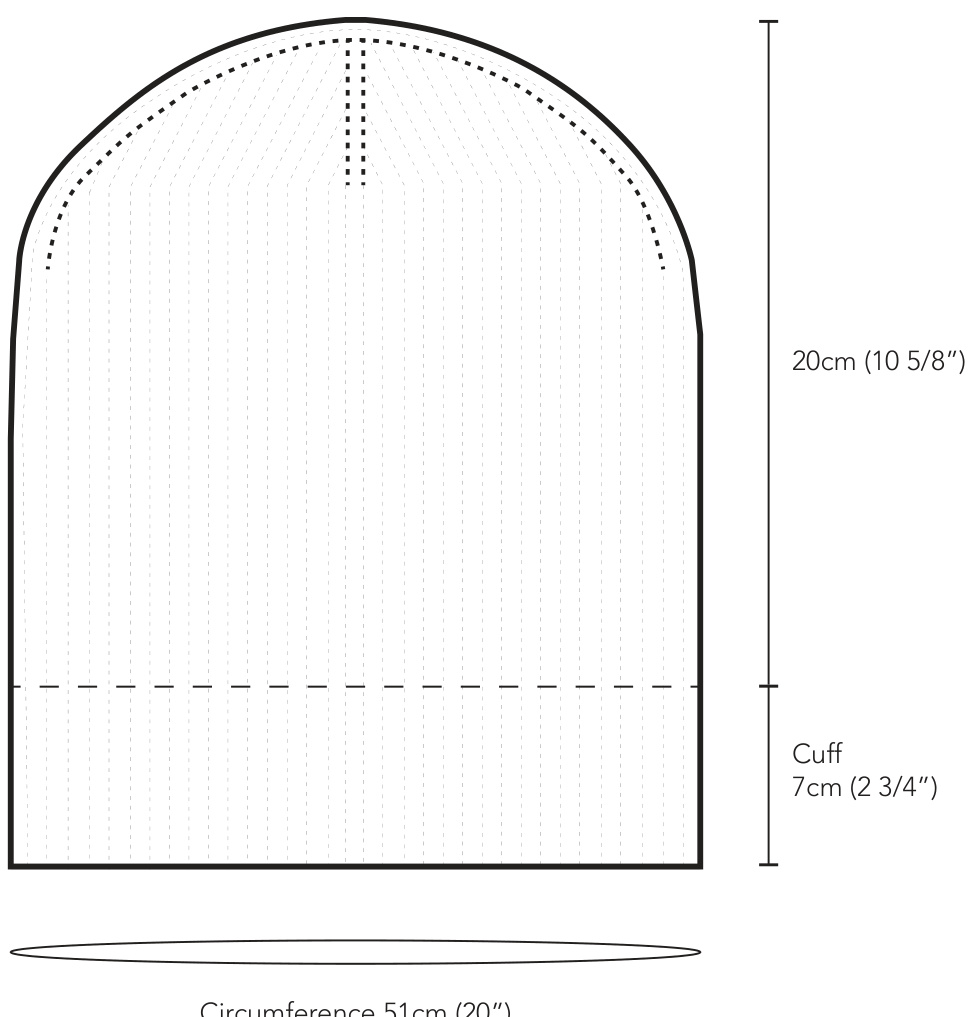
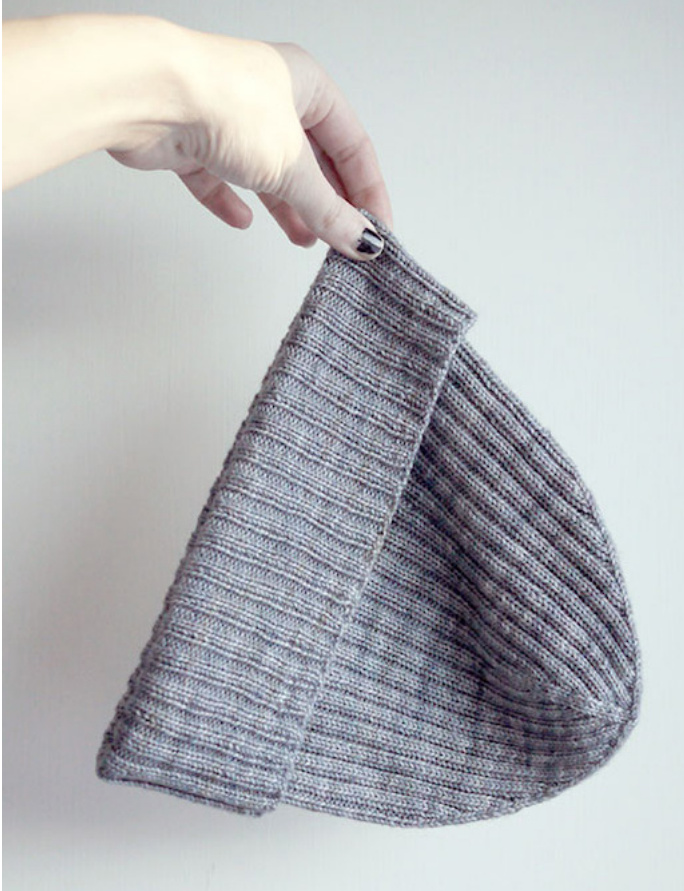
This hat is knit in the round from brim to crown with a 7 cm wide cuff. The four darts shaping the crown are worked asymmetrically to create a flatter crown, common to store bought hats.
CASTING ON
Cast on 168 sts using the long-tail-cast-on method. Join for working in the round, being careful not to twist your stitches. If you decide to use dpns instead of circulars for the entire hat, evenly divide the stitches on four needles (42 sts/needle).
ESTABLISH 2X2 RIB
Round 1:
p1 \*k2, p2, repeat from\* until one st before end of round, p1. Repeat Round 1 until piece measures 20cm (7 7/8") from cast on edge.
SHAPING THE CROWN
Switch to double pointed needles when necessary. Crown is shaped in four stages (1st to 4th decrease rows) to create the asymmetrical/flat crown.
Setup row:
\*PM, work over 84 sts as established repeat from\* once.
Ist Decrease Row 1:
\*p1, k1, ssk, work as established until 4 sts before marker, k2tog, k1, p1, rep from\* once.
Ist Decrease Row 2:
\*p1, k2, work as established until 3 sts before marker, k2, p1 repeat from\* once. Repeat 1 st Decrease Row 1 and 2 ten more times. (44 sts decreased, total of 124 sts remaining.)
2nd Decrease Row 1:
\*p1, k1, ssk, work as established over 25 sts, k2tog, PM, ssk, work as established until 4 sts before marker, k2tog, k1, p1, repeat from\* once.
2nd Decrease Row 2:
\*p1, k2, work as established until 1 st before marker, k1, k1, work as established until 3 sts before marker, k2, p1, repeat from\* once.
2nd Decrease Row 3:
\*p1, k1, ssk, work as established until 2 sts before marker, k2tog, ssk, work as established until 4 sts before marker, k2tog, k1, p1, repeat from\* once.
2nd Decrease Row 4:
\*p1, k2, work as established until 1 st before marker, k1, k1, work as established until 3 sts before marker, k2, p1, repeat from\* once. Repeat 2nd Decrease Row 3 and 4 six more times. 64 sts decreased, total of 60 sts remaining.)
3rd Decrease Row 1:
\*p1, k1, sssk, work as established until 2 sts before marker, k2tog, ssk, work as established until 5 sts before marker, k3tog, k1, p1, repeat from\* once.
3rd Decrease Row 2:
\*p1, k2, work as established until 1 st before marker, k1, k1, work as established until 3 sts before marker, k2, p1, repeat from\* once. Repeat 3rd Decrease Row 1 and 2 two more times. (36 sts decreased, total of 24 sts remaining.)
4th Decrease Row 1:
\*p1, k1, sssk, k2, k3tog, k1, p1, repeat from\* once. 4th Decrease Row 2: \*p1, k1, ssk, k2tog, k1, p1, repeat from\* once. (12 sts decreased, total of 12 sts remaining.)
FINISHING
Divide the remaining 12 sts on two double pointed needles. First needle should contain sts 1-3 and 9-12 and second needle holds sts 4-8. Cut yarn, leaving 30cm (12"). Using the Kitcheners stitch, graft the stitches together with tapestry needle to create an invisible join. Weave in ends with a tapestry needle and block your hat to the right dimensions.