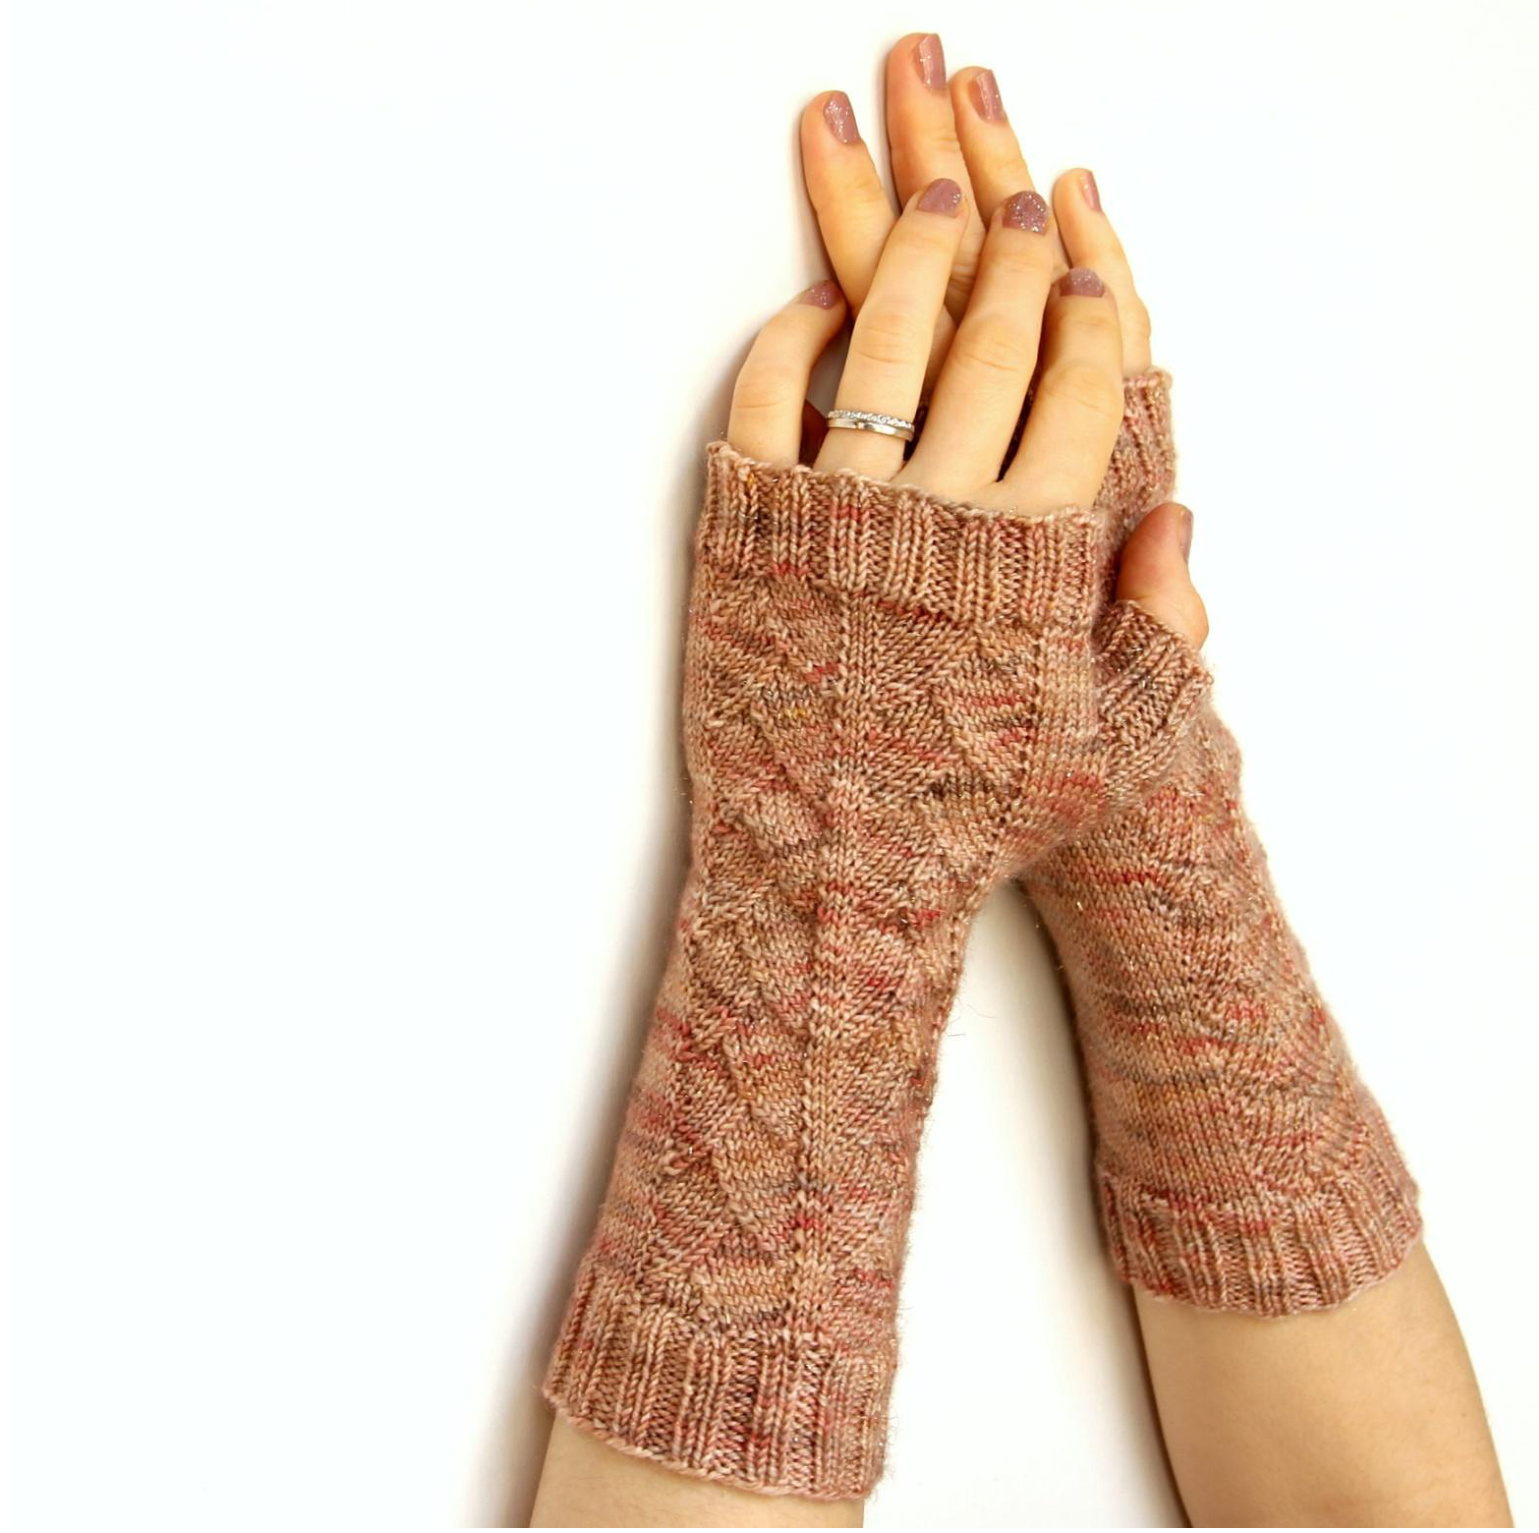
MY CUP OF TEA MITTS By FluffyFibers
中中中中中中中中中中中中中中中中中中中中中中中中中中中中中中中中中 This pattern is an adaptation from RobinLynn's My Cup of Tea Socks, which is a free design on Ravelry. Robin was kind enough to share her own pattern and chart and to allow me to publish this adaptation as a free design. Thank you so much Robin. These mitts are worked from the bottom up, and are designed for a small adult hand. Because the crocus stitch is only knit on one side of the mitt, it is very easy to adjust the width by adding or removing stitches in the plain stockinette area.
NOTIONS
50 grams of fingering weight yarn. I used The Wool Barn Goldisocks in the Enchanted colourway. For durable mitts I recommend using sock yarn or yarn with several plies (i.e. not a singles yarn). · 2.5-mm (US 1.5) DPNs, or size to obtain gauge. ·1 stitch marker to mark the beginning of round. GAUGE: 16-17 stitches and 22 rows = 5 cm in stockinette in the round. SIZE: 15.5 cm (6.1") in the wrist area, 23 cm (9") long, about 13,5 cm (5.3") from C0 edge to thumb gusset. Length is easily adaptable to your liking - simply adjust the number of crocus pattern repeats. Because the crocus stitch is only knit on the top of the mitt, it is very easy to adjust the width of the mitts by adding/removing stitches in the plain stockinette area.
ABBREVIATIONS
BO: bind off co: cast on DPN: double-pointed needle k: knit k2tog: knit two stitches together M1L (make one left): make one (increase) by picking up the loop between the stitch just worked and the next stitch with the left hand needle, front to back; knit into the back of it to make a new stitch. M1R (make one right): make one (increase) by picking up the loop between the stitch just worked and the next stitch with the left hand needle, back to front; knit into the front of it to make a new stitch. p: purl pwise: as if to purl RS: right side sl1: slip one stitch sm: slip marker ssk: slip one stitch onto the right needle, slip another stitch onto the right needle, insert the left needle to the front of the stitches, knit both together (l prefer to slip the first stitch knitwise and the second stitch purlwise)
DIRECTIONS
1. CAST ON
Using long tail cast-on, CO 56 stitches. Arrange stitches onto 3 DPNs so you have 24 stitches on the second DPN, so for 56 stitches: 16/24/16. Join for working in the round.
2. RIBBING
Knit in 2x2 rib (k2, p2) for 15 rounds.
3. CUFF
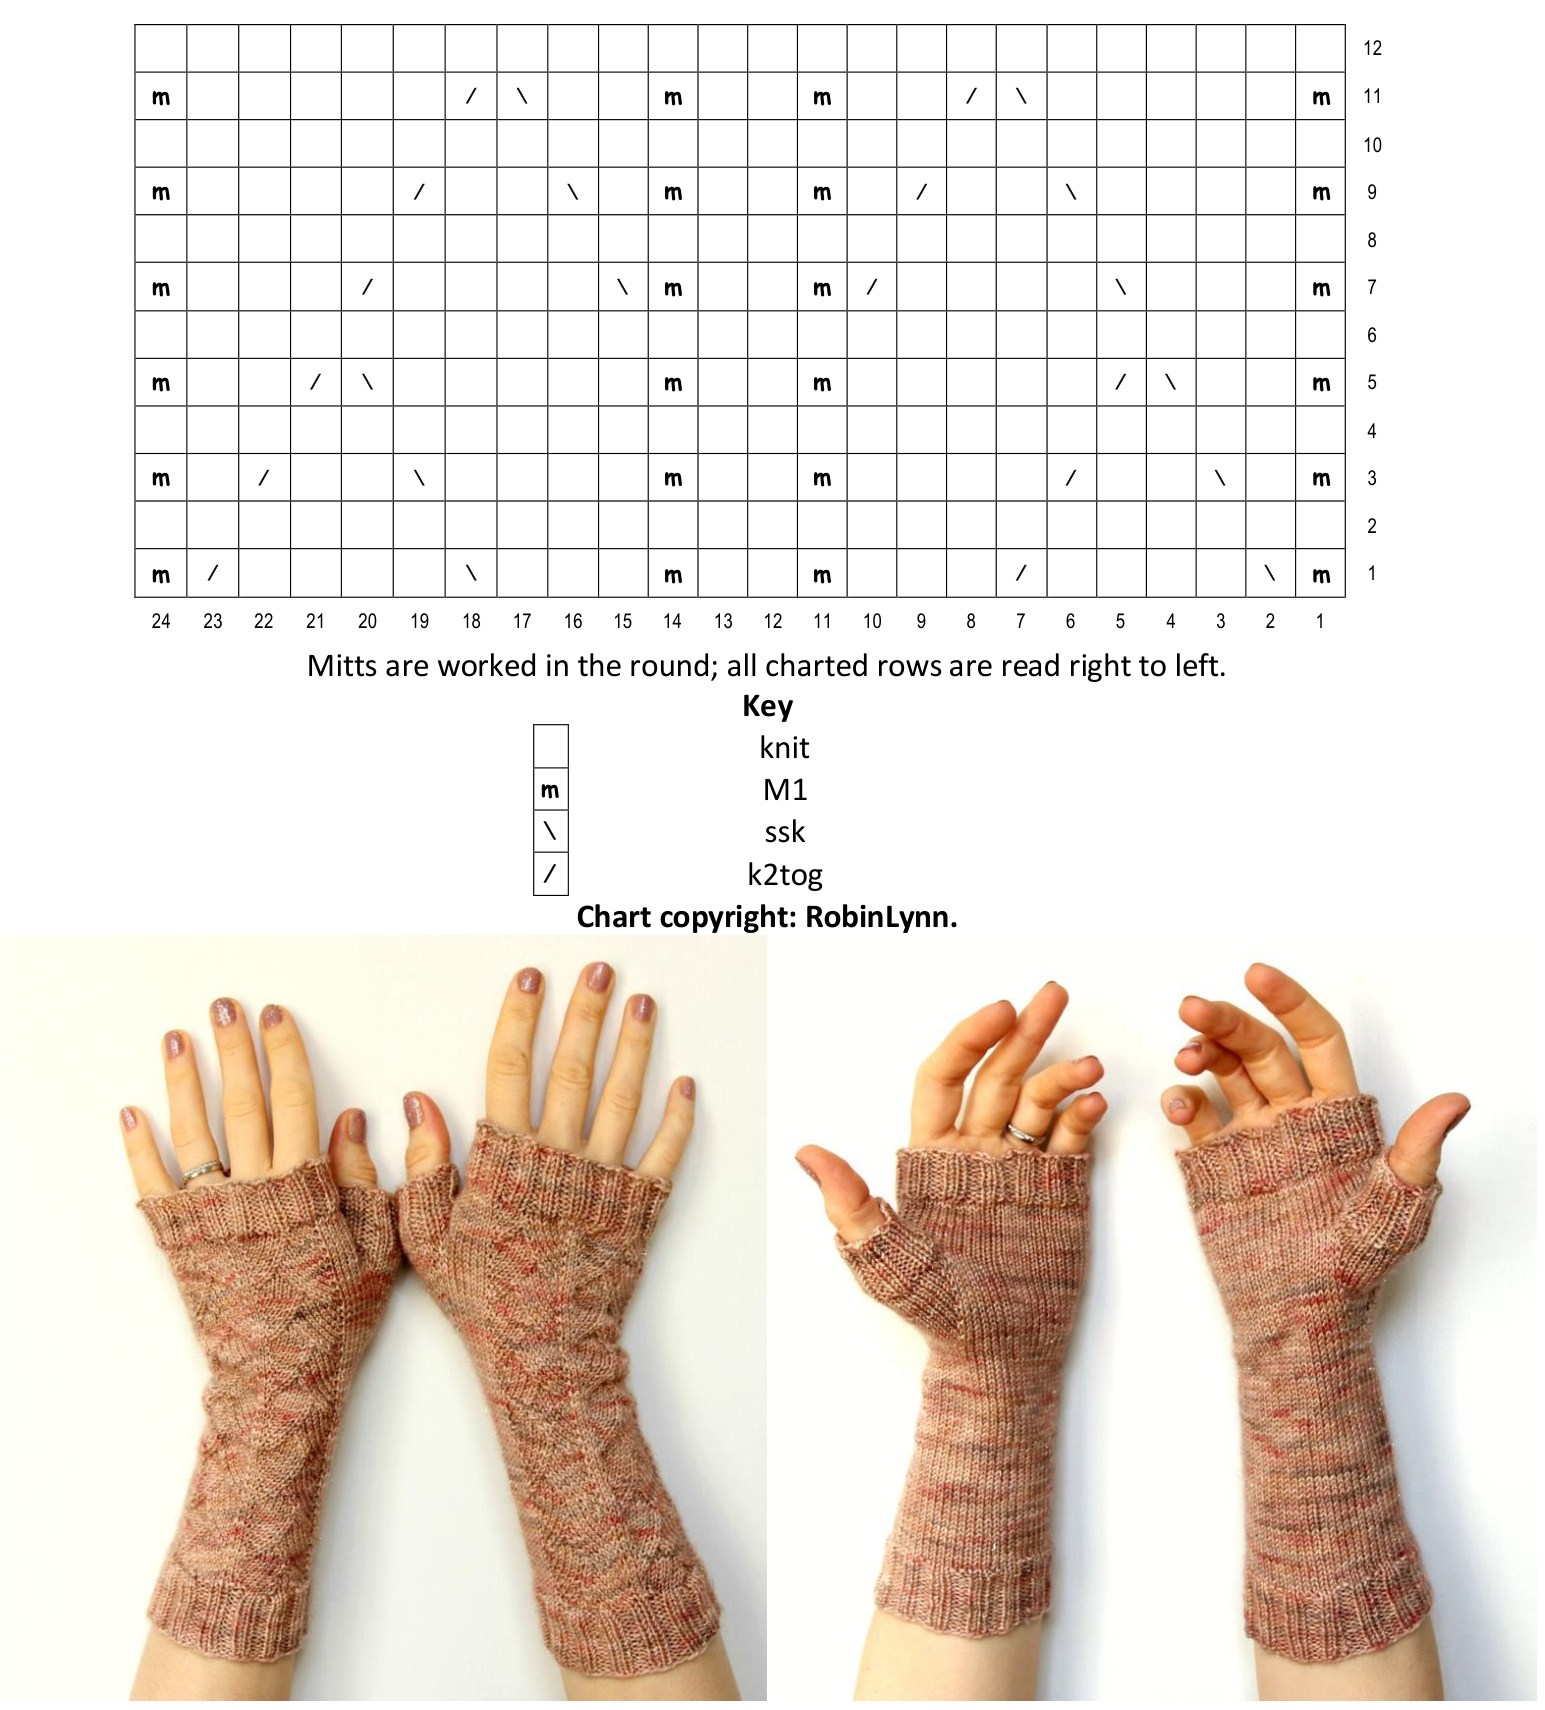
Needles 1 & 3: knit 16 Needle 2: Crocus Motif (also charted p.4): Round 1: M1l, ssk, k4, k2tog, k3, M1l, k2, M1L, k3, ssk, k4, k2tog, M1L Round 2 and all even rounds 2-12: k24 Round 3: M1l, k1, ssk, k2, k2tog, k4, M1L, k2, M1l, k4, ssk, k2, k2tog, k1, M1L Round 5: M1L, k2, ssk, k2tog, k5, M1l, k2, M1L, k5, ssk, k2tog, k2, M1L Round 7: M1l, k3, ssk, k4, k2tog, M1l, k2, M1l, ssk, k4, k2tog, k3, M1L Round 9: M1l, k4, ssk, k2, k2tog, k1, M1L, k2, M1l, k1, ssk, k2, k2tog, k4, M1L Round 11: M1L, k5, ssk, k2tog, k2, M1L, k2, M1L, k2, ssk, k2tog, k5, M1L 2 four times, or to desired length before starting on the thumb REPEAT STEPS 1-2-3 FOR SECOND MITT. Your two mitts are now ready for the thumb gusset. Separate instructions are included below for left and right gussets.
4.THUMB GUSSET ANDTOP OF MITT
LEFT MITT: Round 1: Needle 1: k 7, M1L, k2, M1R, k7 Needle 2: k in pattern Needle 3: k Rounds 2,3,5, 6,8,9, 11, 12, 14, 15, 17, 18: k across (on odd rounds, k in crocus pattern on needle 2) Round 4: Needle 1: k7, M1L, k4, M1R, k7 Needle 2: k Needle 3: k Round 7: Needle 1: k 7, M1L, k6, M1R, k7 Needle 2: k in pattern Needle 3: k Round 10: Needle 1: k 7, M1L, k8, M1R, k7 Needle 2: k Needle 3: k Round 13: Needle 1: k 7, M1L, k10, M1R, k7 Needle 2: k in pattern Needle 3: k K rounds 20-32 in pattern. K in 2x2 ribbing for 10 rows. B0. Round 16: Needle 1: k 7, M1L, k12, M1R, k7 Needle 2: k Needle 3: k Round 19: Needle 1: k7, sl 14 stitches onto safety pin, CO 6, k7 Needle 2: k in pattern Needle 3:k RIGHT MITT: ROUND 1: Needle 1: k Needle 2: k in pattern Needle 3: k 7, M1L, k2, M1R, k7 ROUNDS 2, 3,5, 6, 8,9, 11, 12, 14, 15, 17, 18: k across (on odd rounds, k in pattern on needle 2) ROUND 4: Needle 1: k Needle 2: k Needle 3: k7, M1L, k4, M1R, k7 ROUND7: Needle 1: k Needle 2: k in pattern Needle 3: k7, M1L, k6, M1R, k7 ROUND10: Needle 1: k Needle 2: k Needle 3: k7, M1L, k8, M1R, k7 K rounds 20-32 in pattern. K 2x2 ribbing for 10 rows. BO. ROUND 13: Needle 1: k Needle 2: k in pattern Needle 3: k7, M1L, k10, M1R, k7 ROUND 16: Needle 1: k Needle 2: k Needle 3: k7, M1L, k12, M1R, k7 ROUND19: Needle 1: k Needle 2: k in pattern Needle 3: k7, sl 14 stitches onto safety pin, C0 6, k7
5.THUMBS
Put live stitches on needle, pick up one stitch before first CO stitch, pick up each CO stitch at top of thumb opening, pick up one stitch between last CO stitch and live stitches. Distribute between DPNs. K 2 rows. On second row, decrease to obtain a multiple of 4 stitches (in my case 24 stitches). k 2x2 ribbing for 10 rows. B0. Repeat step 5 for second mitt. Weave in ends.
Crocus Motif Chart (worked across Needle 2)