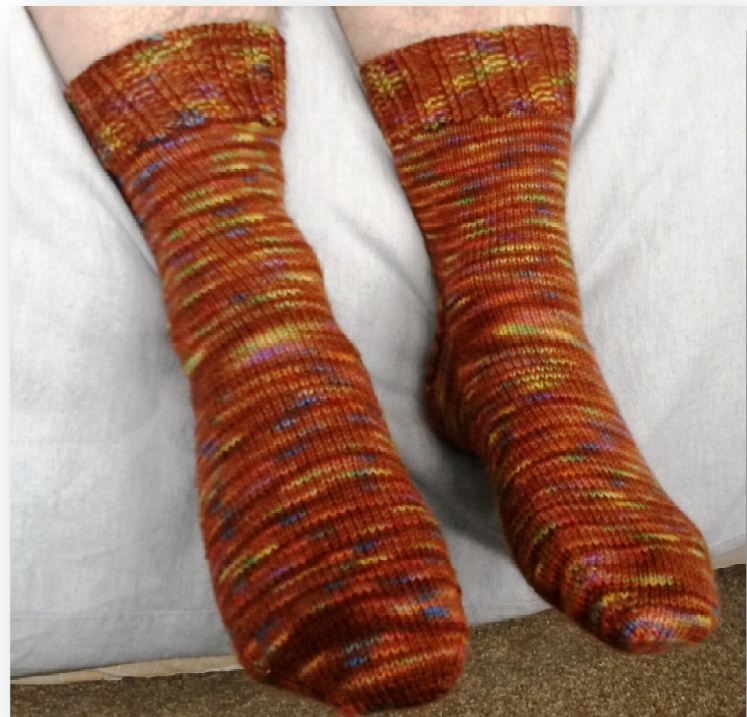
Vanilla Sock with Gusset and Choice of Reinforced Heel
B1
Jo Torr
Description
This pattern is for a basic toe-up sock with a gusset and reinforced heel flap, suitable for both men and women. There is a choice of style of heel flap - standard Heel Stitch or Eye of Partridge. Although there are detailed instructions given for three sizes, there is also a section that explains how to use this as a starting point for a smaller or larger sock. Along the way, as well as instructions there will be explanations - why you're doing something rather than just telling you what to do. It has been written assuming you will use Magic Loop, but there is no reason why you shouldn't use dpns if you prefer.
Techniques Used
Magic Loop Judy's Magic Cast On Jeny's Surprisingly Stretchy Bind Off
Materials
100g 4ply/ fingering weight sock yarn
Gauge
8 stitches and 11 rows per 1"/2.5cm
Notions
2.5mm (US 1 %2) circular needle (or whatever size is necessary to achieve gauge), 32"/80cm inch/2.5cm) Stitch markers Tapestry needle for weaving in ends
Size (approx), measured around midfoot
Small - 6.5"/16.5cm unstretched, 8"/20.25cm stretched Medium - 8"/20.25cm unstretched, 10"/25.5cm stretched Large - 9"/22.75cm unstretched, 11"/28cm stretched
Abbreviations
K Knit P Purl K2Tog Knit 2 together KF&B Knit into front and back of stitch PM Place marker RM Remove marker SI Slip stitch - always slip purlwise, unless otherwise instructed TBL Through back loop M1R Make 1 right - lift the loop between the current and next stitches from the back and knit into the front M1L Make 1 left - lift the loop between the current and next stitches from the front and knit into the back W&T Wrap and turn EOP Eye of Partridge Repeat the instructions within the brackets
Toe
Using Judy's Magic Cast On, cast on 20 (24,28) stitches, 10 (12,14) on each needle. Knit all the stitches on each needle for first round. After this increase as follows: Round 1: 1st needle : KF&B, K to 2 stitches before end of needle, KF&B, K1 2nd needle: as first needle Round 2: Knit with no increases In case you're thinking that the first round sounds lop-sided, well actually it's not. The KF&B increase creates a little bar that shows to the left of the stitch that it's worked into. This way it shows after the first stitch and before the last, so the sock toe is properly symmetrical. Repeat rounds 1 and 2 till there are 28 (32,36) stitches on each needle, 56 (64,72) in total. For the first couple of rounds it seems to lie flat, but don't worry, give a little tug as you move from one needle to the next and it soon starts to shape itself into a recognisable toe. Once you've done a few rounds, as soon as there's enough to support it, attach a removable marker to the toe in the “corner" at the start of your round. I find this easier than putting my marker on the needle to mark the start of the round as I like to be at the end of a round when I put my knitting down so this would leave it in danger of falling off. As you have distributed the stitches across the needles, the change from one needle to the other nicely marks the start of the round so your marker doesn't need to be too precise.
Foot
The stitches on the first needle will be the instep stitches, the second needle will be the sole stitches. Continue in stocking stitch until the desired length. Huh? What's she talking about? Well, you can't really tell just by trying it on where you need to start increasing for the gussets, but it's really important if you want your socks to fit properly. Take a look at the calculation in the box at the side and you'll see how to
Tip - How to Calculate Where to Start Increasing
Multiplythetotal numberof stitches you have after all the toe increases by 0.75. Divide this by the number of rows per inch/2.5cm, according to your own gauge. That is the length of the part of the foot after the gusset increases have started, including the heel turn (you'll need to multiply by 2.5 if you are working in cm). To know how much to knit before you start increasing for the gussets, subtract the length you have just worked out from the actual length of your foot, then subtract 0.25 inch/0.75cm more - this will give you the negative ease you need to make your sock fit nicely. out; remember you're measuring from the very start of the toe, where you cast on
Gusset Increases
Continue in stocking stitch until specified length for foot (see side note). From this point, continue working the instep stitches in stocking stitch and at the same time begin increasing on the sole, as follows: Round 1: K1, M1R, K to 1 before end of sole stitches, M1L, K1, Knit instep stitches Round 2:Knit Place markers to separate the gusset stitches on each side from the central 28 (32,36) sole stitches. Repeat rounds 1 and 2 13 (15,17) times more (total 84 (96,108) stitches - 28 (32,36) on instep, 56 (64,72) on sole). On the final round, stop when you reach the second marker.
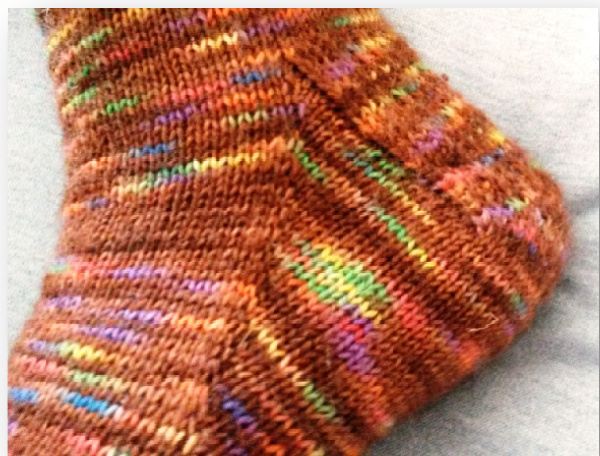
Heel Turn
Following these instructions will give you a heel turn that is worked in heel stitch. You don't have to do that, if you would prefer not to then just work the whole thing in stocking stitch with no slipped stitches, but I think it gives extra strength and reinforcement in one of the most vulnerable parts of the sock. You've probably noticed that there is a choice of pattern for the heel flap - I haven't provided the corresponding Eye of Partridge (EOP) pattern for the heel turn because I think that the heel stitch underfoot is more comfortable. You willbe at the point of beginning the first gusset. Knit the gusset stitches now, increasing asfollows: K3, M1R, [K2, M1R, K1, M1R] 2 (0,0) times, [K2, M1R] 1 (5,6) times, K3 Work across instep stitches in stocking stitch. Increase gusset stitches along other side: K3, M1L, [K2, M1L, K1, M1L] 2 (0,0) times, [K2, M1L] 1 (5,6) times, K3 There are now 20 (22,25) gusset stitches on each side. At this gauge this gives you a heel flap of approximately 3"/7.5cm for the medium size, very slightly less for the small or more for the large. Whoa! What happened there? Where did those increases come from? Well it's all about fit: a nicely fitting heel flap is pretty well square, that way it will wrap round the sides of your heel and snug in at the top of your heel so that the leg starts in the right place. If you were to just work your heel flap without the increases then you'd find it would be short and squat rather than nice and square, and the slipped stitch pattern would only make it worse because the slipped stitches change the row gauge. You might think that the obvious solution would be to start making the increases sooner, so that by the time you reach the heel you've got more gusset stitches. Well the problem with that is that you'd be starting to make the foot larger earlier than your foot actually needs it, so you'd end up with it being baggy around the top of your foot, no good at all. This way you get the extra height in your heel flap without needing to extend the length of the gussets. Work the heel turn only on the sole stitches. For your own preference this could mean leaving the gusset and sole stitches on the same needle, separated by the markers (l'll assume this is what you're going to do and refer to the markers) or you might feel more comfortable moving the gusset stitches to the same needle as the instep stitches; if you do this, don't forget to re-position the markers to separate the gusset stitches from the instep.
Tip - How to Wrap and Turn
There are a myriad of different ways to Wrap and Turn and if you have a favourite, then please go ahead and use it. For anyone who hasn't done it before, or would just like a little reminder, this is how I like to do it. On Knit Side: Bring the yarn from the wrong side to the right side of the work, between the needles. Slip the next stitch purlwise, then take the yarn back to the wrong side - you have now "wrapped the stitch". Put the stitch back onto the left hand needle and turn the work. The yarn is on the wrong side, ready to start purling. On Purl Side: Bring the yarn from the wrong side to the right side of the work, between the needles. Slip the next stitch purlwise, then take the yarn back to the wrong side. Put the stitch back onto the left hand needle and turn the work, ready to startknitting. Row1: [K1, Sl1] until 2 stitches before the marker, W&T (see above). Row 2: Purl to 2 stitches before the marker, W&T. Row 3: K1, [Sl1, K1] until 3 before the marker (5 next row, then 7, then 9, etc.), W&T. Row4: Purl to 3 stitches before the marker (5 next row, then 7, then 9, etc.), W&T. Row 5: Sl1, [K1, Sl1] until 4 before the marker (6 next row, then 8, then 10, etc.), W&T. Row6: Purl until 4 stitches before the marker (6 next row, then 8, then 10, etc.), W&T. Repeat rows 3 - 6, each time adding to the number that remain before the marker, until there are 8 (10,11) stitches on each side (7 (9,10) wrapped, the very outside stitch not wrapped) and 12 (12,14) centre stitches.
Tip - How To Lift Wraps
On Knit Side: Insert the right needle under the wrap to lift it from the right side, then lift it up and over the stitch it wrapped so it ends up sitting on the needle to the left side of it. Knit the 2 together through the back. With ssK: Lift the stitch as before, but knit the original stitch, the wrap and the next stitch together, all through the back. On the Purl Side: Insert the right needle under the wrap to lift it from the right side, then liftit up and over the stitch it wrapped so it ends up sitting on the needle to the left side of it.Purl the 2 together. With P2Tog: Lift the stitch as before, but purl the original stitch, the wrap and the next stitch all toqether. Work as established to the first wrap (knit the knits and slip the slipped stitches). Lift and knit this and all but the last wrap (see note above for how to do this). On the final remaining wrapped stitch, work the wrap and SSK at the same time. Turn. Sl1, purl to the first wrap. Lift and purl this and all but the last wrap. On the final remaining wrapped stitch, work the wrap and P2Tog at the same time. Turn. You should now have 26 (30,34) sole stitches, 2 fewer than when you started, and will have worked a heel turn with a slipped stitch pattern.
Heel Flap
Which do you want to do - a Heel Stitch pattern or an Eye of Partridge pattern on your heel flap? Both give good reinforcement by making the fabric denser, so from that point of view there's no difference. Heel stitch looks a little more like ribbing, with alternate columns of stitches raised slightly above the fabric, whereas EOP looks a bit more solid. You could say that you need to concentrate just a tiny bit more for EOP because it's not quite so easy to read your knitting. I tend to use Heel Stitch for my husband and EOP for me, but there is no logic at all in that, just personal preference. One thing that is important is that EOP has less sideways stretch, so if you are knitting for someone with an exceptionally narrow or wide heel then I would recommend Heel Stitch as there's more give and more contraction. For the vast majority of people you should be perfectly alright with either. You should be ready to work the right side of the heel flap. Decide which you would like to do and follow one or other set of directions.
Heel Stitch Heel Flap
Row1: Sl1, [K1, Sl1], repeat until 1 stitch before the first marker. You will notice that 1 stitch after the marker is a gap. RM, then SSK. Turn. Row2: Sl1, purl to 1 stitch before marker, RM, P2Tog. Turn. Row3: Sl1, [K1,Sl1], repeat until 1 stitch before gap, SSK, turn. Row4: Sl1, purl to 1 stitch before gap, P2Tog, turn. Repeat rows 3 & 4 until there are 2 stitches outside of each gap. You should have just worked a wrong side row.
Eye of Partridge Heel Flap
Row 1: Sl1, [K1, Sl1], repeat until 1 stitch before the first marker. You will notice the 1 stitch after the marker is a gap. RM, then SSK. Turn. Row 2: Sl1, purl to 1 stitch before marker, RM, P2Tog. Turn. Row 3: Sl1, K2,[Sl1, K1], repeat until 1 stitch before gap, SSK, turn. Row 4: Sl1, purl to 1 stitch before gap, P2Tog, turn. Row 5: Sl1, [K1, Sl1], repeat until 1 stitch before gap. SSK, turn. Row 6: Sl1, purl to 1 stitch before gap, P2Tog, turn. Repeat rows 3 - 6 until there are 2 stitches outside of each gap. You should have just worked a wrong side row.
Leg
Return to working in the round. Work in Sl1, K1 as established across the heel flap until 1 stitch before the gap, SSK, K1. Work instep stitches in stocking stitch. K1, K2Tog, work stocking stitch across the back of the leg. By now you should be back to the “right" number of stitches and the little trick with the SSK at one side and the K2Tog at the other has closed up those annoying little holes that can appear just when you think everything is going well. If you want to know why, it's because the holes appear when you turn your work and start to go in the opposite direction - that's how we get that gap while we're working the heel flap. In this final round, those decreases are done with all the knitting going in the same direction, so there's no opportunity for making the holes. Continue working the leg in stocking stitch until the desired length. Which brings us to the question - how long is long enough? Of course it's your choice, but what if you're knitting a gift and can't ask the recipient's preference? There are two commonly used rules of thumb for producing a nicely proportioned sock. The first is that the length of the sock should be the same as the wearer's hand, the second is that if you fold the sock in half at the heel, with toe to ribbing, then the length of the foot should be the same as the length of the leg. Either of these methods work well in my opinion. One thing I would say though is please don't try to use these instructions if you want to make a knee length sock; unless you've got very skinny calves, there will need to be shaping which just isn't included here.
Cuff
I like to do a 2x2 twisted rib. I think that not only is it the most stretchy, but also the twisted rib rather than a “normal" rib makes the stitches stand out more. All rounds: [K2TBL, P2]. Repeat to end. Repeat until cuff measures required length. I've seen books that suggest that the number of rows should equal half the number of stitches on one needle (which in this case would be 14 (16, 18)), but I think that's a bit short and prefer to do half as many again (21 (24, 27)), but again it's personal choice. One thing that you might want to consider is that a longer cuff has more “memory" - in other words it is more likely to spring back to shape once it's been stretched. Bind off using Jeny's Surprisingly Stretchy Bind Off Weave in all ends. Enjoy, you've finished!
Going It Alone
So, you've read through all that and none of those sizes are going to work for you, you need bigger or smaller, or you prefer to knit at a different gauge, what to do? Well I hope by now you've got enough of the idea of how to knit the sock, but you need the numbers to get you going. Well here you are. I'm not going to promise that this will work at the extremes of the ranges (so if you want to knit baby socks or socks for a giant with that lovely cobweb yarn you've got in your stash, then please look out a specific pattern), but for the majority of socks you're going to want to knit, this should work for you.
| Total number of stitches for foot | Work this out by measuring around your mid- foot then calculating how many stitches in your gauge it will take to knit this size. Then reduce that number by roughly 10% for negative ease to make your sock fit properly. It doesn't have to be exact, near enough is good. Aim for an even number, all these instructions are for even numbers, and if you want to do a 2x2 rib, then make it divisible by 4. |
| Number of stitches to cast on | Approximately 1/6 of the total stitches on each of your two needles (remember to adjust this if you're using dpns). Round to the nearest even number. |
| How much to knit before starting the gusset increases | This is already detailed in the main pattern because everyone needs this bit. Take a look back at the box on page 2. |
| Gussetincreases | Increase so that your sole stitches have doubled, so you will have %4 of your total foot stitches in each gusset. |
| Heel turn -gusset expansion | In that final round before you start the heel turn, divide the number of stitches in each gusset by 2.5. Round this to the nearest whole number, then increase by this number of stitches, evenly along the stitches in each gusset. |
| Heel turn - number of stitches to wrap | Now this is messy and I'm sorry. What you're aiming for is that roughly 1/3 of the sole stitches are wrapped on each side, with the remaining 1/3 in the middle. If you want to go with that, then you really won't be far wrong. If you want to be more accurate then follow this calculation. Multiply the total number of foot stitches by 0.3 and round it up to the next whole number. Subtract 2. Now halve that number and round it down. Phew, it's over. That's the number that you need to wrap on each side, remembering that there is one outside |
| But my instep is higher/lower than normal | stitch on each side that doesn't get wrapped. Honestly you would be amazed at the number of people that think that simply because so many top-down patterns tell you to make heel flaps that are too short, really |
| this formula should fit most people. But if it doesn't, and you know your own feet after all, then the thing to do is NOT to start increasing for the gusset earlier or later, all this will do is make the foot too baggy/tight. What you need to do instead is adjust the number ofstitchesyou increase before starting the heel turn.Work out the standard amountas above,thenadd orsubtract a couple (please, not too many, it won't need it)toadjust thefit. |
If you have any questions about this pattern, please feel free to contact me at http://www.ravelry.com/people/JoHT. If you want to sell any socks you make from this, then be my guest - it would be your hard work, not mine, though if you become rich from it, then please feel free to send chocolate @ Jo Torr, March 2014
Worksheet
If you find the instructions above a bit daunting, or want to double check, then why not use this worksheet to help? The worked example is in inches.
| Calculation | Your numbers | Example | ||
| Measure around your foot in inches or cm | a | 9 | ||
| Measure the length of your foot in inches or cm | b | 10 | ||
| How many stitches per inch/cm? | C | 8 | ||
| How many rows per inch/cm? | d | 11 | ||
| Calculate how many foot stitches | axc | =9 x 8 = 72 | ||
| x 0.9 | =72 x 0.9 =64.8 | |||
| e | Round to nearest even number | 64 | ||
| Calculate how many stitches to cast on each needle | e÷6 | =64/6 | ||
| f | Round to nearest even number | =10.67 10 | ||
| Calculate how much to knit before starting gusset increases | e x 0.75 | = 64 x 0.75 = 48 | ||
| g +d | =48/11 =4.36 | |||
| b-g | =10 - 4.36 =5.64 | |||
| - 0.25 inch/0.75cm | =5.64 - 0.25 =5.39 inches | |||
| Calculate how many to increase for each gusset | Sole stitches =e÷2 | =64/2 =32 | ||
| h ÷2 | =32/2 | |||
| Calculate how many to expand each gusset by | h÷2.5 | =16 =16/2.5 | ||
| Round to nearest | =6.4 6 | |||
| Calculate how many to wrap on each side | whole number ex0.3 | =64 x 0.3 | ||
| Round up to nearest whole | =19.2 20 | |||
| number -2 | =20-2 | |||
| ÷2 | =18 =18/2 =9 | |||
| Round down to | 9 | |||
| nearest whole number |


