SECRETGEEKLIFEOKt
The Cape Hatteras Fingerless Mitts
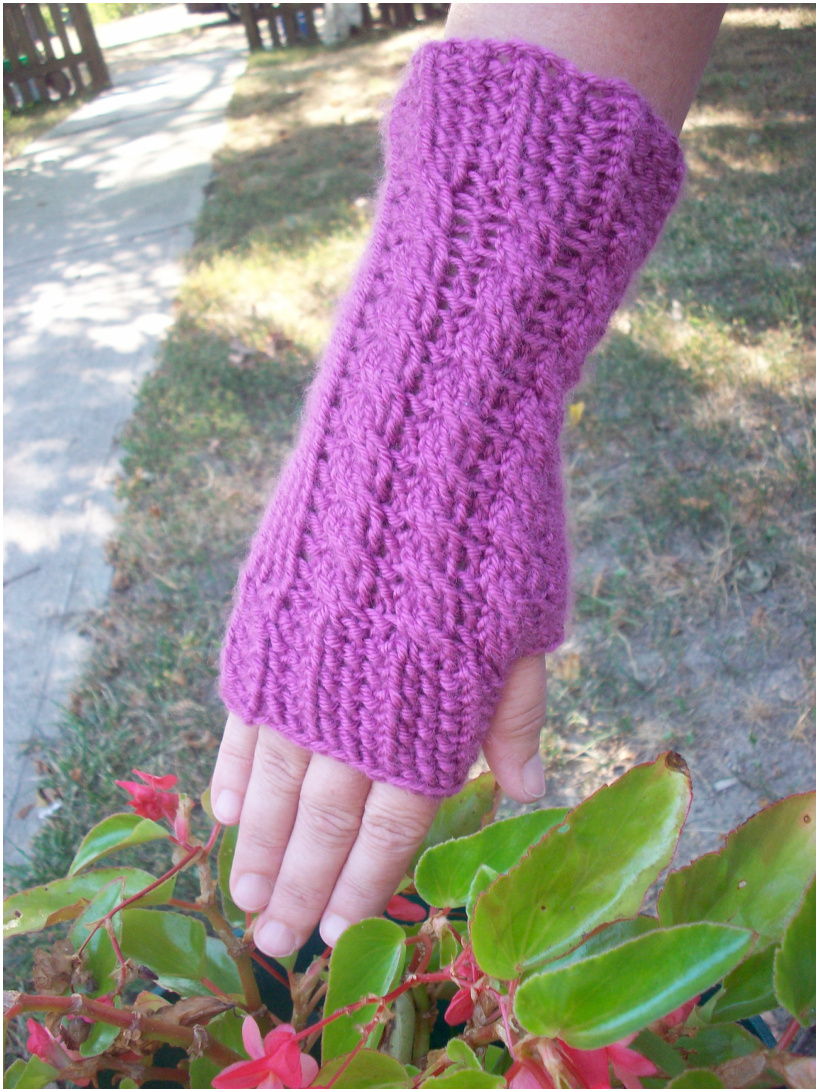
These fingerless mitts were designed to match the Cape Hatteras Scarf. There are three small cables down the front of the mitt, while the rest of the mitt is in stockinette stitch. NOTE: These mitts are knit from the elbow to the fingers!
Materials
100 yds. of worsted weight yarn Size US 7 dpns - set of four Tapestry needle Stitch markers Cable needle
Gauge
8 rows x 5 stitches in 1in.
Instructions
The simple cables on these mitts make it a great project to learn cabling and knitting in the round!
Right Mitt Directions
For variation, try knitting the palm side in seed stitch. Cast on 30 st. Divide 10 st. onto 3 dpns, join stitches, being careful not to twist them. Work 12 rounds Beaded Rib. Divide stitches as follows: dpn #1 - 16 stitches, #2 - 7, #3 - 7. Start Chart #1. Note: This chart is worked on the first 16 stitches of each round. For the FIRST ROW, FIRST REPEAT ONLY, you will increase 3 stitches AFTER you work the 16 stitches of the chart: K4, M1, K3, M1, K3, M1, K4. After working each row of the chart, K all the rest of the stitches in each round (palm stitches). Chart #1 is worked for a total of 18 rows: repeat rows 1-8 twice, then rows 1 and 2 once more. → The good thing about knitting in the round is that you can try on your mitts as you go! Right here would be a good time to try it on - if it feels that it will be too tight for your palm, you can add in a few extra palm stitches on the next row! The next 17 rows form the thumb gusset. Make sure you pay attention to the number of the cable row that you are working, as well as which row includes the increases! Row 1 - Work Row 3 of cable chart, pm, M1R, K1, M1L, pm, K rest of palm stitches. Row 2 - Work Row 4 of cable chart, K rest of all palm stitches, including thumb gusset. Row 3 - Work Row 5 of cable chart, K rest. Row 4 - Work Row 6 of cable chart, sm, M1R, K3, M1L, K rest. Row 5 - Work Row 7 of cable chart, K rest. Row 6 - Work Row 8 of cable chart, K rest. Row 7 - Work Row 1 of cable chart, M1R, K5, M1L, K rest. Row 8 - Work Row 2 of cable chart, K rest. Row 9 - Work Row 3 of cable chart, K rest. Row 10 - Work Row 4 of cable chart, M1R, K7, M1L, K rest. Row 11 - Work Row 5 of cable chart, K rest. Row 12 - Work Row 6 of cable chart, K rest. Row 13 - Work Row 7 of cable chart, M1R, K9, M1L, K rest. Row 14 - Work Row 8 of cable chart, K rest. Row 15 - Work Row 1 of cable chart, K rest. Row 16 - Work Row 2 of cable chart, M1R, K11, M1L, K rest. Row 17 - Work Row 3 of cable chart, B0 12, K rest. (remove stitch markers) After Row 17, work 12 rows of Beaded Rib, then bind off. On the first row of the Beaded Rib, you need to decrease as many stitches as you added in order to get back to 30 stitches, keeping in pattern. Weave in ends, and you're ready for the left hand mitt!
Left Mitt Instructions
Follow the Right Mitt instructions until the 17 thumb gusset rows, then follow instructions below: Row 1 - Work Row 3 of cable chart, K until the last stitch, pm, M1R, K1, M1L, pm. Row 2 - Work Row 4 of cable chart, K rest of all palm stitches, including thumb gusset. Row 3 - Work Row 5 of cable chart, K rest. Row 4 - Work Row 6 of cable chart, K until marker, sm, M1R, K3, M1L, sm. Row 5 - Work Row 7 of cable chart, K rest. Row 6 - Work Row 8 of cable chart, K rest. Row 7 - Work Row 1 of cable chart, K until marker, sm, M1R, K5, M1L, sm. Row 8 - Work Row 2 of cable chart, K rest. Row 9 - Work Row 3 of cable chart, K rest. Row 10 - Work Row 4 of cable chart, K until marker, sm, M1R, K7, M1L, sm. Row 11 - Work Row 5 of cable chart, K rest. Row 12 - Work Row 6 of cable chart, K rest. Row 13 - Work Row 7 of cable chart, K until marker, sm, M1R, K9, M1L, sm. Row 14 - Work Row 8 of cable chart, K rest. Row 15 - Work Row 1 of cable chart, K rest. Row 16 - Work Row 2 of cable chart, K until marker, sm, M1R, K11, M1L, sm. Row 17 - Work Row 3 of cable chart, K until marker, B0 12. Work 12 rows of Beaded Rib, remembering to decrease back to 30 stitches on the first row, then bind off in pattern. Weave in ends, and you're ready to go!
Charts and Details
Beaded Rib:
Row 1: \*P1, K3\* to last 2 st., then P1, K1 Row 2: \*K1, P1, K1, P1\* to last 2 sts., then K2
Chart #1
(To be followed for the first 16 stitches of each round.)
| 8 | - | - | ||||||||||||||
| 7 | ||||||||||||||||
| 6 | 二 | 二 | 二 | 二 | ||||||||||||
| 5 | ||||||||||||||||
| 4 | ||||||||||||||||
| 3 | ||||||||||||||||
| 2 | ||||||||||||||||
| 1 |
Chart Legend:

Abbreviations
K - Knit P-Purl K1tbl - Knit the stitch through the back loop. L/C - Slip 2 stitches to a cable needle, hold in front. K 2 stitches, then K the 2 from the cable needle.


