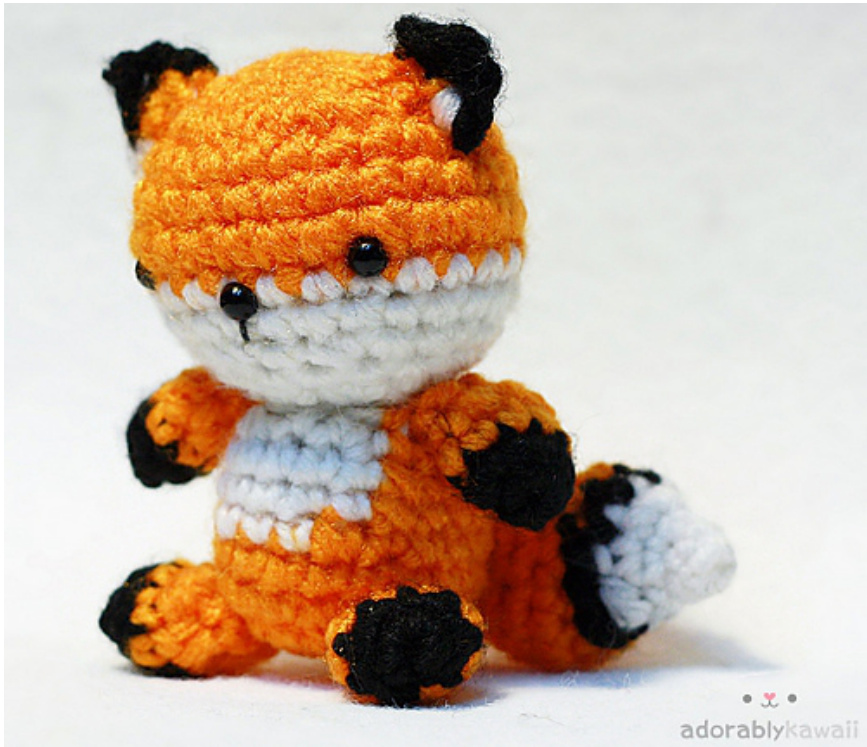
Tiny Fox Amigurumi Pattern by adorably kawaii
Materials:
Tools:
\*For wider kerchief, continue in pattern until desired width is reached. DK/Light Worsted weight yarn in orange, black, and white. (I used Red Heart Sport Yarn and Bernat Softee Baby) Three 4.5mm safety eyes Black embroidery thread Transparent nylon thread Stuffing One 6mm safety eye Pipe cCleaner
Size:
Approximately 3" (7.6cm) tall. Results will vary depending on your tension and your yarn & hook choice.
Abbreviations:
Ch - Chain Sc - Single crochet 2 sc - 2 single crochet increase 3 sc - 3 single crochet increase Sc2tog - 2 single crochet decrease Sk - Skip Sl st - Slip stitch St(s) - Stitch(es) R# - Round/Row # Rep - Repeat
Magic Ring:
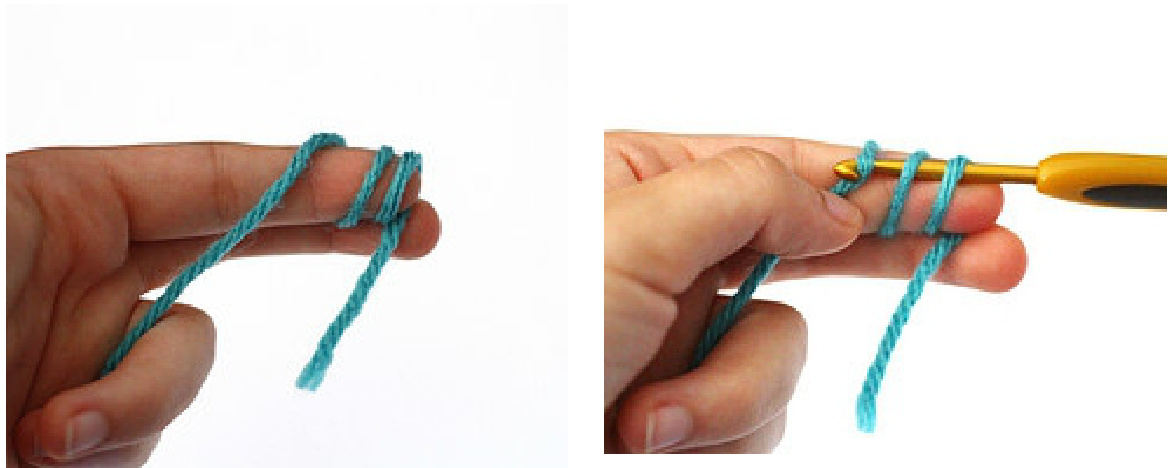
A few inches from the end of the yarn, wrap two loops over your finger. While the loops still on your finger, insert the hook from right to left into the loops and pull the working yarnthrough.
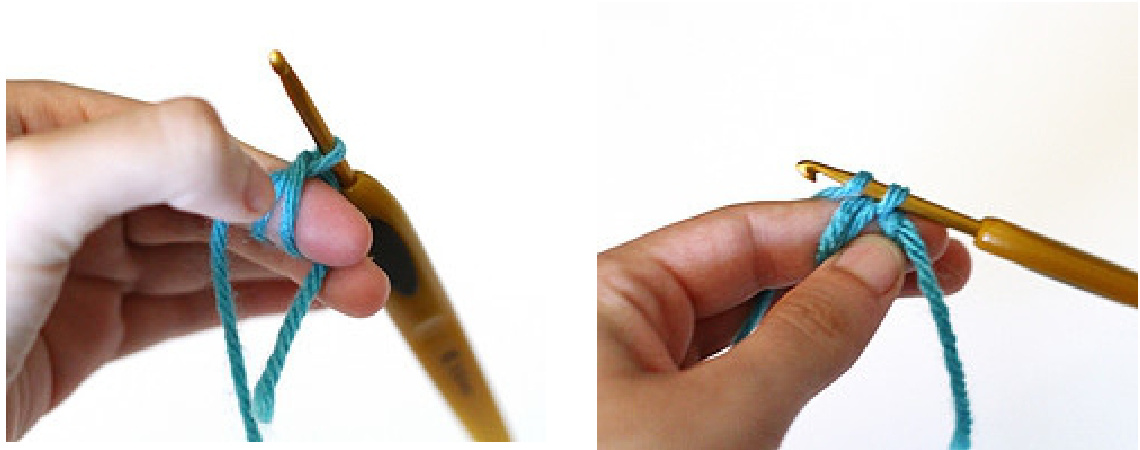
Carefully take the loops off your fingers and chain one. This doesn't count as the first stitch.
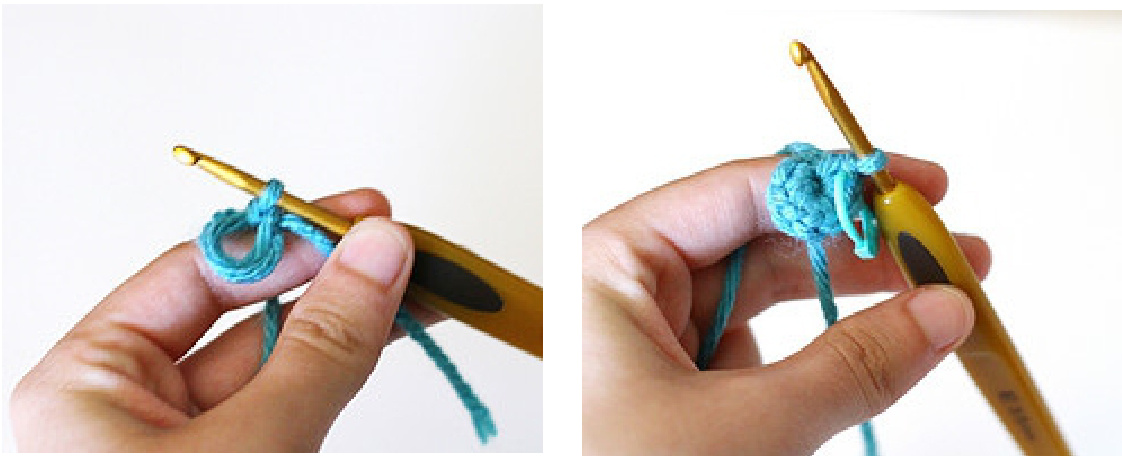
Insert the hook into the two loops again and pull up a loop. Yarn over and draw through both loops. This counts as the first single crochet stitch. Continue for the rest of the stitches. Then pull the yarn tail to close the hole.
Color Changes:
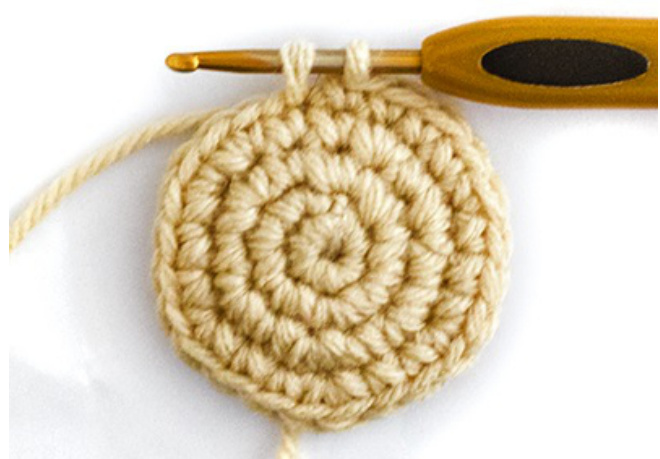
When you get to the last stitch in the current color, insert hook into the next stitch, yarn over, and draw up a loop.
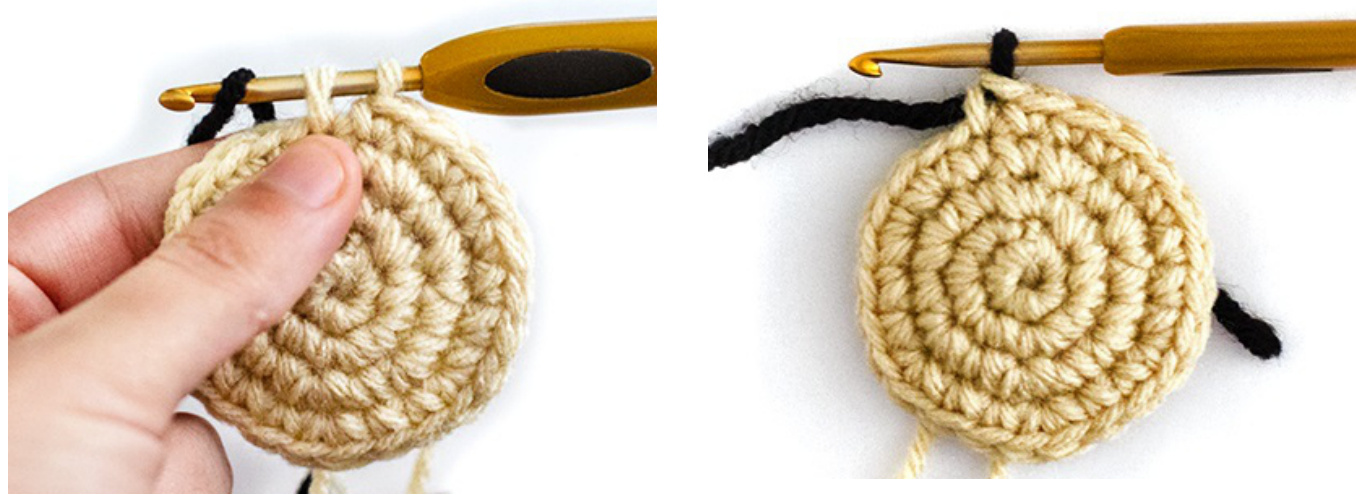
Yarn over with the new color and draw through both loops on the hook.
Head:
With orange yarn, R1: 6 sc into magic ring. R2: 2 sc in each st around. (12 sts) R3: \*2 sc in st, sc in next s+\* rep to end. (18 sts) R4: \*2 sc in st, sc in next 2 sts\* rep to end. (24 sts) R5-6: Sc in each st around. (2 rounds) R7: Sc to the last st, change to white yarn, sl st.
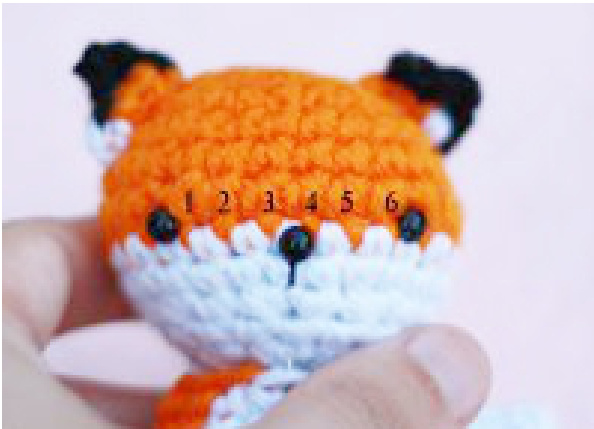
R8: Sc in each st around. Put two 4.5mm safety eyes above the last round with about 6 sts in between. R9: Sc in each st around. Put one 4.5mm safety eye above the last round centered between the two eyes as a nose. Then stitch on the mouth using black embroidery thread. R10: \*Sc2tog, sc in next st\* rep to end. (16 sts) Start stuffing. R11: Sc in each st around. R12: \*Sc2tog\* around. (8 sts) Finish stuffing. Fasten off.
Left Ear:
R1: With black yarn, ch 2. 2 sc in the first ch. Fasten off. R2: With white yarn, insert hook into the first st and sc. Change to orange yarn, sc in the previous st. 2 sc in next st. Fasten off. Weave the ends through the back.
Right Ear:
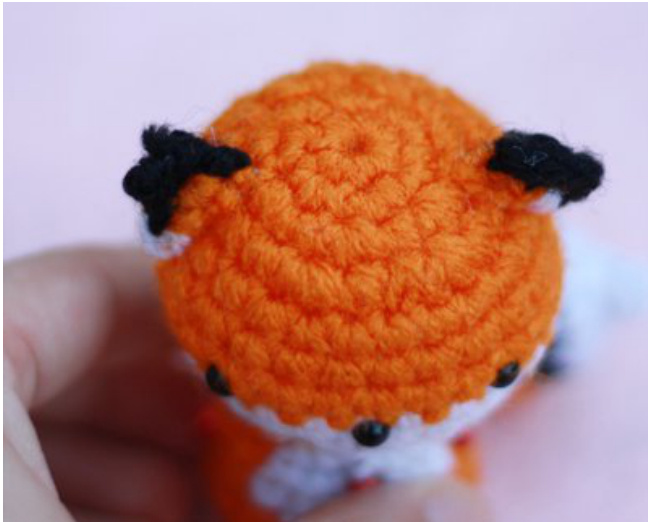
R1: With black yarn, ch 2. 2 sc in the first ch. Fasten off. R2: With orange yarn, insert hook into the first st and 2 sc. Sc in the next st. Change to white yarn, sc in the previous stitch. Fasten off. Weave the ends through the back. Use transparent nylon thread to sew the ears onto the head.
Body:
With orange yarn, R1: 6 sc into magic ring. R2: 2 sc in each st around. (12 sts) R3: \*2 sc in st, sc in next s+\* rep to end. (18 sts) R4: Sc in each st around. R5: Sc in 2 sts. Change to white yarn, sc in next 3 sts. Change to orange yarn, sc to end. R6-7: Sc in st. Change to white yarn, sc in next 5 sts. Change to orange yarn, sc to end. (2 rounds) R8: Sc in st. Change to white yarn, sc in next 5 sts. Change to orange yarn, sc to end. R9: Sc2tog over the next 2 sts (by pulling up the second loop and finishing the decrease with white yarn.) Sc in next 2 sts. Sc2tog. Change to orange yarn. \*Sc in 2 sts, sc2tog\* x3. (13 sts) Stuff. Fasten off, leaving a long tail for sewing. Don't sew the head onto the body yet if you want to make the tail jointed.
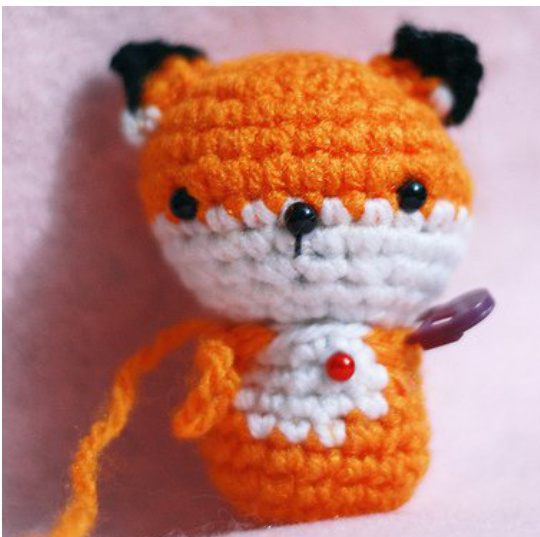
Legs (Make 4):
With black yarn, R1: 4 sc into magic ring. R2: 2 sc in each st around. Change to orange yarn. (8 sts) R3: Sc in each st around. R4: Sc2tog. Sc in the next 4 sts. Sc2tog. (6 sts) Sl st in next st. Don' + stuff. Fasten off, leave a long tail and sew together so it's flat. Then sew them onto the body.
Tail:
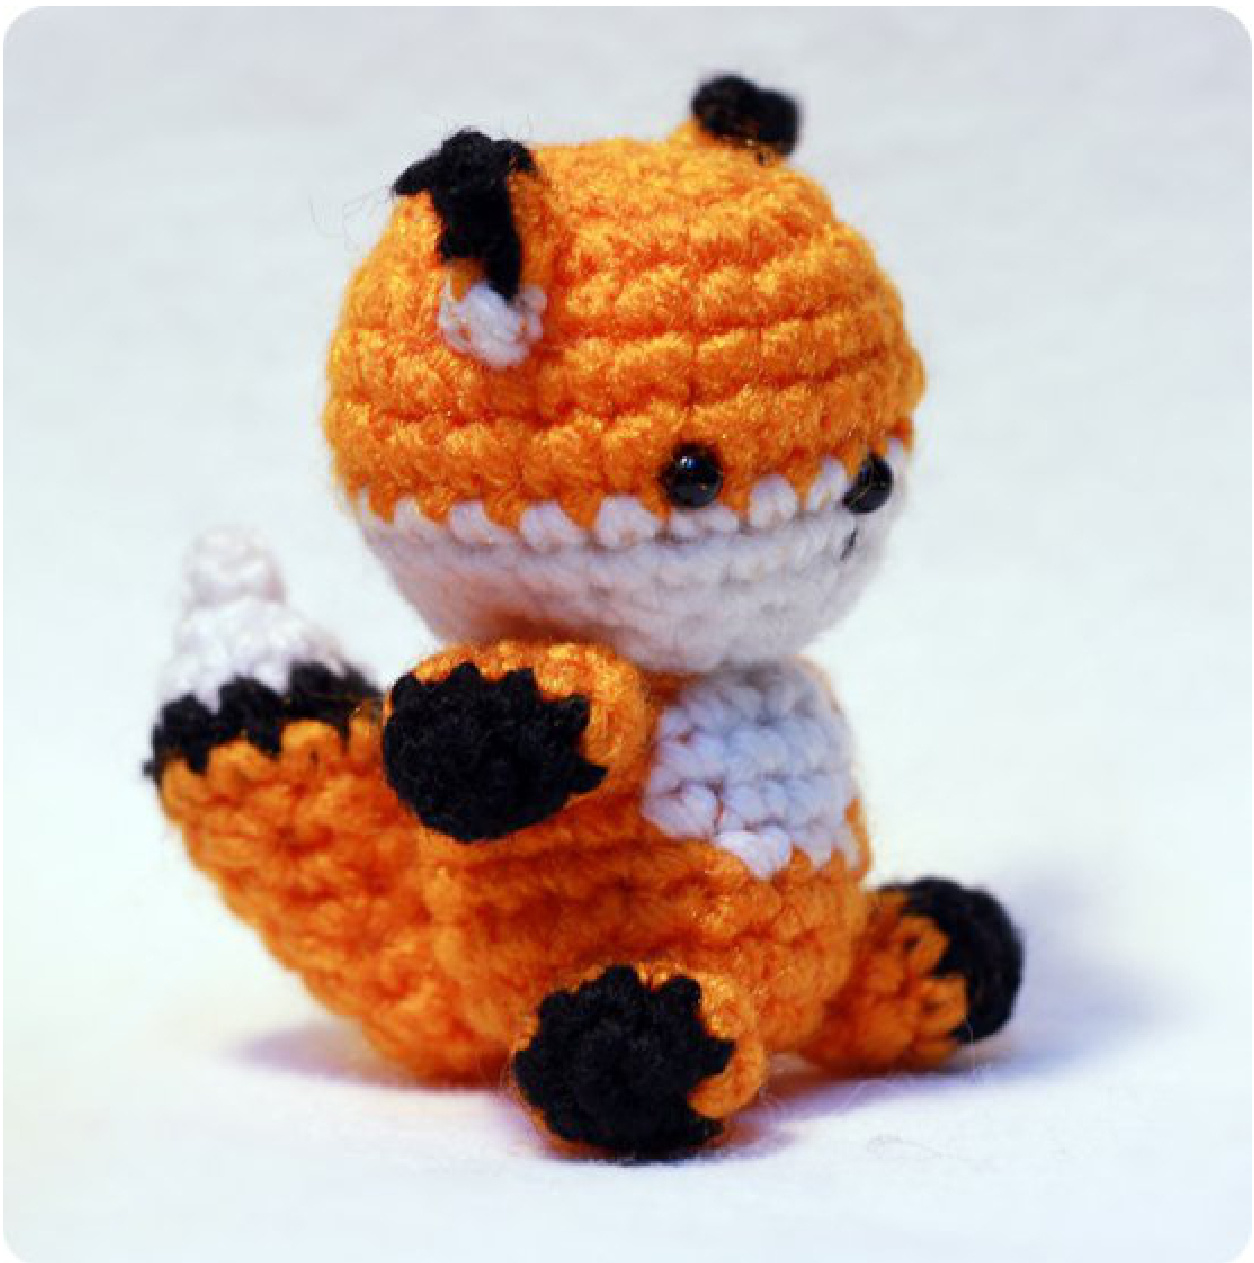
With white yarn, R1: 3 sc into magic ring. R2: Sc in each st around. R3: 2 sc in each st around. (6 sts) R4: \*2 sc in st, sc in next st\* rep to end. Change to black yarn. (9 sts) R5: Sc in each st around. Change to orange yarn. R6: 2 sc in the first st through the back loop only. 3 sc in the second st. 2 sc in the next st. Sc to end. (13 sts) R7: Sc in 9 sts. \*Sc2tog\* x2. (11 sts) R8: \*Sc in 3 sts. \*Sc2tog\* x2. Sc to end. (9 sts) R9: Sc to the last 2 sts, sc2tog. (8 sts) R10: Sc in each st around R11: Sc to the last 2 sts, sc2tog. (7 sts) R12: Sc to the last 2 sts, sc2tog. (6 sts) Fasten off, leaving a long tail. Stuff the bottom firmly. Put in a pipe cleaner.
To make the tail jointed:
Insert the 6mm safety eye into the tail and push it through a hole on the 10th round. (The end should be sticking out on the side that is to face the fox' s back.) If the eye is sticking out/not completely in, use your hook to pull the yarn out of the way and then push the eye in more. Then sew the ends together so that there is no hole. Insert the end of the eye in the bottom center of the back of the body and place the washer over it. Then sew the head onto the body.
@ Adorably Kawaii. Pattern is for personal use only. Please don't redistribute/resell the pattern in any way or form. If you post the finished items you make online, my only request is that say something like “Pattern designed by Adorably Kawaii - www.adorablykawaii.com"


