Garlic
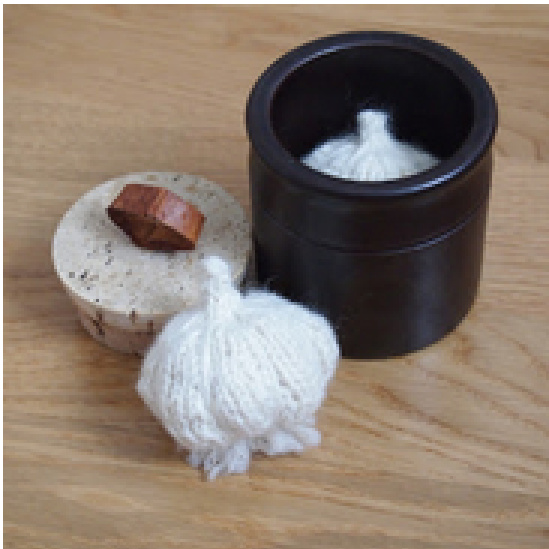
Needle:3.25mm Yarn: worsted weight Size: a Ig. clove of garlic! Gauge: doesn't matter, as long as the sts are tight so the stuffing doesn't show through Abbreviations: CO - cast on inc - increase by knitting through the front and the back of the st K - knit K2tog -K two sts together P-purl rep - repeat S1 - slip 1 st purl wise, with yarn held in front if it is a P st, or in back if it is a K st st(s) - stitch(es) \*note - lots of little short-rows are used to make the bumps for the individual cloves, I did not wrap & turn, but just pulled my sts tight to avoid any little holes. You may prefer the wrap & turn method instead. - CO 4, join to work in the round 1 - inc in every st (8 sts) 2 - (and all even rows) K 3 - [inc 1, K1] rep around (12 sts) 5 - [inc 1, K2] rep around (16 sts) 7 - [inc 1, K1] rep around (24 sts) 9 - [inc 1, K2] rep around (32 sts) 10 -K First short-row: 1. S1, K4, turn 2. S1, P4, turn 3. S1, K7 - rep 1.2.3. four times to end of round - K 1 round Second short-row: 1. S1, K3, turn 2. S1, P3, turn 3. S1, K3 - rep 1.2.3. 8 times to end of round - K 1 round - [K2 tog, K2] rep around (24 sts) - K 1 round Third short-row: 1. S1, K4, turn 2. S1, P4, turn 3. S1, K3 - rep 1.2.3. 6 times to end of round \*note: you'll have to "borrow" the first st of the round to complete the last repeat - K 1 round Decreases for stem \*note: when the opening starts to get small, stuff garlic before continuing to close! 1 - K3, [K2tog, K5] rep to end of round (21 sts) 2 - (and all even rows) K 3 - [K2tog, K4] rep to last 3 sts, K2tog, K1 (17 sts) 5 - K2, [K2tog, K3] rep to end of round (14 sts) 7 - [K2tog] rep to end of round (7 sts) 9 - [K2 tog] rep to last st, K1 (4 sts) 11 -K - cut a long tail and pull through last 4 sts - use the tail to shape garlic, and form individual cloves . start by pushing directly through the garlic from top to bottom, then bring the yarn up around the outside, along a "seam," go through the "base" of the stem (about a cm from the tip) and back down the other side. Work one stitch in the bottom to hold it in place, then repeat 3 more times, to form 8 sections. - knot on some additional lengths of yarn to the bottom of the garlic, split the ends, and trim to form roots


