- An assortment of novelty & other non-wool yarns/ribbons/fibers (any type): carry-along with the wool on every row for texture. Here's my craft fiber source: Wind Rose Fiber Studio on etsy.com. KNITTED & FELTED BIRD'S NESTS.by Shirle Bedient This is a quick and easy project. It's surprisingly natural looking and a lovely handmade gift. Needles: 16" long Size 15 circular & Size 13 double points and a tapestry needle Wool yarn used for every row: - 44 yards of 100% wool in #5 or bulky weight (like Lopi lcelandic wool) OR 44 yards each of two stands of worsted weight wool that are worked together for the entire nest. jute twine and anything with glitz/metallics. - And of course, eggs, or maybe jewelry? - NO TYING ENDS! The felting process will secure them. Experiment with color. The fabric and non-wool fibers/yarns/strips you knit in will make the wool Fantasy Glitz nest go a lot further and they're what really make the nest. You wil use double pointed needles for the last couple of rows. I just used size 13 because I had them.
Abbreviation: SSK-Slip the first stitch on the LH needle (as if to knit) to the RH needle without actually knitting it. Do the same with the next stitch. Insert the LH needle into the front loops of these stitches (left to right). Wrap the yarn in the usual way around the RH needle and knit the 2 slipped stitches together.
Cast on 36 stitches. I recommend doing your cast on with just the wool because its hard to count those stitches with the fuzzy/stringy yarn there. Place a marker and join the stitches by slipping the first stitch onto the left needle and knitting it together with the last cast on stitcch. Pull yarn tightly. Now add one of your fluffy/stringy textured yarns as you knit every row carrying them along with the wool. Add the yarns in this fashion: Insert the right needle into the next stitch on the left needle, lay the novelty yarnbetween the needleswith 1-1/2" hanging at the back and the main length hanging on the front, wrap the wool combined with the front tail of the accent yarn around the right needle and knit the stitch. This first knit round feels tight to knit but when it's done the knitting will be much easier. If I'm using a yarn from a ball (typically I do use the eyelash yarns this way) I go around one whole round and cut it at the marker leaving about 1-1/2" hanging behind. If using the precuts I add another precut as each runs out. I tend to join the same fiber/fabric precut strips for a whole round and let the last one go past the joining marker wherever it lands not cutting it off at the marker and joining a new one there. - Knit each round: add the textural fiber/yarn/fabrics as you knit each round until you have 4-1/2 to 5 inches. - Consider doing your decreases with just the wool and regular yarns. Why waste those precious novelty yarns and fibers on the bottom? Begin decreases as follows: Round 1: SSK, k2, K2tog to marker. Round 2: Knit a round to marker Round 3: SSK, knit 1, K2tog to marker. Round 4: Knit a round to marker Switch to double points. You may be more comfortable switching earlier than this. Round 5: SSK, K2tog to marker Cut yarn, leaving about an 8" tail. Thread yarn end into tapestry needle. Insert needle through each stitch and remove from needle, pull tight & knot well, weave end in an inch or so and cut. Felt in top load washer with small load water level, hottest water, 1 T. dish soap and some old jeans to help with agitation. Check after first agitation cycle BEFORE it gets to drain and rinse to see if it has felted enough. (l had to go through 5 agitation cycles.) When the felting is done let washer finish cycle. Remove, shake and shape. it will need a trim. Allow to dry thoroughly. Dress nest with optional embellishments if you choose and, of course, eggs...or maybe jewelry?
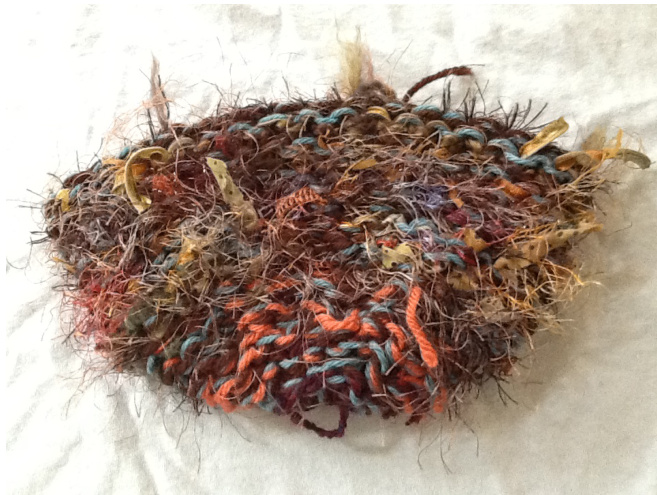
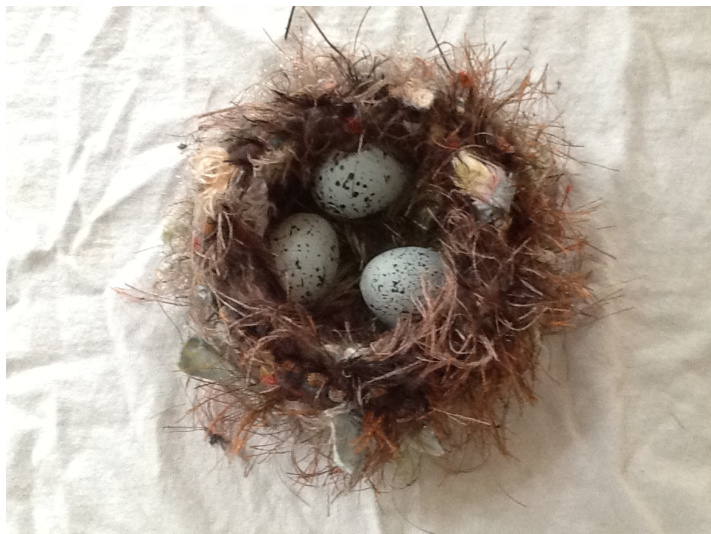
At left: An hour's "nest" knitting ready for felting. Above: The same nest after felting and a trim


