Frankie's Knitted Stuff

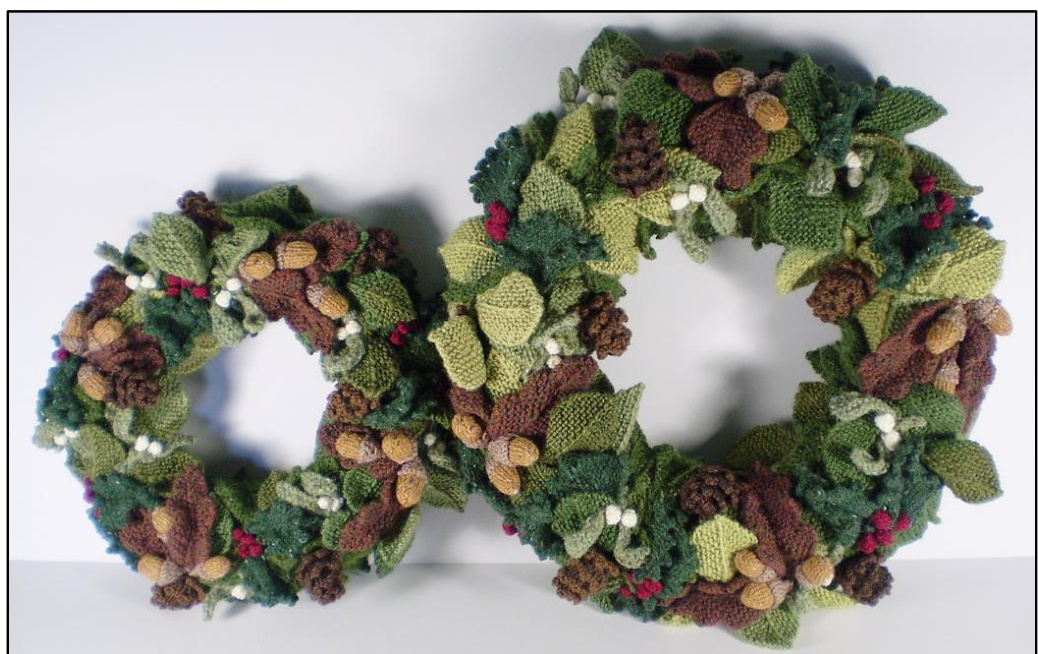
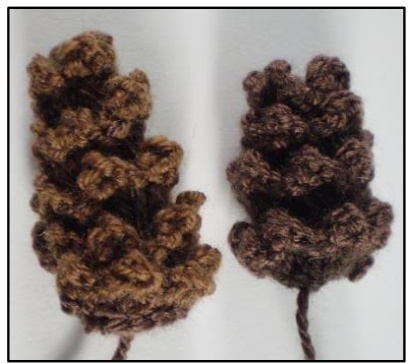
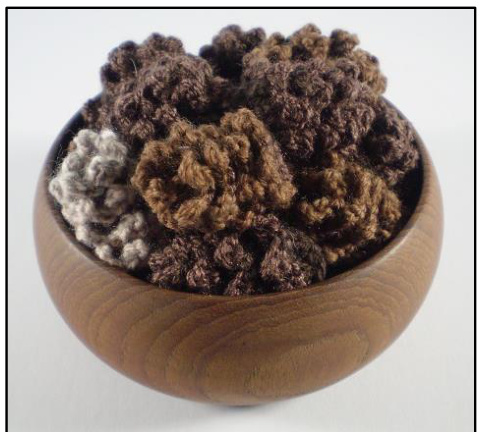
Fir cones add some texture to the wreath and make a change from knitting leaves. These are a knitted strip, shaped with short rows and then rolled up and sewn to make the cone shape. A picot cast off in a lighter shade gives them that distinctive edge. You can use various shades of brown for your fir cones, I used three shades, from dark to light they were: Sirdar Country Style DK (155 m / 50 g, shade 0530), Stylecraft Special DK (295 m / 100 g) in Walnut and Rowan Pure Wool 4 ply (160 m / 50 g, shade 461). They were knitted with 3.25 mm / US size 3 needles. For a frosted effect you could work the cast off row with cream yarn. The big cones are about 4 cm long and the small ones 3 cm (1%2" and 1"). 40 g of yarn will make about a dozen fir cones; I made six for each wreath.
Big Cones
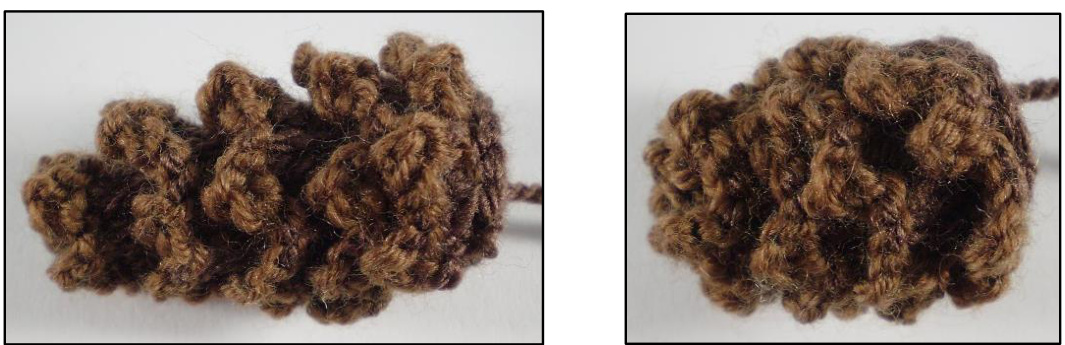
Using the cable method and the darker shade, cast on 48 stitches. Row 1: K8, turn (there is no need to wrap the yarn). Row 2: (and all even numbered rows) Purl. Row 3: K16, turn. Row 5: K24, turn. Row 7: K32, turn. Row 9: K40, turn. Row 11: Knit all 48 stitches. Now, using the lighter shade, cast off with the picot edge cast off. This is the most tedious part of the pattern but it makes all the difference. \*Cast on 2 sts (cable method), cast off 3, cast on 2, cast off 4, repeat from \* to the end of the row. Darn in all the ends and attach a new length of yarn to the cast on edge at the widest part of the strip. Now roll the strip tightly, with the knit side of the stocking stitch on the outside. Keep the cast on edge level so that the other edge spirals. Oversew the edge as you go to hold it all together. When it is all rolled up you will have a long, pointed cone. You can leave it like this or take the yarn up through the centre and back down again to pull it into a squatter shape as I have done. Leave the tail of yarn to sew the cone to the Wreath.
Small Cones
Using the cable method and the darker shade, cast on 40 stitches. Row 1: K8, turn. Row 2: (and all even numbered rows) Purl. Row 3: K16, turn. Row 5: K24, turn. Row 7: K32, turn. Row 9: Knit all 40 stitches. Using the lighter shade, cast off using the picot edge cast off: \*Cast on 2 sts (cable method), cast off 3, cast on 2, cast off 4, repeat from \* to the end of the row.
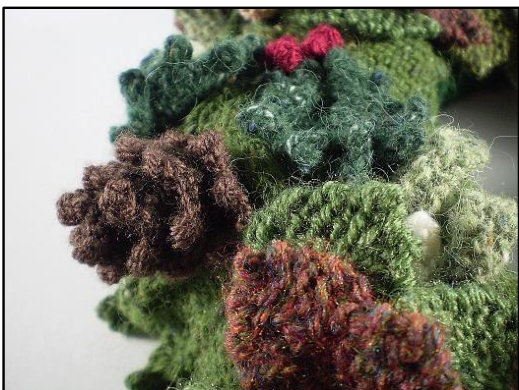
Sew the fir cone together in the same way as the big cone. Pin the fir cones to the wreath (you'll need pins with long heads for this) and then sew them in place, using the yarn tails.
Abbreviations
st / sts stitch / stitches K knit
Frankie Brown, 2013. My patterns are for personal use only and should not be used to knit items for sale. Please do not use them for teaching purposes without my permission.


