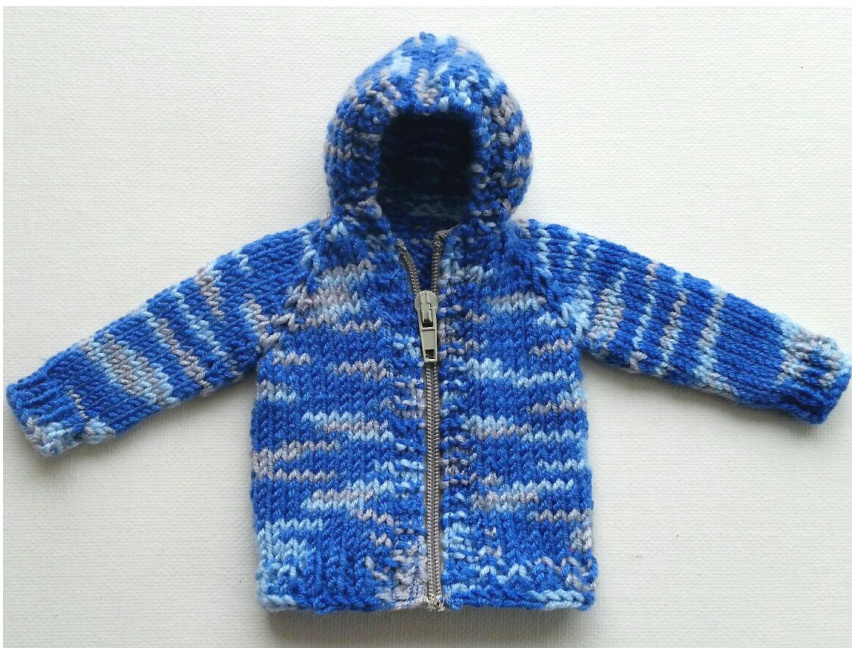
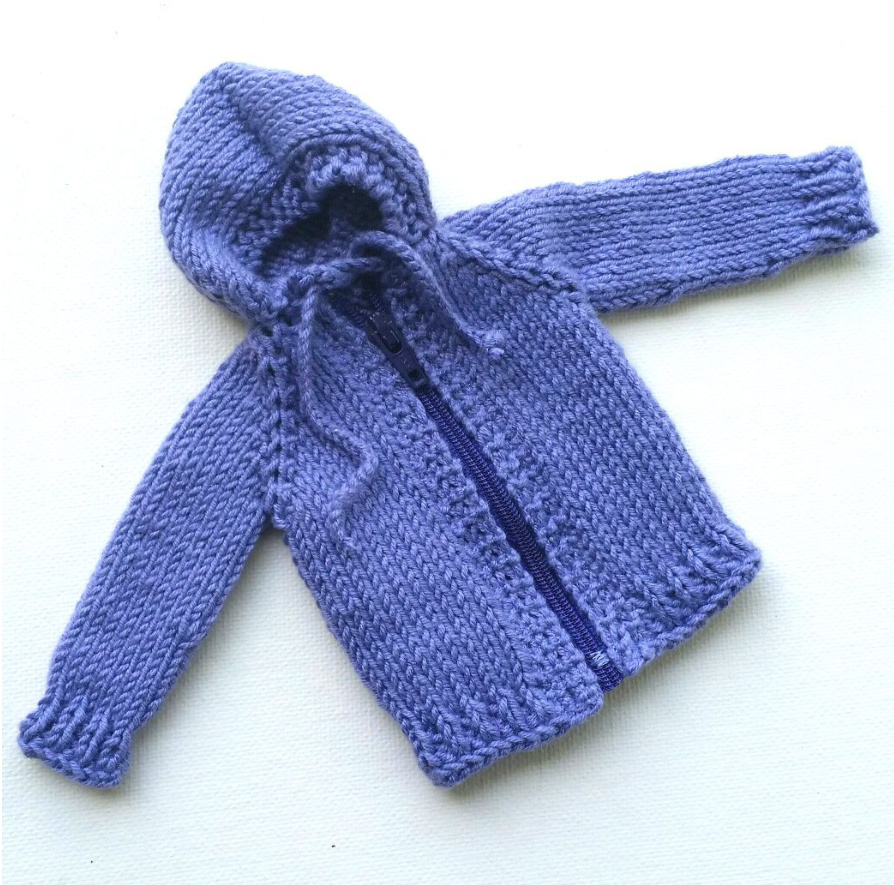
Ken Doll Hoodie By Claudia A. Lowman
This knitted pattern is a hoodie for Ken and similar male dolls. It is worked flat, in stockinette stitch, from the neck down. The sleeves are raglan sleeves. The hoodie is added after the basic cardigan/jacket is complete. This means that the pattern can also be a stand-alone cardigan without adding a hood. The basic cardigan has a edging that is replicated on the hoodie to match edges and to serve as a border for sewing the zipper. The directions are segmented into four parts: I. Basic Cardigan, Il. Sleeves, Ill. Hoodie, IV. Zipper
Supplies:
1. Yarn: fingering weight, sock, sports weight yarns 2. Needles: · size U.s. 3 [3.25 mm] (required) · size U.s. 2 [2.75 mm] (optional) 3. Zipper: ordinary zipper to match selected yarn. Using an ordinary zipper means that the hoodie will be “step in," unless you use a separating zipper. Knitting Abbreviations: cO = cast on Sts = stitches K = knit P = purl Fb inc = increase in the front and back of the stitch Dec = decrease by knitting two stitches together PM = place marker Ssk = slip slip knit (decrease that leans left)
BASIC CARDIGAN
Using size 3 needles, C0 18 stitches. Row 1: K3, fb inc in each of the next 12 sts, K3 (30) NOTE: on ALL rows (knit and purl) of the sweater, knit the first and last three stitches to make an edging. Knit these somewhat loosely so that you can sew on the zipper later with greater ease because you will have to stretch them. Row 2: K 3, P 3, PM, P 4, PM, P 10, PM, P 4, PM, P 3, K 3. NOTE: For the next several rows until the sleeves (those stitches between markers 1 and 2 and 3 and 4) reach 18 stitches each, continue in this manner: 1. Knit Rows: K 3, fb inc BEFORE and AFTER each marker. 2. Purl Rows: K 3, P across to the last 3 sts, K 3. After the purl row when the sleeves reach 18 sts, on the next knit row: K 13, place 18 sts onto a holder, K 24, place 18 sts onto a holder, K 13. Make sure that the stitches under the arm sleeves are tight when moving from cardigan front to cardigan back and then to the other cardigan front. Later, when the sleeves are done you can close up any hole left under the arm when finishing. Continue stockinette st pattern with the same stitch pattern (always starting and ending with K 3 on the purl rows and all knitting on the knit rows) until the cardigan measures 4 inches (about 10 cm) or desired length. On a knit row: K 3, (K 1, P 1) across until you reach the last 4 sts. Fb increase and then K 3. Remaining knit and purl rows: K 3, (K 1, P 1) across until you reach the last 3 sts, K 3. Repeat until you have the desired ribbing rows, about 4 rows. End on a PURL row to work from the backside with Grandma's Favorite Bind Off to make the lower edge slightly stretchier. (The edge looks more uniform working it from the backside.+ Here is the link to Grandma's Favorite Bind Off: https:/ /www.youtube.com/watch?v=tYMFEYvCBRE
SLEEVES
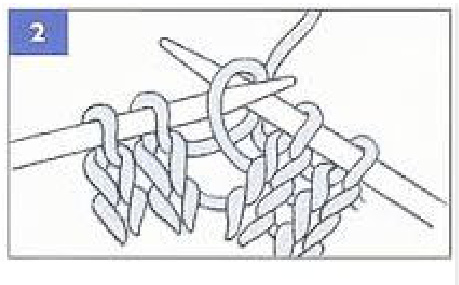
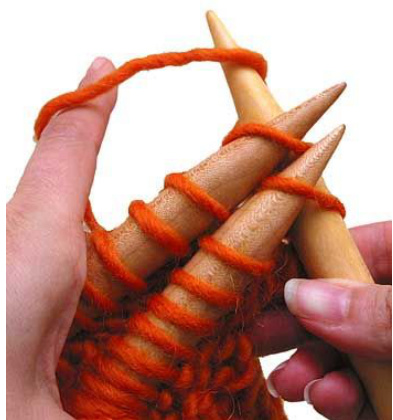
Place the 18 stitches from one of the sleeves onto needles. (l prefer to work the sleeves in the round but you can work them flat, if you prefer). Work the sleeves in stockinette st. When the sleeves are about halfway complete, dec at the start of a row. (17) When the sleeve length is about 34" complete, dec at the end of the round/row. (16) In another row or two switch to size 2 (2.75 mm) needles and continue for a few rows before starting K 1, P 1 ribbing. I do about 4 rows of ribbing. End on a K row so you can finish with Grandma's Favorite Bind Off method for a more flexible ribbing. HOODIE With the right side of the cardigan facing, pick up 18 stitches at the neck edge starting at the right edge and moving across to the left. Row 1: From the purl side, K 3, fb inc in each of the next 12 sts, K 3. (30 sts) Row 2: K across. Row 3: K 3, purl to the last 3 sts, K 3. Row 4: From K 5, inc between sts\*, (K 4, inc between sts) four times, K 4. (36 sts) \*Here's how to execute the increases in Row 4: Worktotheplacewheretheincreaseistobemade. Inserttheleftneedlefromfronttobackintothe horizontalstrandbetweenthetwostitches:Knitthe stitchthroughthebackloopasshown.Onthepurl side,inserttheneedlefromfronttobackandthenpurl thestitchthroughthebackloop.
Note: If the doll head is larger than Ken's, repeat rows similar to rows 3 and 4 for additional increases but stagger them so they are not on top of the previous increases. Row 5: K 3, P across to the last 3 sts, K 3. Repeat rows 5 and 6 until you reach about 3-4 rows below the crown of Ken's head. You may have to stop and put the sweater on Ken, sleeves and all to get the accurate stopping point. Length of the hood should NOT go all the way up to the top of the head because there are shaping rows to complete before closing up the hood.
Shaping rows:
On a K row, K 15, ssk, PM, K 2, PM, K 2 tog, K the remaining sts. (34) Purl Row: K 3, P across to the last 3 sts, K 3. Knit Row: K up to two stitches before the PM, ssk, K 2, K2 tog, K the remaining sts. (32) Purl Row: K 3, P across to the last 3 sts, K 3. Repeat the last two rows one more time. (30)
Three needle bind off:
You will need three needles to finish. Place half of the sts on a needle and the other half on another needle. Place the two halves right side together so that purl rows face you. Bind off by knitting through two stitches at a time and binding off as usual. Refer to a youtube video if you need a reminder on binding off with this method or if it is new to you. Weave in all yarn ends. Turn to right side.
ZIPPER
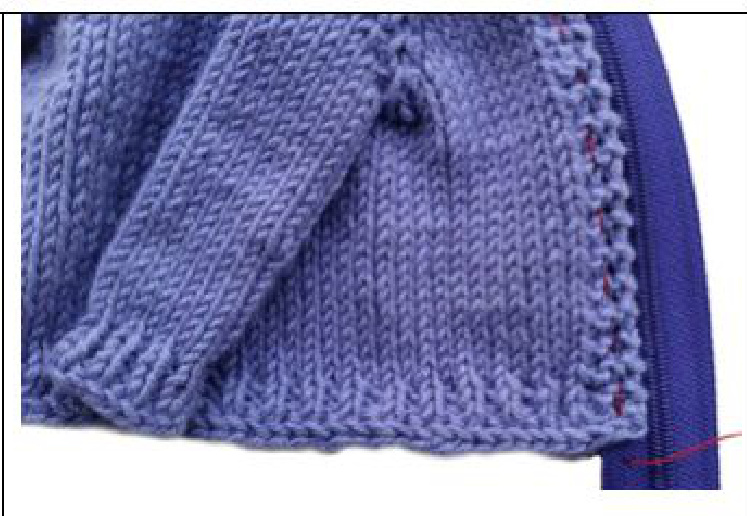
1. Select a zipper for the hoodie. Whatever is on hand, matches, and has plastic teeth is perfect. 2. Finish the upper fabric end of the zipper so that it will not fray. Possibilities include folding over the upper fabric ends to the inside and tacking in place before machine sewing or by pinking the ends. 3. With the zipper closed, pin one side of the zipper to the hoodie, slightly stretching as you go making sure that the bottom of the placket (front opening on either side of the hoodie) matches the lower edge. The placket will tend to pull up rather than be the same as the rest of the garment. CAUTioN: if you don't stretch the placket as you go, you might have the same issue I had with my first hoodie. See how the bottom edge is not level with the rest of the hoodie on the second example? It pulls up. That's the insidebackofthehoodieshowingthrough. 4. Hand baste the zipper to the finished edge: · using a contrasting color of thread so you can easily remove the stitches later, make running stitches · and stitching a line down the placket (not too close to the zipper edge) because you will be machine stitching there 5. Repeat steps 3-4 for the other side of the zipper, making sure that the lower edges of the hoodie match.
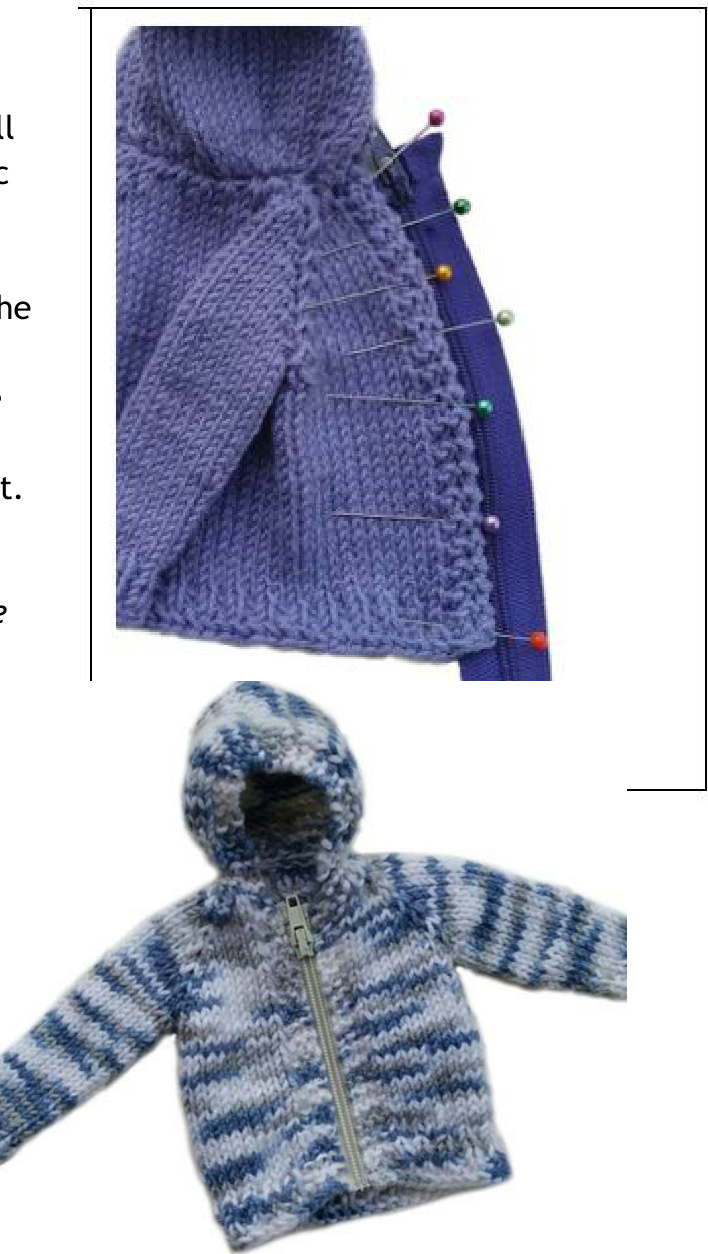
If sewing is mostly frustrating to you, on the next page I am going to share a few tips on inserting this zipper that might spare you some aggravation. Maybe these tips will even help you going forward, especially if you want to work with knits but you haven't had good luck sewing them in the past. Comfortable as a seamstress? I'm recommending that you read this section anyway so you don't have to reinvent the wheel to finish this project. It's already been tried and tested. Okay, here is the BEST tip I learned from Bishop sewing classes a long time ago: Get a little scrap of fabric (doubled) to run through the machine. It will look like the photo ol
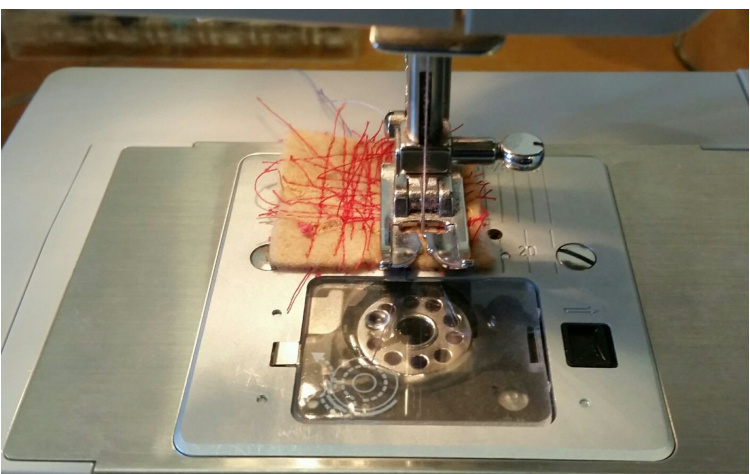
7. UNZIP the zipper on the hoodie way below the lower edge. 8. Starting with the left side of your hoodie (as it faces you), insert the needle into the top of the placket and close to the zipper teeth. Lower the foot in place to start sewing. Here's how this will look (right). See the scrap in the background? It's still there. Threads have not been clipped. Because you have not clipped the threads you won't have loose threads getting caught down in the machine to mess everything up. 9. LEAVE the scrap there for the time being. Stitch down the length of the placket close to the edge near the zipper teeth. When you reach the bottom, sew the left: As you can see, I had previously been sewing with red thread so the crisscross lines in red are visible on the scrap. However, for this project, I switched to lavender thread for the top and purple for the bobbin. 6. Sew the scrap near to the end, lift up the foot and the needle and move the scrap a few inches out of the way. You can see the scrap piece moved out of the way in the lower photo here.
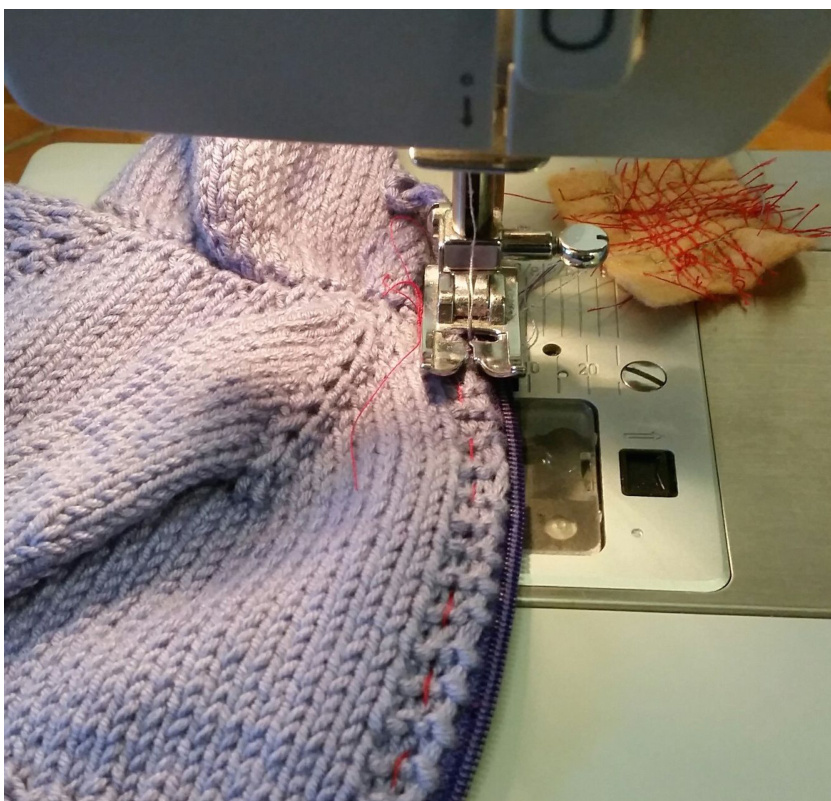
across some stitches (three worked for me) to make a parallel line of sewing back up the placket. This line is not parallel to your first line of stitching but not all the way out to the far placket edge-only about three stitches over so you can catch the zipper fabric. Sew back up to length the top. At the top, sew across to the starting point and secure your threads with somereverses. 10. Clip the thread to the hoodie, but not to the scrap. Sew a line on the scrap to be ready for the next machine sewing without having loose thread ends. 11. Now you are going to sew the other side of your zipper, which was also previously basted in place. However, before you start, zip up the zipper and double check to see if your lower edges match. If something is going to be off, this is the critical place. When you are sure that it is going to be good match on the left and right sides, unzip. To start sewing, this time you will start at the lower edge of the right side of the hoodie near the zipper and sew up to the top, sew over a few stitches, then down to the lower edge. Stitch across to the beginning to complete your long rectangle of sewing (up, over, down, across). 12. This time, cut threads to both the hoodie and the scrap. Cut any loose threads to the hoodie. Remove the basting. Look on the back of the zipper to be sure that you caught the second line of sewing to the zipper. If not, correct with additional sewing. 13. Zip up the zipper. Zig zag across the lower end of the zipper (not exactly at the bottom edge but near it) BEING CAREFUL not to sew through the back of the hoodie. See photo to the right for placement of the zig zag stitches. You can just make them out in this picture as a lavender little square near the lower edge of the zipper. Once you have zig zagged half ten or so stitches, the zipper tab will only zip to the stitching. This will make it a “step into" hoodie. In other words, using a regular zipper means it is not a separating one but the hoodie is open enough that it is an easy on/off for Ken. 14. Now, cut off the unneeded end of the zipper-zipper teeth.
All done!


