Brain Slug

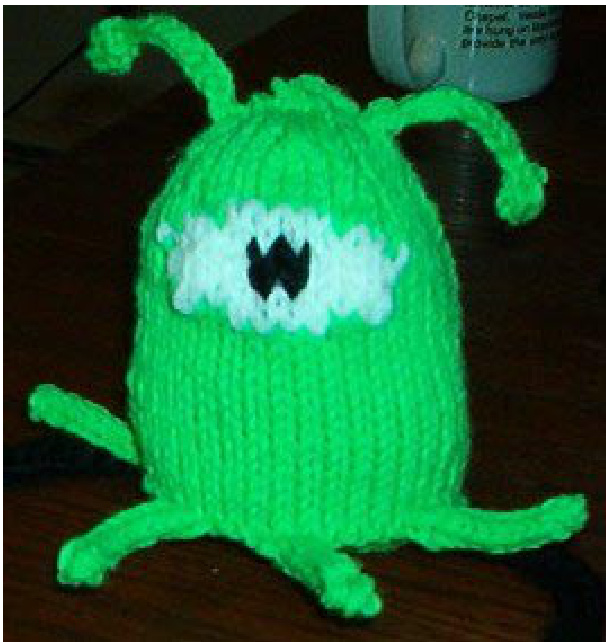
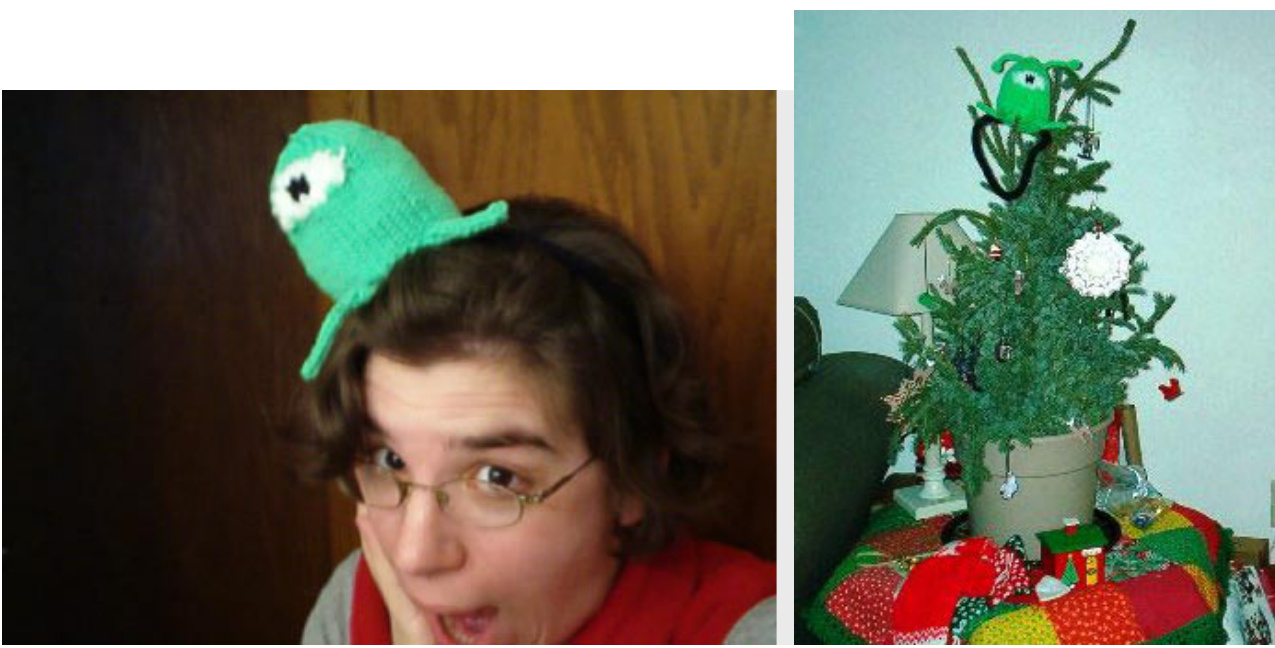
A Futurama-style brain slug. Worn with a headband in a color that matches your hair, the effect can be startling. Knits up quick for Halloween parties and gifts. As the designer of this pattern, I would love to hear your comments on it. Inspiration taken from this pattern is encouraged. However, this pattern cannot be put to any commercial use, including selling the pattern in this or any other format, teaching a forpay class, or selling items made from this pattern (whether for charity or profit), without prior written permission from the author . Thisisafree patt.fyou have paid forthis pate,please contact meby emailng TJ@johnnysstew.com. TChemGrrl, Copyright 2006 Fits any creature with a sufficiently rich, delicious brain.
What you'll need:
-Ability to do, or willingness to learn: Casting on, knitting, purling, working in the round, increases and decreases, picking up stitches, I-cord knitting, and stuffed-animal construction. Optional: either intarsia or duplicate stitching, or both, but not neither. -Less than 50 yards bright green yarn -Very small amounts (less than 5 yards) of white and black yarn. -A few yards of yarn for the headband, OR a barrette and a glue gun. -Double-pointed needles, a size or two smaller than recommended for your yarn. I used worsted weight yarn and size 6 needles, and knit somewhat tightly. -Yarn needle to weave in ends. -Stuffing. Polyfil stuff works. So do scraps of yarn.
Notes:
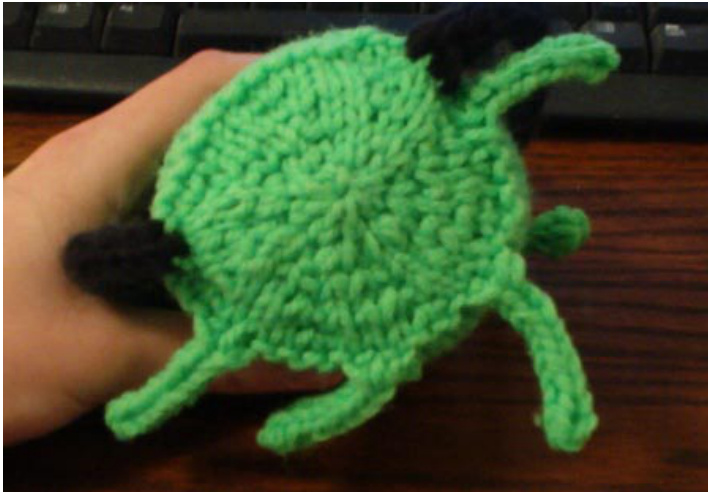
The cast-on should be done loosely enough to put stuffing through the hole. After stuffing, it will be sewn shut. Leave a good length of yarn at the cast on end so you can sew the hole shut. The brain slug is constructed by knitting a flat circle for the base, then creating what is in essence a tiny hat. The legs, antennae, and headband are created by picking up stitches from the plane of flat stockinette and working perpendicularly from there (see picture below). This pattern contains many notes. Fear not, they're mostly advice and opinion.
Directions:
Base:
Cast on 8 stitches onto double-pointed needles, and connect the ends without twisting the stitches. Knit two rounds plain, then increase by 8 stitches every other round until there are 40 stitches. Knit one round plain, then purl one round (this provides a "folding point" from which the visible portion can be worked).

Head:
Continue kniting plain with the green yarn until what you have is slightly wide in diameter than it is tall (about 15 rows). Now it comes time to make a choice--do you want to do the eye in duplicate stitch or intarsia? I did the white part in intarsia and the black in duplicate stitch, but if you really love stitching you may want to do both that way, and if you really like intarsia, you can do them both that way. A description of the eyeball, both in word and chart format, are shownbelow. [Note: True intarsia in the round doesn't work. (The yarn ends up on the wrong side. Try it!) However, there are a few ways to cheat, which can be found by searching the phrase "intarsia in the round". I chose to strand across the inside by loosely bringing the white yarn from the left side to the right when I reached the spot where I started working the white yarn. This method is A: somewhat wasteful of yarn, B: very ugly from the backside. Fortunately, only a small amount of yarn is being used, and the back side will never be seen. However, there are other methods, all of which are reasonably straightforward and easy-to-use. Pick your poison.] Place a marker. The descriptions below begin at this marker. If you choose to duplicatestitch this whole section, knit 6 plain green rows and return to the chart when the slug has been stuffed.
Eye (written directions):
Round $1\!:\!\mathrm{k}3$ green, ${\bf k}4$ white, work green for the rest of the row. Round $2;{\bf k}1$ green, k8 white, work green for the rest of the row. Round $3\colon\mathbf{k4}$ white, $_{\mathrm{k}2}$ black, ${\bf k}4$ white, work green for the rest of the row. Round $4!\,\mathrm{k4}$ white, k2 black, k4 white, work green for the rest of the row. Round $5;{\mathrm{kl}}$ green, k8 white, work green for the rest of the row.\ Round 6:k3 green, k4 white, work green for the rest of the row.
Eye (chart):
Blank square: green X in square: white

Finishing the eye, top of the head:
Cut the white and black yarns, if you used them, and weave in the ends now because you won't be able to access them once you close up the top. Work 2 rows plain, then decrease by 4 stitches every other row until 4 stitches remain. Cut the yarn about a foot away from the work, weave this into the last 4 stitches, and weave in the ends.
Antennae:
[Note: A variety of effects could be created depending on where you choose to place the antennae and legs. I think of placement of features as being the creative component to toymaking. In other words, cheerfully disregard the well-meaning advice in this and the next section.] Pick up 3 stitches in a spot slightly to one side and towards the front of the very top. In other words, if I'm looking down at my brain slug, and the eye is at 6 o'clock, the antennae sprout out at about 4 and 8 o'clock, a little in from where the tip of the hour hand would be. Knit these three stitches as I-cord until the antennae is long enough. To make the bobble on the end, increase once in each of the 3 stitches, leaving 6. Work one row plain, then do two triple-decreases, leaving 2 stitches. Cut the yarn about a foot away from the work, and weave these two stitches into the bottom of the bobble, making a semi-spherical bump on the top of the antennae. Repeat this process for the second antennae.
Legs:
[Note: I stuffed my brain slug before knitting on the legs. I found this gave me a firmer surface from which I could more easily pick up stitches, but your mileage may vary. If you would like to do this, skip to the finishing section, then come back here.] With the green yarn, pick up 3 or 4 stitches on the outer edge of the base of the brainslug, just beneath the purled row, in a spot where you'd like a leg to be. Work these stitches as I cord for about 10 rows. Cut the yarn about 12 inches from the work, weave the yarn into the live stitches, and carefully bring the yarn down the center of the I-cord. This can seem a little fiddly at first, but it makes the legs a litle stiffer and more moldable. Repeat until you like the number of legs your brain slug has.
Headband:
On one side of the brain slug's base (underneath the purled row), pick up 4 stitches, in whatever yarn you like. Work these 4 stitches as I-cord until it's long enough to fit around your head. Cut the yarn about a foot from the work, and weave the live stitches to the base of the brain slug opposite the side on which you started the I-cord. Alternate method: hot-glue abarrette or hair band to the base of the brain slug. Alternate method #2: Sew an elastic or ribbon to either edge of the base.
Finishing:
(Note: A tip for people new to making stuffed toys: stuffing usually compacts over time, so put in enough stuffing for your brain slug to be slightly firmer than you'd like it to be long-term. This process always uses more stuffing than you'd think. Or at least, it always takes more stuffing than $^{*}\mathrm{I}^{*}$ think.) Stuff your brain slug via the hole created by casting on. When your brain slug is firm enough, take the dangling yarn from the cast on edge and weave it through the stitches around this hole several times and pull tight to close it. Tie a knot if it doesn't seem secure, and weave in the end. If there is a part of the ye you didn't make using intarsia, use duplicate stitch or embroidery to put it on. Weave in and trim any remaining ends. Wear it with pride. Or shame.


