Frankie's Knitted Stuff
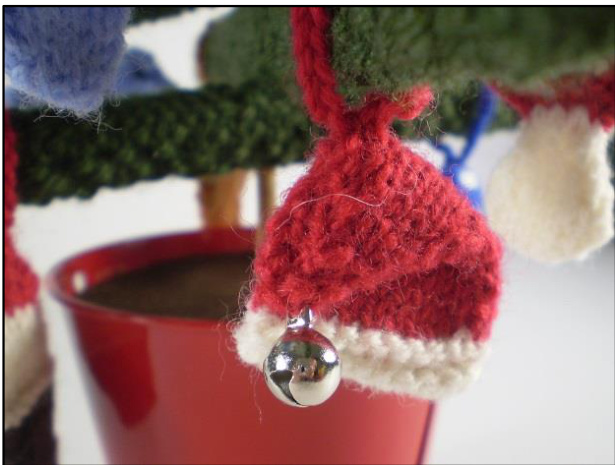
A Christmas hat decoration for your tree, complete with tiny bell. The hat is 3 cm / 1" tall and is knitted with thin 4 ply yarn on 2.25 mm / US size 1 needles. Notes on making these tiny decorations are at the end of the patter
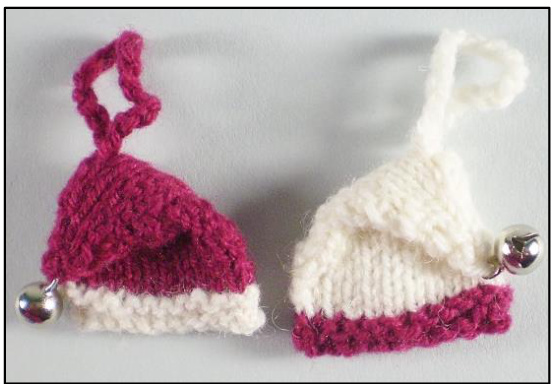
Using your hat colour cast on one stitch and knit into the front and back of it (2 sts). Row 1: Kf&b, K1 (3 sts). Row 2: Purl. Row 3: Knit. Row 4: Purl. Row 5: K1, ml, K to last st, ml, K1. Row 6: Purl. Row 7: Knit. Row 8: Purl. Repeat Rows 5 - 8 twice more. Row 17: K1, ml, K7, m1 K1 (11 sts). Row 18: Purl. Row 19: Knit. Row 20: Sl first st pwise, P to end. Now change to the hat trim colour. Row 21: Knit. Row 22: Knit into the back of the first st, K to end. Row 23: Knit. Cast off knitwise. The back of the hat is knitted in exactly the same way as the front. With the wrong sides facing, oversew / whipstitch the front and back together. Sew a small bell to the top of the hat and then fold the point over and sew it to the top of the trim on one side.
Hanging Loop
Using a 2.5 mm crochet hook and your hat colour make 20 chains, a length of about 7 or 8 cm / 3". Sew the two ends to the highest part of the hat.
Abbreviations
st / sts stitch / stitches K knit P purl kf&b knit into the front and back of the stitch m1 make 1 by lifting the thread before the next stitch and knitting into the back of it sl1 slip one stitch pwise purlwise Frankie Brown, 2015. My patterns are for personal use only and should not be used to knit items for sale. Please do not use them for teaching purposes without my permission.
Making Tiny Decorations
Although these little decorations are quick to knit, their size means that they can be tricky to sew together. Here are a few general tips which might make the process a bit easier. In most cases the decorations are knitted in two parts and then sewn together; they are not stuffed. You may think it would be easier to knit them in one piece, thereby giving less ends to sew in but, with shapes this small, it is important that the two sides are identical and this is easiest to achieve by knitting them separately. C There will be quite a few tails of yarn for such tiny things. I recommend that you leave them and then use them to sew the decorations together, changing between different coloured tails as you get to them and darning in those you don't need. The exception to this is where the decorations are knitted in one colour. For these, darn in all the ends except one which you can use to sew the pieces together. You don't have to be too careful about darning in the ends actually; I mostly just threaded them through the decoration to the other side from where they started and cut them off. It's often easier to add any embroidery after sewing the front and back of the decoration together. I know this sounds odd but, otherwise, all those yarn tails get in the way and it's difficult to hold such a tiny piece of knitting. It's much more stable when it's sewn up. The two sides of the decorations are oversewn / whipstitched together, with the wrong sides facing. When you are joining cast off edges, work through the outside loop of each stitch only for a tidy join.


