Frankie's Knitted Stuff
A Jacob's Ladder is a traditional toy, normally made from wooden tiles linked by ribbons. When held vertically the tiles appear to travel down the line as they flip from side to side and the ladder can also be formed into various shapes and patterns, making it ideal for storytelling.
This version is made with plastic canvas tiles covered with brightly coloured knitted squares which are linked with short knitted ribbons. The knitting is very simple but assembling the toy takes a little while and must be done correctly if the finished toy is going to work.
The Plastic Squares
For these you will need Ultra Stiff plastic canvas with seven bars to the inch; a piece a little over 6" x 8" will be big enough. Cut twelve squares, each 14 bars or 2" square and then snip off the sharp corners to stop them poking through the knitting.
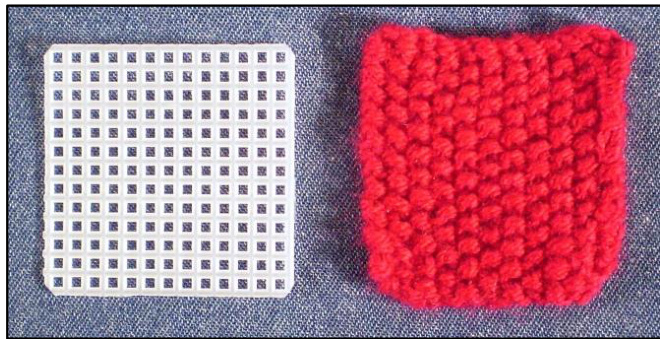
The Knitted Squares
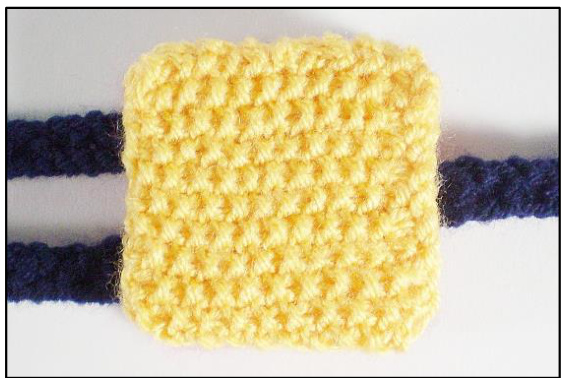
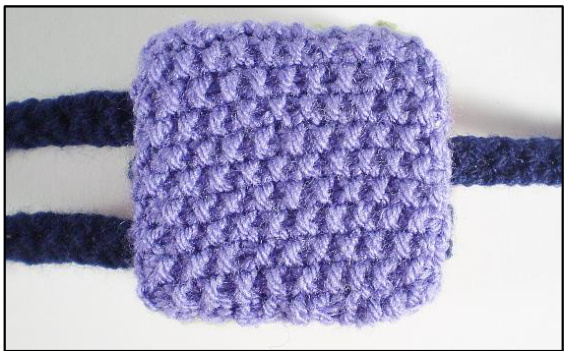
These are knitted with DK weight yarn on 4 mm / US size 6 needles, working to a tension of 11 stitches and 20 rows to 5 cm / 2"2 using moss stitch (US seed stitch). I used six shades of Stylecraft Special DK (295 m / 100g); you can use other yarn but I would recommend still choosing six colours as it will help to keep track of what you are doing when assembling the tiles later. Using the cable method cast on 11 stitches and work 20 rows in moss stitch: Every row: K1, \*P1, K1, repeat from \* to end. Cast off, still working in the moss stitch pattern. You will need to knit 24 squares all together, four in each of the six colours. Don't worry if the knitted squares are slightly smaller than the plastic ones, they will stretch to fit. Sew the knitted squares round the plastic squares, taking special care to cover the corners. You will now have 12 knitted tiles, two in each colour. At this point I had a lot of fun arranging the tiles in pretty patterns and taking photos but I shall just show you this one.

The Knitted Ribbons
These aren't pretty like the squares but they are the most important part of the project. I knitted mine with navy blue Stylecraft Special DK, again using 4 mm needles. Using the cable method cast on 25 stitches. Work one row in moss stitch and then cast off in pattern, knitting the last two stitches together at the end of the cast off row. Leave the two tails of yarn, these will be used to assemble the toy. nitl5ottheser1bhons.eachoneshoiild lesareooinotobaieenoiiohroonmto.nmoie
Assembling the Ladder
Follow these instructions carefully, one step at a time, making sure that your ladder matches the pictures before going on to the next instruction.
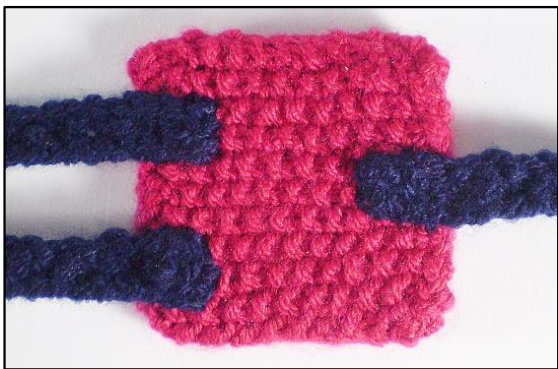
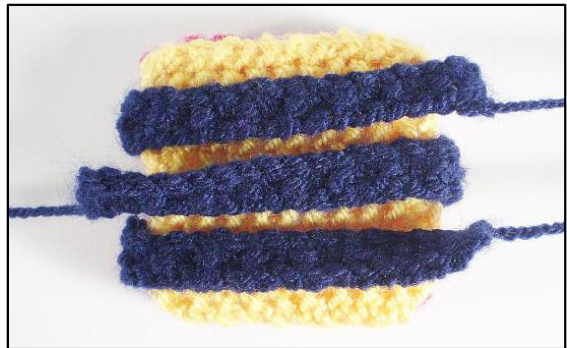
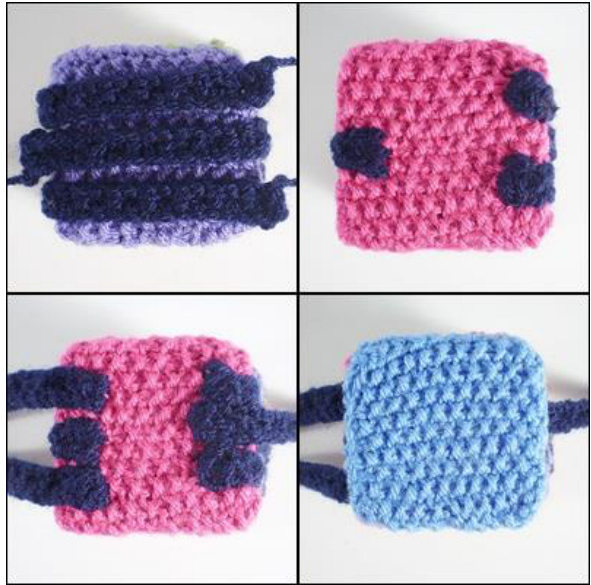
Take the first tile and sew three ribbons to it, one on the right and two on the left as shown. Position each ribbon 1.5 cm / 1/2" in from the edge. This is important! Now put the second tile on top of the first and sew them together.
Oversew all round, working through the inner knitted squares only; you can sew through the knitted ribbons when you get to them.
Fold the ribbons back across the top of the second tile but don't sew them down. You will now have two ribbons on the right side and one on the left. Place the third tile on top of the other two and sew the ends of the three ribbons to it as shown.
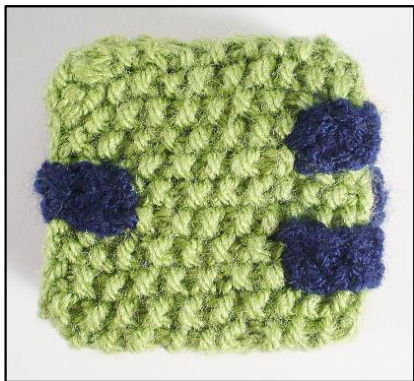
Again, sew the ends of the ribbons 1.5 cm in from the edge.
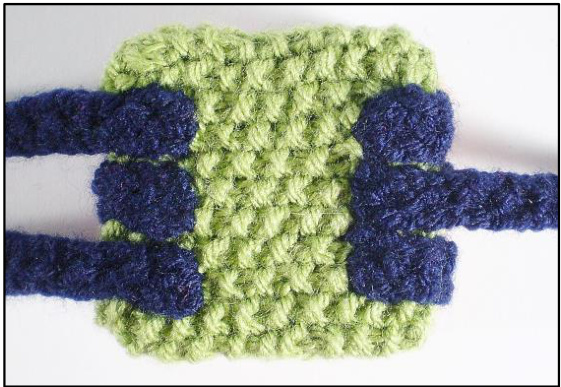
Now add three more ribbons to this tile, one on the right and two on the left. You can line these up with the last set of ribbons rather than measuring.
Add the fourth tile and sew it to the third one. You will now have two pairs of joined tiles, linked together with ribbons. If you look back to the last page you will see that this most recent picture is the same as the one of the first pair of tiles (with the yellow tile on top). From now on you can repeat the four steps illustrated on this page until you have used up all the knitted ribbons. So, fold the ribbons across the completed pair of tiles, add the next tile and sew the ends of the ribbons to it. Then add another set of ribbons before topping with another tile and sewing the two tiles together.
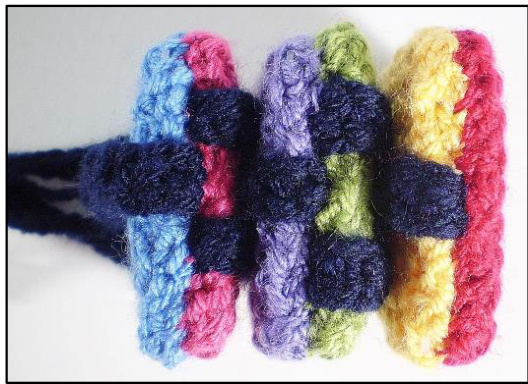
When you have three pairs of tiles you will have used all your six colours once and the ribbons will show in a chequerboard pattern on the side of the tiles.
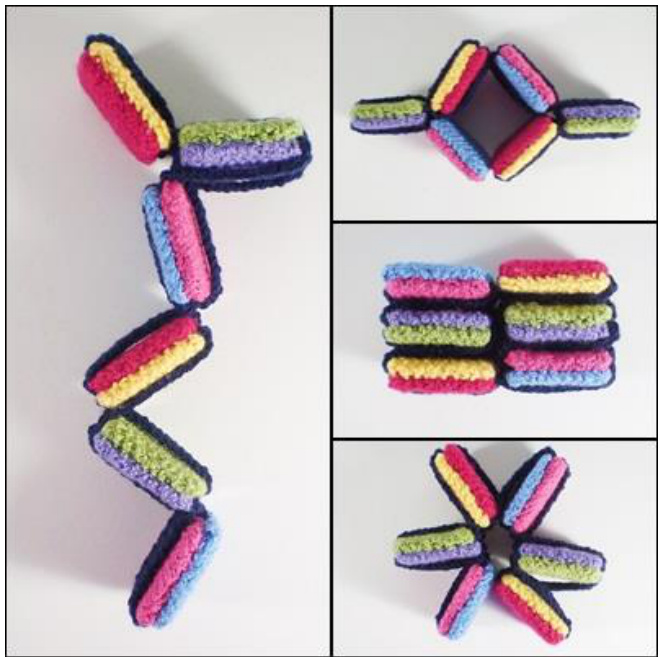
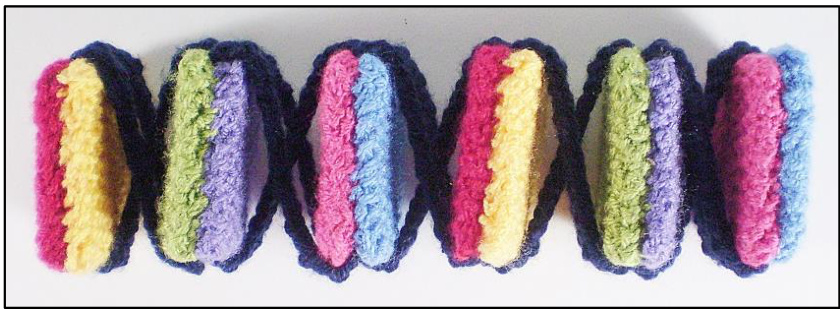
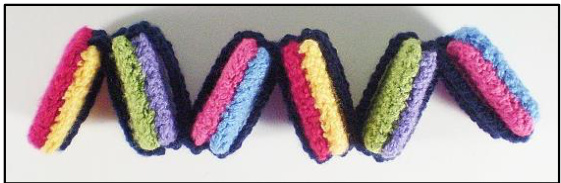
Carry on adding tiles until you run out of ribbons. With the final pair of tiles you will skip the third of the four steps pictured above and sew the last tile down without adding more ribbons. Your finished Jacob's Ladder should look like this; if you pull gently on the ends the ribbons will form crosses between each pair Of tiles.
To make the tiles appear to move down the ladder, hold it up by one end and then fold the top pair of tiles down so that it lies against the second pair.
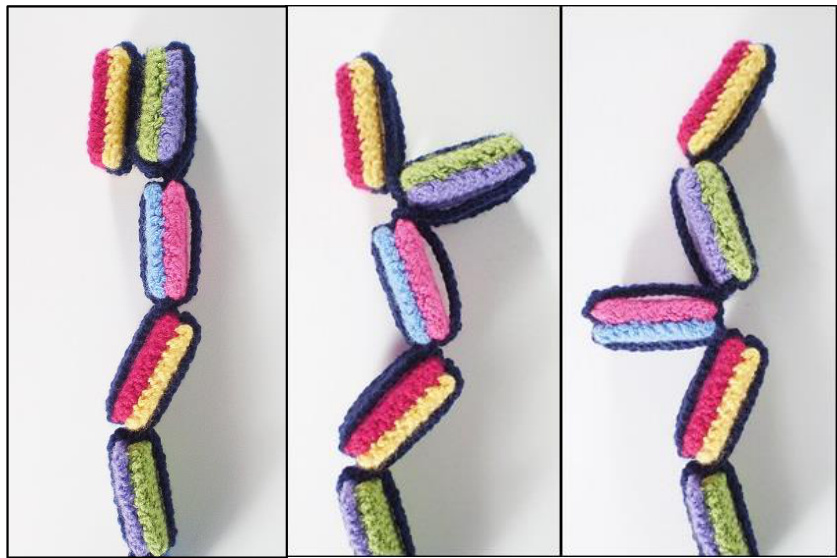
The second pair of tiles will pivot away from the first and touch the third pair, which will in turn pivot out to the side and so on ... What to do if the tiles ‘stick' First, try shaking them. The ladder moves more smoothly after a few goes when the ribbons have settled into place. If this doesn't work then the ribbons are either too short or have been sewn to the tiles more than 1.5 cm in from the edge. In either case I would suggest you try wetting and pinning the ladder out to stretch the ribbons before resorting to taking the whole thing apart. Now see how many shapes you can make with this fascinating toy. Just for starters, can you make a table, a bed, a snake and a star?
Frankie Brown, 2015. My patterns are for personal use only and should not be used to knit items for sale. Please do not use them for teaching purposes without my permission.


