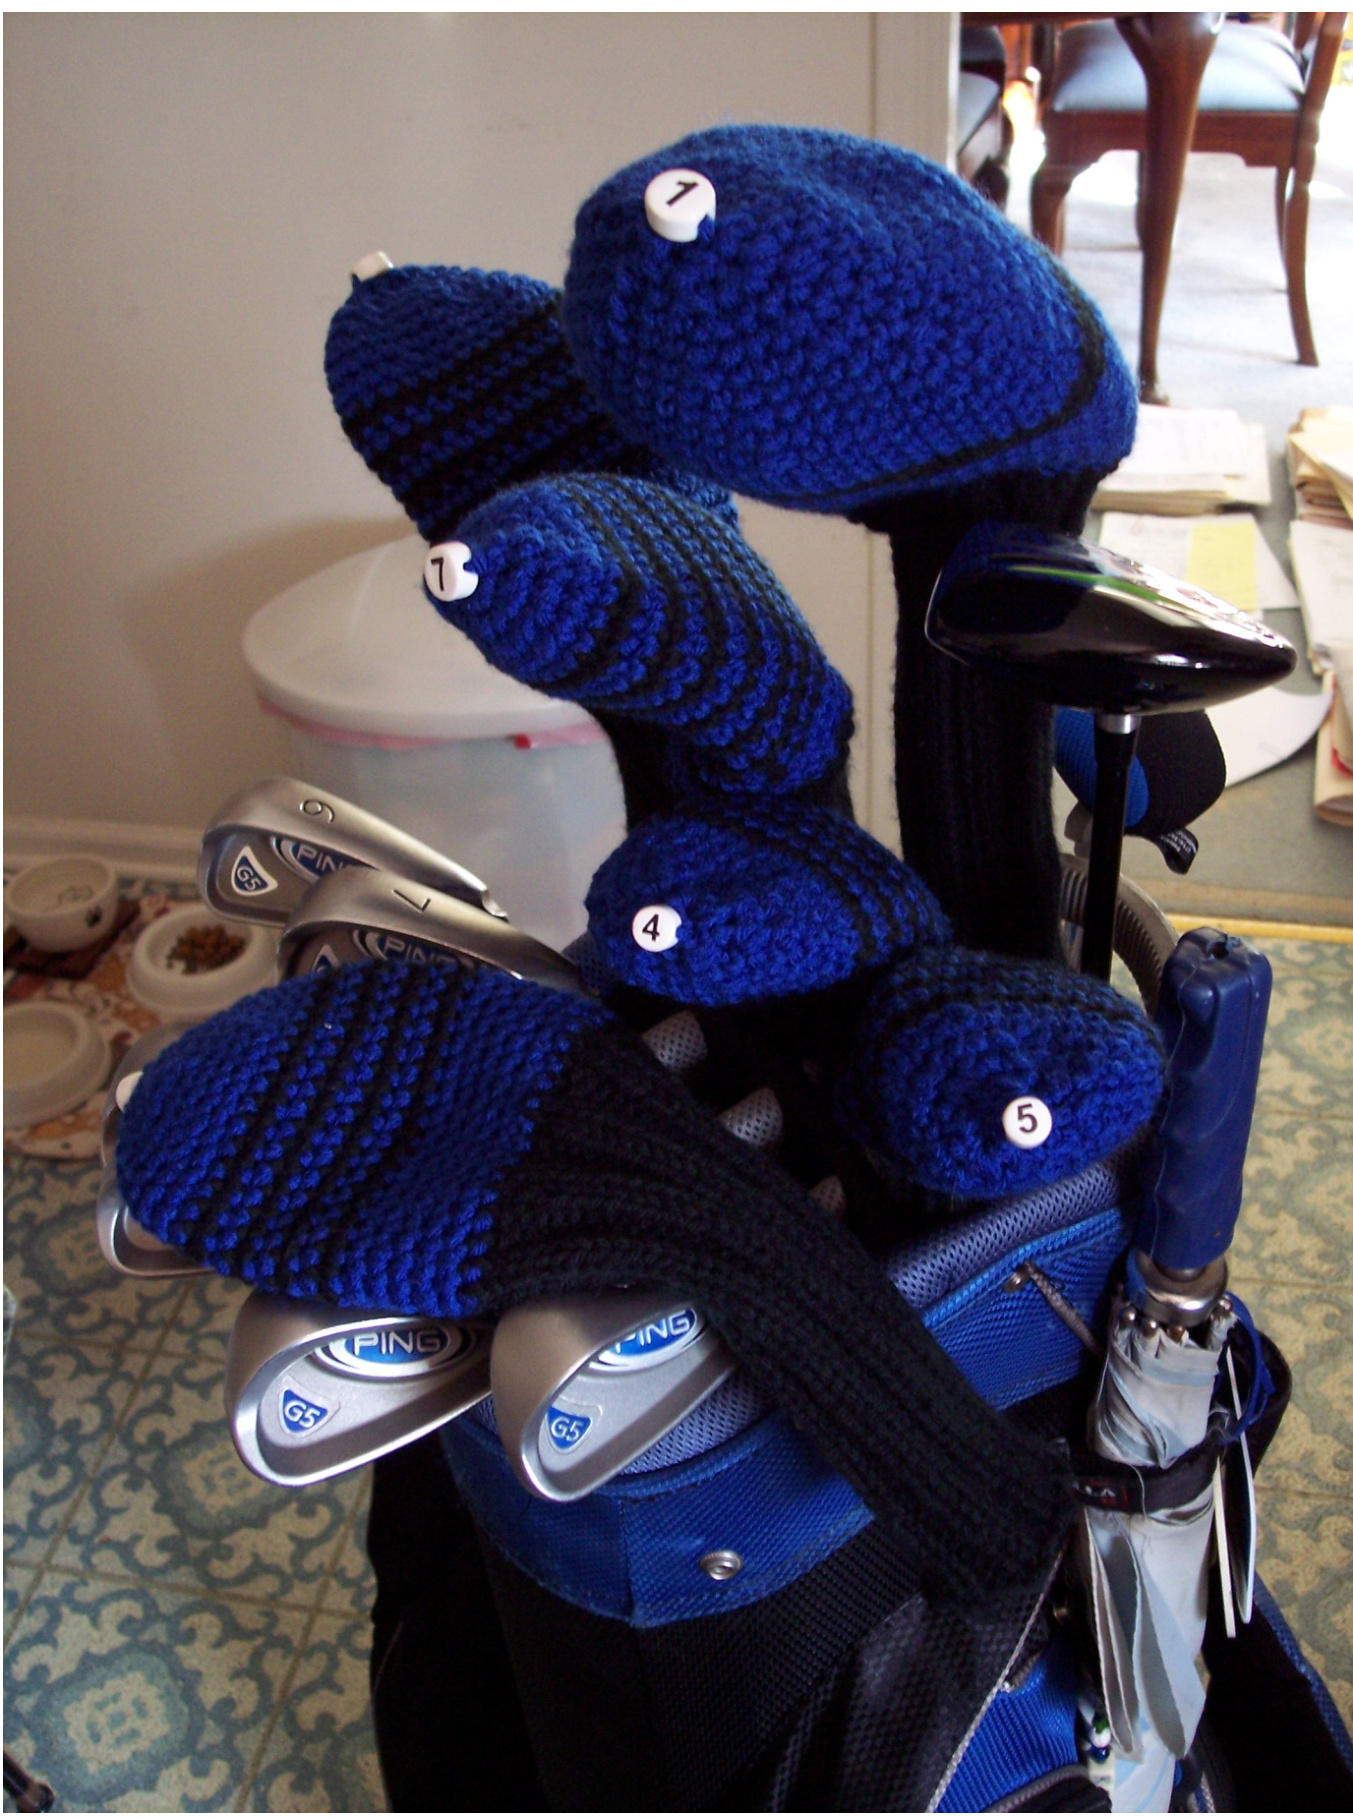
Knit-Crochet Golf Headcovers for Drivers (460cc), Fairway woods, and Hybrid clubs (Designed by Kristina Miller - January/February 2013)
The best combination of techniques to make an optimal stretchy yet sturdy headcovers for your clubs!
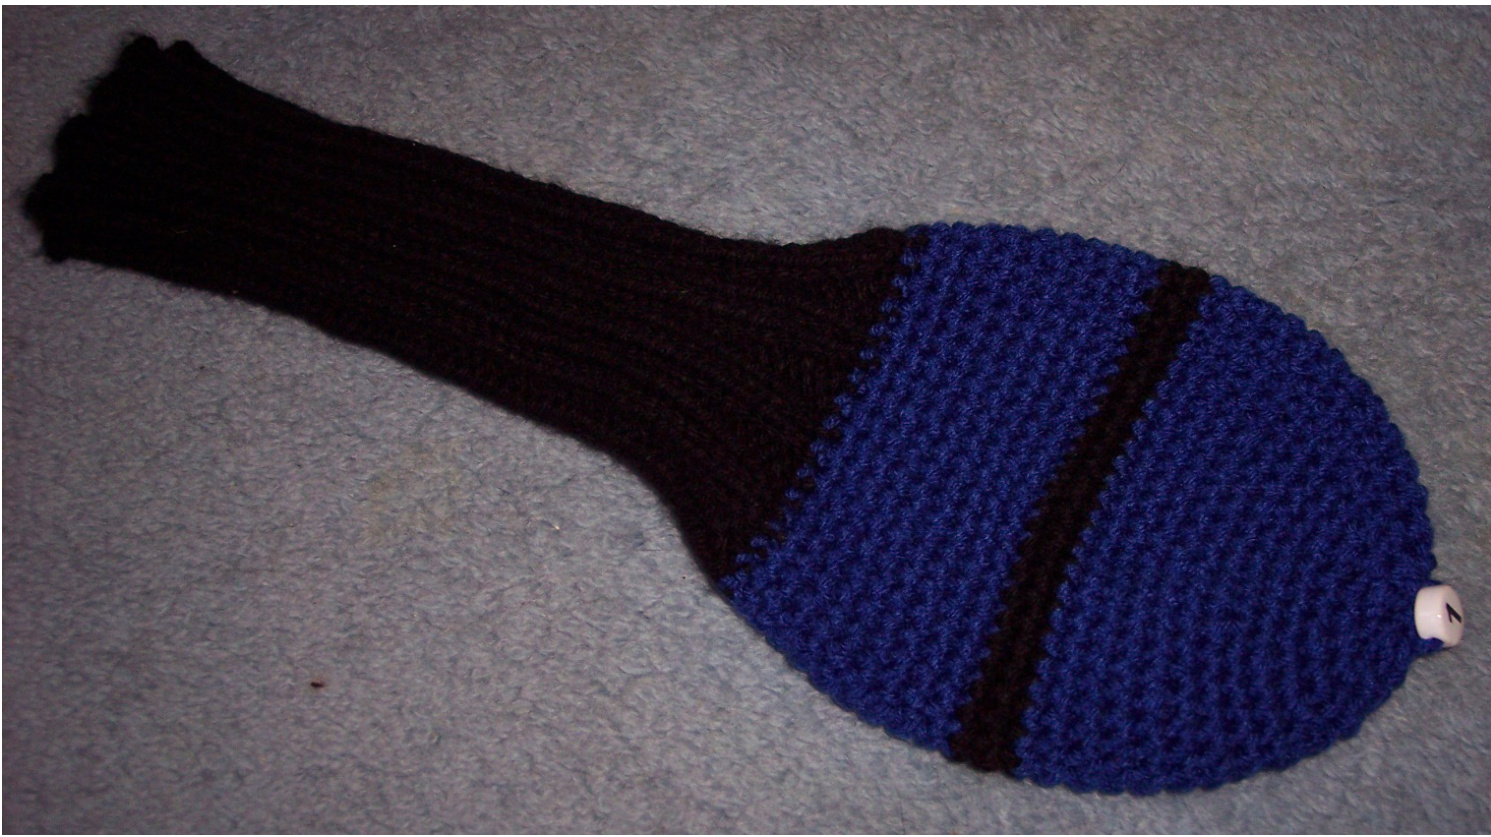
iolf Driver Headcover (460cc size) (Designed by Kristina Miller - Feb 2013
The best combination of techniques to make an optimal stretchy yet sturdy headcover for your clubs!
Materials:
· 2 contrasting colors of worsted weight acrylic yarn (so they can be machine washed and dried) Set of #7 (4.5mm) double-pointed knitting needles (dpn) ·Size H/8 (5mm) crochet hook Optional: knitting needle marker and safety pin to mark beginning of rounds
Step 1: You will create the knitted "sock" tube first:
With yarn #1, loosely cast on 37 stitches and distribute between 3 dpn's without twisting. Slip the end stitch on the right needle over to the left needle (the first needle you will start your knitting on); this is the beginning of the round and now the first and last stitch are both on the same needle. Knit these two stitches together - this will give you a firm, strong join. You now have 36 st distributed on 3 needles. Mark beginning of row. Knit in K2 P2 ribbing around for 9" or desired length. On the last row knit all stitches around. Cut yarn, leaving about an 8-12" length for finishing and weaving in.
Step 2: Now the crocheted club head cover:
Row 1: With yarn #2, leave about an 8-12" tail and chain 1 (at a later point the two tails from Step 1 and 2 will be tied together at the finishing step to make a neat connection - don't worry about it now). Insert crochet hook in first knit stitch and pullthrough a loop, yarn over and pullthrough both loops, 1 single crochet (sc) made. Continue around in this manner until all knit stitches have been made into a sc; join with slip stitch (sl st) in first sc - 36 sc. Mark sl st as beginning of round. Rows 2-4: Chain (ch) 1, sc in each sc around; join with sl st in first sc - 36 sc. Row 5: Ch 1, [sc in next 6 sc, 2 sc in next sc] 5 times, sc in last sc, slip st in 1"t sc - 41 sc. Row 6: Ch 1, sc around, slip st in 1st sc - 41 sc. Row 7: Ch 1, 2 sc in 1st sc, [sc in next 5 sc, 2 sc in next sc] 6 times, sc in last 4 sc, slip st in 1st sc - 48 sc. Rows 8-12: Ch 1, sc around, slip st in 1st sc - 48 sc. Rows 13-14: Change color; ch 1, sc around, slip st in 1\*t sc - 48 sc. (To begin a row with an alternate color start with ch 1 of new color through loop on hook (initial ch 1 for row) and then single crochet around with new color ending with a sl st in first sc. Carry unused color along wrong side of work until instructed to fasten off.) Rows 15-17: Change color; ch 1, sc around, slip st in 1st sc - 48 sc. ip cover inside out and weave all ends in now before working on remainder of cove Row 18: Ch 1, 2 sc tog, [sc in next 5 sc, 2 sc tog] 6 times, sc in last 4 sc - 41 sc Row 19: Ch 1, sc around, slip st in 1st sc - 41 sc. Row 20: Ch 1, [2 sc tog, sc in next 5 sc] 5 times, 2 sc tog, sc in last 4 sc - 35 sc. Row 21: Ch 1, sc around, slip st in 1"t sc - 35 sc. Row 22: Ch 1, \* sc in next 3 sc, 2 sc tog; repeat from \*, slip st in 1"t sc -- 28 sc : Ch 1, \*sc2tog, sc in next 5 sc; repeat from \* around; join with sl st in first sc—24 s Row 24: Ch 1, sc in next sc, \*sc2tog, sc in next 2 sc; repeat from \* to last 3 sc, sc2tog, sc in last sc; join with sl st in first sc-18 sc. Row 25: Ch 1, \*sc2tog, sc in next sc; repeat from \* around; join with sl st in first sc-12 sc. Row 26: Ch 1, [sc2tog] 6 times; join with sl st in first sc—6 sc. Fasten off, leaving a 12" tail. With yarn needle, thread tail through sts of last round and draw tight to close hole. Leave a 12" tail so that you can additionally fasten a pompom, tassel (instructions below), or purchased number bead or tag (good internet source for tags: http://www.naptags.com/enplta.html ).
Tassel instructions:
Using both yarns colors used, hold 2 strands of yarn together and wrap yarn around a 4" square of cardboard approx 30 times. Wrap a 24" length of Yarn #1 several times around wound yarn at top of cardboard, and tie securely (do not trim ends, use them later to tie tassel to cover). Cut yarn at lower end of cardboard. Wind another 24" length of Yarn #1 around wound yarn 4 times approx. 1" from top (to form tassel neck) and tie firmly. Trim ends of tassel evenly. Use strands at top of tassel and club cover to securely tie to top of cover.
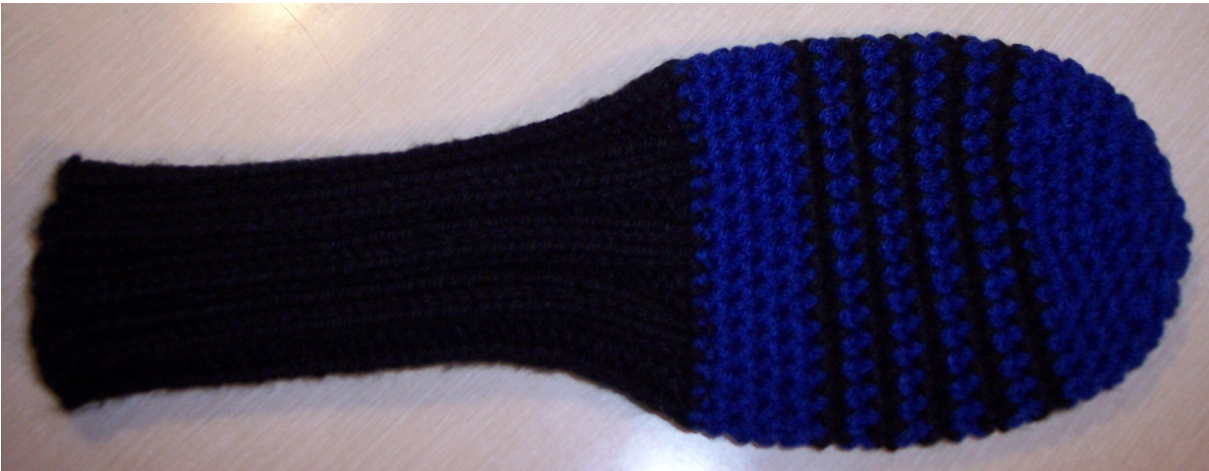
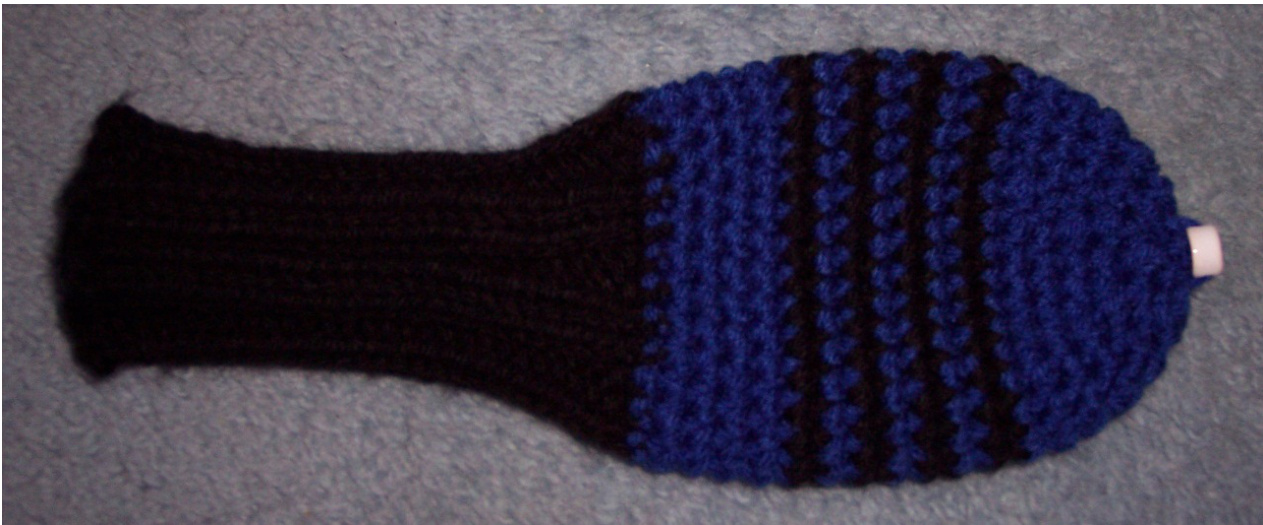
Nlt-ciuelet Gull meaucuveis iui ral way wuuus (vesiyneu vy nristunu ivei - junuury zuis) The best combination of techniques to make an optimal stretchy yet sturdy headcover for your clubs!
Materials:
2 contrasting colors of worsted weight acrylic yarn (so they can be machine washed and dried) Set of #7 (4.5mm) double-pointed knitting needles (dpn) ·Size H/8 (5mm) crochet hook Optional: knitting needle marker and safety pin to mark beginning of rounds
Step 1: You will create the knitted "sock" tube first:
With yarn #1, loosely cast on 33 stitches and distribute between 3 dpn's without twisting. Slip the end stitch on the right needle over to the left needle (the first needle you will start your knitting on); this is the beginning of the round and now the first and last stitch are both on the same needle. Knit these two stitches together - this will give you a firm, strong join. You now have 32 st distributed on 3 needles. Mark beginning of row. Knit in K2 P2 ribbing around for 7" or desired length. On the last row knit all stitches around. Cut yarn, leaving about an 8-12" length for finishing and weaving in.
Step 2: Now the crocheted club head cover:
Row 1: With yarn #2, leave about an 8-12" tail and chain 1 (at a later point the two tails from Step 1 and 2 will be tied together at the finishing step to make a neat connection - don't worry about it now). Insert crochet hook in first knit stitch and pull through a loop, yarn over and pull through both loops, 1 single crochet (sc) made. Continue around in this manner until all knit stitches have been made into a sc; join with slip stitch (sl st) in first sc - 32 sc. Mark sl st as beginning of round. Row 2: Chain (ch) 1, sc in each sc around; join with sl st in first sc - 32 sc. Rows 3-15: Continue Row 2 but start making stripe pattern as indicated in striping chart by fastening on yarn #1 again and alternating with yarn #2. (To begin a row with an alternate color start with ch 1 of new color through loop on hook (initial ch 1 for row) and then single crochet around with new color ending with a sl st in first sc. Carry unused colors along wrong side of work until instructed to fasten off.) Flip cover inside out and weave all ends in now before working on remainder of cover (when you do this may vary depending on the number of stripes. For 9-wood, wait until end and flip the whole headcover inside out). Row 16: Ch 1, [sc in next 6 sc, sc2tog] 4 times; join with sl st in first sc-—28 sc. Row 17: Ch 1, sc in each sc around; join with sl st in first sc—28 sc. Row 18: Ch 1, \*sc2tog, sc in next 5 sc; repeat from \* around; join with sl st in first sc-24 sc. Row 19: Ch 1, sc in next sc, \*sc2tog, sc in next 2 sc; repeat from \* to last 3 sc, sc2tog, sc in last sc; join with sl st in first sc-18 sc. Row 20: Ch 1, \*sc2tog, sc in next sc; repeat from \* around; join with sl st in first sc—12 sc. Row 21: Ch 1, [sc2tog] 6 times; join with sl st in first sc—6 sc. Fasten off, leaving a 12" tail. With yarn needle, thread tail through sts of last round and draw tight to close hole. Leave the 12" tail so that you can additionally fasten a pompom, tassel (instructions below), or purchased number bead or tag (good internet source: http://www.naptags.com/enplta.html ).
| STRIPING CHART | |||||||
| 3 wood | 4 wood | 5 wood | 7 wood | 9 wood | |||
| Row 1 | Yarn2 | Yarn2 | Yarn2 | Yarn2 | Yarn2 | 32 sC | |
| Row 2 | Yarn2 | Yarn2 | Yarn2 | Yarn2 | Yarn2 | 32 sC | |
| Row 3 | Yarn2 | Yarn2 | Yarn2 | Yarn2 | Yarn1 | 32 sC | |
| Row 4 | Yarn2 | Yarn2 | Yarn2 | Yarn1 | Yarn2 | 32 sC | |
| Row 5 | Yarn2 | Yarn2 | Yarn2 | Yarn2 | Yarn1 | 32 sC | |
| Row 6 | Yarn2 | Yarn2 | Yarn1 | Yarn1 | Yarn2 | 32 sC | |
| Row 7 | Yarn2 | Yarn1 | Yarn2 | Yarn2 | Yarn1 | 32 sC | |
| Row 8 | Yarn1 | Yarn2 | Yarn1 | Yarn1 | Yarn2 | 32 sC | |
| Row 9 | Yarn2 | Yarn1 | Yarn2 | Yarn2 | Yarn1 | 32 sC | |
| Row 10 | Yarn1 | Yarn2 | Yarn1 | Yarn1 | Yarn2 | 32 sC | |
| Row 11 | Yarn2 | Yarn1 | Yarn2 | Yarn2 | Yarn1 | 32 sC | |
| Row 12 | Yarn1 | Yarn2 | Yarn1 | Yarn1 | Yarn2 | 32 sC | Fastenoff3-wood |
| Row 13 | Yarn2 | Yarn1 | Yarn2 | Yarn2 | Yarn1 | 32 sC | Fasten off 4-wood |
| Row 14 | Yarn2 | Yarn2 | Yarn1 | Yarn1 | Yarn2 | 32 sC | Fasten off 5-wood |
| Row 15 | Yarn2 | Yarn2 | Yarn2 | Yarn2 | Yarn1 | 32 sC | |
| Row 16 | Yarn2 | Yarn2 | Yarn2 | Yarn1 | Yarn2 | 1st decrease row - 28 sc | Fasten off 7-wood |
| Row 17 | Yarn2 | Yarn2 | Yarn2 | Yarn2 | Yarn1 | 28 sc | |
| Row 18 | Yarn2 | Yarn2 | Yarn2 | Yarn2 | Yarn2 | Decrease row - 24 sc | |
| Row 19 | Yarn2 | Yarn2 | Yarn2 | Yarn2 | Yarn1 | Decrease row - 18 sc | Fasten off 9-wood |
| Row 20 | Yarn2 | Yarn2 | Yarn2 | Yarn2 | Yarn2 | Decrease row - 12 sc | |
| Row 21 | Yarn2 | Yarn2 | Yarn2 | Yarn2 | Yarn2 | Decrease row-6 sc | |
Tassel instructions:
Using both yarns colors used, hold 2 strands of yarn together and wrap yarn around a 4" square of cardboard approx 30 times. Wrap a 24" length of Yarn #1 several times around wound yarn at top of cardboard, and tie securely (do not trim ends, use them later to tie tassel to cover). Cut yarn at lower end of cardboard. Wind another 24" length of Yarn #1 around wound yarn 4 times approx. 1" from top (to form tassel neck) and tie firmly. Trim ends of tassel evenly. Use strands at top of tassel and club cover to securely tie to top of cover.
If Headcovers for Hybrid clubs (Designed by Kristina Miller - February 201
The best combination of techniques to make an optimal stretchy yet sturdy headcover for your clubs!
Materials:
2 contrasting colors of worsted weight acrylic yarn (so they can be machine washed and dried) Set of #7 (4.5mm) double-pointed knitting needles (dpn) ·Size H/8 (5mm) crochet hook Optional: knitting needle marker and safety pin to mark beginning of rounds
Step 1: You will create the knitted "sock" tube first:
With yarn #1, loosely cast on 25 stitches and distribute between 3 dpn's without twisting. Slip the end stitch on the right needle over to the left needle (the first needle you will start your knitting on); this is the beginning of the round and now the first and last stitch are both on the same needle. Knit these two stitches together - this will give you a firm, strong join. You now have 24 st distributed on 3 needles. Mark beginning of row. Knit in K2 P2 ribbing around for 4 %" or desired length. On the last row knit all stitches around. Cut yarn, leaving about an 8-12" length for finishing and weaving in.
Step 2: Now the crocheted club head cover:
Row 1: With yarn #2, leave about an 8-12" tail and chain 1 (at a later point the two tails from Step 1 and 2 will be tied together at the finishing step to make a neat connection - don't worry about it now). Insert crochet hook in first knit stitch and pull through a loop, yarn over and pull through both loops, 1 single crochet (sc) made. Continue around in this manner until all knit stitches have been made into a sc; join with slip stitch (sl st) in first sc - 24 sc. Mark sl st as beginning of round. Row 2 & 3: Chain (ch) 1, sc in each sc around; join with sl st in first sc - 24 sc. Row 4: Ch 1, sc in next 2 sc, 2 sc in next sc, [sc in next 5 sc, 2 sc in next sc] 3 times, sc in last 3 sc; join with sl st in first sc -28 sc. Rows 5-13: Chain (ch) 1, sc in each sc around; join with sl st in first sc - 28 sc. Continue this row but start making stripe pattern as indicated in striping chart by fastening on yarn #1 again and alternating with yarn #2. (To begin a row with an alternate color start with ch 1 of new color through loop on hook (initial ch 1 for row) and then single crochet around with new color ending with a sl st in first sc. Carry unused colors along wrong side of work until instructed to fasten off.) Flip cover inside out and weave all ends in now before working on remainder of cover (when you do this may vary depending on the number of stripes. : Ch 1, \*sc2tog, sc in next 5 sc; repeat from \* around; join with sl st in first sc—24 st Row 15: Ch 1, sc in each sc around; join with sl st in first sc - 24 sc. Row 16: Ch 1, sc in next sc, \*sc2tog, sc in next 2 sc; repeat from \* to last 3 sc, sc2tog, sc in last sc; join with sl st in first sc-18 sc. Row 17: Ch 1, \*sc2tog, sc in next sc; repeat from \* around; join with sl st in first sc—-12 sc. Row 18: Ch 1, [sc2tog] 6 times; join with sl st in first sc-6 sc. Fasten off, leaving a 12" tail. With yarn needle, thread tail through sts of last round and draw tight to close hole. Leave the 12" tail so that you can additionally fasten a pompom, tassel (instructions below), or purchased number bead or tag (good internet tag source: http://www.naptags.com/enplta.html ).
| STRIPING CHART | ||||
| 4 Hybrid | 5 hybrid | |||
| Row 1 | Yarn2 | Yarn2 | 24 sC | |
| Row 2 | Yarn2 | Yarn2 | 24 sc | |
| Row 3 | Yarn2 | Yarn2 | 24 sc | |
| Row 4 | Yarn2 | Yarn2 | Increase row - 28 sc | |
| Row 5 | Yarn2 | Yarn1 | 28 sC | |
| Row 6 | Yarn1 | Yarn2 | 28 sC | |
| Row 7 | Yarn2 | Yarn1 | 28 sC | |
| Row 8 | Yarn1 | Yarn2 | 28 sC | |
| Row 9 | Yarn2 | Yarn1 | 28 sC | |
| Row 10 | Yarn1 | Yarn2 | 28 sC | |
| Row 11 | Yarn2 | Yarn1 | 28 sC | |
| Row 12 | Yarn1 | Yarn2 | 28 sC | Fasten off 4-hybrid |
| Row 13 | Yarn2 | Yarn1 | 28 sC | Fasten off 5-hybrid |
| Row 14 | Yarn2 | Yarn2 | 1st decrease row - 24 sc | |
| Row 15 | Yarn2 | Yarn2 | 24 sc | |
| Row 16 | Yarn2 | Yarn2 | Decrease row-18 sc | |
| Row 17 | Yarn2 | Yarn2 | Decrease row - 12 sc | |
| Row 18 | Yarn2 | Yarn2 | Decrease row - 6 sc | |
Tassel instructions:
Using both yarns colors used, hold 2 strands of yarn together and wrap yarn around a 4" square of cardboard approx 30 times. Wrap a 24" length of Yarn #1 several times around wound yarn at top of cardboard, and tie securely (do not trim ends, use them later to tie tassel to cover). Cut yarn at lower end of cardboard. Wind another 24" length of Yarn #1 around wound yarn 4 times approx. 1" from top (to form tassel neck) and tie firmly. Trim ends of tassel evenly. Use strands at top of tassel and club cover to securely tie to top of cover.


