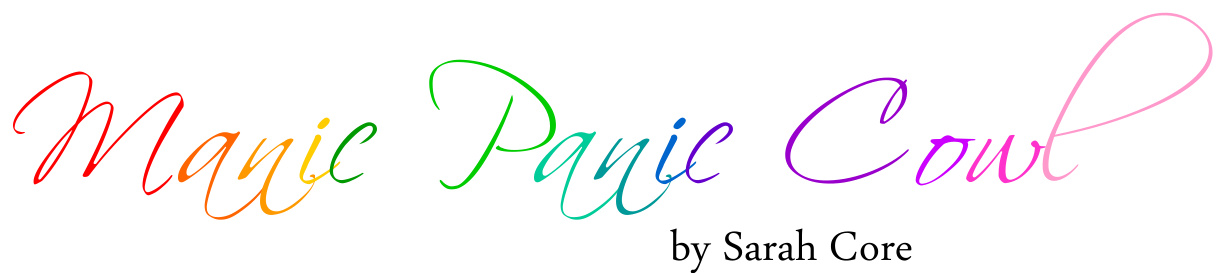
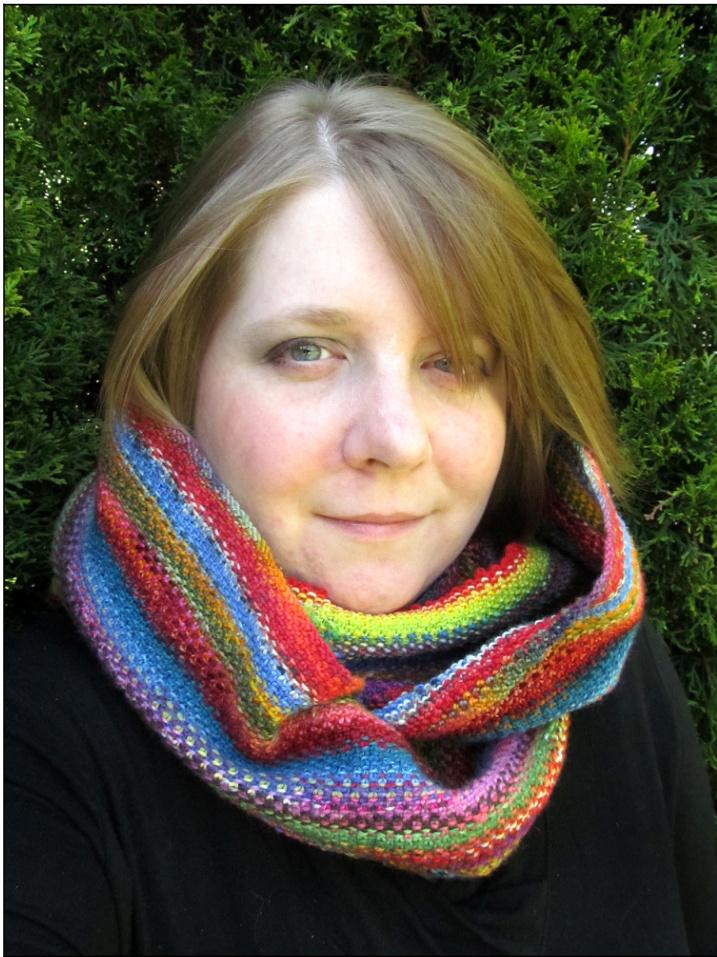
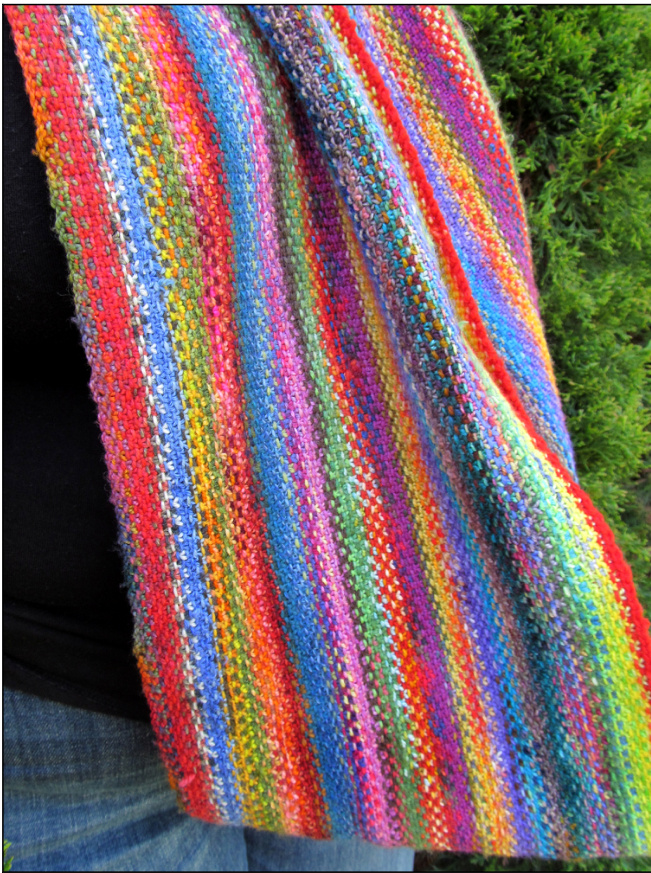
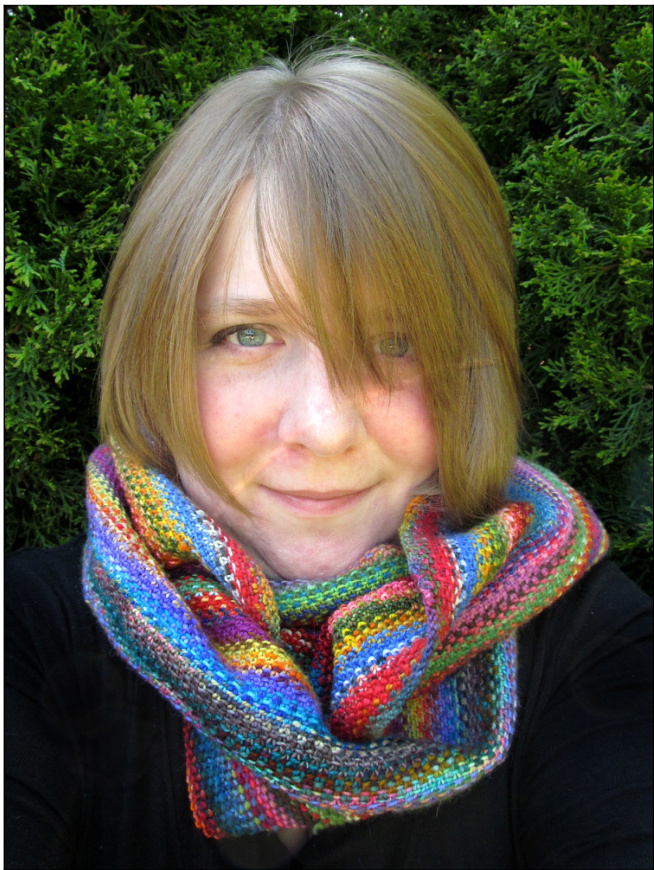
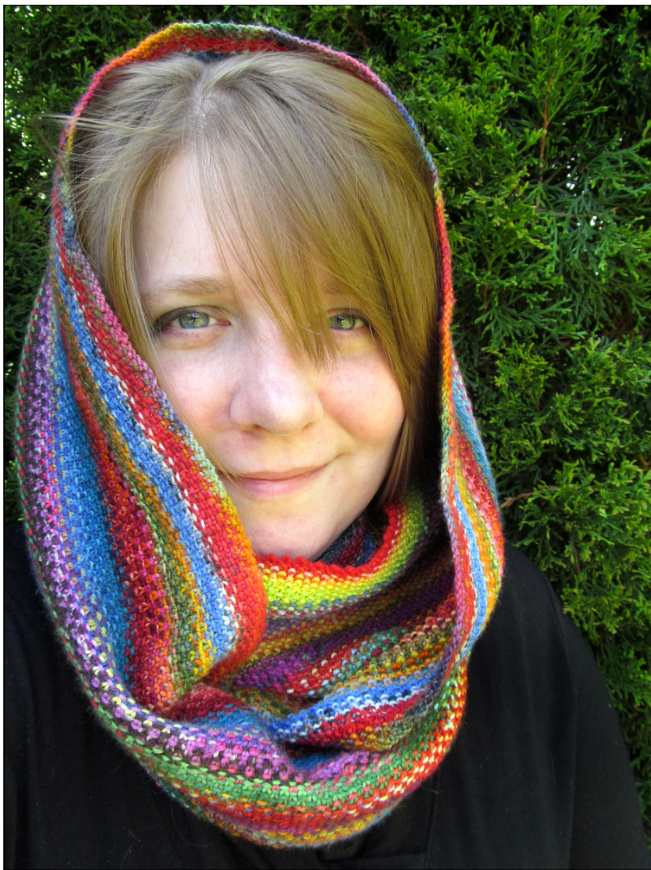
The beauty of a cowl, whether it is short or long, is that it is, in essence, one never-ending loop. With a scarf you are limited by having two ends that must be pulled up or held together in some manner, but the cowl is able to twist and turn into a scarf, a hood, or even a shrug with just the slightest movement of fabric. In this variation on the Mini Mania Scarf, I've thrown out the ends and created an epic, endless loop in a manic color palette all your friends will want. The best part about this cowl is you can knit it with all those little bits of leftover yarn that have been multiplying like rabbits in the corners of your stash. Make it unique by knitting it big or little, fat or skinny, in a loop or even twisted as a moebius! This pattern uses the eponymous fabric stitch, or linen stitch, so named because it looks similar to a woven linen fabric. The stitch uses simple slipped stitches to create a dramatic finished project and is knit lengthwise to most accurately replicate the style of a woven garment.
MATERIALS
Size US 6 (4.25mm) circular needles, 40" or longer (Tight knitters might want to go up a needle size). 225 - 1,500 yards / 205 - 1,370 meters of sock or fingering weight yarn, at minimum 9 miniskeins, weighing 5 to 6 grams each.
SIZES
based on cowl's total length Short: \~333 stitches (should be necklace length) Medium: \~445 stitches (torso length) Long: \~555 stitches) 5.5 ft. long (waist length
DIRECTIONS
The important thing to remember about knitting this cowl is that you must cast on an odd number of stitches. The reason for this is simple - because you are knitting in the round, you need an odd number so you can continue the slip-knit-slip-knit rhythm of the pattern. Otherwise, when you reach the beginning of the next round you'll end up with two knitted stitches next to each other, or two slipped stitches next to each other. I like to think of the pattern as just endlessly repeating, so I just follow round 1 until I hit the stitch marker, remove it, and then keep on going.
THE COWL
CO an odd number of stitches. I recommend using the knit cast-on to save time, since it is just the knit stitch being made repeatedly and kept on the left needle. Plus I like the edge it creates. Knit Cast- On: \*Knit 1, leaving stitch on left needle. Transfer new stitch onto left needle by slipping it knit-wise. Repeat from \*. After CO, join to begin working in the round. Place stitch marker to mark beginning of rnd. Rd 1: \*k1, yfwd, sll, yb; rep from \* to end. Rd 2: \*yfwd, sl1, yb, k1; rep from \* to end.
Manic Panic Cowl. Copyright @ 2013 Sarah Core, Exchanging Fire. This pattern is for personal, non-commercial use only and may 2 not be sold or reproduced. For more information or technical assistance contact ladydanio@gmail.com. Rd 3-Infinity: Rep rds 1 and 2 until it's time to cast off. BO using invisible (or tubular) cast-off method for smoothest edge. Weave in all ends as needed. If you need a visual guide for the tubular bind-off I recommend this video. If this all seems too tedious, you can just bind off in-pattern (aka in linen stitch).
THE MOEBIUS
The important thing to remember about a moebius is that it is not a full twist. By this I mean that if you accidentally twist your stitch at the beginning of joining in the round and you realize it much later, you don't have a moebius. You just have a twisted loopy thing. Now, if you are a lazy or accidental knitter (like me) and that works for you, by all means, twist your stitches and call it a design feature! But if you want to conquer the magic of the moebius, which is technically a half twist, then you need some instructions. Keep in mind that a moebius is worked from the center out, so each completed round will be worked on either side of the caston, towards the outer edges of the garment.
I find the best way to make a moebius cast-on is to follow the Intro to Moebius Knitting video by Cat Bordhi on YouTube. Cat is as lovely in-person as she sounds on her video, and seeing the moebius as it is knit is really essential in my book. Knitting is a visual art for good reason. CO using Cat Bordhi's Magical Moebius Cast-On. Place stitch marker to mark beginning of rnd. The stitch marker in moebius knitting is very important, so make sure you have that in place. Remember with the nature of a moebius you'll knit around the needles twice to make one round. And The hardest part is the cast-on (which isn't really hard at all,it's just a bit confusing to look at) and then it's all smooth sailing. Rd 1: \*k1, yfwd, sll, yb; rep from \* to end. Rd 2: \*yfwd, sl1, yb, kl; rep from \* to end. Rd 3-Infinity: Rep rounds 1 and 2 until it's time to cast off. Wrap and turn for knit cast-off on the wrong side. BO using invisible (or tubular) cast-off method for smoothest edge. Weave in all ends as needed. If you need a visual guide for the tubular bind-off I recommend this video. If this all seems too tedious, you can just bind off in-pattern (aka in linen stitch).
TIPS & FINISHING
· For joining together two different scrap yarns I just hold the two strands of yarn together for about 5-6 stitches. You can also do the weave-in method instead, where you stop knitting with one yarn, start with another, and then later take the ends and weave them into the bumps on the wrong side of the work. And since you are knitting in the round, there is never a purl side. · Switch between a highly variegated yarn and a more semi-solid color for dramatic results. Knit until you run out yarn or get bored. · For the largest size takes about 2 to 3 grams of fingering weight per round (I switch yarns every two or three rows). · rollow the two-by-two rule ana save yourself some precious frogging time! You should always be knitting into the slipped stitch and slipping the knitted stitch from the previous round. You'll see this pair of stitches sitting there two-by-two, and you should always knit into the first stitch in the “set” and then slip the second. Watch carefully for your first few rounds, as you can easily knit an entire row without noticing you've done it wrong. This comes in especially handy for the moebius version! · Halfway through your project and don't know when to stop? If you want to try and determine how wide you'd like your cowl to be, take a piece of cloth or pillowcase or something and wrap it around your neck. See how much of the fabric you like having rumpled there. With the width you've identified as being the right size, lay the fabric against the rows you currently have. Using your project like a ruler, flip it across the measured space until you can see how many times you'll need to knit those rows. · Lastly, blocking is not necessary for this cowl. However, if you do decide to wet-block it, make sure to have good ventilation or lay it in the sun, otherwise the dense fabric may take some time to dry.
ABBREVIATIONS
CO - cast onst - stitchBO - bind offsts - stitchesk - knitRS - right sideP- purl WS - wrong side rep - repeat yb - move yarn to the back sl - slip yfwd -move yarn forward (to front)
KNITTING RESOURCES
For online assistance with any of the techniques used in this pattern, please check out a few of my favorite knitting resource websites, listed below: · www.craftyarncouncil.com/weight.html - Standard weight chart from the Craft Yarn Council will guide you in choosing the right yarn. Then check out their helpful standard body measurements sizing and knitting chart abbreviations and symbols. ·www.knittinghelp.com/videos/learn-to-knit - Informative videos and succinct descriptions cover almost everything, from the basic stitches right up to advanced techniques. · www.ravelry.com/groups/exchanging-fire - Join the Exchanging Fire group on Ravelry, an online knitting community where you can find full pattern support and chat with me. Visit my website, exchangingfire.com, to learn more about me and my upcoming designs!


