Janet Barton Knits
Felted Bag With Pockets
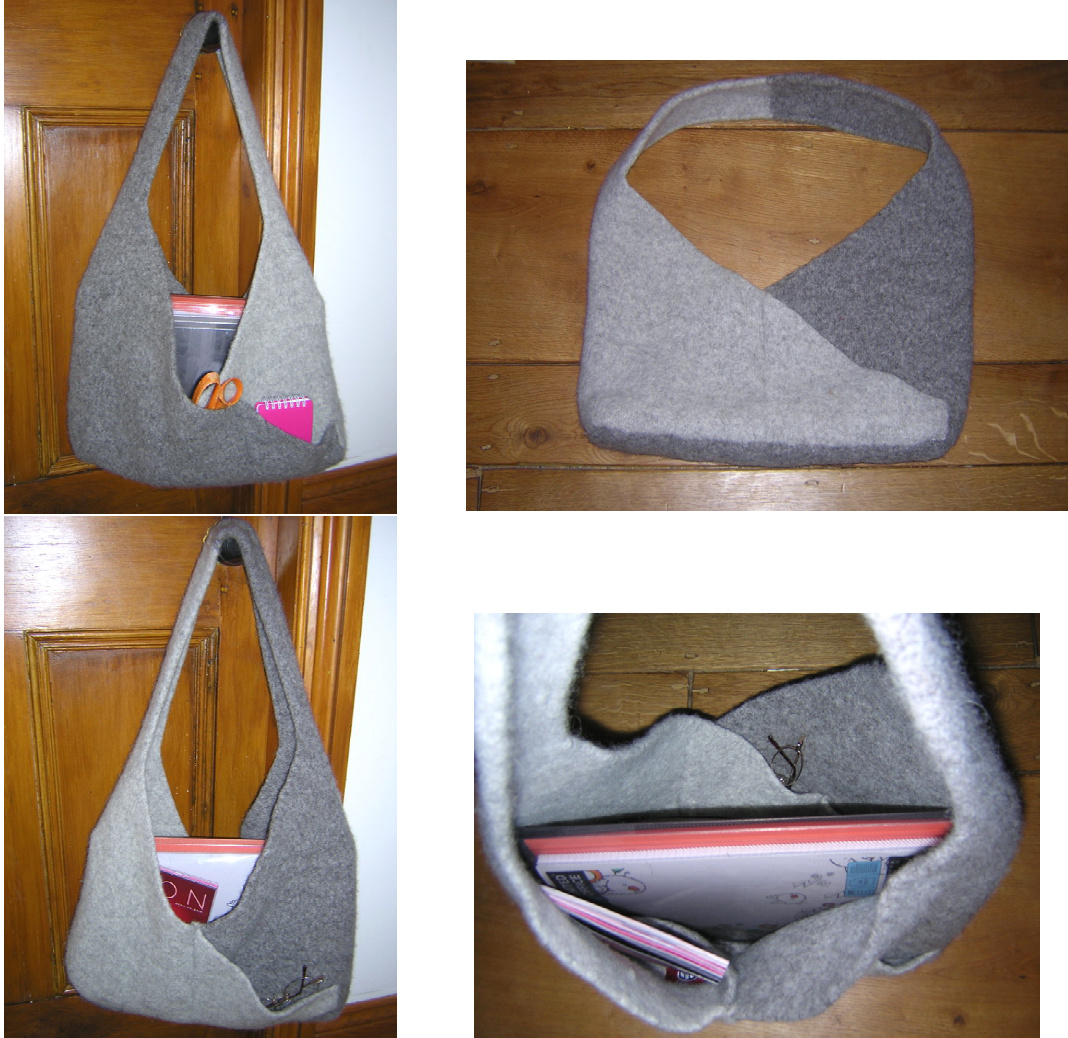
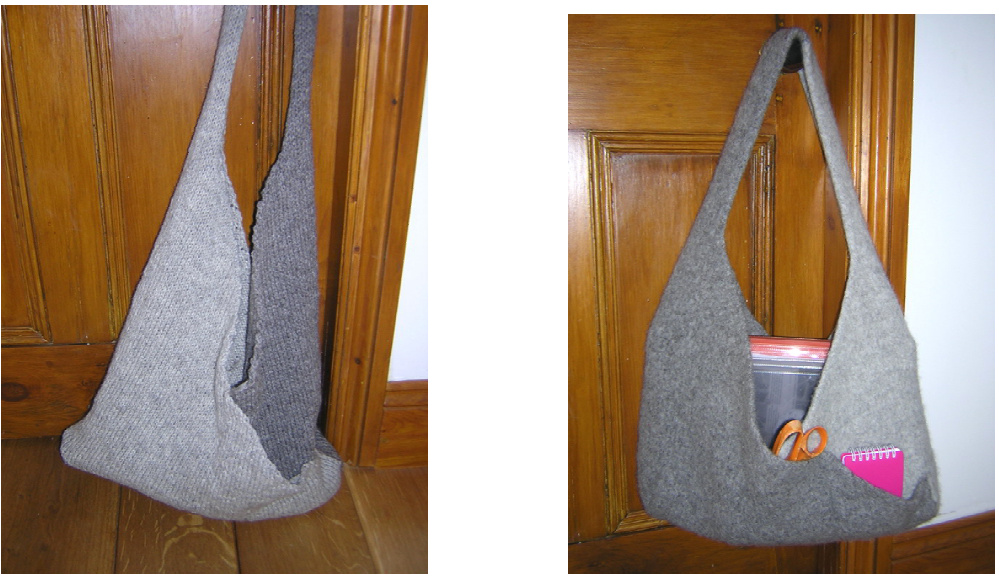
This felted bag idea came about through a design I created in fabric. Iliked the shape so decided to create a felted one too. The base and part of the body of the bag overlap. Use of seams on the overlap parts creates pocket on the outside AND inside of the bag. Thus its a roomy tote but your phone, lipstick and money are all readily accessible! The pockets are different sizes depending which side you are looking at. The design lends itself well to different shades of wool. But it would be just as nice in one shade all Over.
Information
Needle Size: 5.5mm Yarn: Aran Weight British Breed Woollen Yarn (the original item was made from Graphite and Pumice shades of British Breed blended yarn from Sheepfold.co.uk) Quantities: 2 x 100g balls of each colour, or approx 300 meters of each colour. Guage: Pre-felting, 16 stitches and 20 rows to 4 inches. Guage is not vital for a felted bag, as you will felt it down as far as you wish. Measurements: Imperial: Pre felting: 22" wide x 24" high (to start of handle) x 4.5" deep Post felting: 16" wide x 16" high (to start of handle) x 3.5" deep. Length of handle 22" Metric: Pre felting: 56cm x 61cm x 12cm Post felting: 41cm x 41cm x 9cm. Length of handle 56cm. NB on yarn quantities : the original bag used almost exactly 200g of each colour. If you wish to make a swatches, have a longer handle, or just to be absolutely sure you have enough, then you may wish to order an extra ball, or longer yardage, of each colour. NB on felting with two colours. I designed this bag deliberately to use two different colours. You will need to do this with 2 shades of the same wool. Different breeds and makes of yarn felt differently. Even with the original bag for this pattern, one shade shrunk more than the other. I like to think that this gives it a nice assymetrical look, and could be evened up a bit when I pulled at it after felting.
INSTRUCTIONS:
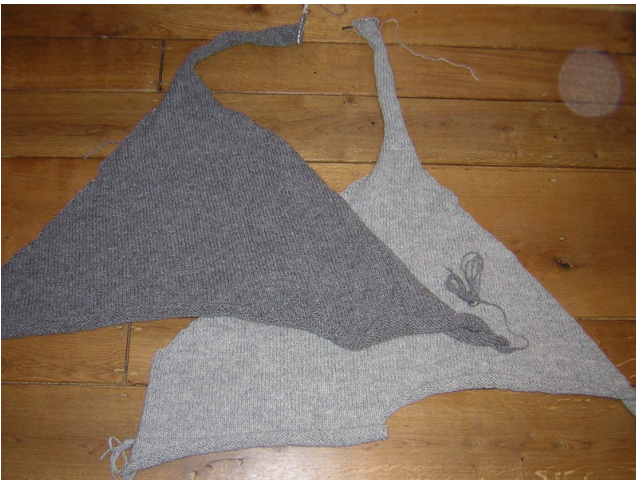
You will knit two pieces, which need to be mirror image of each other. One piece with the right side up should be identical to the other piece with its wrong side up.
Side One:
Cast on 70 stitches Row 1: Knit Row 2: Purl Rows 3 - 20, repeat rows 1 and 2, 9 times more. You will end on a purl row. You have now made the base' of the bag. Turn your work as if to commence knitting the next row, but instead cast on another 85 stitches onto the left hand needle. You will now have 155 stitches on the needle. Repeat rows 1 and 2, 8 times. These 16 rows are the start of the body of the bag, and the 16 row side is later referred to as the 'short side of pockets'. These short sides may be a little confusing when it comes to sewing up but they are essential to stop everything sliding out of the outside edge pockets! Now commence decreasing to shape the slanted panels which will overlap on the front and back of the bag. You can be quite tight with the K2togs so that the bag pockets do not sag. Row 1: K2 tog, K to last 2 stitches, K2tog Row 2: P2tog, P to last 2 stitches, P2tog Row 3: as row 1 Row 4: purl all stitches, no decreases. Repeat these 4 rows until 20 stitches remain. Don't worry if your number of stitches only hits 20 half way through a decrease row. Knit the handle: Continue on these 20 stitches with one row knit, one row purl, until the handle is 15 inches long. (you can make it longer or shorter if you wish, it can always be stretched a bit as it dries after felting, or cut to make it shorter
Don't forget to leave a few yards of each colour yarn for sewing up.
Either cast off the stitches to sew up later, or leave them on a holder to graft.
Side Two:
Using the other colour wool, this side has to be knitted in mirror image to the other piece. They MUST be the reverse of each other. le, the purl side must be up on one side and the knit side up on the other, for them to match if placed on top of each other. Cast on 70 stitches. Row 1: Purl Row 2: Knit Repeat rows 1 and 2, 9 times more. You will end on a knit row. You have now made the be of the bag. Turn your work as if to commence purling the next row, but instead cast on another 85 stitches onto the left hand needle. You will now have 155 stitches on the needle. Repeat rows 1 and 2, 8 times; these 16 rows will form the short sides of the pockets. Now commence decreasing to shape the panels of the bag. You can be quite tight on the p2togs so that the pockets do not sag after felting. Row 1: P2 tog, P to last 2 stitches, P2tog Row 2: K2tog, K to last 2 stitches, K2tog Row 3: as row 1 Row 4: Knit all stitches, no decreases. Repeat these 4 rows until 20 stitches remain. You have now knit the body of the bag. Commence handle Work the 20 stitches for the handle as per side one. You will now have two pieces of bag, mirror images of each other.
Making Up The Bag
Some parts of this may seem a bit fiddly. Remember that you are working with two pieces that will overlap, that the bag has a base, and that there are short sides to the pockets. 1. Sew pockets on one side and seam off the base.

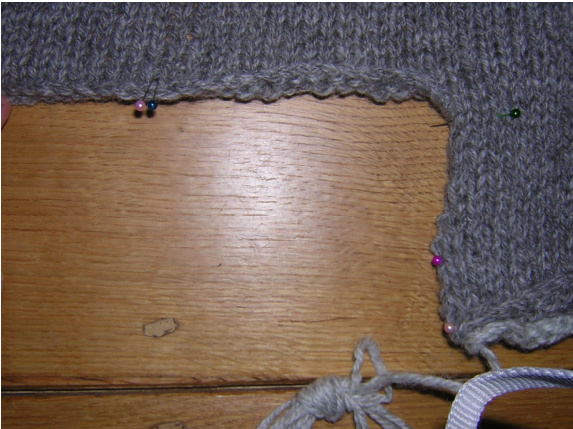
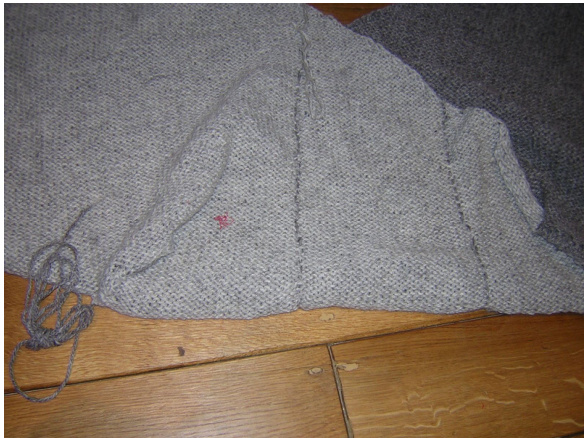
With Right Side upper on both pieces, place the bases one over the other. You may wish to place the darker colour upper, as the upper side at this point is the one that you will be putting on the floor etc when the bag is finished. Sew the pieces together with two seams, these seams create the pockets on one side where the slanting sides overlap: Smooth out the overlapping pieces, pin along the base to hold it together. Sew the two layers together in two straight seams each 1/3 along the piece. In the picture the seam lines are shown with yarn in the opposite colour, so that you can see it. The actual seam should be done in the colour of the piece with the knit side uppermost so that you won't see it when the bag is complete. Only sew as far up as the pieces overlap. This will make three pockets on this side. One on the outside, one on the inside, and one that can be accessed from inside or out. Sew a line across the width of the base where it meets the body of the bag. This row of stitching will cut off the bottom of the pockets from the base and should be sewn 20 rows up from casting on. (Sorry no pic of that stage). 2. Attach the 'sides' to the base. Place a pin or other marker 15 stitches along away from the base'. (the first 15 of the 85 stitches that were cast on after the base was worked).
Placing the right sides together, match the marker to the bottom corner of the two layers of the base. The first 15 stitches are going to be sewn to the edge of the 20 rows of the base. Sew this seam with the correct colour of wool for the piece that you placed the pin or marker in. Be sure to catch all three layers in your stitches.
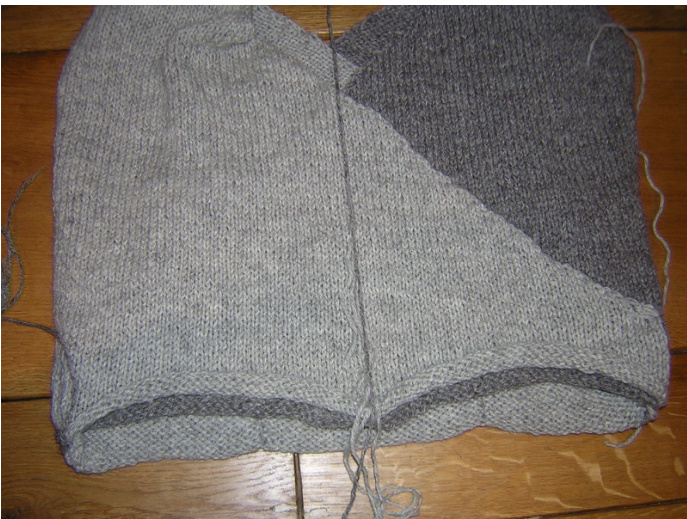
3.Repeat on the other side 4.Your bag should now resemble a great big flat thing with a sort of open gusset at the bottom. 5.Turn the bag over so that the wrong side is facing you as shown in the picture below.
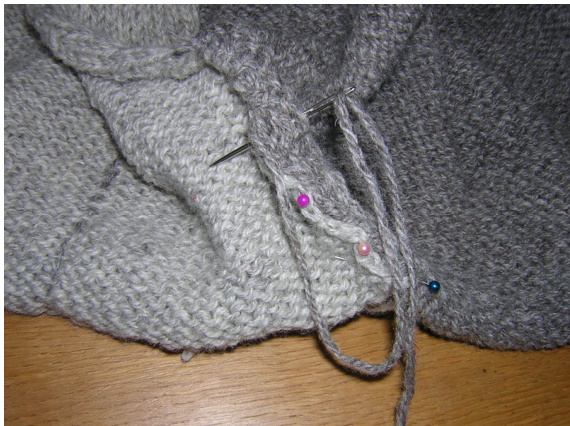
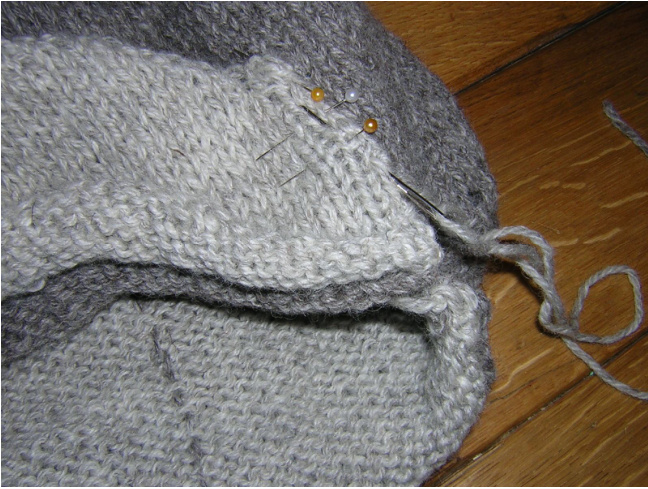
6. Take hold of the far right corner (dark grey 16 row short side on the pics). Fold it over to line up the bottom of the dark grey piece that is now on top with its knit side upper, with the bottom of the base seam. Don't worry that the right sides are outside, you are not sewing the bottom at this point. The short pocket side seam now on top needs to be sewn so that it goes 'up' from the base of the bag, as it forms the bottom of one of the side seams of the bag.

Follow the line of stitches up and sew this little short seam up 16 rows of the side panel. It will look all bunched up and wierd but don't panic. You are sewing part of what will be the side of the bag, to the short side of the pocket. Make sure you sew it with the colour wool that is the right side of the bag here - in this case the paler grey. Now reach out to the left and fold the light grey side over so that its right side is upper. Line up its bottom of the short straight seam with the lower right 'side' of the bag. Sew it up so that the short straight seam is perpendicular to the base seam that you sewed before. Yes I know these short seams are fiddly sorry!
(lf you put your hand inside at the base and push it out, you should be able to see where the base and side of the bag are forming ). 8. Now sew the seam to split this side into two larger pockets.
You will need to put one hand inside the bag and it can be a bit fiddly trying to keep the seams straight as you wrestle with this huge woolly tube. Try to keep it as flat as you can. You may find it useful to put the tube shaped bag around an ironing board. On this side one seam makes two pockets, one on the outside and one on the inside. You can put two seams on this side, same as the other side, if you wish. Or one seam on both sides. Again I've shown the position of the seam with a length of the contrasting colour, but you should sew it up with the same colour as the right side facing you.
9. Sewing up the base
Turn the tube inside out so that right sides are together inside the tube. Match up the two layers at the bottom of the base, with the two layers of the overlapping sides. Sew them all together to complete the base of the bag. Its less bulky if you oversew it rather rather than straight stitch or back stitch along the seam. As all the edges will be curling up, I recommend that you pin two pieces together, then a third, then fourth, then remove the pins as you sew.
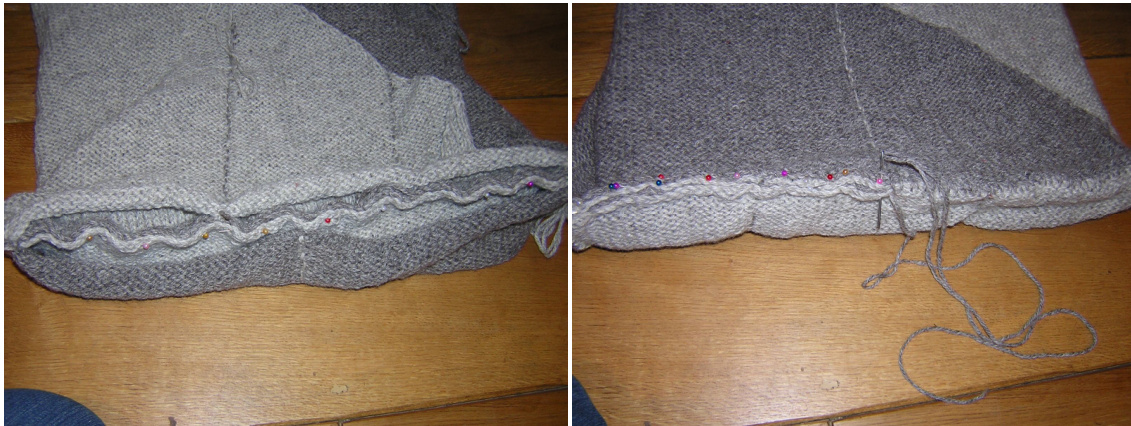
10. Finish the short sides of the pockets. Turn the bag right side out again and sew the short sides which are still open, line up the edge with the edge of the side of the bag. Turn the bag inside out, find the last little short side seam, and sew that up along the edge of the side of the bag. Pockets complete!

11. Graft the two sides of the handle together, or cast them off and sew up. Before felting it looks like this: After:
Felting:
I put my bag in a front loading washer at 60 degrees with extra rinsing cycle for two washes with jeans and a training shoe. Use whatever washing machine you have, or a bucket and sink plunger. Check on the felting during the process. When it is the size and density you require, pull it into shape, pack it with books or boxes as it dries to give the base and sides some shape. Thankyou for downloading my pattern. I hope you enjoy making and using it as much as I do. Please be polite and don't sell copies of this pattern in any form. I have no objection to knitters selling the finished item, as long as I am credited as the designer. Copyright Janet Barton 2011


