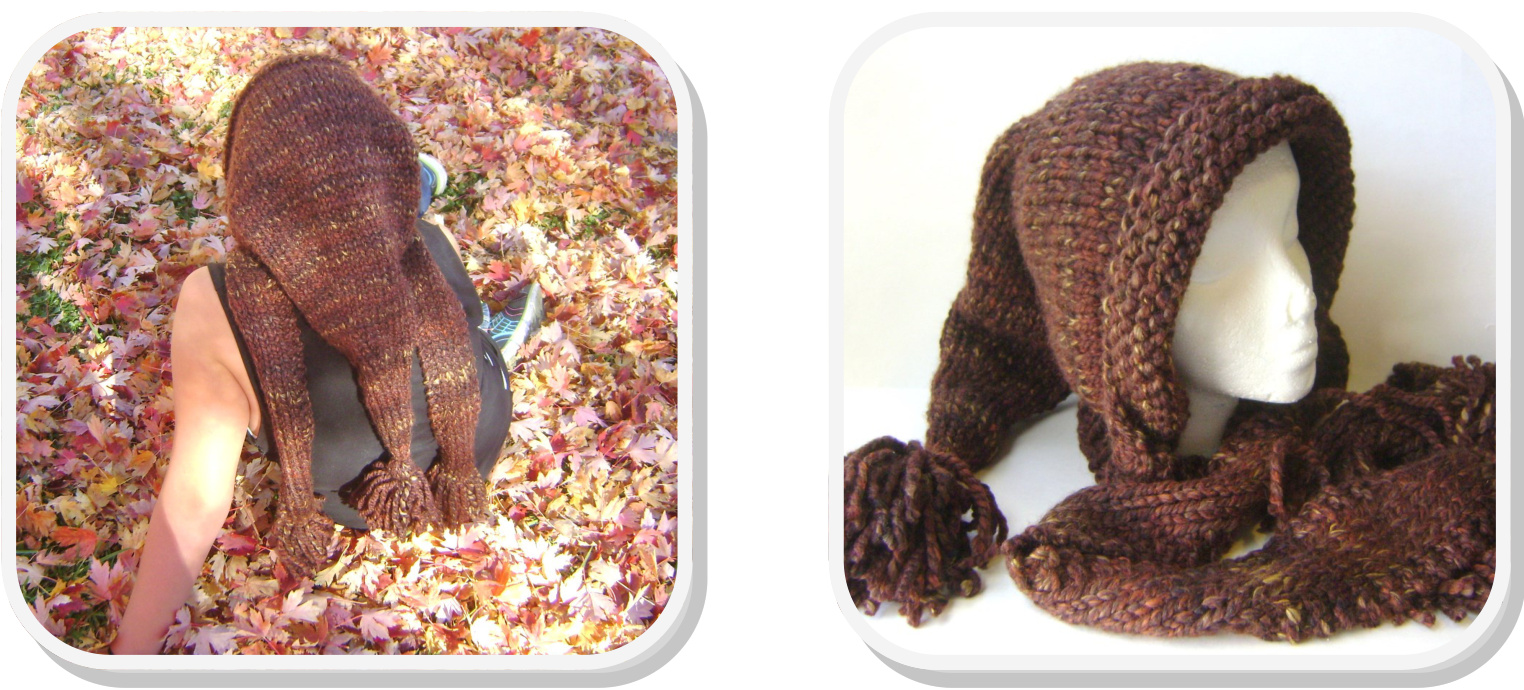
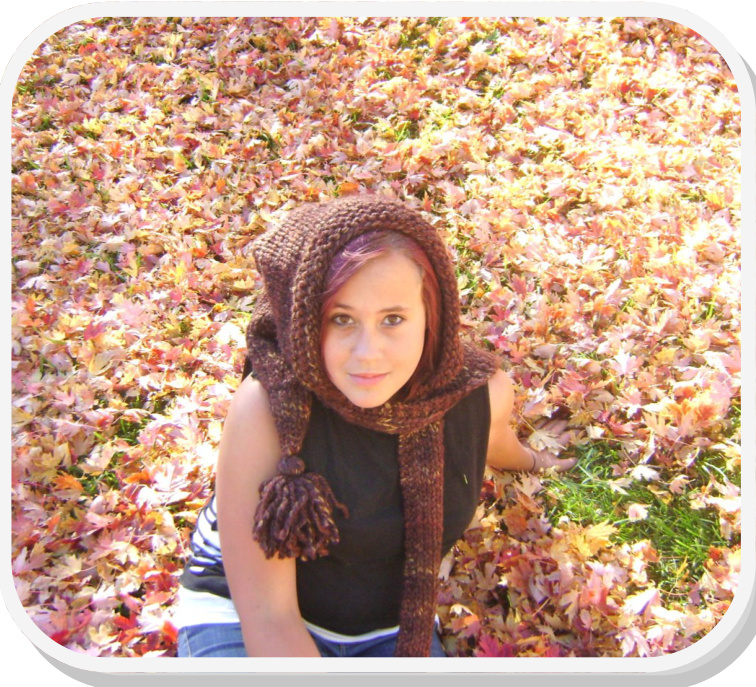
Traveling Hood
By Rhea Allais For long journeys, or short trips. Gauge: on size 13 needles, 9 st x 13 rows = 4" x 4", in stockinet Materials: One 26" size 13 US circular needle or One set ten or twelve inch size 13 US single point needles One 16" size 13 US circular and/or one set size 13 double pointed needles 200 yds. super bulky weight yarn, such as Lion Brand HometownUSA,LionBrandWool-EaseThick&Quick,or Rowan Big Wool. It takes two balls of Thick & Quick Solids or three of Thick & Quick Prints. Scissors, stitch marker, stitch holder, and large eye yarn needle Instructions
CO 50 stitches
Row 1-5: s1, Knit to end of row. This is the front edge of the hat, and you may knit more rows as desired, for a wider cuff. Row 6: s1, knit to end (right side) Row 7: s1 purl wise, purl to end (wrong side) Repeat rows 6 and 7 eight more times (18 rows of stockinet total). Row 24: s1, k2tog, knit to last three, ssk, k (48) Row 25: s1, purl to end Repeat rows 24 & 25 three more times (42 stitch esleft) Row 32: (use 16" circular or double points to knit this row, as you will begin knitting in the round immediately following) s1, k2tog, knit to last three, ssk, place marker, s1 Now your stitches are on the circular needle, bring the left point up to start working in the round. Slip the last stitch on the right needle onto the left needle, and knit it together with the first stitch on the left needle. Knit around, the marker is the end of your row. (39)
Continue working in the round for the decrease section. Crown Decreases: (switch to DPN's or magic loop when necessary) Row 1: \*k2tog, k11\* repeat around (36) Row 2 & 3: knit around Row 4: \*k2tog, k10\* repeat around (33) Row 5 & 6: knit around Row 7: \*k2tog, k9\* repeat around (30) Row 8 & 9: knit around Row 10: \*k2tog, k8\* repeat around (27) Row 11 & 12: knit around Row 13: \*k2tog, k7\* repeat around (24) Row 14 & 15: knit around Row 16: \*k2tog, k6\* repeat around (21) Row 17 & 18:knit around Row 19: \*k2tog, k5\* (18) Row 20, 21, 22: knit around Row 23: \*k2tog, k4\* repeat around (15) Row 24, 25, 26:knit around Row 27: \*k2tog, k3\* repeat around (12) Row 28, 29, 30: knit around Row 31: \*k2tog, k2\* repeat around (9) Row 32, 33, 34: knit around Row 35: \*k2tog, k1\* repeat around (6) Row 36: knit around Cut yarn with a long tail, use yarn needle to pull yarn through these last six stitches, pull tight, fasten off, and weave in end. Neck edge and ties Along bottom edge of hat, pick up and knit 35 stitches, it should be easy to see where to pick up in each slipped stitch along this edge. Take extra care in picking up stitches where you joined to work in the round, so no gaps are created. The exact number will not matter, but you will need to have an odd number of stitches on your needles. Row 1: (wrong side) k2, p4, k2, \*p1, k1\* repeat to last 9 stitches, p1, k2, p4, k2 4, k2, \*p1, k1\* repeat to last 9 stitches, p1, k2, p4, turn work. Do not work last two stitches Row 5: (ws) s1, p2, k2, \*p1, k1\* repeat to last 9 stitches, p1, k2, p2, turn work. Do not work last four stitches. Row 6: (rs) s1, k3, place the eight stitches that are now on the right needle onto a stitch holder. Bind off the next section of stitches (the ribbing), and you should have 8 stitches left. Then, begin working these as the first tie. The first tie: Row 1: knit (8) Continue working these two rows for a total of 80 rows. Bind off loosely. Tie 2 Move remaining stitches from holder onto your needle. Arrange them so you can start working on a wrong side row. Join yarn and begin working: Row 1: k2, p4, k2 (8) Row 2: k8 (8) Continue working these two rows for a total of 80 rows. Bind off loosely. Finishing: Cut 16 pieces of yarn 10" long for fringe on the ends of the ties. Using a crochet hook, attach 8 bits of fringe to end of each tie. A good YouTube video for attaching fringe can be found here: http://www.youtube.com/watch?v=GpJTKwwHbls, or you can do a Google search for "attaching fringe to a scarf". I use a DvD case to make the fringe and tassel, and wrap the yarn around the short way—the little recession where the case opens is very convenient to slide in your scissors to cut the yarn. To make your tassel, use a DVD case, and wrap your yarn around it 32 times. Slide a long piece of yarn (l'm calling this tie #1) inside your looped yarn, and work it along the spine of the DVD case. Tie it as tightly as you can, but do not knot. Cut the yarn on the other side of the case (in the opening recession), and then tighten your tie and knot it. Cut one last piece of yarn about 18 inches long, and wrap it (tie #2) twice around the tassel to create a "neck". Wrap this tightly, and when it is arranged to your liking, tie it in a knot. Let the ends of tie #2 hang down with the rest of the tassel, and trim to the same length. Sew the tassel to the pointy end of your hat, using the ends of tie #1. Weave in all the remaining ends. To make the ties lay straight (they will want to curl),they will need to be blocked. If your yarn is mostly wool, you can simply get the ties wet, press out the excess water between two towels, and then lay them flat to dry. They will keep their flatness. For acrylic yarn, or acrylic blends, lay one tie as flat as possible on your ironing board. Place a damp cloth over the tie, and then lightly apply a hot iron (cotton/linen setting) to the damp cloth, with very little pressure on the tie. The steam will relax the fiber, and it willay flt. Apply steam to each part of the tie for 10 seconds, and then allow the tie to cool completely before moving. Repeatwiththesecondtie. Copyright 2013, Rhea Allais. This pattern may not be reproduced in any media or reprinted without permission from the author.