stegosqurus
By Cassidy Clark
body1
CO 40. Working back and forth in rows, starting with a purl row, work 5 rows. At beginning of 6th row, BO 15 sts. Knit till end of row. (25 sts) Purl next row. Next two rows: K1, SSK, K till 3 sts from end, K2tog, K1. P1, P2togtbl, P till 3 sts from end, P2tog, P1. Knit next row. At beginning of next row, BO 6, P to end. Work 4 rows. Next row: SSK, SSK, K till 4 from end, K2tog, K2tog. BO all sts.
body 2
CO 40. Working back and forth in rows, starting with a purl row, work 4 rows. At beginning of 5th row, BO 15 sts. Purl till end of row. Knit next row. Next two rows: P1, P2togtbl, P till 3 sts from end, P2tog, P1. K1, SSK, K till 3 sts from end, K2tog, K1. Purl next row. At beginning of next row, BO 6, K to end. Work 4 rows. Next row: P2togtbl, P2togtbl, P till 4 sts fromend, P2tog, P2tog. BO all sts.
spines
CO 20. Working back and forth in rows, Purl onerow. Next row: K1, \*YO, K2tog\* till one st from end, K1. Purl next row. BO all sts. Fold the cast-on edge to the BO edge, with the knit side on the outside. Using a tapestry needle, whip stitch the two sides together. This will be sewn onto the body later. This is exactly like a picot edge—once you fold it in half, it will look like spines.
legs [mqke a]
CO 10. Working back and forth, and starting with a purl row, work 5 rows. BO all sts. Fold the leg in half, with the side edges together, NOT the BO edge and the CO edge together. It should look like a fat square. Sew together except for the top. Add a small amount of stuffing into the leg, then finish sewing. This will be grafted to the body later.
Finishing
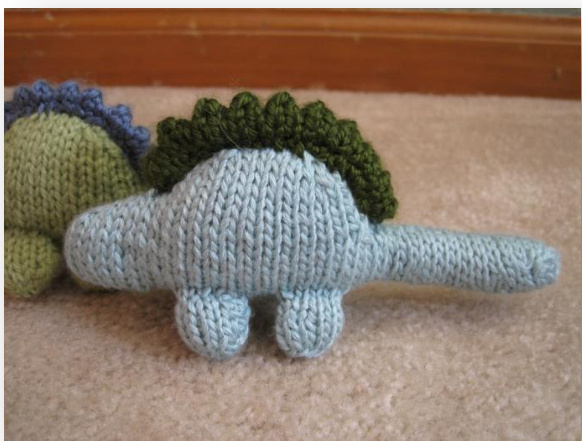
Sew both sides of the body together using mattress stitch, with the purl sides on the inside.Leave a small hole to allow for stuffing. Once stuffed, sew up the hole. Sew the spines onto the stegosaurus, using the picture as a guide for placement. Sew the legs onto the stegosaurus, using mattress stitch. This creates a smooth-looking edge that appears to be seamless. If you wish, you may embroider a face onto the stegosaurus. If you want your stegosaurus to be baby safe, remember not to use buttons or anything that could be a choking hazard. Safety eyes or just embroidery thread are good alternatives. Enjoy!! Note: Please do not sell this pattern or use the product of this pattern for commercial use without consent from Cassidy Clark. Thank you!


