BohoKnillerChie Spins
Thatch By Brittany Wilson
PATTERN NOTES
MATERIALS Needles: 1 pair US #11/8mm straight needles Notions: Tapestry needle Yarn: Fleece Artist Thatch [wool; 109yd/100m per 125g skein]; color: Vermillion GAUGE 10 sts/19 rows = 4" in stockinette stitch
FINISHED MEASUREMENTS
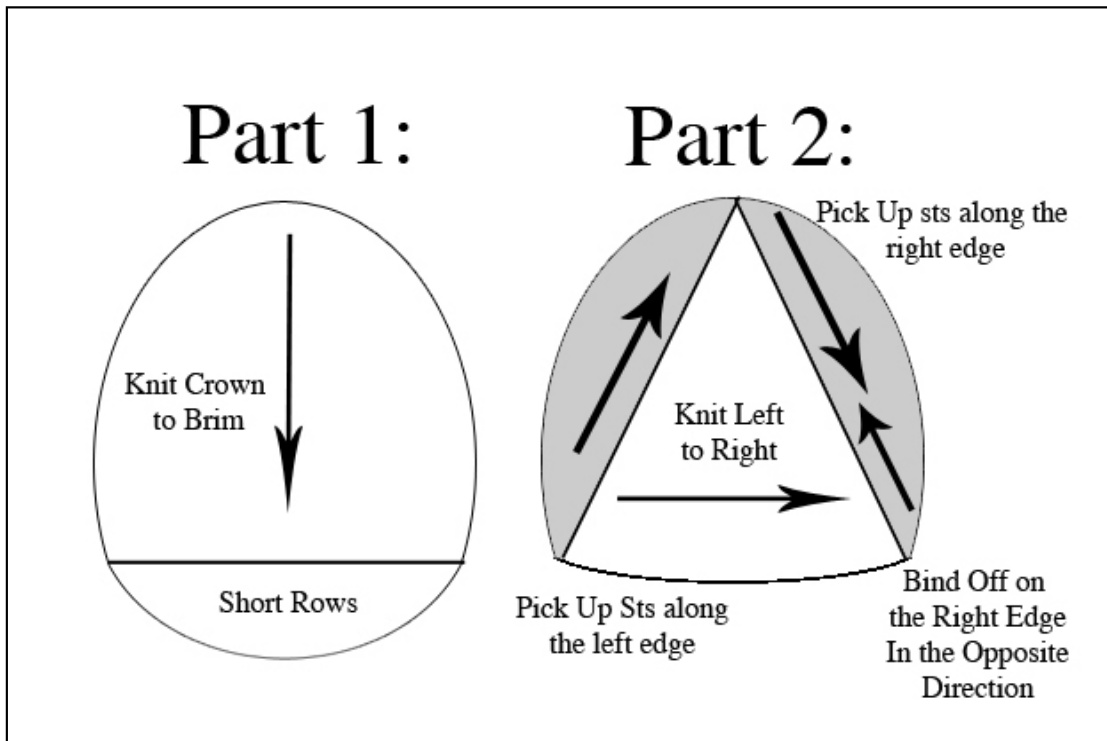
Size:Adult Measurements with piece laying flat: 8.5" wide 9" tall The hat is worked flat, starting with 2/3 of the body and then the other third is picked up in the opposite direction and knit in a different stitch pattern. For helpful tips and videos on the Wrap and Turn and 3 Needle Bind Off techniques please check out http://www.knittinghelp.com/ ABBREVIATIONS USED: CO- cast on W&T- Wrap and Turn RS- right side K2TOG- knit 2 together WS- wrong side M1- Make 1 STS- stitches BO- Bind Off PU- pick up P- purl K- knit RH- right hand LH- left hand PATTERN Part 1: Knit from the crown to the brim. CO 4 sts using long-tail cast on. Row 1 (WS): P all sts Row 2 (RS): (K1, M1) 3 times, K1= 7 sts Row 3: P all sts Row 4: (K2, M1) to last st, K1= 10 sts Row 5: P all sts Row 6: (K3, M1) to last st, K1= 13 sts Continue in this manner until you have completed 9 total increase rows and have a total of 31 sts on your needle.
Work in Stockinette Stitch (K all sts on the RS and P all sts on the WS) until your piece measures 6" from the last increase row, or 9" from cast on row. If you want to place markers at the beginning and ending of the last increase row it might be helpful for identifying this row in Part 2 On the next RS row begin working a section of short rows as follows: Row 1 (RS): K26, W&T Row 2 (WS): P21 W&T Row 3:K20, W&T Row 4: P19, W&T Row 5: K18, W&T Row 6: P17 W&T Row 7: K16, W&T Row 8: P15 W&T Row 9: Knit to the end of the row, hiding your wrapped sts as you go. Row 1o: Purl to the end of the row, hiding your wrapped sts as you go. Row 11 (RS): BO all sts, do not break yarn.
Part 2: Knit from the Left Side of the Hat to the Right Side of the Hat.
Hold Part 1 with WS facing up, small crown to your left and short rows to your right. The top (right side of the hat) and bottom (left side of the hat) edges should be curling towards you so the RS is visible. From the RS edge that is closest to you (the left side of the hat) PU and K 2 of every 3 sts until you reach the first increasing row from Part 1. You should have approximately 18 sts on your needle. WS Row: K all sts RS Row: Kto the end, PU and K the next 2 sts along the Part 1 left edge. Repeat these 2 rows a total of 6 times until you reach the top of the crown, you should have 30 sts on your needles. Knit 1 more Ws Row. At this point you will begin decreasing back down the right edge of your hat, in the opposite way that you increased. RS: Knit WS: PU the first st on the right edge of the crown and knit it together with the first st on your LH needle. Repeat this one more time then continue as follows: K2tog, K2tog, K to end= 2 sts decreased. Repeat these 2 rows until there are 18 sts left (or the number of sts that you had when you first picked up stitches on the left edge before the crown increases) and you have reached the last increase row from crown of Part 1. Turn the hat inside out. You will now work a 3 needle bind off (with only 2 needles) from the bottom edge back up to where you were just working on the inside of the hat. The right edge will curl towards you so the RS is visible, and that is where you will PU your sts for the bind off. PU 1 st from the bottom edge of the right edge of the hat and K2tog with first st on the LH needle. Repeat this again Pass the first st on the RH needle over the second st. Continue in the manner, picking up 2 sts out of ever 3 on the right edge, of knitting a stitch from the right edge together with one from your LH needle and passing the 1st st from the RH needle over the second until there are no more sts left on the LH needle and you have reached where the increasing sts of Part 1 starts. Break your yarn and pull it through the last remaining st on your RH needle.
FINISHING
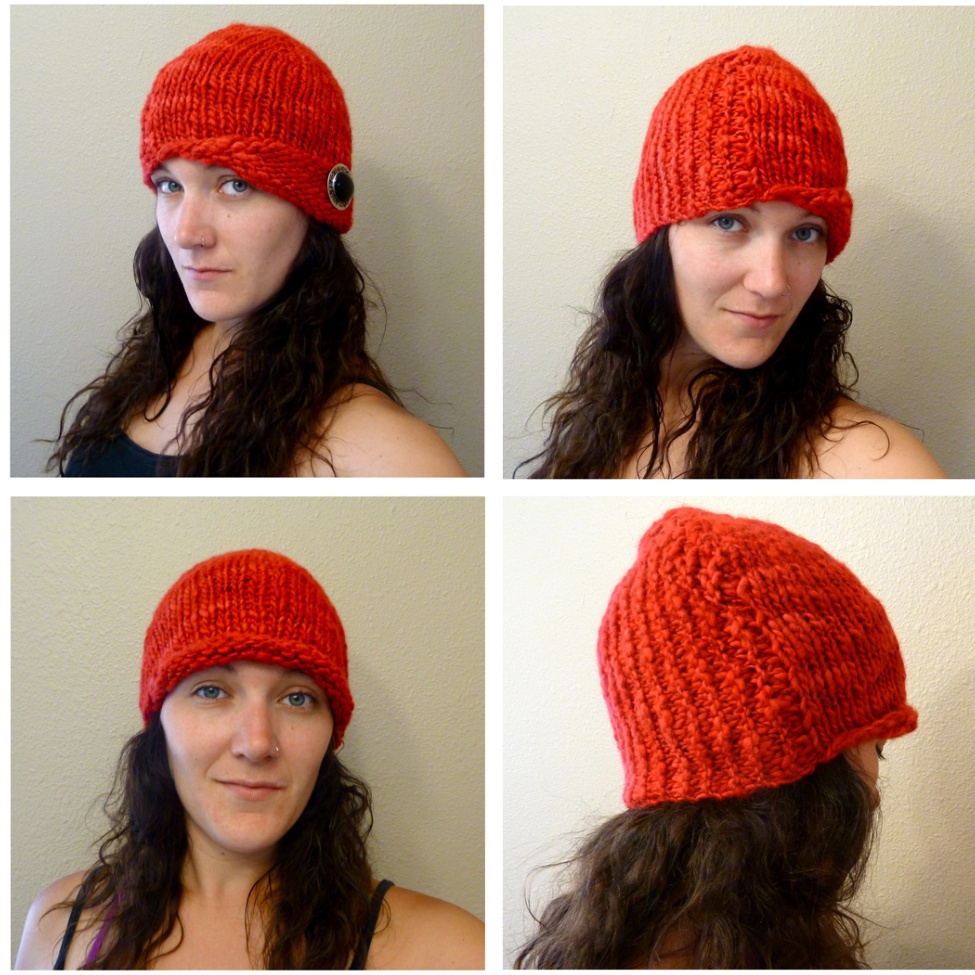
Weave in all ends. Block as desired. If you prefer to wear the hat as a cloche style hat, use a brooch to secure short row brim against the hat so it doesn't roll. The pattern and photographs contained in this document are the property of BohoKnitterChic Spins. This pattern is available for personal use only. No unauthorized reproduction, in whole or in part, or distribution of this pattern or content is allwed, Copyright @ 2012 BohoKnitterChic Spins
Part 2 In Pictures
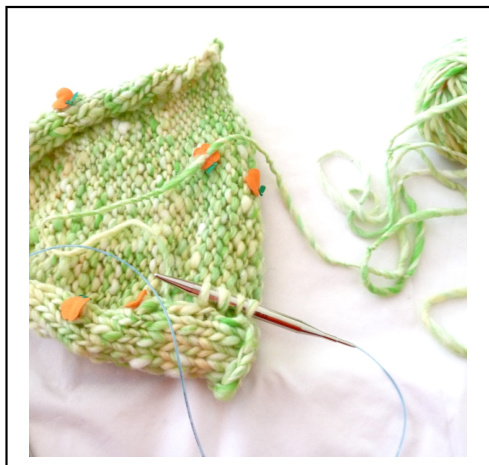
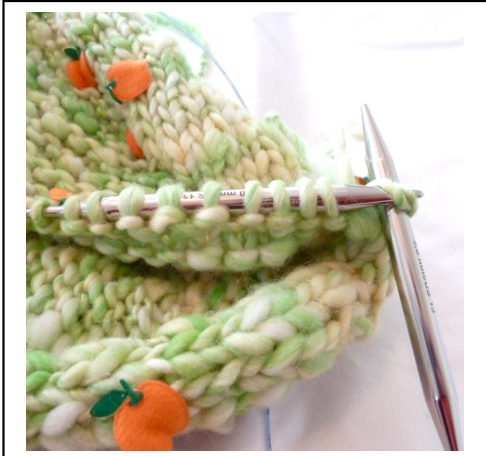
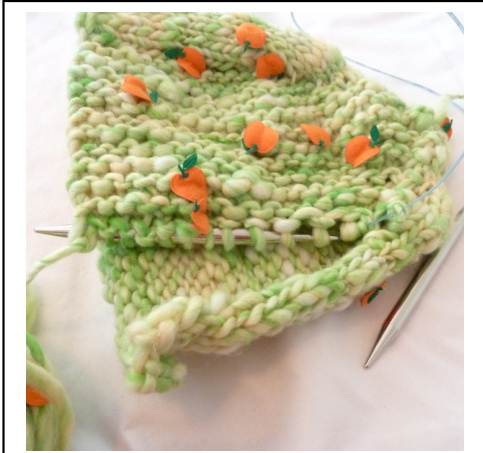
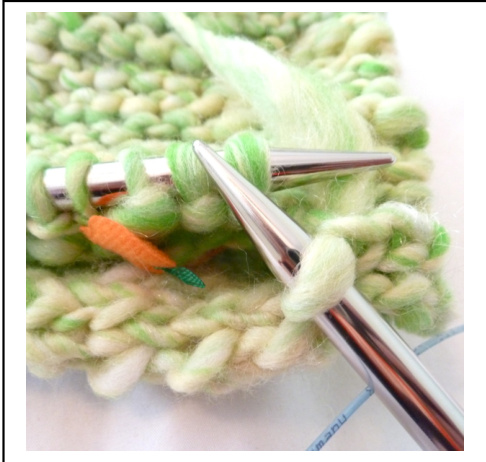
Pick up stitches along the left edge of Part 1, starting on the right side where your yarn tail ended up after Binding Off Part 1 Decrease down the right edge of the hat. Decreases are worked by picking up stitches on the right side of the right edge and worked together with the wrong side of left working piece. After Decreases are done the yarn will be on the bottom edge of the work. Turn the work inside out to finish joining the two edges together. Work a 3 needle bind off with 2 needles from the bottom edge back up on the wrong side of the work to where the right edge decreases were worked.


