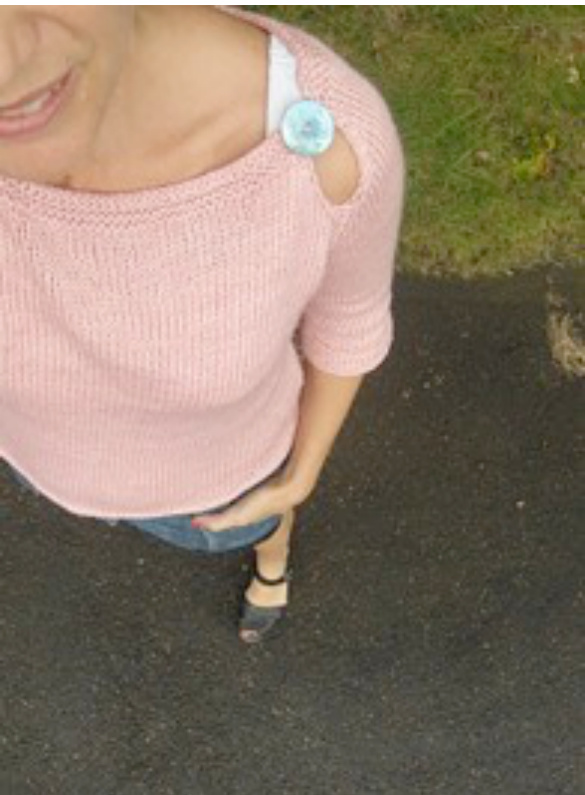
Molly - a raglan sweater with button
This sweater is knit in stockinette stitch with fake garter "seams". The sweater is knitted in the round, except for in the beginning when it is knit back and forth. A few simple shortrows, extending 15 sts on the front at each "side-seam" will result in a lovely curved hem in the back. You will need approximately 930 yards of worsted weight yarn and a circular needle size that will give you a gauge of 17 sts/ 10 cm (4") for bustsize 38". For other sizes, the stated yarn and gauge work fine too, but I'm unable to say how much yarn will be required for that. You can also work the sweater in other yarn weights. To achieve the best fit as possible, you start by making some calculations for the neckline, and try the sweater on as you go. Since I use the metric system, all calculations in this pattern are based on that. There are many sites on the web for cm to inch conversion. Here is a link to one good one: http://www.garnstudio.com/ lang/en/includes/pinnestr.php (Perhaps you even have the metric system on the other side of your measuringtape:)) I have knit this sweater both in a single color and a striped version. The striped version is knit in a worsted weight yarn, with a stripe pattern of 8 rows of MC and 2 rows of CC. (The single color version is knit from a fingering weight yarn held double.) A little note about yarn: If you use a superwash yarn (I used Madelinetosh worsted MCN), wash your swatch to see how it changes. My swatch grew quite a bit after washing, so I knit my sweater a little bit too tight- then it fit perfectly after wash. Your swatch will shrink back, about to its original size, if you dry it in a tumble dryer. However, I don't recommend putting this yarn in the dryer, since it gets fuzzy and feels more synthetic when the nylon "blooms" in the dryer.
1) Swatch and calculations
(Note: If you use inches, you can do your calculations in centimeters by converting from inches with an online calculator such as the one mentioned above. Once you have your initial stitch numbers, you can continue with ‘inch' measurements as you complete your sweater.) Start with knitting a swatch to check your gauge. You are wanting to find the number of stitches over a width of 10 cm. Use a circular needle that works for your yarn. Then, measure how wide you want your neckline to be, for example 65 cm. If your gauge is 17 sts per 10 cm, you cast on 17 x 6,5 ≥ 110 sts (rounded from 110.5). Enter your neckline measurement here (in centimetres): Enter your gauge: . Divide the neckline by 10: Your gauge times your neckline divided by 10 = number of sts to cast on:
2) Neckline and raglan
Cast on the number of stitches you got after the calculations, and knit garter stitch, back and forth, for 5 rounds. On the following round you place out stitch markers to mark the raglan stitches. Start placing markers for raglan as follows: Example: You need 8 sts for the garter seams, As in my example with a cast on of 110 sts, you have 102 sts remaining. You get the number of sts for sleeves by dividing the remaining sts by 8. 102/8=12.75. Round that up to the nearest number, in this example that number is 13. You should now have 13 sts per sleeve and 39 sts per front and back. Add or subtract to make a total of 102 sts, here 13 per sleeve and 38 per front and back. Your sweater: (a) This number is the number of sts per sleeve. Take this number (a) times 3: Add or subtract to get your total number of sts minus 8: (b). (Note: both a sections have the same number, as do the b sections.) This description gives you a split on the right shoulder. If you'd rather have that split on the left side, switch places on a and b. Knit as follows: k1, pm, k(b), pm, k2, pm, k(a), pm, k2, pm, k(b), pm,k2, pm, k(a), pm, k1. Now you've established the raglan increases.
3) Yoke
Work in stockinette stitch back and forth, except for the one or two sts surrounded by markers. They will always be worked in garter stitch (ie knit on every row when working back and forth, knit and purl every other row when working in the round). The first round of stockinette stitch is on the wrong side, thus the a- and b- parts are purled. On the next round, the right side, work raglan increases as follows: Make new sts one st before or after the markers. There are no increases in the garter area. Row 1: K1, slm, (a:) k1, m1R, knit until one st before m, m1L, k1, slm, k2, slm, (b:) k1, m until one st before m, m1L, k1, slm- continue as established the whole round. Row 2: Purl across except for the raglan sts, that are worked in garter stitch. Repeat row 1 and 2 until the slit measures 8 cm, or as long as you want it to be. Continue working in the round in st st, (except for the garter raglan-"seams"). The first and the last st will be the fourth garter "'seam"'. Adjust the sts so that that seam also is worked in garter stitch. The round now begins right after the two garter sts that previously were the slit. Increase for raglan every other row as before. Work as established until the raglan measures about 22 cm, or what you need to get a comfortably tight sweater around the upper chest. Try it on by putting it on two or more circular needles, or by threading a long piece of scrap yarn through the loops. Put the armholes together by using a safety pin, to see that it fits just right under the arm pits. It shouldn't be too tight but not too loose either (remember that you'll want a tighter fit if you're working with Madelinetosh MCN or other superwash yarn, since it will grow when washed). When you're happy with the fit, remove the safety pins and continue.
4) Body
Put the sleeve sts, + one of the two garter raglan sts on each side of the sleeve, on scrap yarn. Work st st in the round: front+2+back+2 sts. The two “fake seam" sts on each side are worked in garter sts, ie knit and purl every other row. Keep the markers on each side of the garter seams. Continue working the body straight. Try it on often, maybe every 5th cm, to make sure that the fit is as you like it. If you need to increase or decrease for your bust or waist, make them one st before or after the garter seams, just like you made them on the raglan increases. (On my sweater I work straight for about 10 cm before I decrease the first time: \* k2tog, k until 3 sts before first marker, ssk, k1, slm, p2, slm \* repeat \*\*. After 20 rows the decrease row is repeated.) Work even without decreases. Work until you're happy with the length of the sweater, minus 3.5 cm. (My sweater measures 44 cm in the center front here.)
5) Rounded edge with short rows
Try the sweater on again before you continue, to make sure that you're happy with the length. Now you will make a rounded edge on the back of the sweater using short rows. (lf you're making a sweater with the neckline slit on the left side, this row should be worked until you've worked 15 sts passed the right garter seam and are working the front of the sweater.) Slip the next st as if to purl, hold the yarn behind the st and then put it in front of work, sl the slipped st back to the left needle. The yarn has now been wrapped around the slipped st. Turn work. Purl across (=stockinette stitch). Work across the two garter seam sts (make sure these are worked in garter st), continue purling, and work across the next two seam sts in garter st. Purl 15 sts, slip the next st as if to purl, hold the yarn in front of the st and put it behind work, lift the slipped st back to the needle, turn. Continue back again, knit (= st st), across the garter seams on both sides, and 5 more sts. Slip m, wrap and put the st back as before, turn. Work until 5 sts after the second pair of garter sts. Slip, wrap, put back and turn. Continue as established at 10 sts intervals until you've worked short rows 5 times per side. (Feel free to repeat more times if you are making a larger sweater.) Go back to working in the round. Work the wrapped sts together with the "wrap loop'- that will hide the holes that otherwise are visible when working short rows. Continue st st next row too, working all the wrapped sts.
6) Garter edge
Either you work every other row purl and knit, thus getting a garter stitch edge. Or else you knit back and forth, without working in the round. Work 12 rows (6 ridges). Cast of loosely on a knit row. (If the cast-off is too tight it is better to try again than to have this bug you every time you wear the sweater I usually make extra yo:s and knit them, about every 10th st, to make it looser.)
7) Sleeves
Pick up the stitches for one of the sleeves that you've had waiting on scrap yarn. Use dpn:s the same size as your circular needle, or use the magic loop method. Work even, keeping the two sts between the markers in garter st. Work for about 10 cm, then decrease one st on every side of the garter seam by working k2tog in the beginning of the row and ssk in the end of the row. Repeat this 3 more times (altogether 4 times) every 10th row. Work even until the sleeve measures 26 cm- or as long as you want it to be (I like 3% sleeves.) Work garter stitch for 3 cm by alternating purl and knit rows, making 6 ridges like the edging of the body. Bind off loosely on a knit row. Make one more sleeve.
8) Finishing
Graft the little hole under each sleeve. If you've knit the edge of the body back and forth, sew it together with mattress st from the right side. A very good description on how to do this is here: http://www.knitty.com/ ISSUEspring04/mattress.html Sew the garter sts on the neckline together the same way. Fasten a big button to hide the seam.

Block your sweater by washing it, spin it in your washing machine (the fabric will look more even and you get rid of a lot of water so that your sweater dries faster), and lay flat to dry. Finished! Mia Edvardson email me: mia@mia-edvardson.se visit my blog: http://miastick.blogspot.com


