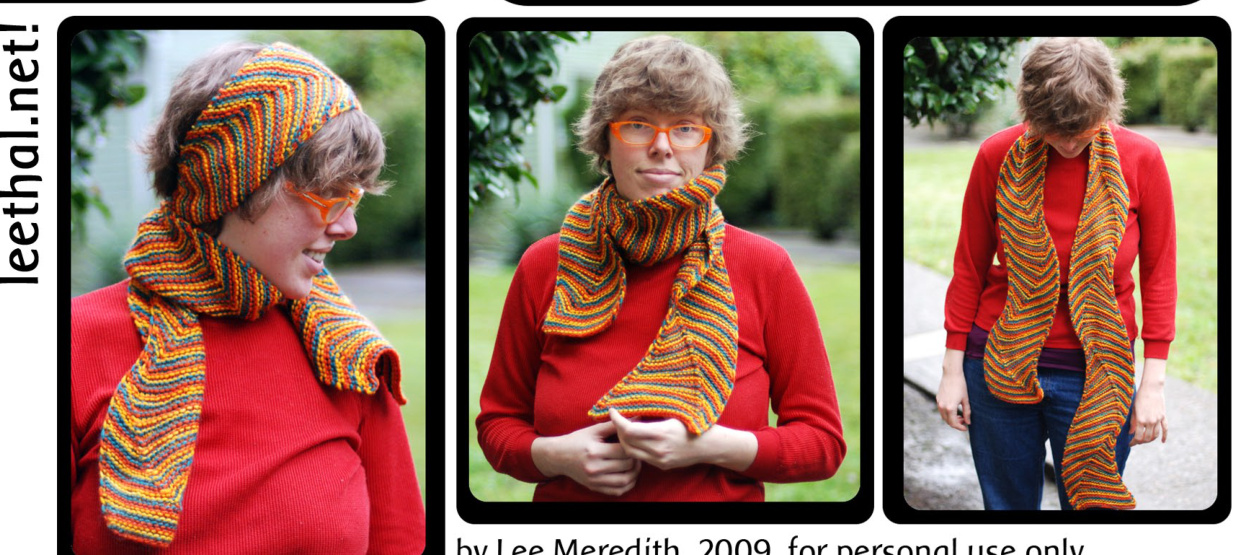
leethal's waving chevron scarf
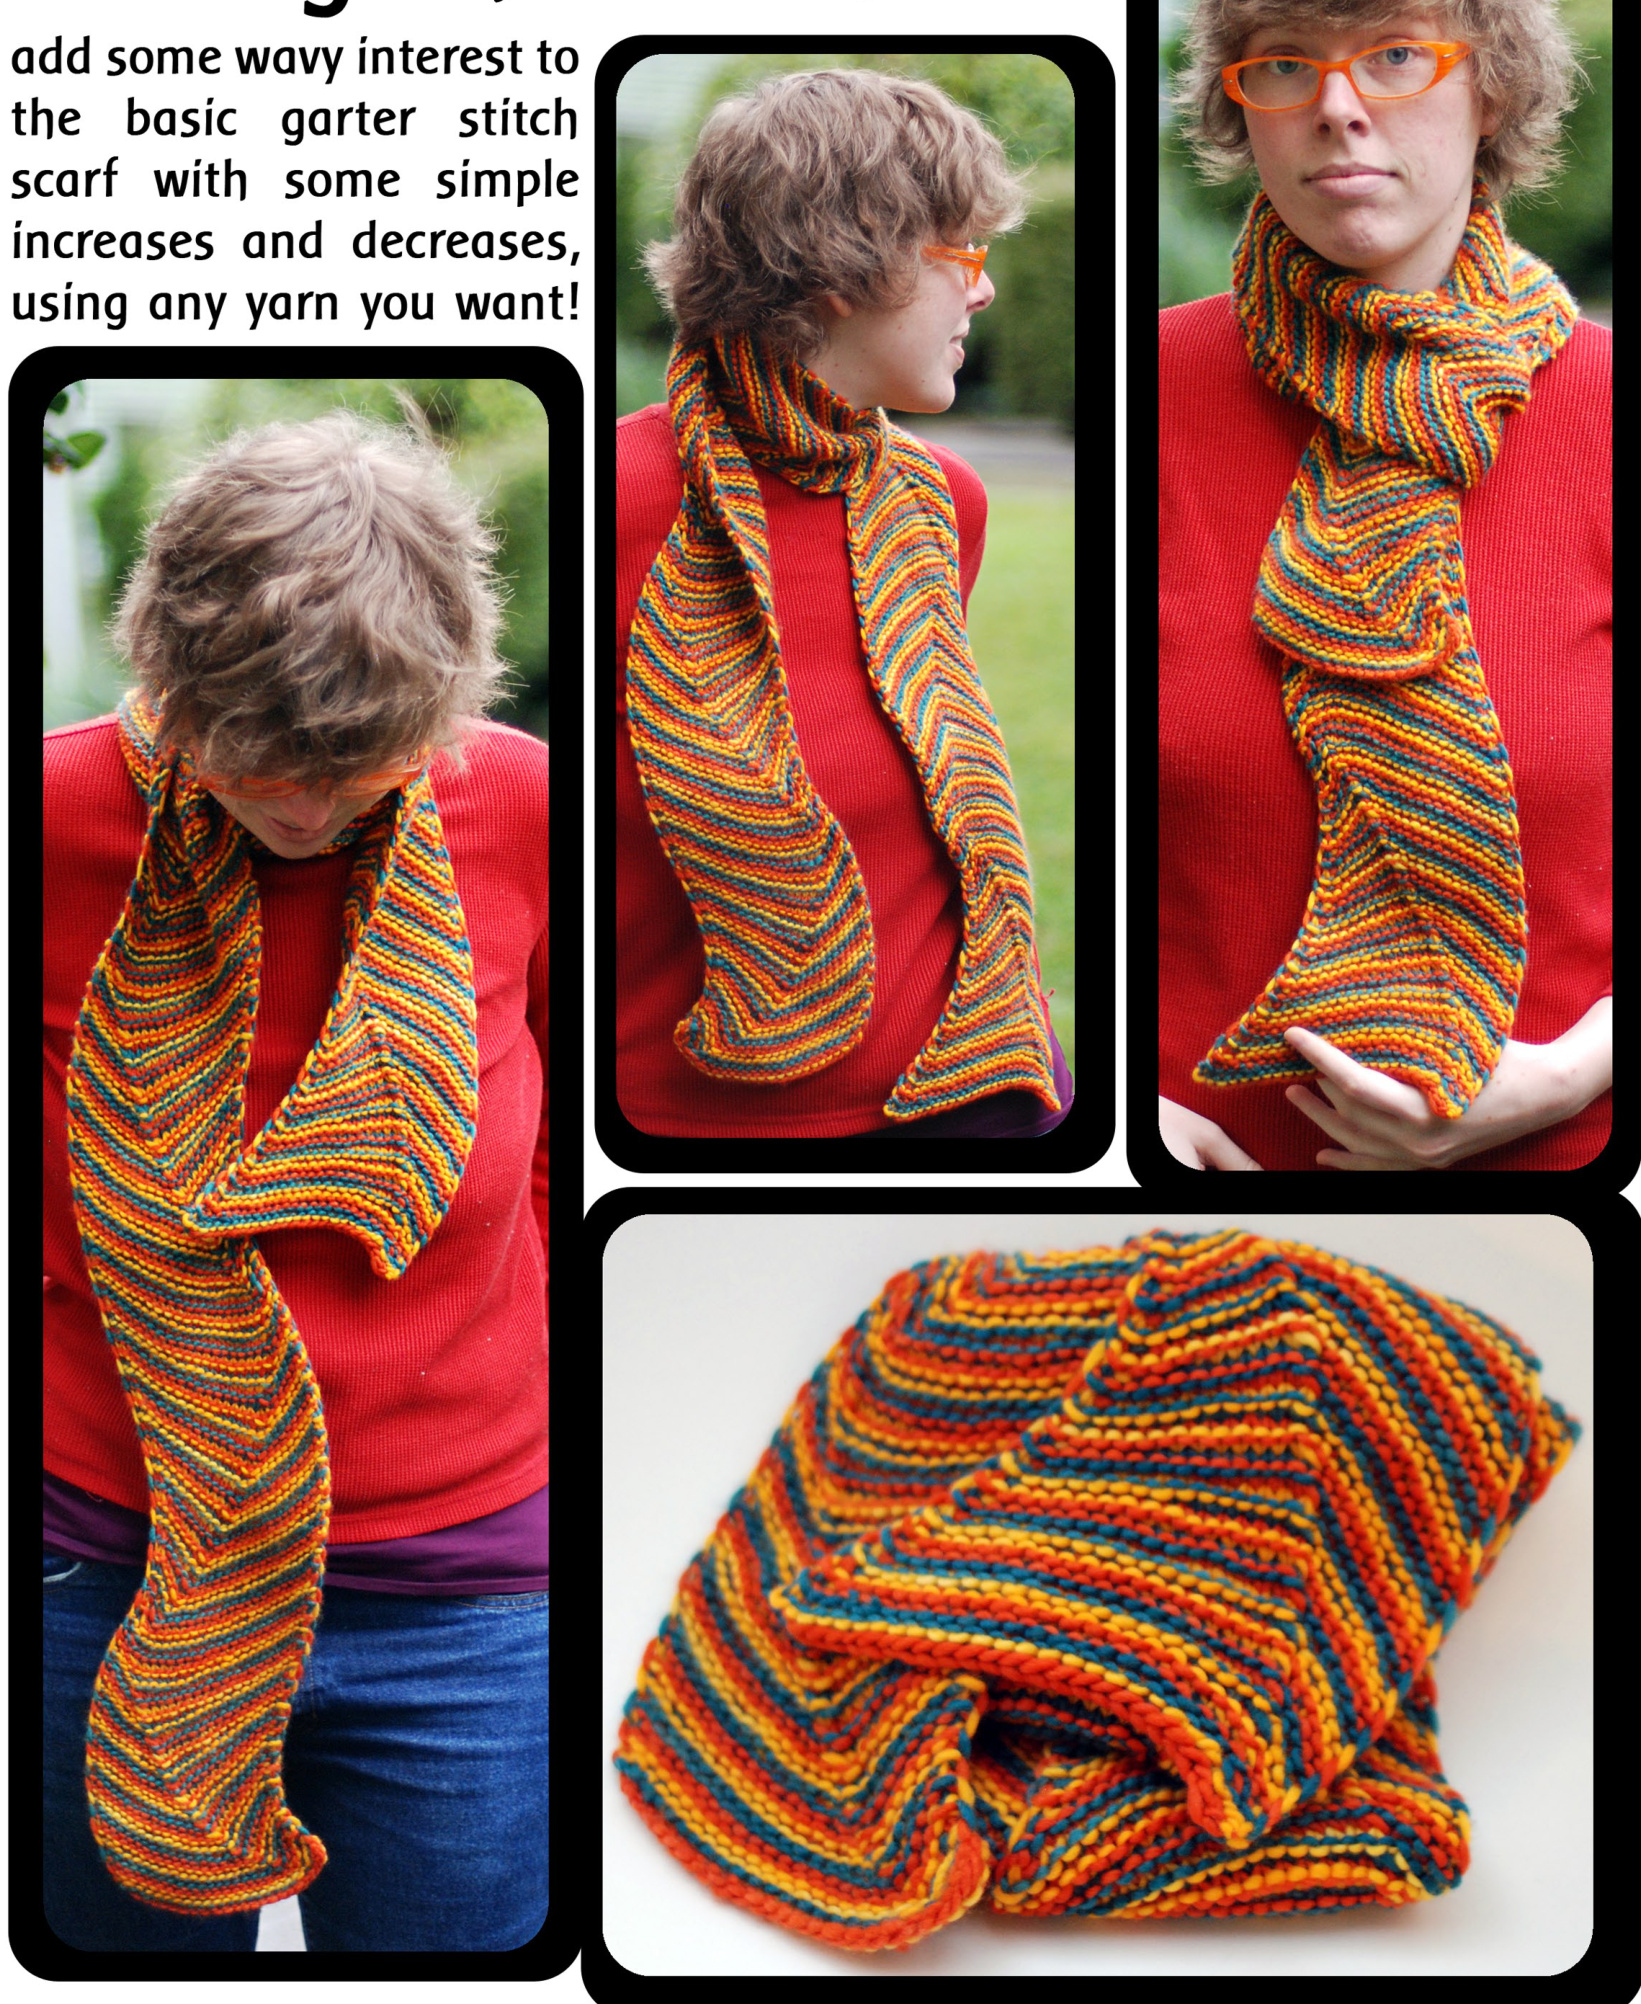
Waving Chevron Scarf
Terms:

To make this scarf you need any yarn, in 3 colors, any needles, for any gauge! In the sample I used Worsted, and size US $10\,1/2$ needles. The pattern is written for any number of stitches, so you can choose to use smaller needles and more stitches, or fatter needles and less stitches, or make the srarf as wide or narrow as you want! Using 3 solid colors will create the striped chevron look you see in the sample, but you could experiment with self-striping yarn, variegated, or even a single solid, for a textured pattern in stead of stripes. I wouldn't rec- ommend striping between only 2 colors, as that will result in a clear right side and wrong side to your scarf, which 1 like to avoid. $\mathsf{y}=\mathsf{y a r n}$ (or color) kfb $=$ knit front and back (increases 1) pm $=$ place marker $\mathsf{s k}2\mathsf{p}=$ slip a stitch, knit 2 together, pass the slipped stitch over (decreases 2) $\mathsf{k}=$ knit
Here's the pattern:
(yl): cast-on (example scarf is 26 stitches) row 1 (y2): kfb, pm, sk2p, k to last 1, kfb row 2 (y3): knit all row 3 (y1): kfb, k to marker, sk2p, k to last 1, kfb Repeat rows 2 and 3, switching yarn with every row so you will rotate yl, y2, y3, yl, y2, y3. Repeat until there are no stitches between the sk2p and the last stitch (kfb). That's one section, now you'll bring the chevron back over to the other side by switching the odd and even rows. So, starting with that last pattern row, this is what you'll do: (odd row): kfb, k to marker, sk2p, kfb (even row): knit all, removing the marker (odd) : knit all When switching between 3 yarns, just carry each color loosely along the edges. You'll be knitting with one yarn, while the other two each hang from the two sides. At the beginning of each row, bring the new yarn over the old, always the same way for a neat edge. Be sure to untangle your yarn balls every couple of rows or you'll end up with a huqe mess! Now start back at row 1 of the pattern (but ignore the y#, just keep rotating 1,2,3,1,2,3). Keep repeating the whole thing, so the chevron waves from one side to the other, until the scarf is as long as you want (the sample scarf has 8 sections). Finish at the end of a section - knit the row in which you remove the stitch marker, then bind off the following row. Weave in the ends, and block as needed. 1 lightly wet blocked the sample by spraying it with water and laying it flat on a towei overnight.