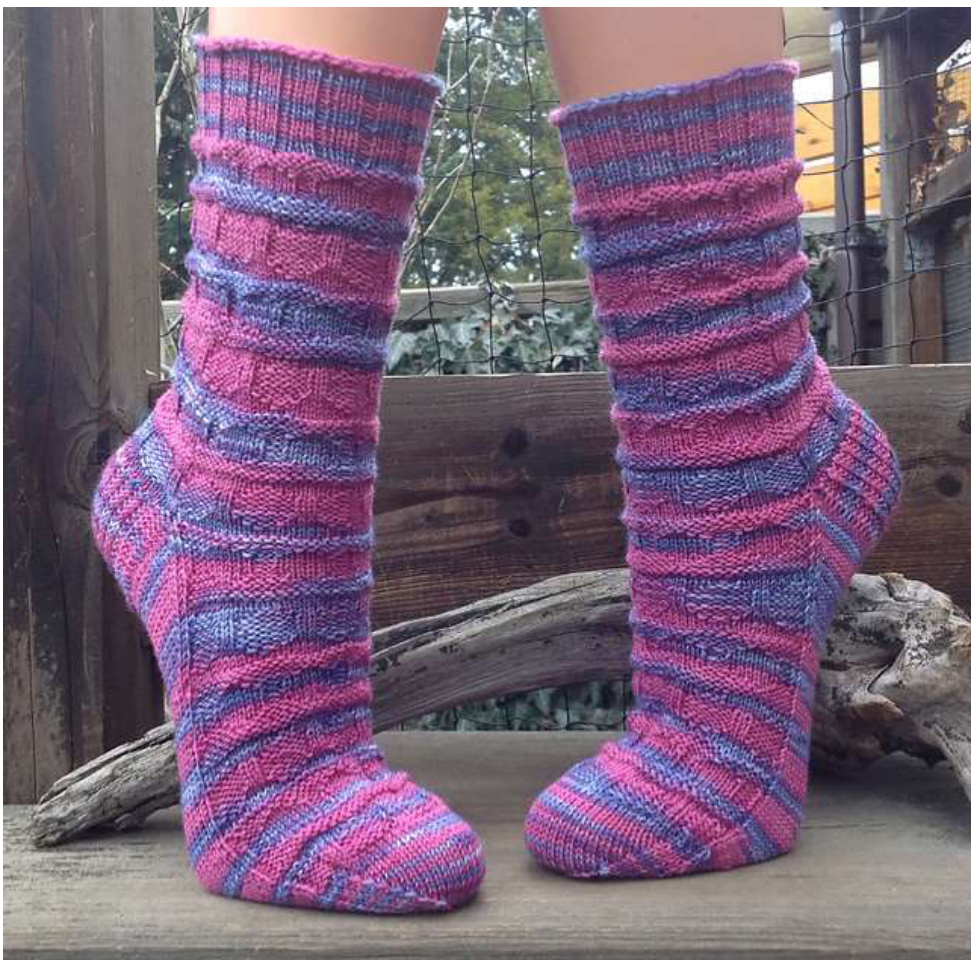
Sanduhr engl. (by cdknuddel)
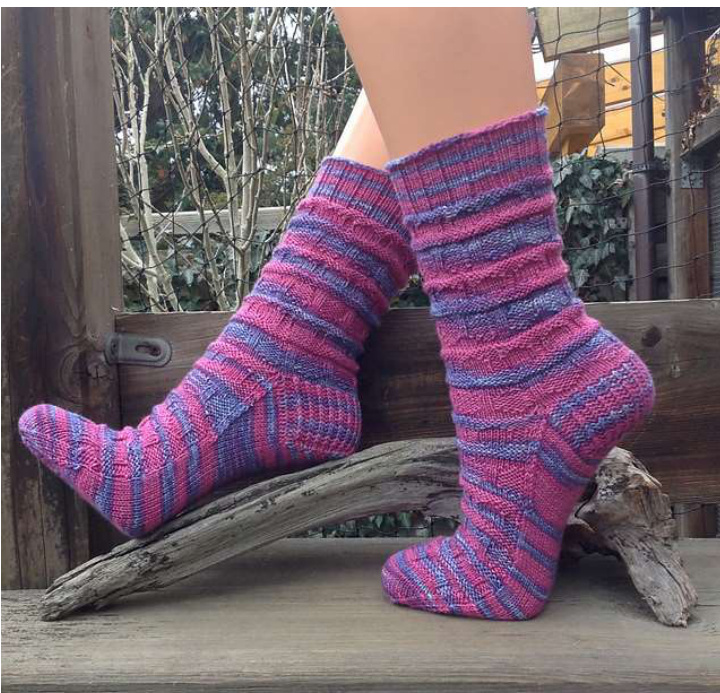
A nice pair of socks also for beginners with an easy knit - purl pattern!
Yarn:
1 Ball of Sockyarn 4 - ply (420m / 100g) Used in example: Atelier Zauberelfe Allround (400m/100g)
Size:
EUShoesize39 For bigger or smaller sizes you could cast on 8, 16.,... stitches more or fewer.
Materials:
Needlesize: 2,0 - 3,0 mm; In example used 2,5 mm dpns 1 set of dpns or 1 - 2 circs 1 Crochet Hook in Needle size 2 Safety Pins 1 TapestryNeedle 1Row counter or 2 pieces of yarn in contrasting colour to count the rows (every 1o"h row slip the thread around the first stitch on needle 1) C2016 Claudia Dahnke Please respect my copyright! The pattern is for your private use. Please don't sell the pattern or the items worked from the pattern. Sanduhr engl. (by cdknuc
Cast on:
Cast on 69 stitches with crochet hook. In the next row slip first stitch knit wise, knit 1 row and divide all stitches evenly on 4 dpns or 2 circs, knit last stitch with first (slipped) stitch together to join in the round (be careful not to twist the work), 68 stitches should be remaining!
Ribbing:
Now work Ribbing (k3 / p1) for 20 Rounds or to desired cuff length. Increase in the last Round of Ribbing evenly up to 72 stitches. The Cuff could also be worked in your own desired manner!
Leg
Now work the Leg Chart. In example the Chart is worked 9 times every round. Work Chart 1; 2 or 3 times, or to desired Leg length
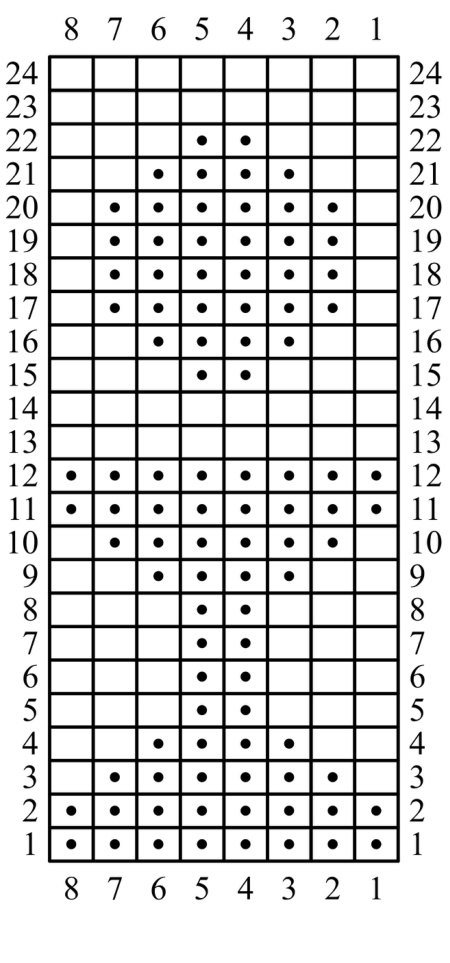
Then follows the Heel. Stitches re/k li/p
Heel Flap
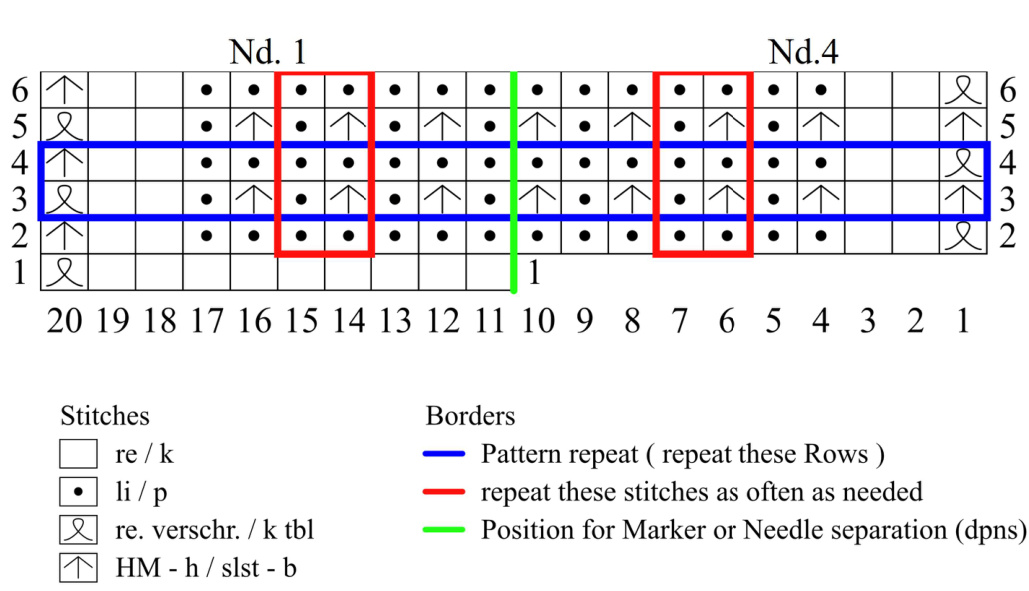
The Heel flap is worked with slipped stitches over 36 stitches and for a total of 30 Rows (back and forth) on Needle 4 + 1. The red lines are marking the stitch repeat (repeat them as often as needed). The blue lines are marking the Row repeat (repeat them as often as needed). The uneven Rows of the Chart are the right side rows (they are worked from right to left). The even Rows of the Chart are the wrong side rows (they are worked from left to right).
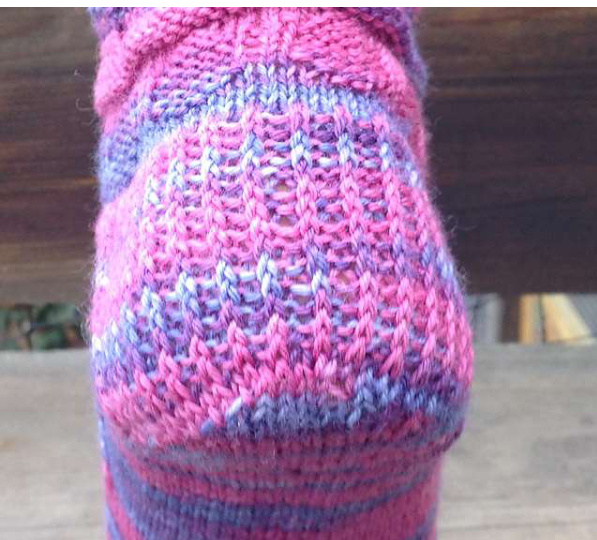
Chart for Heel Flap
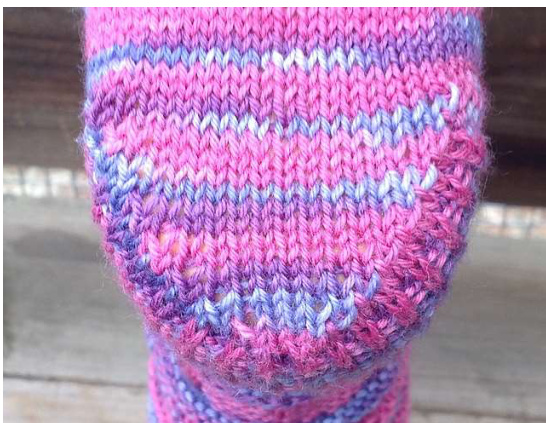
Heel turn:
Now work the Heel turn. R 1) sl 1 knitwise wyib - k 18 - k2tog - k 1 - turn R 2) sl 1 purlwise wyif - p 3 - p2tog - p 1 - turn R 3) sl 1 purlwise wyib - k to 1 st before gap - k2tog - k 1 - turn R 4) sl 1 purlwise wyif - p to 1 st before gap - p2tog - p 1 - turn Now 20 heel stitches should remain. Knit 10 stitches (Nd. 4). Now start to work in the round again
Gusset
R 1) Nd. 1 k the remaining 10 sts. from heel, pick up 17 stitches along side of heel flap Nd. 2 + 3 work Instep in pattern (Chart) Nd. 4 pick up 17 sts along the other side of heel flap and knit the remaining 10 heel sts on Nd. 4 You are now at the beginning of the round again. R 2) Nd. 1: k 10 - ktbl. 17 Nd. 2 + 3: Instep in Pattern (Chart) Nd. 4: ktbl 17 - k 10 R 3) Nd. 1: k to 3 sts before end of Needle - k2tog - k 1 Nd. 2 + 3: Instep in Pattern (Chart) Nd. 4: k1 - k2togtbl - k remaining sts R 4) Nd. 1: k all sts Nd. 2 + 3: Instep in Pattern (Chart) Nd. 4: k all sts Repeat R 3 + 4 until Needle 1 + 4 hold 16 stitches each.
Instep:
The sole stitches (Nd. 1 + 4) are always knitted stitches! The Instep, on needle 2 and 3, are worked in Pattern (Chart) The Chart is worked until approx. 5 cm before the desired foot length is reached. In example for EU Shoe size 39 are 68 R worked.
Toe:
Vork toe as follows or every shape of toe that you i
To set up for the toe, the stitches have to be rearranged. Slip 1 stitch from Nd. 2 to Nd. 1 and 1 stitch from Nd. 3 to Nd. 4 (so each Needle holds 17 stitches!) : round): Nd. 1 + 3: k to 3 sts before end of Needle - k2tog - k1 Nd. 2 + 4: k1 - k2togtbl - k rem. sts und): Nd. 1 - 4: k all sts Repeat R 1 + 2 until 10 stitches remain on every Needle. Now repeat R 1 until 5 stitches remain on every Needle. Knit the stitches on Needle 1 again (without decreasing), now the Yarn is at the side of the foot.
Close the Sock
Slip all remaining Instep stitches on one safety pin (close it!) and the remaining sole stitches on the second safety pin (close it!). Break Yarn, leaving at least a 10 Inch long tail. Slip the stitches from the first safety pin on one dpn and the stitches from the second safety pin on a second dpn. Close the sock with Three - Needle - Bind - Off. Hold one dpn behind the second in left hand and with a third dpn in right hand knit the first stitch from both left hand dpns together, repeat with the next stitch of both left hand needle, now lift the first worked stitch from right hand needle over second worked stitch - 1 stitch remains on right hand needle. Work all remaining stitches from left hand needles in the same manner until only one stitch remains on right hand needle. Pull remaining tail of yarn through last stitch and pull tight! Wave in the ends (on cuff and toe) and work second sock.
Stitch Glossary
HM - h / slst - b Masche abheben wie zum rechts stricken mit Faden hinten / slip stitch as if to knit with yarn in back. HM li - h / slstp - b Masche abheben wie zum links stricken mit Faden hinten / slip stitch as if to purl with yarn in back. li / p Linke Masche / purl. re / k Rechte Masche / knit. re. verschr. / k tbl Rechts verschrankte Masche / knit through back loop.
Happy knitting!
Dear knitter, because my English is out of the school, itis not very good, I try my best to translate my German patterns for the English speaking community on Ravelry. If you find any errors, or if you have any questions about the pattern, or if it is not understandable, please feel free to contact me over PM on Ravelry (my user name is cdknuddel ) so that I could learn and correct my errors! Thanks in advance for your help! Greets Claudia


