YQu Drive Me CrAfTy
Email Me Find me on Facebook Find me on Ravelry Find me on Craftsy
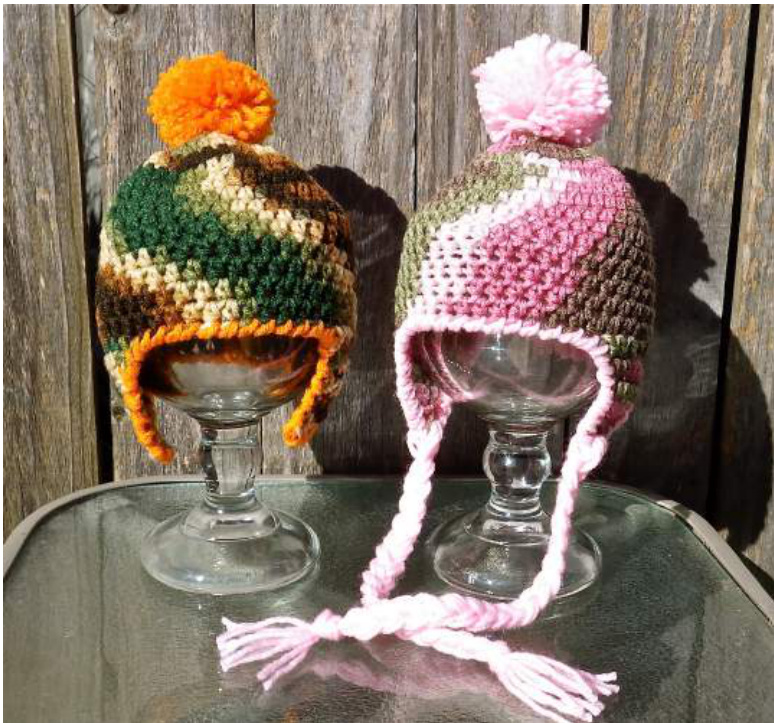
Allin-Qne Beanie Bundle
Materials:
\* Worsted Weight (Caron One Pound, Red Heart Super Saver or With Love) \* US 1/9 5.50mm crochet hook Gauge: 6 stitches and 5 rounds = 2 inches CHECK YOUR GAUGE. Use any size hook to obtain gauge
Stitches:
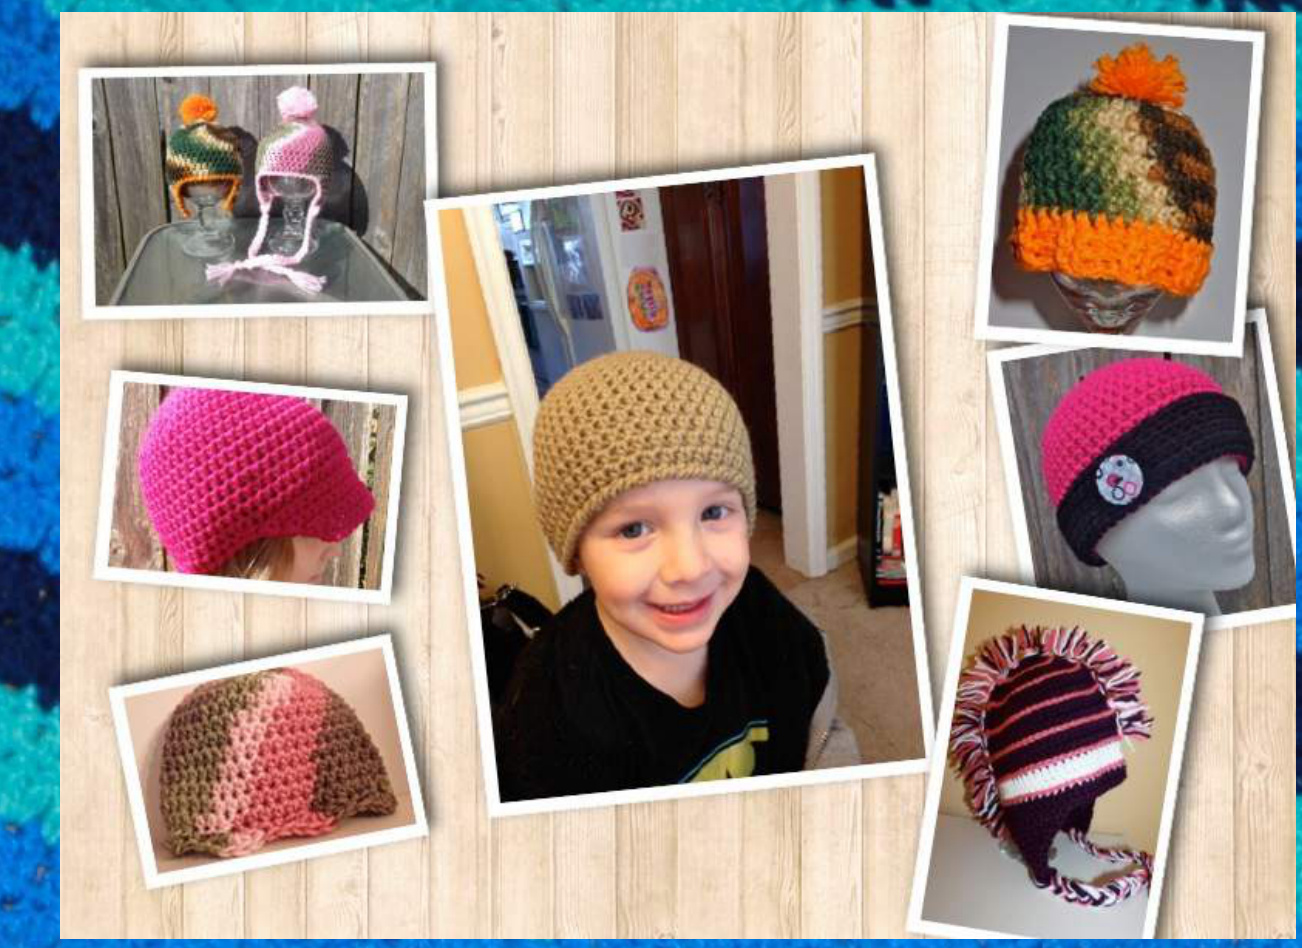
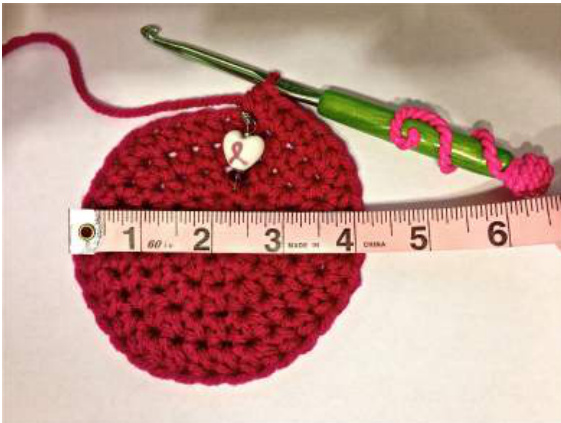
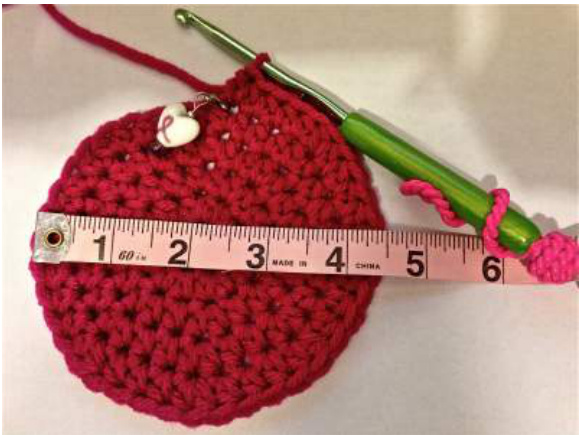
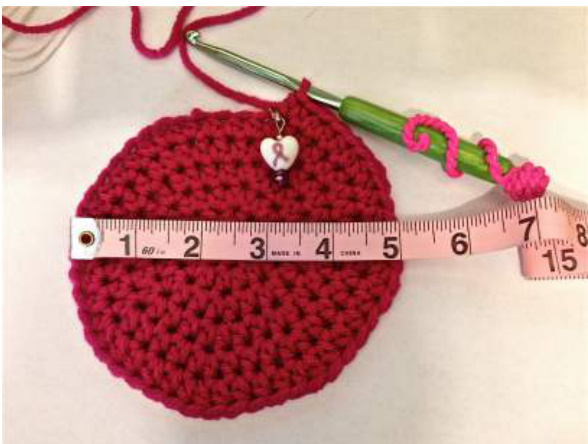
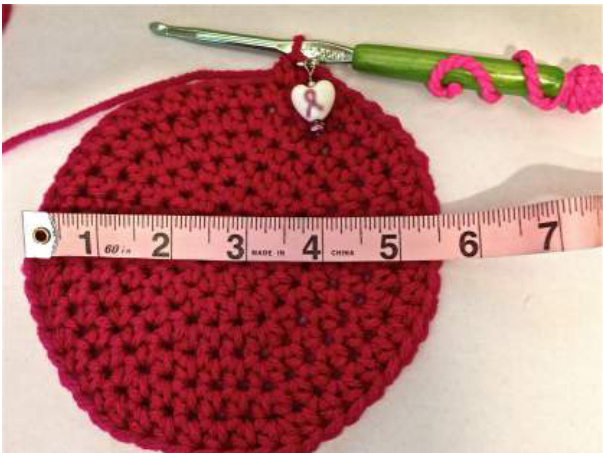
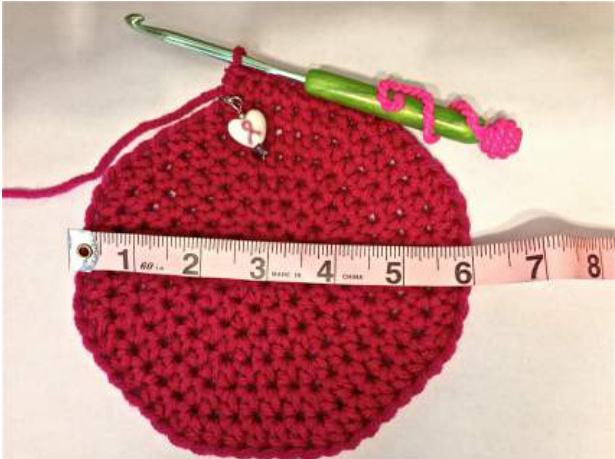
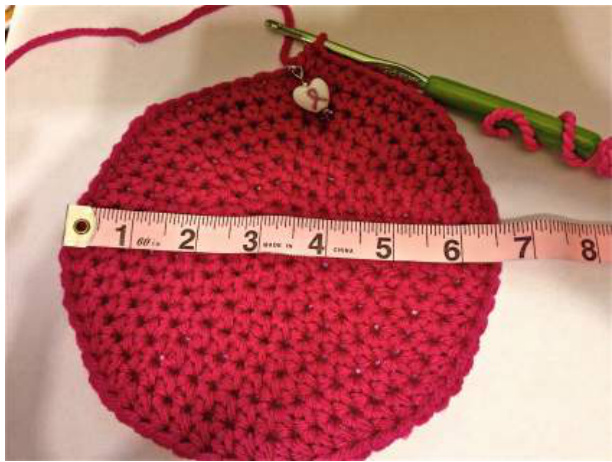
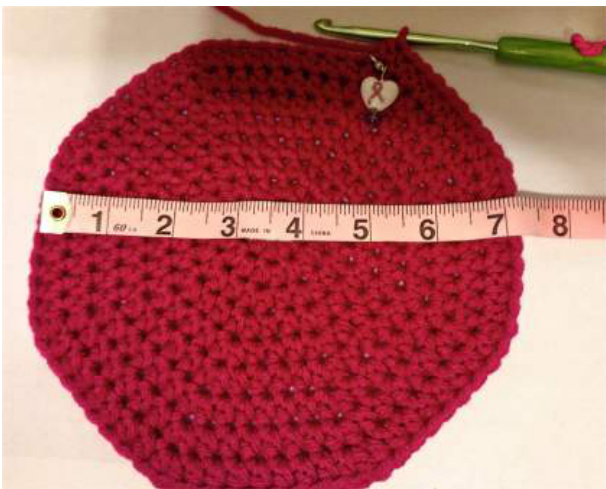
hdc - half double crochet, rsc - reverse single crochet variety of different stitches for different looks - try looking the ones up you don't know on youtube \*Work in continuous rounds, do not join How to make a magic circle: (optional) http://mcgonigal-myfavoriterecipes.blogspot.com/2012/06/how-to-crochet-magic-circle.html All-in-One Beanie Bundle: You Drive Me CrAfTy This pattern has everything in it that I was searching for when I was learning to crochet. My goal for this pattern is for you to be able to match my gauge, work this hat and for it to fit the recipient perfectly. I want this hat to meet all of your expectations and be your go to hat pattern. I want you to be creative and to test how far this versatile pattern can actually go. Gauge is very important with all projects, especially when making a garment to fit well. If you cannot match gauge exactly it is more important to match the stitches portion and then crochet more or less rounds/rows until you've got the correct length. To check your gauge, use a measuring tape to count how many stitches across you have per inch and again with how many rows/rounds per inch. Compare with the designer and if it doesn't match up, go up or down a hook size until it does! Circumference is the measurement of your head going around it. There are charts out there with the average circumference size by age, it's ok to follow those most of the time but keep in mind, not everyone has an average size head. The circumference of your hat should be about 2" less than the actual circumference of the head it's for to allow for stretch. To make sure your hat is going to fit properly, you should measure the circumference of the head you are making it for. (ex. you just got an order for a 6 month old baby, you are given a circ measurement of 20", go ahead and make the 1-4yr old size hat for that baby) Diameter is a flat measurement through the circumference (line through the circle). To obtain the correct size you crochet increase rounds until the correct diameter measurement is reached, then you just crochet around evenly for length. Stitch Count It's important to maintain the correct stitch count! You should be counting your stitches after every single round to make sure you didn't accidentally increase or decrease. Increasing or decreasing when you're not suppose to will change the size of your hat!

Wherever you see rsc, you can substitute sc if you'd like. I just prefer the way the rsc gives it more of a finished look. If you'd like to start your beanie using the magic circle method, follow the video on the first page to make your circle, ch 1 and hdc the amount called for in Rd 1 inside your circle. This pattern was a lot of work for myself and my testers. I wanted it to be free so everyone has access to a hat pattern that has it all. If you are happy with this pattern, the best payment I could ever receive is feedback and photos of your work posted on ravelry. Thank yousomuch! If you like your beanies a little longer (fully covering ears and reaches just to the eyes) you can go around one more round before final sc/rsc round. All-in-One Beanie Bundle: You Drive Me CrAfTy
0-3 Months 13"-15" head Go down hook size for newborn
Rd 1: ch 2, hdc 8 in 2nd ch from hook (8) Rd 2: \*2hdc\* (16) Rd 3: \*hdc, 2hdc\* (24) Rd 4: \*2 hdc, 2hdc\* (32) Rd 5: \*3 hdc,2hdc\* (40) 4" diameter Rd 6-13: hdc in each stitch (40) Rd 14: sc, sl, in sc just completed \*rsc\* (40) join and fasten off - should measure 5" in length \* 2 addtl rnds for baby closer to 3 mos, 5.5" in length
3-6 Months 15"-17" head
Rd 1: ch 2, hdc 9 in 2nd ch from hook (9) Rd 2: \*2hdc\* (18) Rd 3: \*hdc, 2hdc\* (27) Rd 4: \*2 hdc,2hdc\* (36) Rd 5: \*3 hdc, 2hdc\* (45) 4.5" diameter Rd 6-16: hdc in each stitch (45) Rd 17: sc, sl, in sc just completed \*rsc\* (45) join and fasten off - should measure 6" in length
6-12 Months 17"-19" head
Rd 1: ch 2, hdc 8 in 2nd ch from hook (8) Rd 2: \*2hdc\* (16) Rd 3: \*hdc, 2hdc\* (24) Rd 4: \*2 hdc,2hdc\* (32) Rd 5: \*3 hdc,2hdc\* (40) Rd 6: \*4 hdc, 2hdc\* (48) 5" diameter Rd 7-17: hdc in each stitch (48) Rd 18: sc, sl, in sc just completed \*rsc\* (48) join and fasten off - should measure 6.5" in length
All-in-One Beanie Bundle: You Drive Me CrAfTy
1 - 4 Years 18"-20" head
Rd 1: ch 2, hdc 7 in 2nd ch from hook (7) Rd 2: \*2hdc\*(14) Rd 3: \*hdc, 2hdc\* (21) Rd 4: \*2 hdc,2hdc\* (28) Rd 5: \*3 hdc,2hdc\* (35) Rd 6: \*4 hdc, 2hdc\* (42) Rd 7: \*5 hdc, 2hdc\* (49) 5.5" diameter Rd 8: \*15 hdc, 2hdc\*,hdc (52) Rd 9-18: hdc in each stitch Rd 19: sc, sl, in sc just completed \*rsc\* (52) join and fasten off - should measure 7" in length
4 Years - Small Adult 19"-21" head
Rd 1: ch 2, hdc 8 in 2nd ch from hook (8) Rd 2: \*2hdc\* (16) Rd 3: \*hdc, 2hdc\* (24) Rd 4: \*2 hdc,2hdc\* (32) Rd 5: \*3 hdc,2hdc\* (40) Rd 6: \*4 hdc, 2hdc\* (48) Rd 7: \*5 hdc, 2hdc\* (56) 6" diameter Rd 8-19: hdc in each stitch Rd 20: sc, sl, in sc just completed \*rsc\* (56) join and fasten off - should measure 7.5" in length
Medium Adult 20"-22" head
Rd 1: ch 2, hdc 8 in 2nd ch from hook (8) Rd 2:\*2hdc\* (16) Rd 3: \*hdc, 2hdc\* (24) Rd 4: \*2 hdc, 2hdc\* (32) Rd 5: \*3 hdc, 2hdc\* (40) Rd 6: \*4 hdc, 2hdc\* (48) Rd 7: \*5 hdc, 2hdc\* (56) Rd 8: \*6 hdc, 2hdc\* (64) 6.5" diameter Rd 9-20: hdc in each stitch Rd 21: sc, sl, in sc just completed \*rsc\* (64) join and fasten off - should measure 8" in length
All-in-One Beanie Bundle: You Drive Me CrAfTy
Large Adult 23"-25" head
Rd 1: ch 2, hdc 8 in 2nd ch from hook (8) Rd 2: \*2hdc\*(16) Rd 3: \*hdc, 2hdc\* (24) Rd 4: \*2 hdc, 2hdc\* (32) Rd 5: \*3 hdc,2hdc\* (40) Rd 6: \*4 hdc, 2hdc\* (48) Rd 7: \*5 hdc, 2hdc\* (56) Rd 8: \*6 hdc, 2hdc\* (64) Rd 9: \*7 hdc, 2hdc\* (72) 7" diameter Rd 10-21: hdc in each stitch Rd 22: sc, sl, in sc just completed \*rsc\* (72) join and fasten off - should measure 8.5" in length
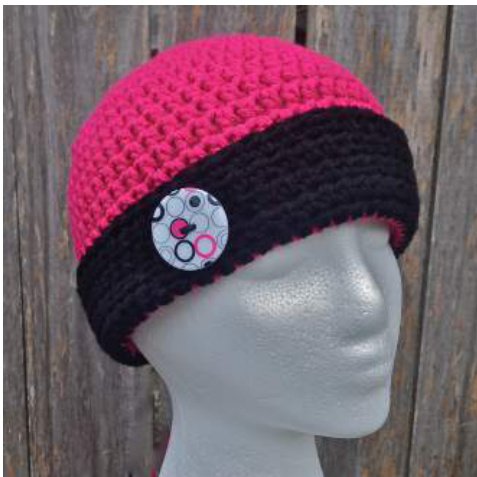
Cuffed Band
Continue in hdc for 3 rounds = 0-12 mos; 5 rounds = 1yr-adult. When you've completed your last round: sc, sl, fasten off.
Scalloped Band
Skip last 2 rounds; \*sk 2 sts, 5hdc, sk 2 sts, sc\* fasten off
2x2 Ribbed Band
Stop crocheting with 4 rounds left to go for 0-12 mos; 6 rounds left to go for 1yr adult. (example: newborn hat has 14 rounds, stop at 10) Rd 1: hdc in each st \*if you're changing colors for the band, do this round in whatever color your band will be in Rd 2-3: \*2 fpdc, 2 hdc\* join, fasten off for 0-12 mos Do 2 more rounds for lyr-adult, join, fasten off
Single Crochet Band
Stop crocheting with 4 rounds left to go for 0-12 mos; 6 rounds left to go for lyr-adult. (example: newborn hat has 14 rounds, stop at 10) sc in each st \*if you're changing colors for the band, do this round in whatever color your band will be in. Continue sc rounds until you reach desired length.
All-in-One Beanie Bundle: You Drive Me CrAfTy
Brim
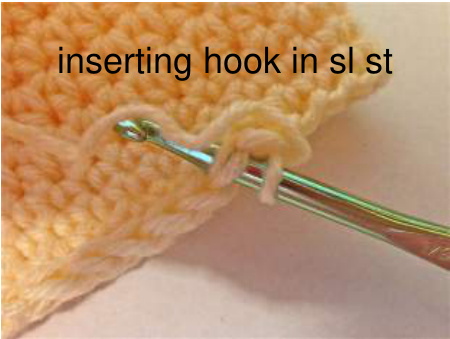
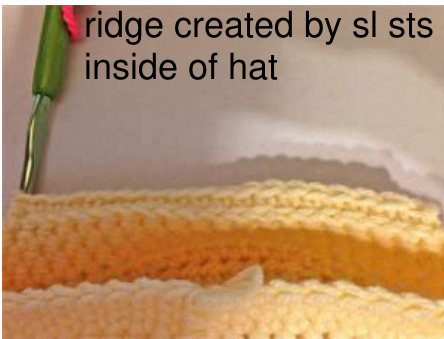
0-3 & 3-6 Fold hat in half to find the center front. Count 10 sts back from center of hat and join yarn. Row 1: slst in the same st as join and in next 19 sts, turn (20) Row 2: sc in 3rd slst from hook and each st across (18) Row 3-6: sc in 3rd st from hook and each st across rsc in each st around hat and on the ends of rows of brim - rsc, ch 1, rsc on the two corners of brim. 6-12 & 1-4 Fold hat in half to find the center front. Count 13 sts back from center of hat and join yarn. Row 1: slst in the same st as join and in next 25 sts, turn (26) Row 2: sc in 3rd slst from hook and each st across (24) Row 3-7: sc in 3rd st from hook and each st across rsc in each st around hat and on the ends of rows of brim - rsc, ch 1, rsc on the two corners of brim. 4-sm adult & med adult Fold hat in half to find the center front. Count 15 sts back from center of hat and join yarn. Row 1: slst in the same st as join and in next 29 sts, turn (30) Row 2: sc in 3rd slst from hook and each st across (28) Row 3-7: sc in 3rd st from hook and each st across rsc in each st around hat and on the ends of rows of brim - rsc, ch 1, rsc on the two corners of brim. Ig adult Fold hat in halt to tind the center tront. Count 18 sts back from center of hat and join yarn. Row 1: slst in the same st as join and in next 35 sts, turn (36) Row 2: sc in 3rd slst from hook and each st across (34) Row 3-8: sc in 3rd st from hook and each st across rsc in each st around hat and on the ends of rows of brim - rsc, ch 1, rsc on the two corners of brim.
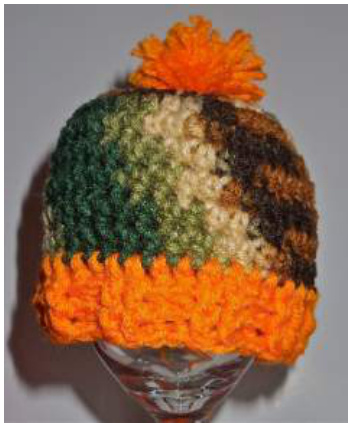
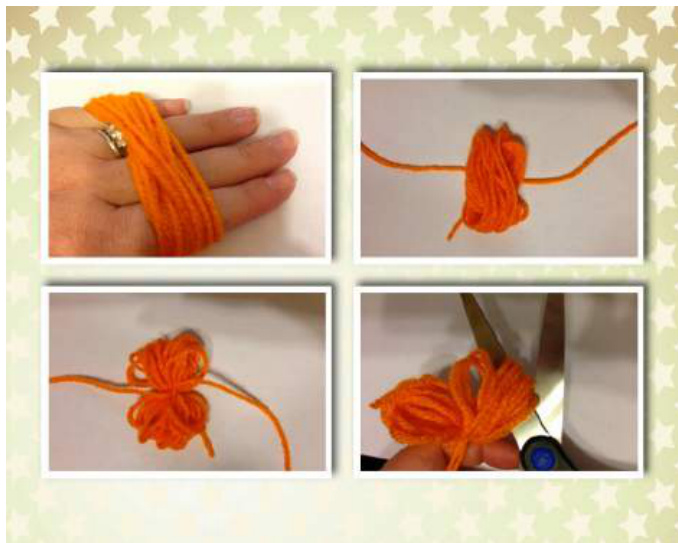
Pom Pom use a pom pom maker or your fingers (I love my pom pom maker!) Wrap yarn around 3 or 4 fingers about 60 times, cut yarn. Cut a piece of yarn about 7" long and tie a knot around center of looped yarn, wrap it around to the other side and knot again. Pull tails of the tie through the center hole of hat and secure. Take scissors and cut all the loops, then trim the pom pom for shape.
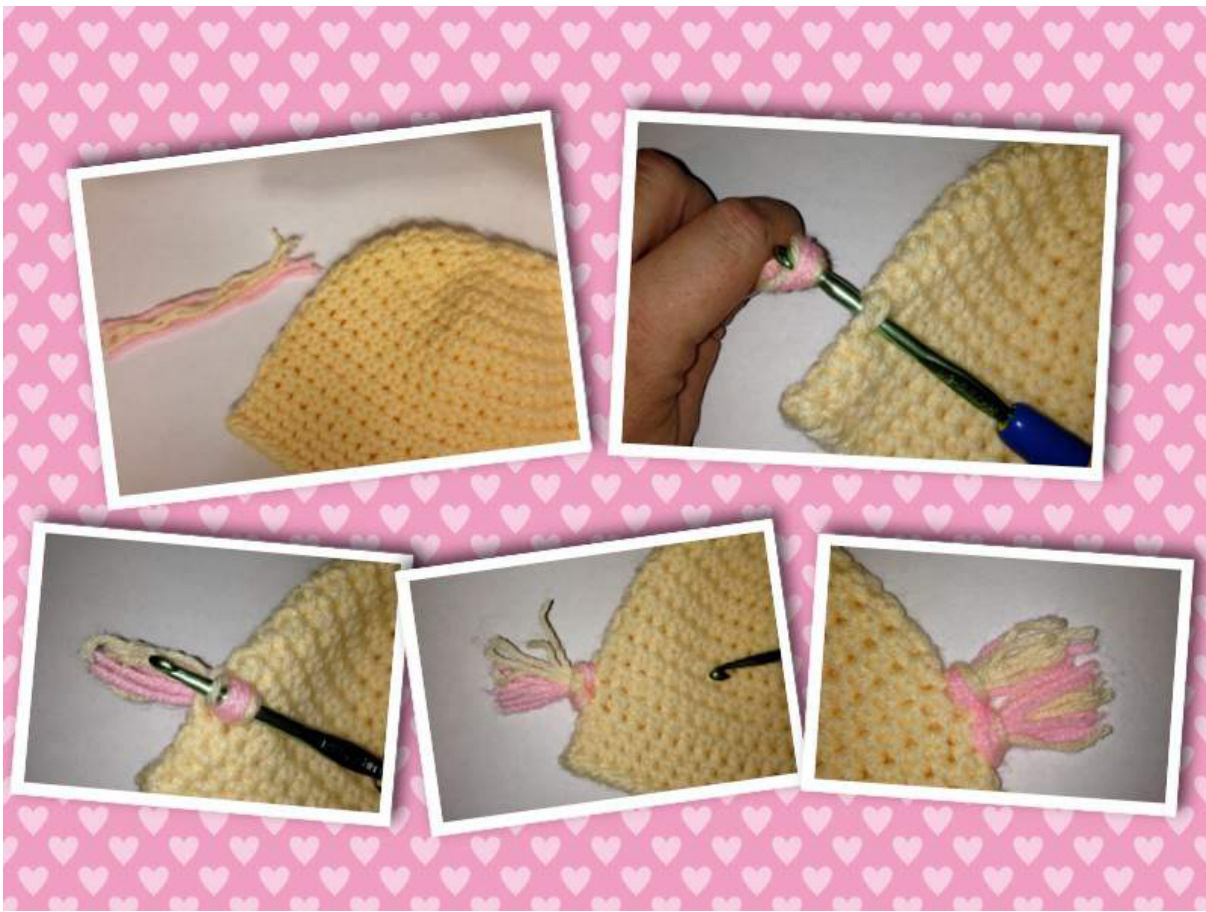
Braids
Cut 6, 36" strands of yarn for a child, (48" for adult) Pull one side of the ends through the tip of the earflap and keep pulling until even with the other end. Separate into 3 sections of 4 strands and braid. Tie a knot at the end and trim fringe. Repeat on the other ear flap, make sure your knots match up so the braids are even and that your fringe is the same length on both braids.
Ear Flaps
0-3 & 3-6 Row 1: sc in 5th st from fasten off and in the next 9 sts, turn (10) Row 2-10: sc in 2nd st from hook and each st across, turn \*do not ch 1, continue until you have 1 st remaining, fasten off Make 2nd ear flap the same way, starting in the 5th st from fasten off, you should have 8 sts in between earflaps in the back. rsc in each st around hat and on the ends of rows of earflap - rsc, ch 1, rsc in the tips of earflaps 6-12 & 1-4 Row 1: sc in 6th st from fasten off and in the next 11 sts, turn (12) Row 2-12: sc in 2nd st from hook and each st across, turn \*do not ch 1, continue until you have 1 st remaining, fasten off Make 2nd ear flap the same way, starting in the 6th st from fasten off, you should have 10 sts in between earflaps in the back. rsc in each st around hat and at the end of rows of earflap - rsc, ch 1, rsc in the tips of earflaps. 4-sm adult & med adult Row 1: sc in 7th st from fasten off and in the next 13 sts, turn (14) Row 2-14: sc in 2nd st from hook and each st across, turn \*do not ch 1, continue until you have 1 st remaining, fasten off Make 2nd ear flap the same way, starting in the 7th st from fasten off, you should have 12 sts in between earflaps in the back. rsc in each st around hat and on the ends of rows of earflap - rsc, ch 1, rsc in the tips of earflaps. Lg Adult Row 1: sc in 8th st from fasten off and in the next 13 sts, turn (14) Row 2-14: sc in 2nd st from hook and each st across, turn \*do not ch 1, continue until you have 1 st remaining, fasten off Make 2nd ear flap the same way, starting in 8th st from fasten off, you should have 14 sts in between earflaps in the back. rsc in each st around hat and on the ends of rows of earflap - rsc, ch 1, rsc in the tips of earflaps.
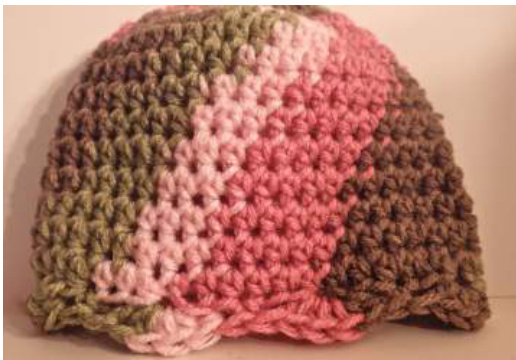
Color Changing
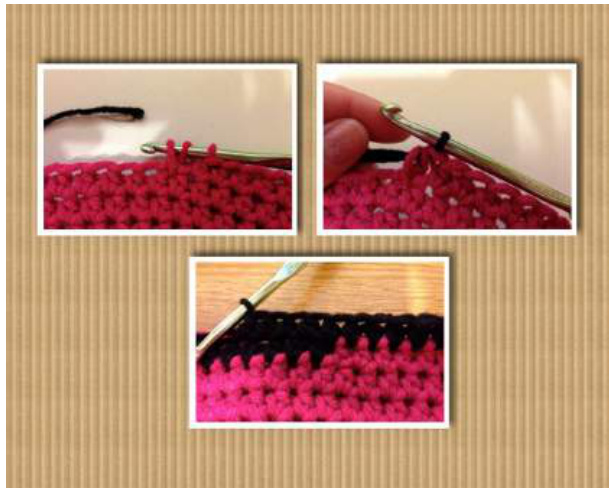
Insert hook into next stitch and pull up color you've been crocheting with. You will now have 3 like colors of yarn on your hook (3 because we're doing hdc). Now pick up the new color and pull through all 3 loops on the hook. Continue hdc with new color. The new color will not match up once you meet up with it but I personally think this looks better than joining and having a seem. If you are ok with this look, just make sure you always add the new color on the back of the hat.
Mohawk Fringe
Fold your hat in half with the fold going through the front center, make sure fold is centered through the top circle (first stitches when you began hat). Fold strips in half, starting 1" above rim of hat for 0-12mo and 2” above rim of hat for 12m-adult, pull center of strips through stitch located on the fold. Repeat this process for each stitch on the folded line all the way to the last stitch on the rim (back Oof hat). With hat still laying folded on it's side, use scissors to trim mohawk so all strips are even. For a fuzzy mohawk, you can untwist each strand of yarn.