Bandwagon Socks
These socks got their name from the number of blogosphere bandwagons that Ijumped on to make them. Please visit the original links for full explanation of those techniques. Sock: Herringbone Lace, Barbara Walker, Craft of Lace Knitting Yarn: Panda Wool, two skeins of 9812 Violets Needle size: 2 US, 20 cm, set of 5 Needles of choice: Prym made by Inox, coated metal, purchased at Shuttles. Spindles & Skeins for a song. I liked a good stiff needle for this yarn much better than bamboo or plastic.

Size: I made these for a female size $9$ They have a lot of stretch in the width and can be shortened easily by trying on the foot and making it to \*your\* length. Yellow highlighted numbers indicate the calculations I used, which you should change for your foot. $\mathsf{A}=$ length of foot before heel $=6.5^{\prime}$ $\mathsf{B}\mathrm{{=}}$ total length of foot with heel $=9.5^{\circ}$ , $\mathtt{C=}$ length of leg above completed ${\sf h e e l}=4.25^{\circ}$
Toe
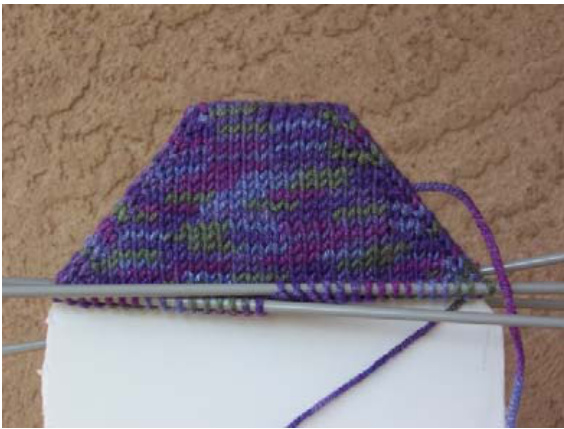
Using Judy's Magic Cast-On and about a foot of tail yarn, wrap 12 stitches onto each of two needles. Row 1: Knit around. (using all 5 needles) Row 2: Increase round as follows: $\sp{\star}{\sf k}\tt^{\star}$ , k in front & back of next stitch, knit to end of needle one, K across to next to last stitch on needle two, k in front & back of next stitch, k1. Repeat from \* for next two needles. Work these two rows until you have 64 stitches, 16 on each needle. Work 8 rows plain with no increases.
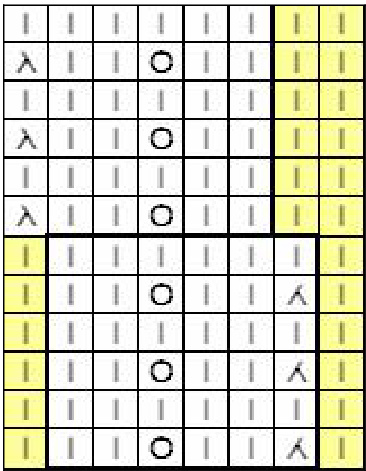
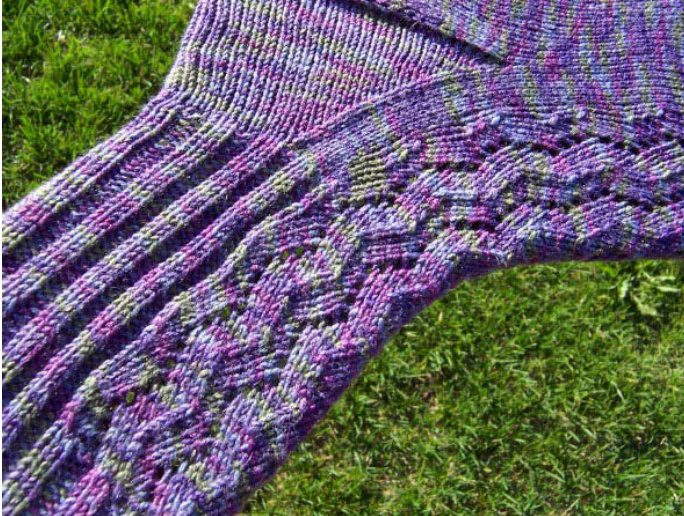
Foot The lace section is worked on the top and front of the foot only. Knit the sole plain. Knit until you reach 6.5 inches or the flattened width of a two fingers below your ankle bone (A). For this pattern, I prefer the words, but you may like the chart better. Both are provided here. For the geeks, you can find the words below in an Excel file which fits perfectly on my Palm Zire Documents to Go. 1 K 2 (SSK, K2, yo, K2) k2 3 K 4 (SSK, K2, yo, K2) k2 5 K 6 (SSK, K2, yo, K2) k2 7 k 8 k1 (K2, yo, K2, K2tog) k1 9 k 10 k1 (K2, yo, K2, K2tog) k1 11 k 12 k1 (K2, yo, K2, K2tog) k1

Heel
I used Maia's unusual and wonderful Toe-up Gusseted heel for this sock. The technique is pretty simple to do, but hard to explain. You take some stitches from each 'side' of $^1\!/\!_{2}$ your sock stitches and move them onto the front needles for a while. Then make a flap.
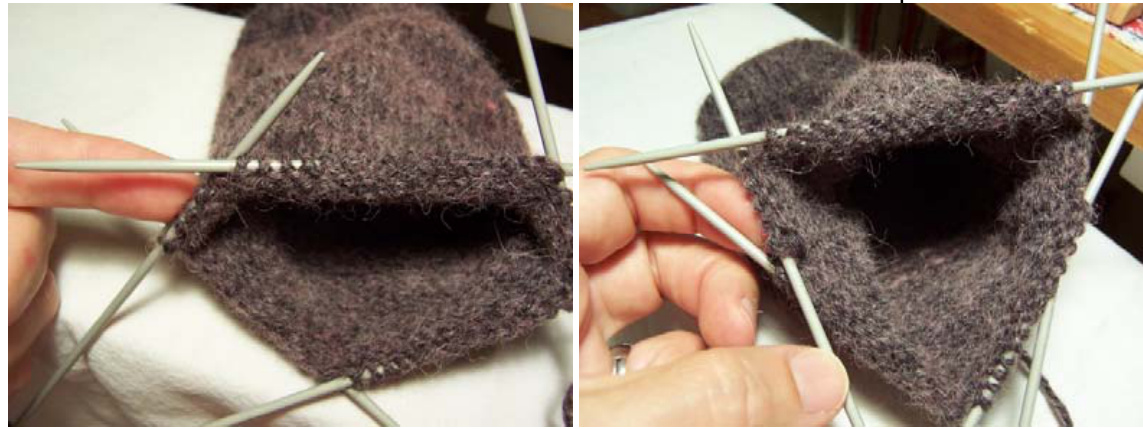
My calculations: 6.5 length before heel flap. Flap made on $6+10+6=22$ stitches,so $^5$ moved off onto each top needle to hold while working flap. I worked until total length was 9.5 inches (B) before starting the heel shaping. I used 10 heel stitches in the center. I had 16 stitches on heel after turning. I picked up 18 stitches on gusset, picked up one gap stitch from the row below and 5 that had been previously moved to the top needles. I decreased starting above the gap stitch until I once again had 16 stitches on each needle. Remember to align the gussets with the gap stitch, probably the most nifty feature of Maia's technique. This means I left 5 stitches on the end of the needle and did my decrease at stitches 6 &7.
Leg
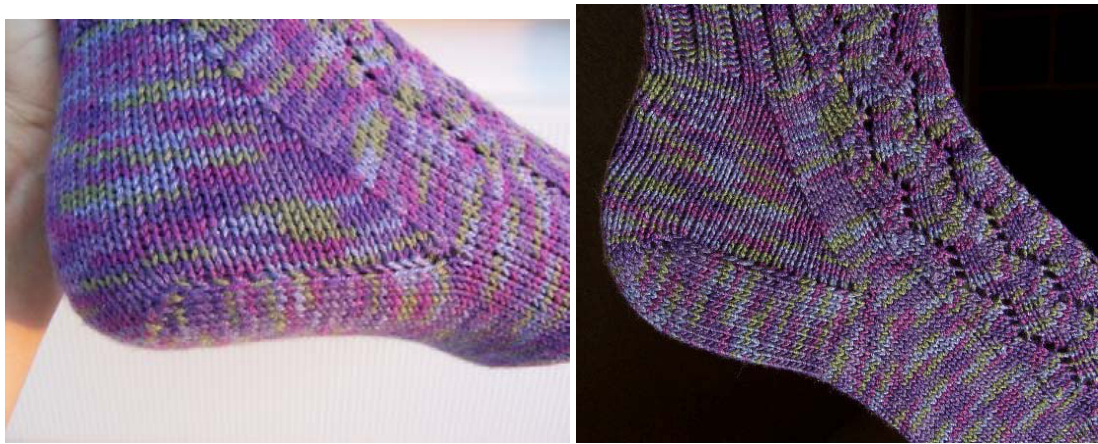
Once you are back to your 16 sts on each needle, continue lace on the front and K2, P2 ribbing on the back of the leg until leg reaches your length, 4.25 inches (C). Finish with K2, P2 ribbing all around for about one inch or until you almost run out of yarn. Bind-off using Elizabeth Zimmermann's sewn bind off. I like the one shown on Knitty (near the bottom). You can't go wrong with this stretchy classic.
This was my attempt to make the Lacy Zig Zag sock on Smoking Hot needles. She didn't provide the directions, or the pattern, so I found something very close and made these. That means that, basically, none of this sock is mine. It is a collection of bits from elsewhere and I completely recommend that you see the original sites listed here.


