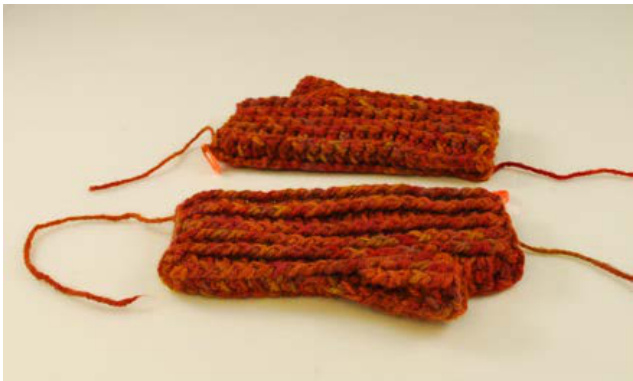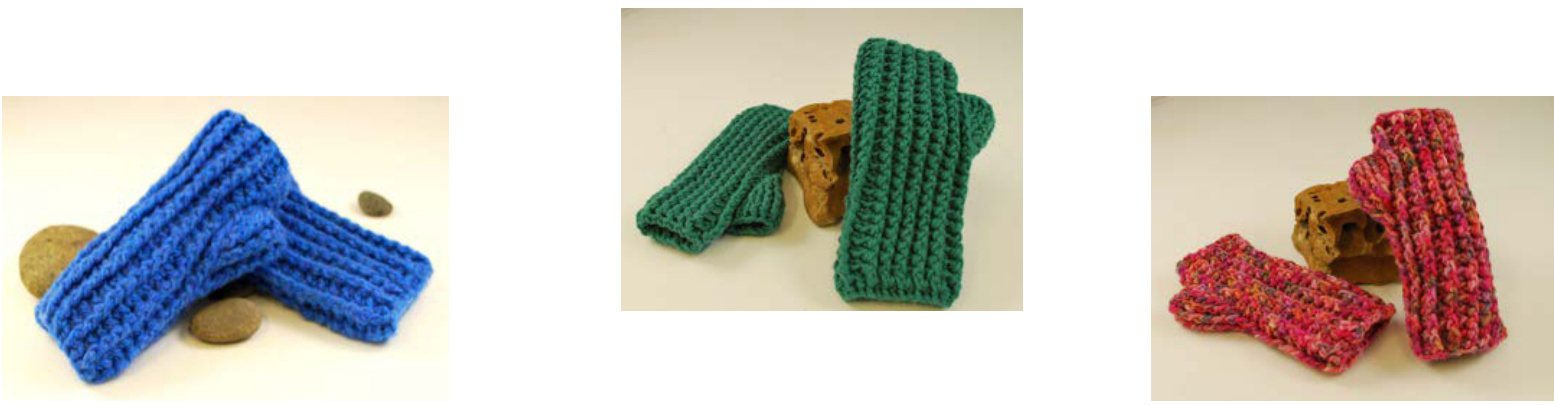
Mitts for the Making
by ef-fa-bility Mitts for the Making are designed for a snug, sleek fit without bagging. Taking approx 150 yards of either aran, worsted, or dk yarn, they are one piece, thumb included and worked from the cuff up. Recommended yarn: A soft plied yarn w/ stitch definition, either Aran, worsted, or dk (directions for other yarns at end of pattern).
Size adjustments:
To determine size, fsc until the length, joined, willfit wrist yet stretch just enough to go over the broadest part of hand, make sure number of fsc is a multiple of 2. You want just a bit of a tug to get them over the broadest part of your hand. ger mitts: Increase number of beginning fsc in 2's. Fsc 26, 28, 30, or more as neede. er mitts: Decrease number of beginning fsc in 2's. Fsc 18,20, or 22 or less as needed f you fsc a different number, your center fpdc will not be stitch 13, please recalculat It's important to try on mitt every few Rounds to check size. Please jot down any adjustments to make it easier to replicate your mitt. Rounds can be added or eliminated for a custom fit. See end of pattern for more tips on sizes & yarns.
Gauge:
Not important, pattern uses fsc to determine stitch count. That said, I crochet large & my gauge came to: 11st per 3" using aran & H hook & 13st per 3" using worsted & G hook.
Stitches used:
Fsc Foundation single crochet. Fsc is essential to know before working this pattern. It's not an alternative beginning here, but the determining factor for how many stitches you need for a custom fit. If you don't know fsc, there are many excellent video & phototutorials available. Ch Chain Dc Double crochet Bpdc Back post double crochet Bpdc 2 tog Back post double crochet 2 together. Yo, insert hook around target bpdc as if to bpdc, yo, pull up a loop, yo, pull through 2 loops, (2 loops on hook,) yo, insert hook around next bpdc, pull up a loop, (4 loops on hook), yo, pull through 2 loops, yo, pull through remaining 3 loops. Fpdc Front post double crochet Fpss Front post slip stitch Slip stitch around stem of stitch indicated Sl st Slip stitch
Other Abbreviations:
mm Move markers up work pattern (fpdc, bpdc) rib Join Sl st into 2nd ch, ch 1, fpss around stitch below, ch 2. (I've discovered fpss, ch 2 is much easier if 1 turn my work to the side, ignore the little loop that's formed in back of stitch - it goes away)
Begin Size Medium Mitts:
Set-up Round: Fsc 24 (or even number to just fit around widest part of hand.) Join w/o twisting, ch 3 (1st fpdc) \*Bpdc in next fsc, fpdc in next\* repeat around, ending w/ bpdc. To join (this round only) sl into 3rd ch, ch1, fpss around ch 3, ch2. -7: (bpdc into next bpdc, fpdc into next) Work pattern around, ending w/ bpdc. Join Round 8: Begin thumb gusset: Gusset begins at the center fpdc opposite beginning fpdc. Work pattern for 12 stitches (or as many needed to get you to bpdc just before the center fpdc), work 2 fpdc into fpdc (stitch 13) (place marker in each fpdc just made. Work pattern until end of round, ending w/ bpdc. Join (mm- move markers up through Round 16.) Round 9: Work 1 fpdc into each fpdc, & 1 bpdc into each bpdc around. (mm) Join Round 10: Work pattern until 1"t marker (mm), fpdc, dc in space between 2 fpdc's, fpdc in next fpdc (mm), work pattern until end. Join Round 11: Begin thumb increases: Work pattern until 1"t marker, 2 fpdc in marked fpdc (place marker in 1st fpdc made), bpdc around middle dc, 2 fpdc in next fpdc (place marker in last fpdc made), work pattern until last bpdc. Join (2 fpdc on either side of middle bpdc) Round 12: Work pattern until 1st marker, 2 fpdc in marked stitch (place marker in 1st fpdc made), middle bpdc, fpdc, fpdc, 2 fpdc in next marked stitch (place marker in last fpdc worked). Work pattern to end. Join (3 fpdc on either side of middle bpdc.) Round 13: Work pattern until 1't marker, 2 fpdc (place marker in 1st fpdc worked), fpdc in next 2 fpdc, middle bpdc, fpdc in next 2 fpdc, 2 fpdc in next fpdc, (place marker in last fpdc worked). Work pattern until last bpdc. Join (4 dc on either side of middle bpdc.) Round 14: End of thumb increases. Work pattern until 1st marker, 2 fpdc , fpdc in next 3 fpdc, middle bpdc, fpdc in next 3 fpdc, 2 fpdc in next fpdc. (mm) (5 dc on either side of middle bpdc.) Work pattern to last bpdc. Join Round 15: Work around, one fpdc into each fpdc, one bpdc into each bpdc. (mm) Join Round 16: Join for thumb. Work pattern until you reach 1st marker. Sl st top loops of both marked fpdc together to join. Remove markers. Bpdc, work pattern to last bpdc. Join Round 17: Work pattern to just before thumb join, bpdc, work bpdc after thumb join, work pattern to last bpdc. Join Round 18: Work pattern until 2bpdc at thumb join, bpdc 2 tog, work pattern to end. Join Round 19: Work pattern around. If mitt is long enough, sl st into 2nd ch of previous round's join, break yarn. If not, work another 1 or 2 rounds until it is. Join Make another mitt just like the 1st one. Block, wind ends. Enjoy.
Other sizes, other yarns:
Worsted weight yarn: G hook (or size to get gauge) fsc between 22-26 for size medium. Split for thumb gusset at Round 9. Dk yarn: F hook to fsc 28-32 for size medium. Split for thumb gusset at Round 9. It may be necessary to add an extra thumb increase (6 fpdc on either side of middle bpdc). Work Round 15 as many times as needed to make thumb tall enough. Support: effability1@google.com Give them, wear them, donate them (please), or sellthem. The pattern, however, is mine & is not to be redistributed or sold.