Patterns & Instructions
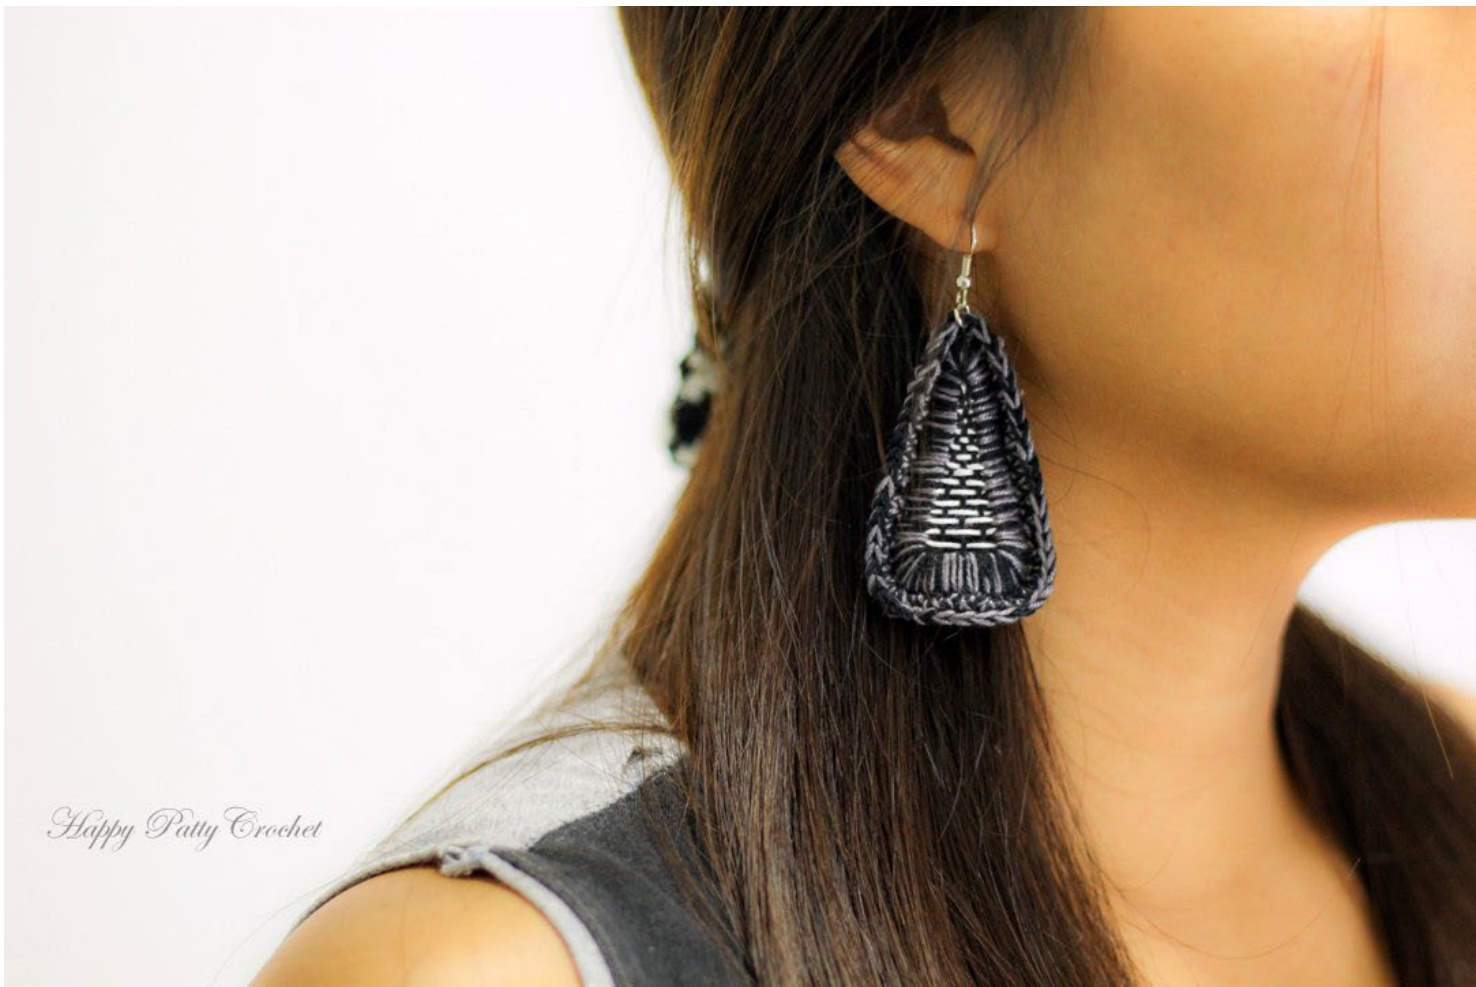
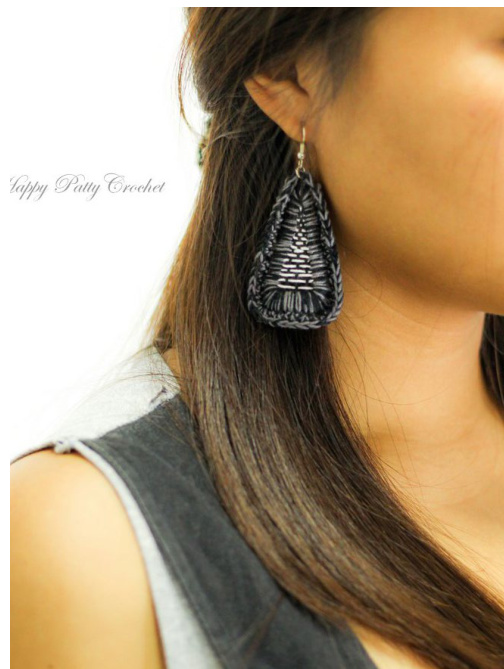
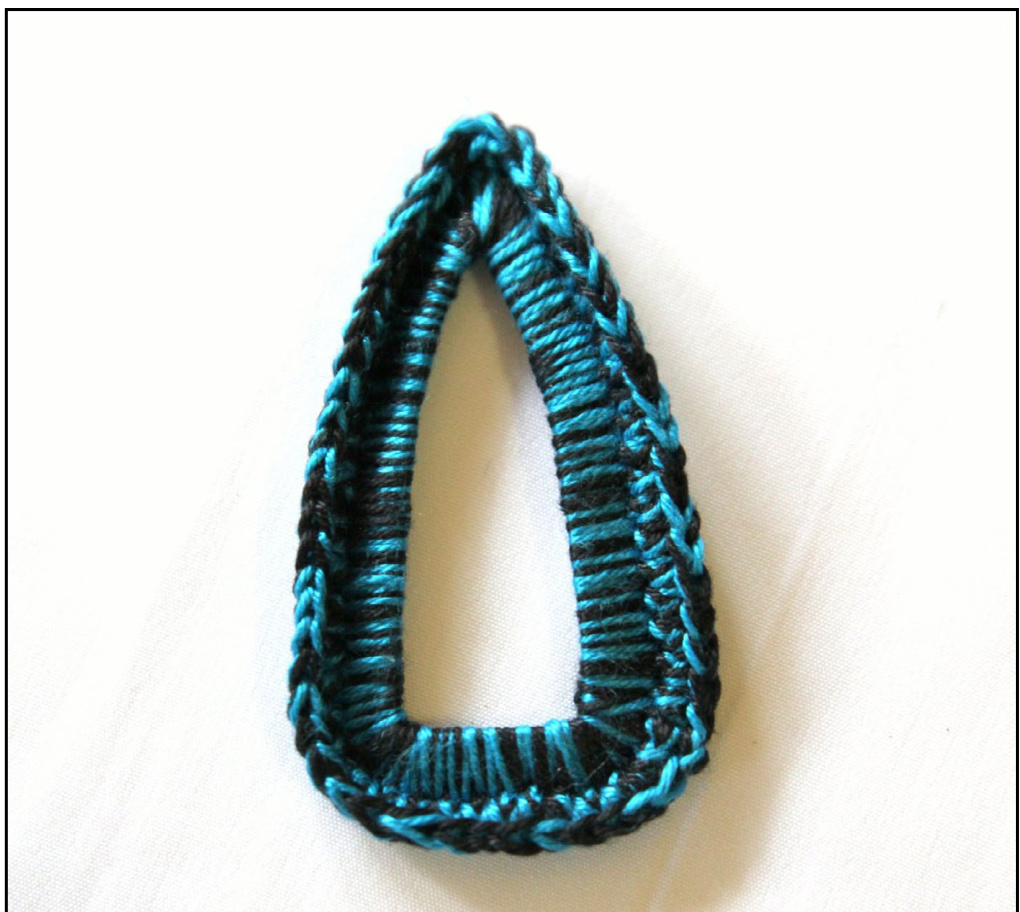
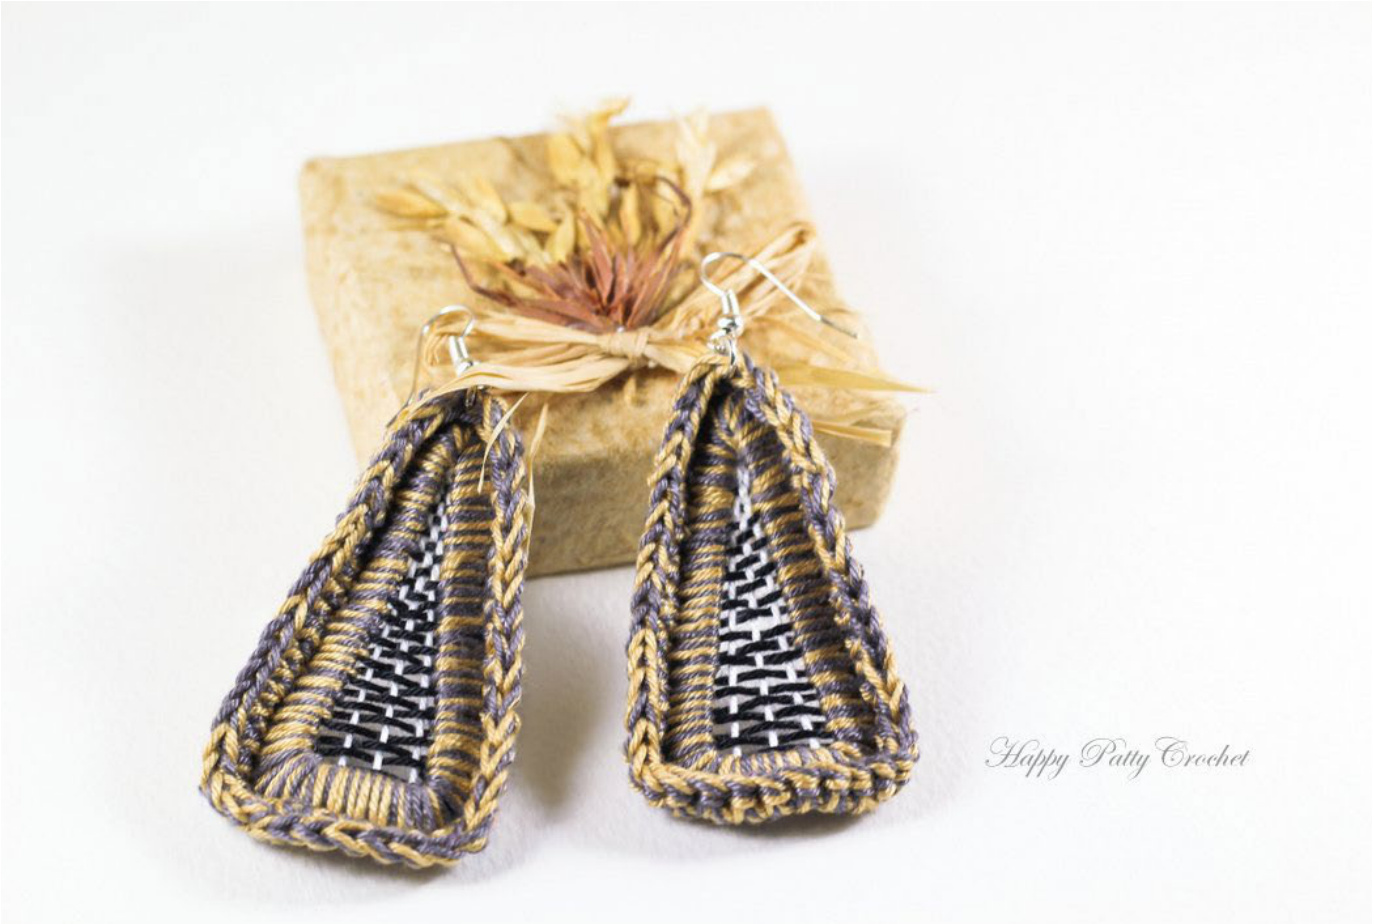
Triangle Earring
Skill Level Beginner
Introduction
In here you will find pattern and instructions for an easy, elegant and stylish crochet triangular shaped earring. Pattern ebook includes a photo guide for the entire making of the earring, with a diagram, followed by instructions in American Standard Terms included inside the photo guie. Don't forget to pay a visit to my Facebook page where upload and update new projects and pattrens! Thank you and Happy crocheting!
Materials
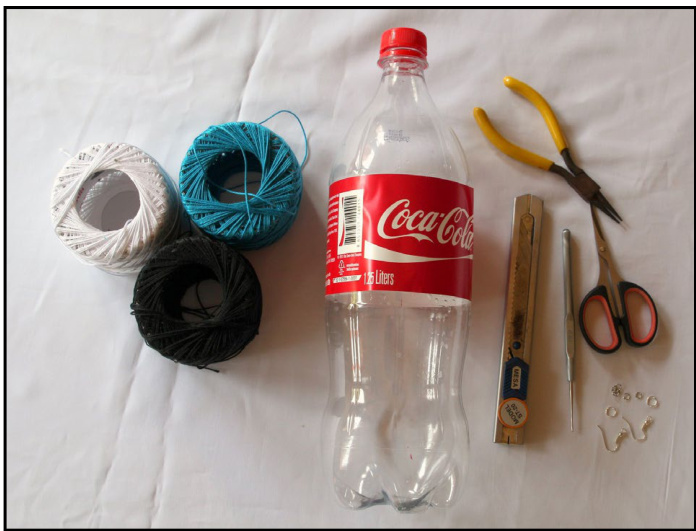
Crochet Thread Size #20 in your choice of colors. Crochet Hook Size 1.0mm to 1.6mm (your choice) - 2 x Earring Hooks. - 4 x Jump or Split Rings. Tapestry needle. - Utility knife (or equally sharp object). - An Empty plastic bottle (water / coke / etc) - Scissors.
Pattern notes
The e-book starts with a photo tutorial with the pattern diagram and then the instructions for the crocheted part is inserted when required (in American Standard Terms, See appendix for conversion to British).
Materials Note :
I recommend using a 100% mercerized cotton thread in Size #20. But, of course, any durable thread in size between #10 to #40 should work.
I've created a page in my Blog where I updated a list of recommended tested threads - see here. \* If you have problem finding the material needed, don't hesitate to contact me and Ill do my best to help.
Abbreviations
sl-st - Slip Stitch ch - Chain sc - Single Crochet yo - Yarn over beg - Beginning
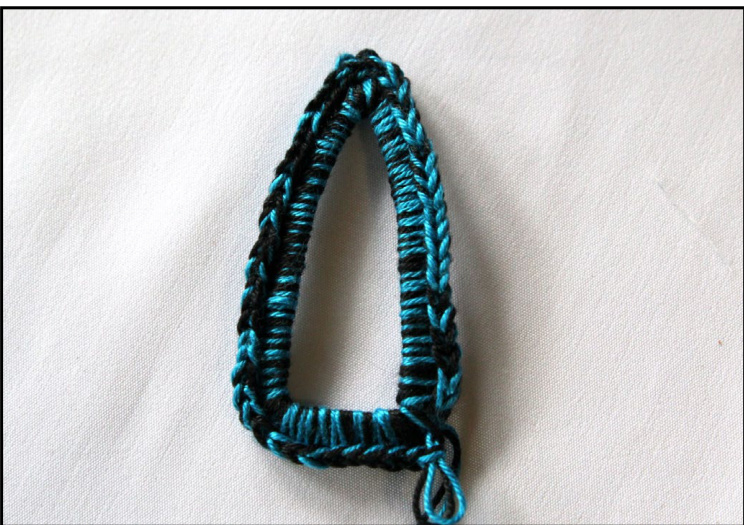
Triangle eEarring
As mentioned before, there are few things more satisfying in DIY then to create something using simple, cheap or even better used materials :) Here, we'll use a used plastic bottle to make the core of the earring (You can make 5 pairs of earrings from a single bottle). This earring is made in 3 stages :
Stage 1 : Making the Earrings Core
To achieve the earrings shape we'll use an empty coke bottle - any large plastic bottle should work, the important part is the shape of the top part of the bottle. I'm using a 1.251 coca-cola bottle, but, others bottle should work as well.
Stage 2 : The Crocheting Part
Next, we'll crochet around the the Core - 2 rounds of easy and fun crochet :) We'll crochet using 2 threads at the same time.
Stage 3 : The sewing part
Lastly, we'll make the grid-shaped part in the middle, by sewing horizontal lines, followed by vertical lines. This ebook shows how to make this earring following the stages above. It recommended to follow the photo guide before starting to crochet.
Preparing the Earring's Core
The core is the part that gives the earrings its shape, and provides firmness and flexibility. We are going to make the core from a used/empty plastic bottle, I'm using a 1.25L Coke bottle, but, of course, any bottle of that similar size, with a similar shape at the top would work great!

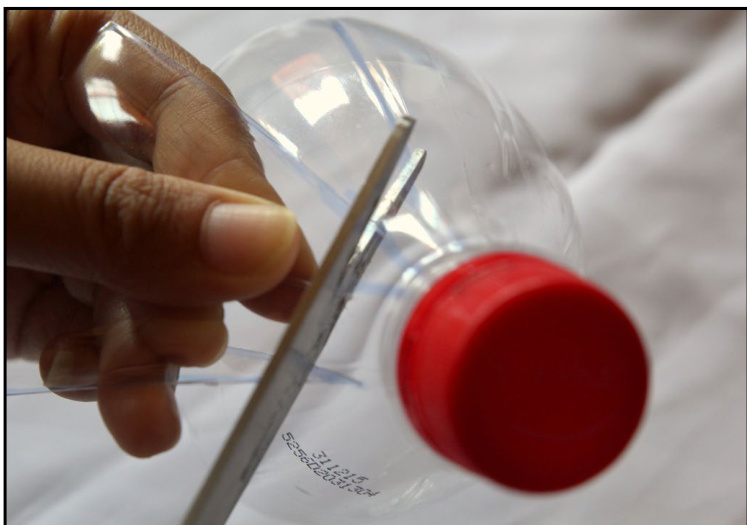
Step 1 - Empty the bottle from its content (I can't recommend drinking it, lol).
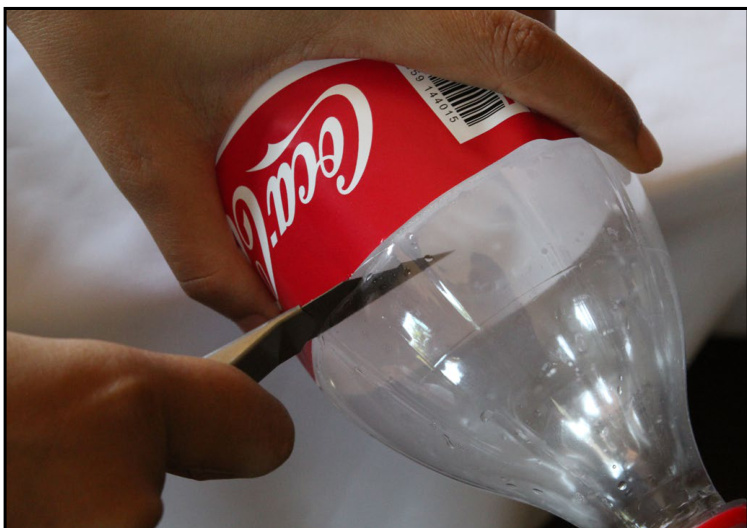
Step 2 - Using a utility knife, or any other equivalently sharp tool - cut the bottle, following the top end of the sticker.

Step 3 - Store the right part (or throw/recycle). We'll only be using the left part.
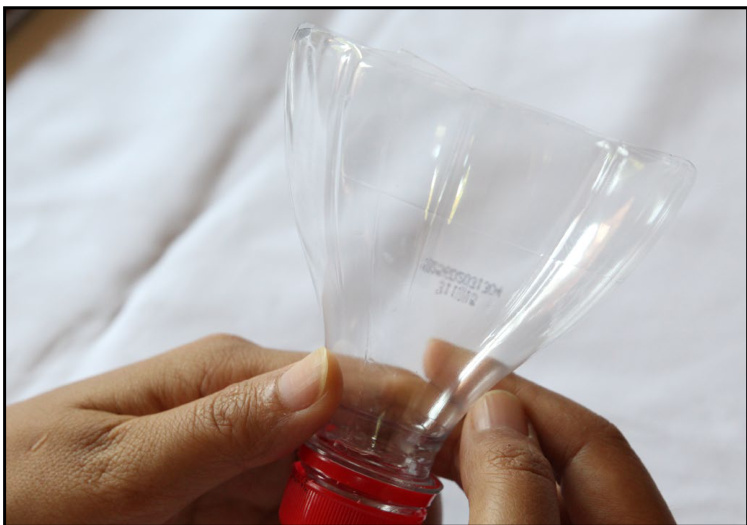
Step 4 - When you look closely at the left part, you'll notive tiny vertical grooves
Step 5 - This ones ...
Preparing the Earring's Core (#2)
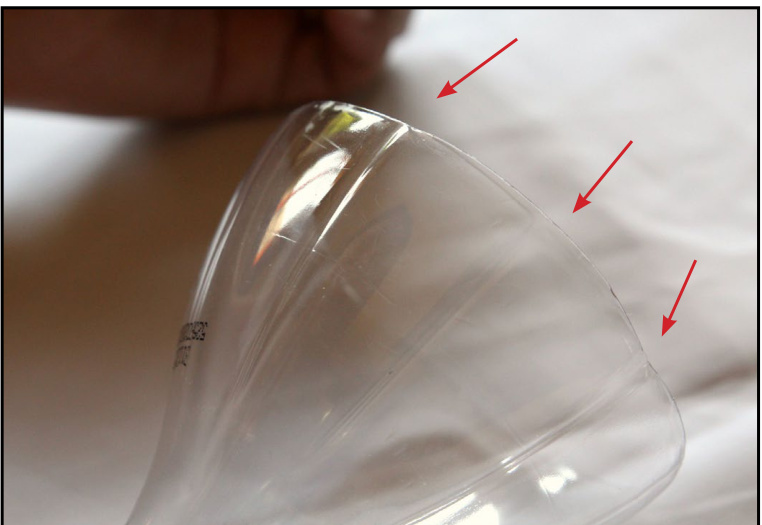
Step 6 - Mark this grooves, that they will be easier to see (optional).
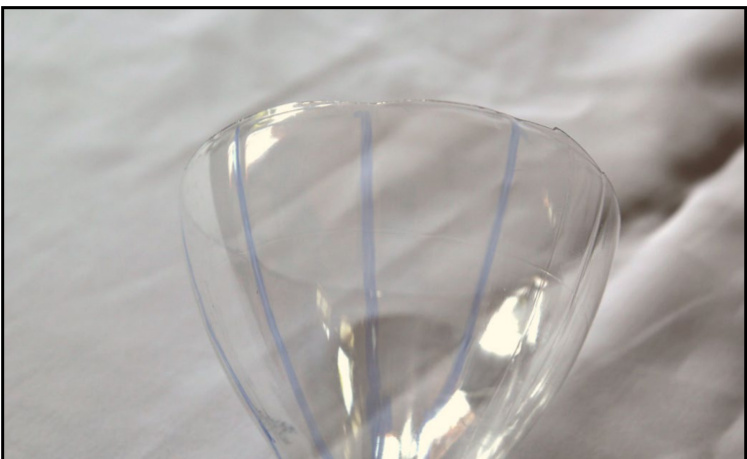
Step 7 - And simply run the scissors/knife, through the marked linkes/grooves.
Step 8 - Next, cut the elements out of the bottle part.
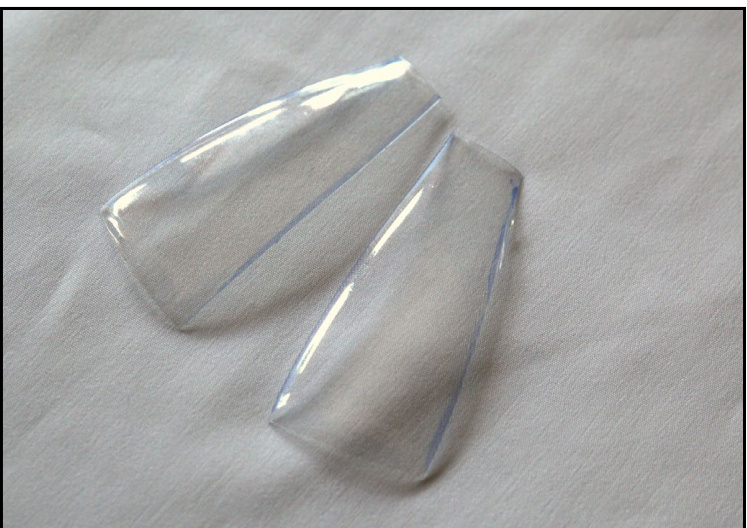
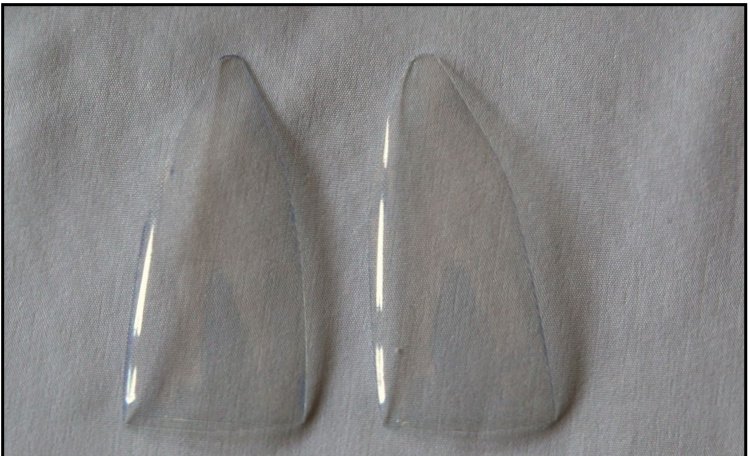
Step 9 - And we have 2 triangular elements.

Step 10 - Next, using a marker, draw a pointy shape, just as in the photo above.
Step 11 - And cut - you'll get something like this.
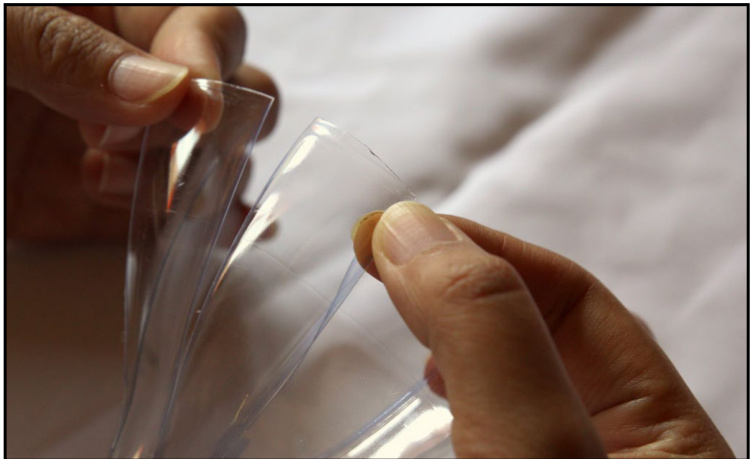
Preparing the Earring's Core (#3)
Step 12 - To achieve a similar shape with the other element, simply place the already cut element on top of the other element, and mark/cut.
Step 13 - Next, we'll smoothen the base of the elements - use the marker to draw a nice balanced new base.
Step 14 - And cut, do for the other element as well.
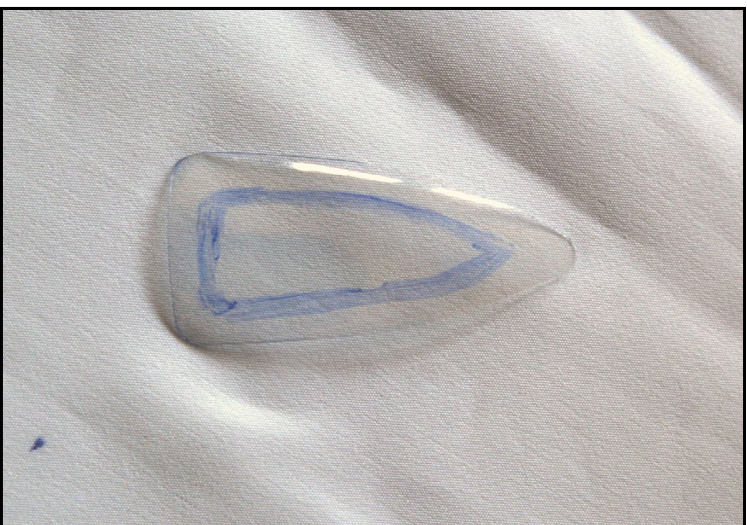
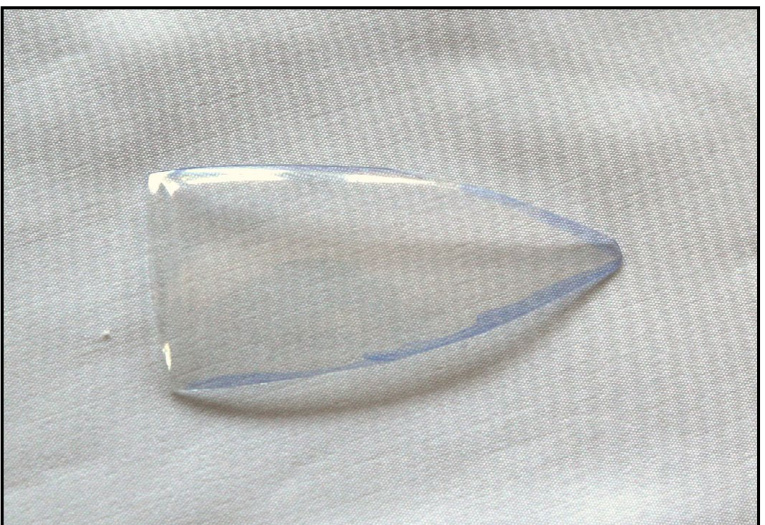
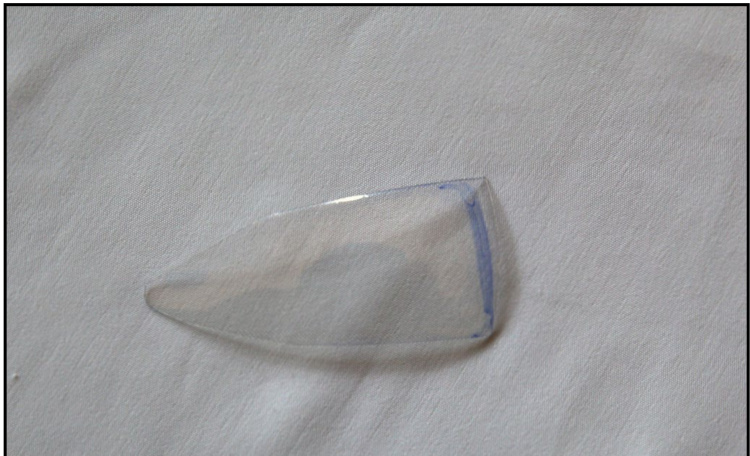
Step 15 - Now, its time to make the hole in the middle - again, with the marker, draw a nice symmetric and balanced shape in the middle.
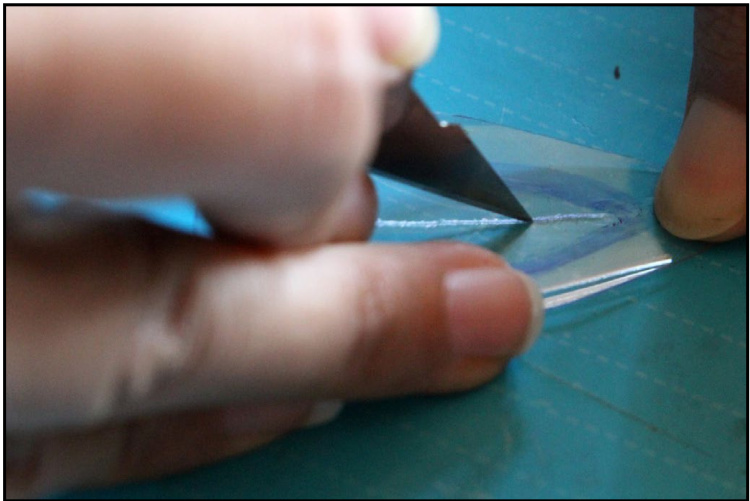
Step 16 - Cutting will be slightly difficult, so I recommend, cutting a line in the middle of the shape you just draw.
Step 17 - And using this hole to slide a scissors and cut following the line you draw.
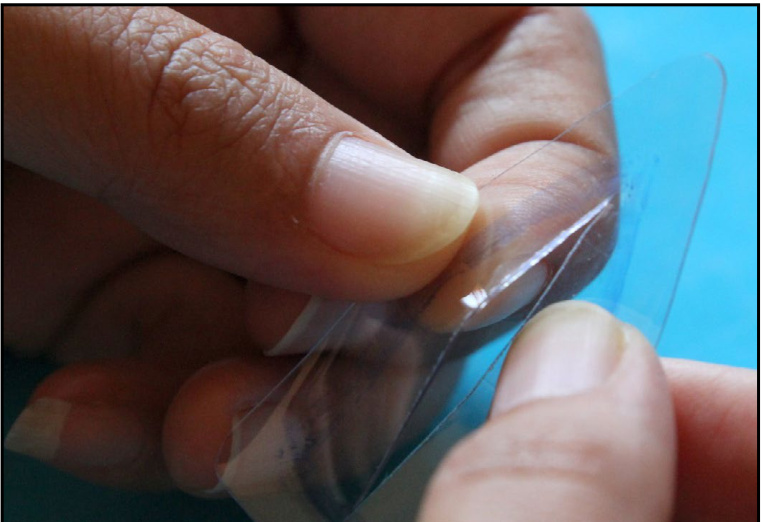
Preparing the Earring's Core (#4)
Step 18 - Follow the line closely, you want it to be nice and symmetric.
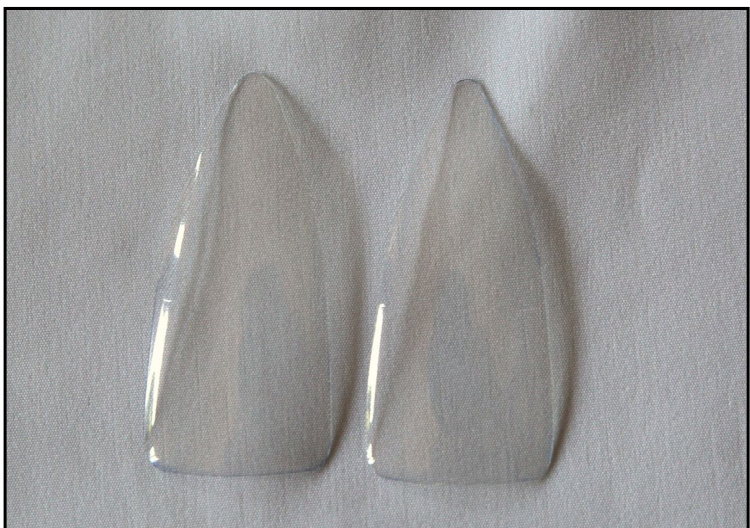
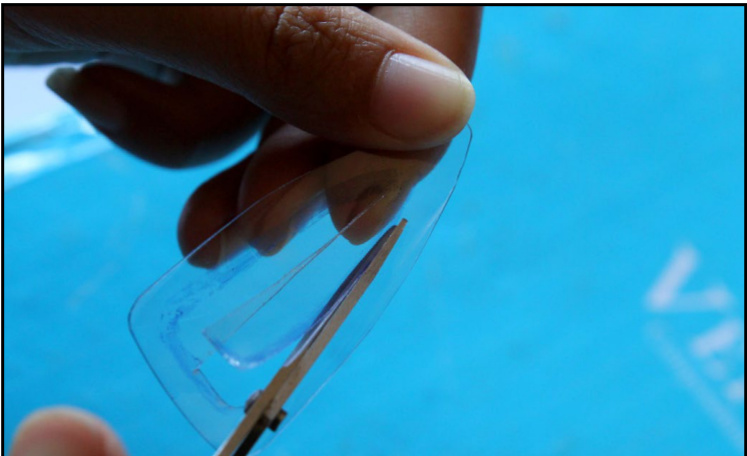
Step 19 - And, we have a single finished core.
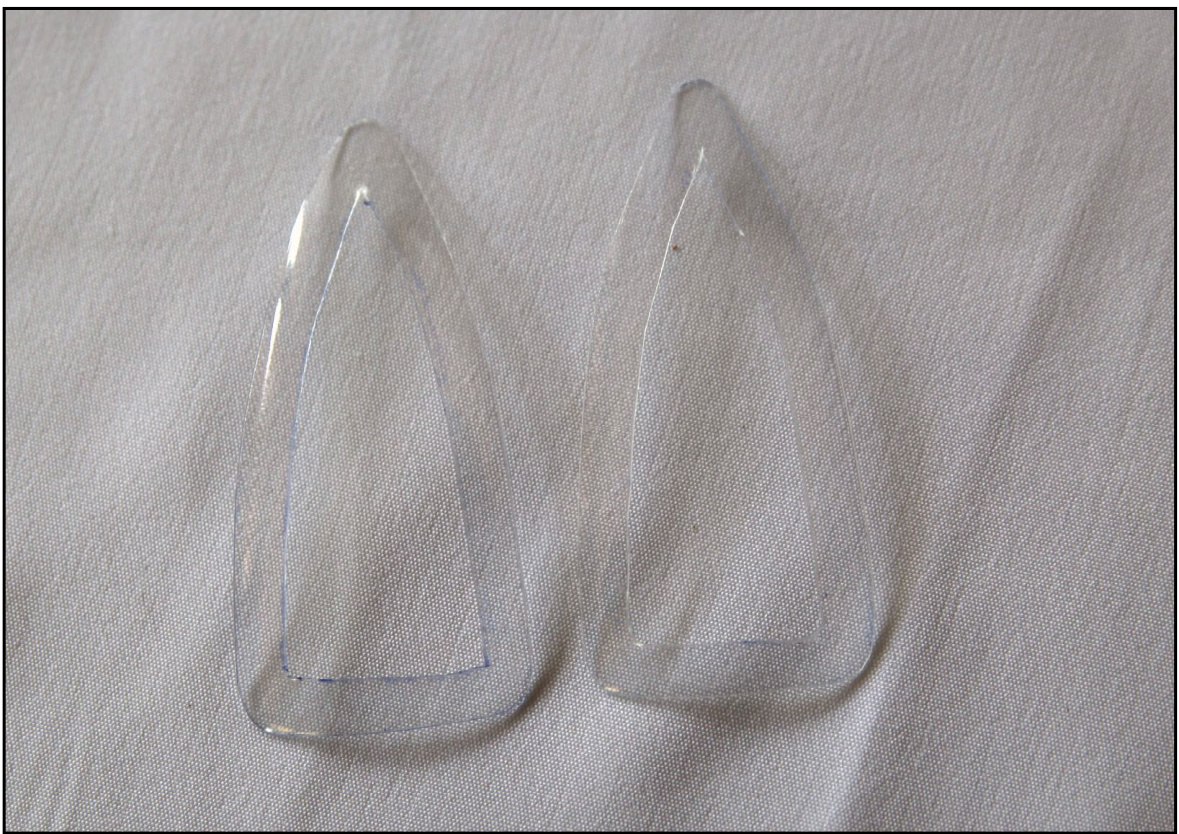
Step 20 - Repeat the same for the second element (you can use the first element to replicate the shape in the middle).
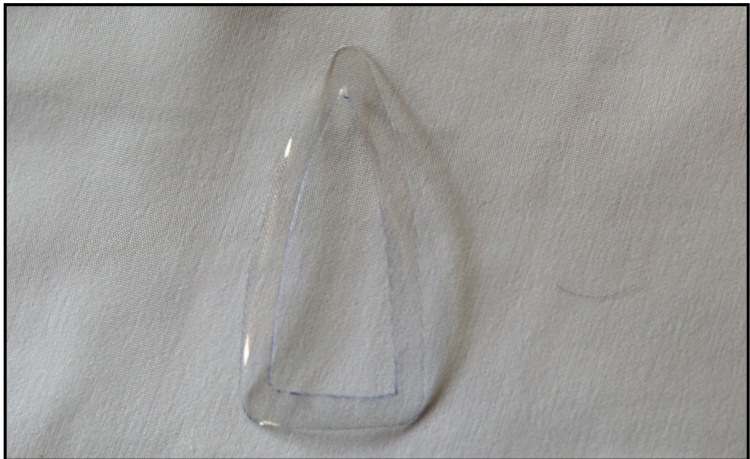
Earring - Pattern Diagram
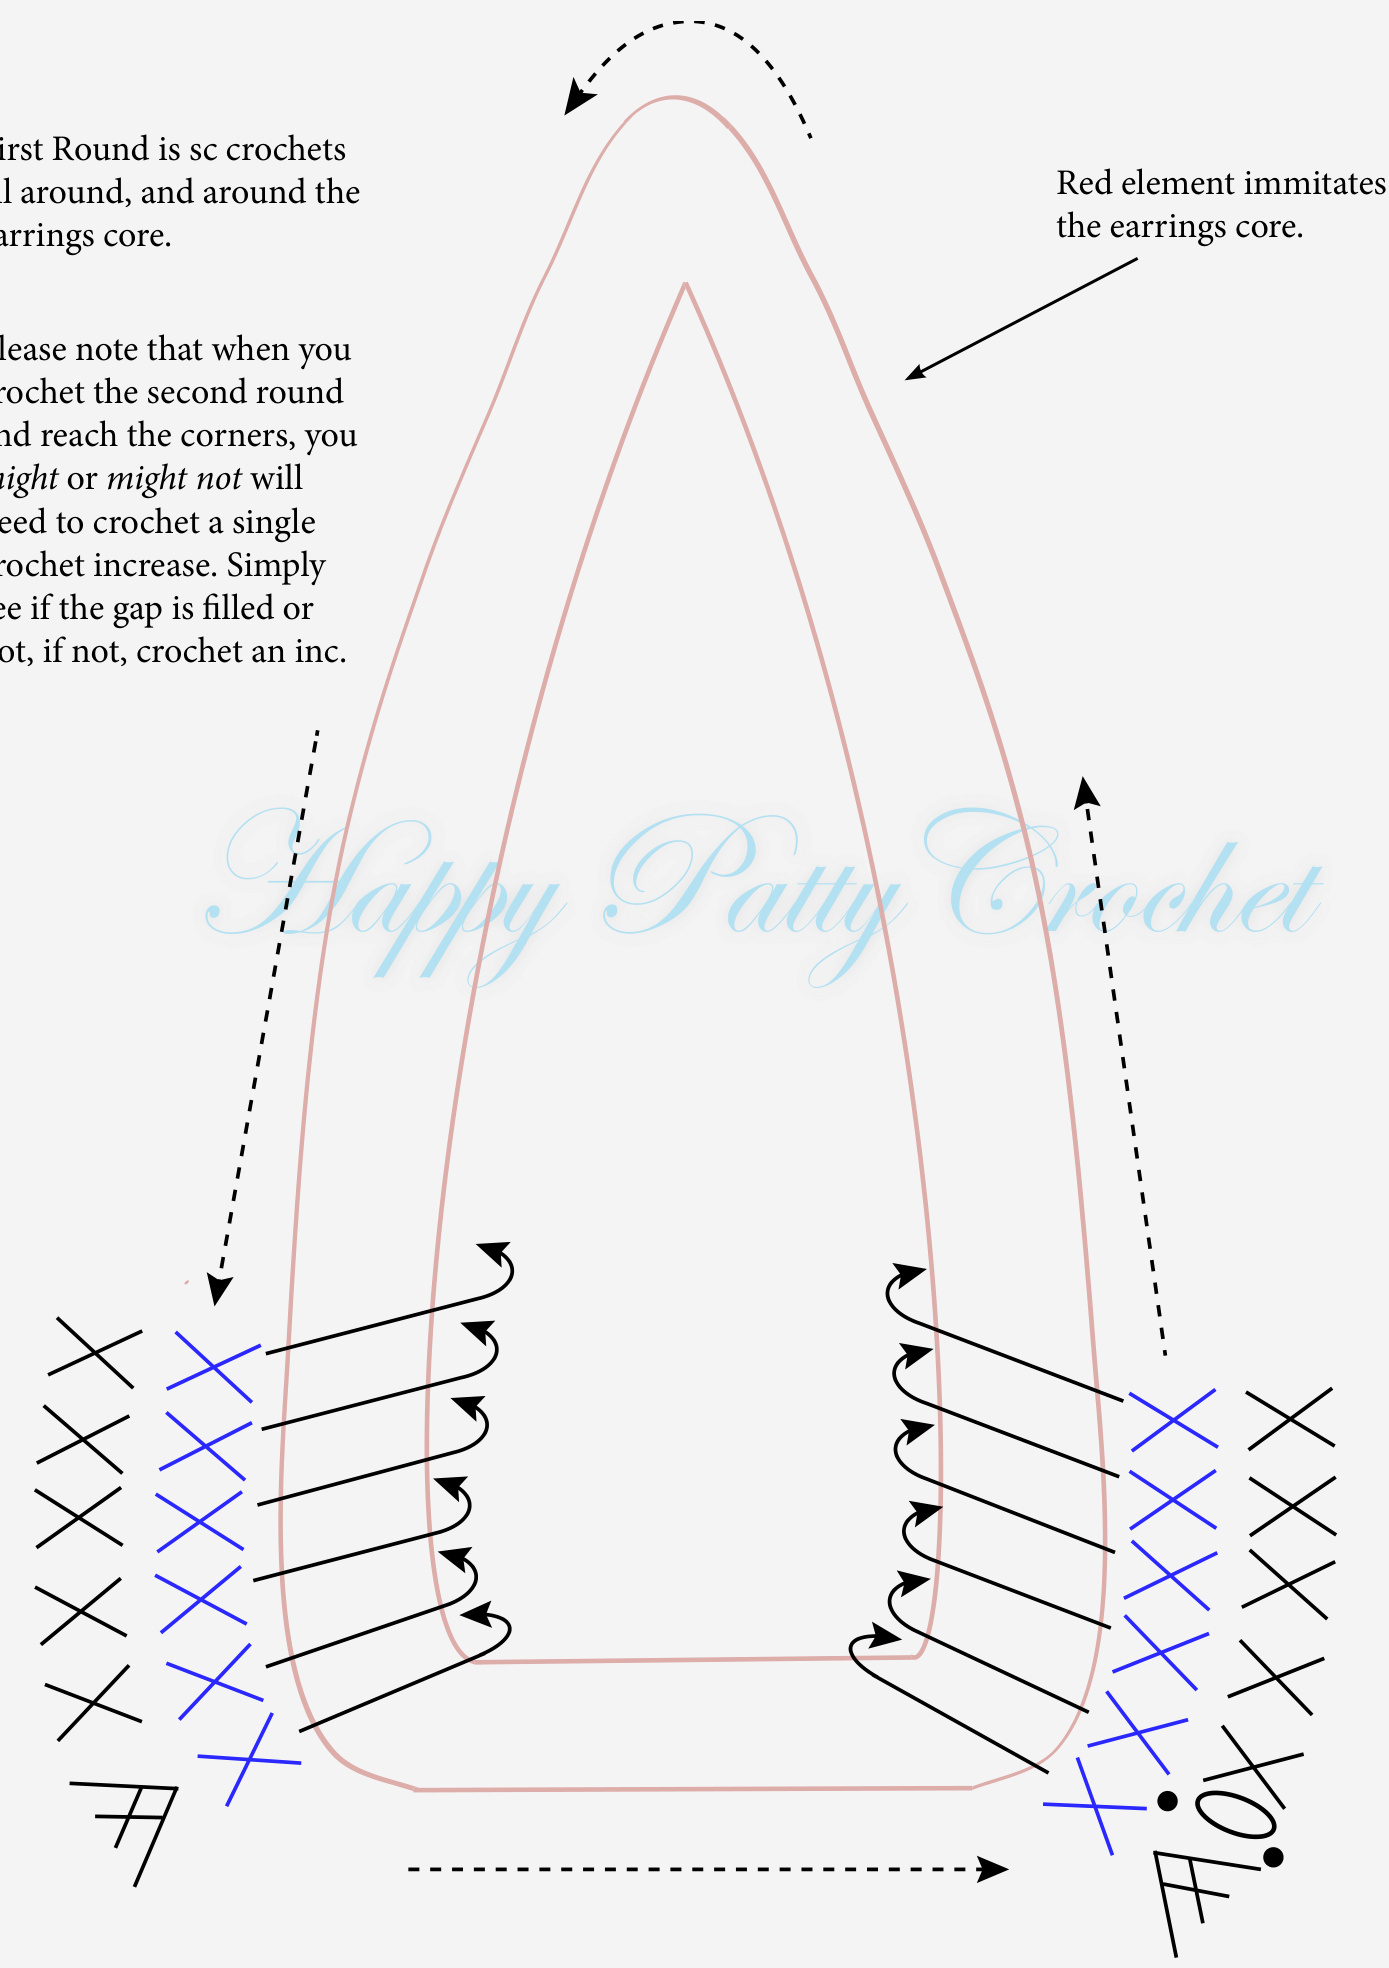
Top Element - Instructions
Make 2 of this. Keep the thread tight when doing the first round.
Please see the photo tutorial in the following pages before crocheting this part. Crocheting the elements takes two rounds :
Round 1 :
Crochet sc around the element's core. Its better to start at one of the bottom corners (as this will prevent the thread from sliding at the beginning). The amount of sc is not important, make sure you cover the entire element in a tight and balanced manner. Finish the round with a sl-st to beg sc.
Round 2 :
Start with a chain, and continue to crochet a sc in each stitch around. Please note, when you reach the corners, if you crochet a single crochet around the corner and a gap is left, re-do the corner and crochet a single crochet increase in the corner's stitch. Finish the round with a sl-st to beg ch.
Crocheting the Earring
Now that you have the finished cores, we can move on to crochet and finish the earrings. We will be using 2 threads (in you choice of colors), and crochet them together around the core (see photos). In the photos I'm using crochet thread size #20, but you can easily use slightly smaller or larger threads.
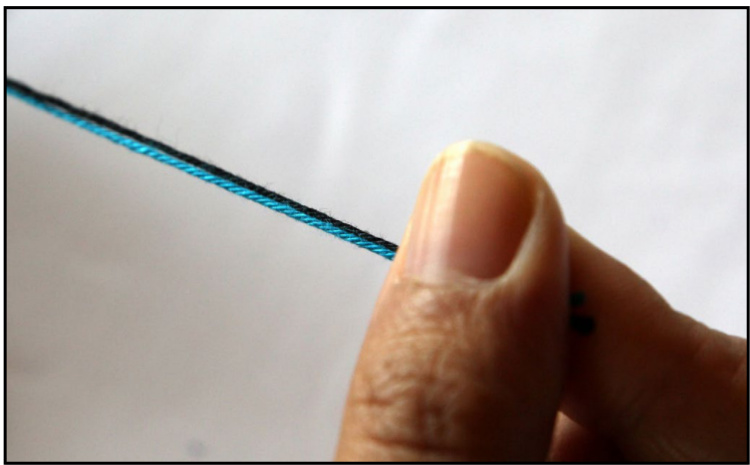
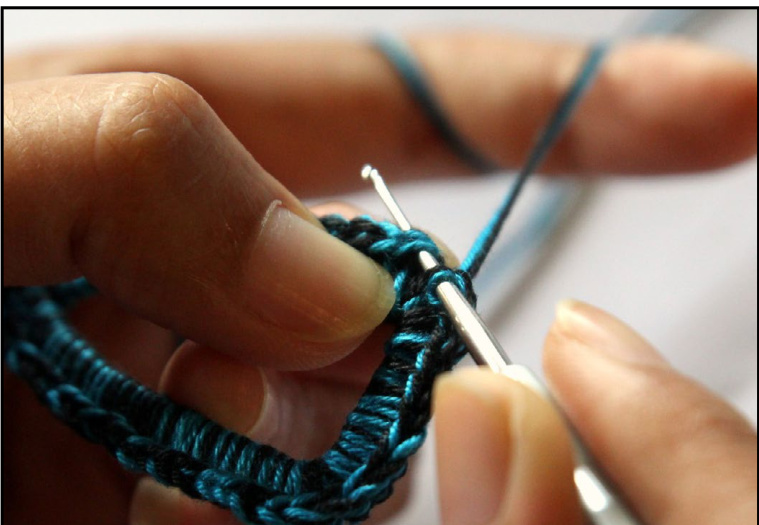
Step 21 - Grab both threads.
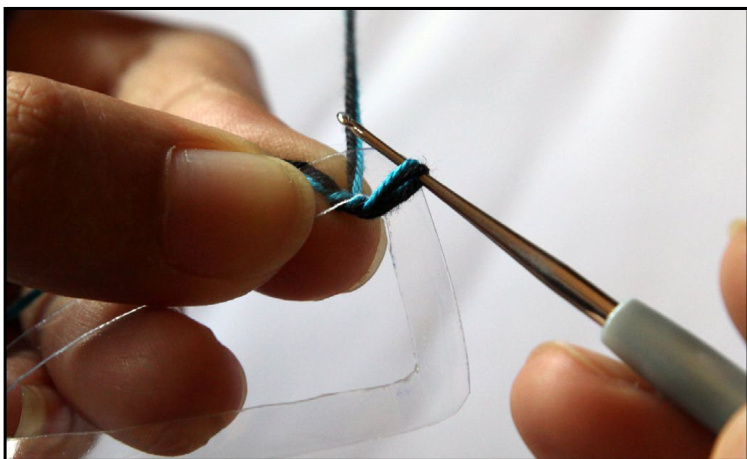
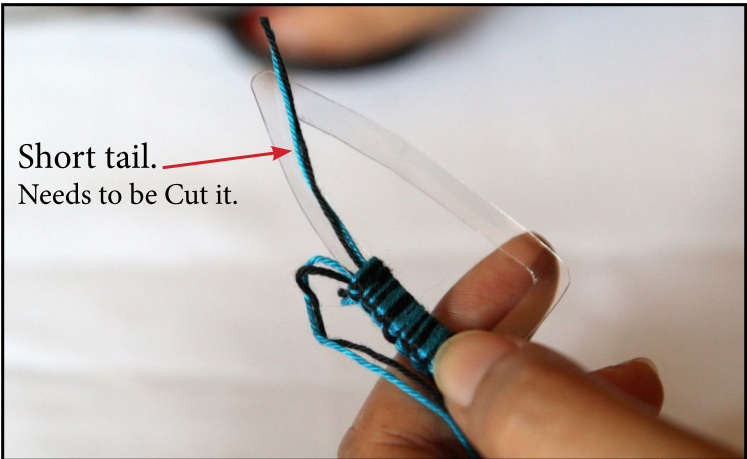
Step 22 - And work with both of them, crocheting single crochets around the element, starting at on of the bottom corners. At the beginnig, crochet around the short tail of the threads as well.
Step 23 - Yarn over ...
Step 24 - ... and pull through.
Step 25 - Repeat 23-24 all around the element. Keep the thread tight, and don't forget to crochet around the short tail as well.
Crocheting the Earring (#2)
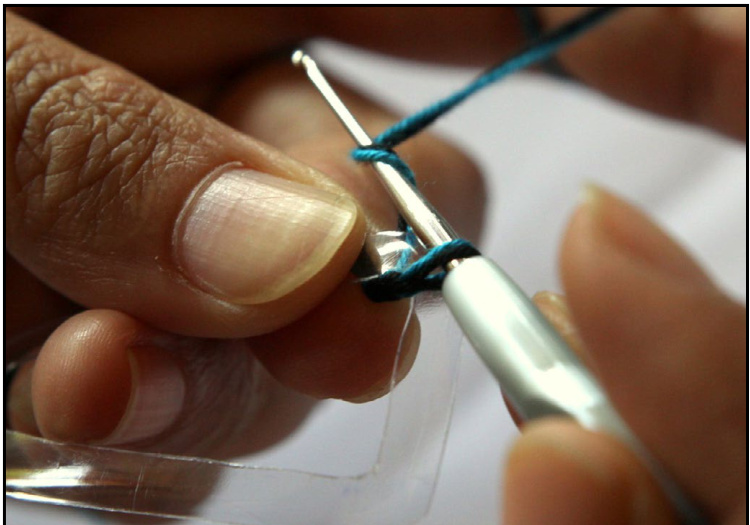
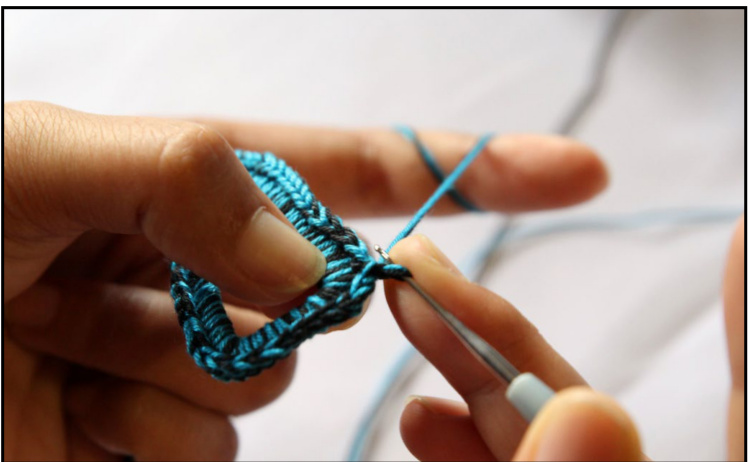
Step 26 - After you've done around a half of the first side of the element - cut the short tail of the threads.
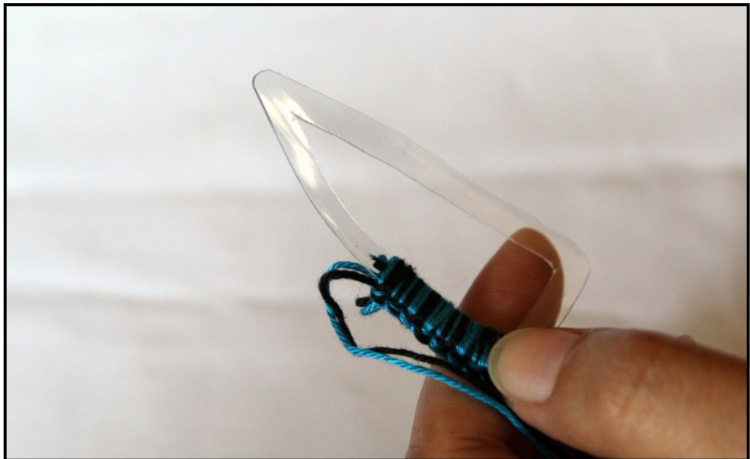
Step 27 - Once short tail is cut. Continue crocheting sc around.
Step 28 - Once you'll reach the tip, it might become difficult to complet the single crochets, if this happen - simply cut the tip to be less pointy.
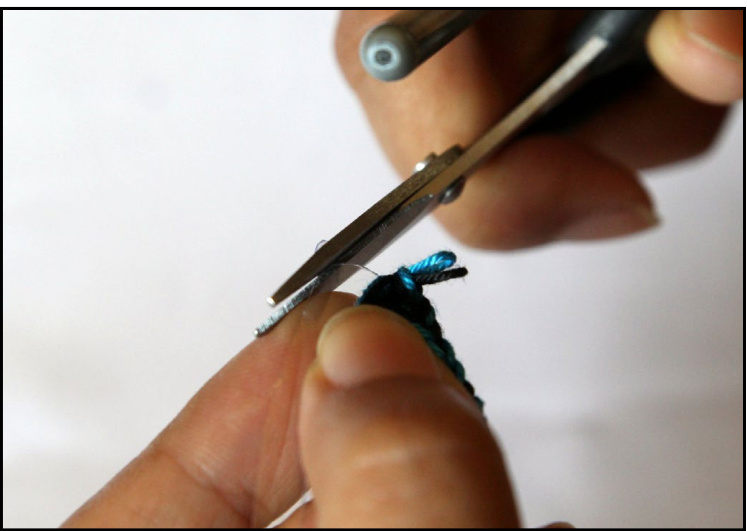
Step 29 - Cutting the tip to make it less pointy will make it easier to continue crocheting around.
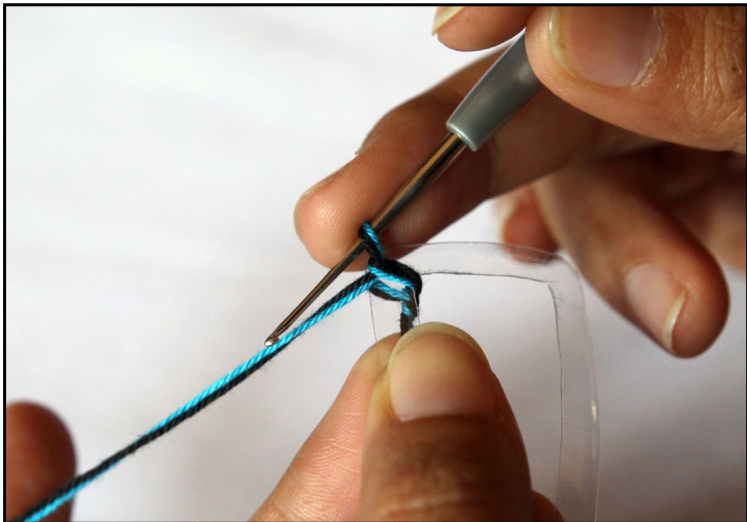
Step 30 - Almost there ..
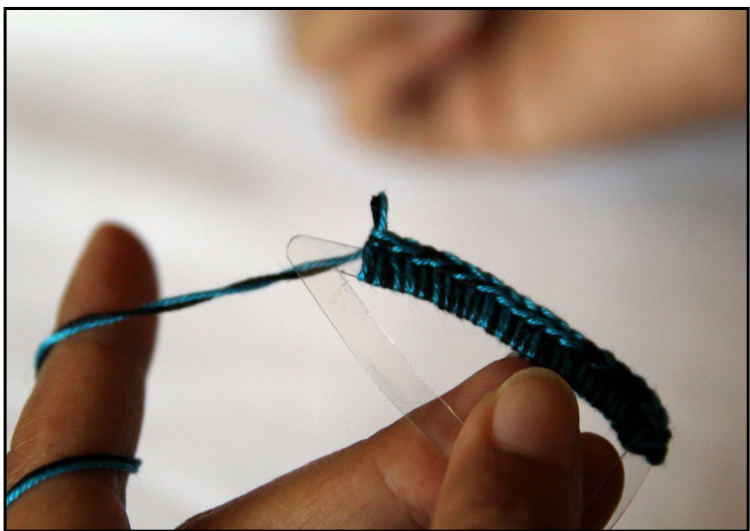
Step 31 - Finish the first round with a sl-st to beg sc.
Crocheting the Earring (#3)
Step 32 - Start the second round, similar to the first, its all sc in each stitch of the first round.
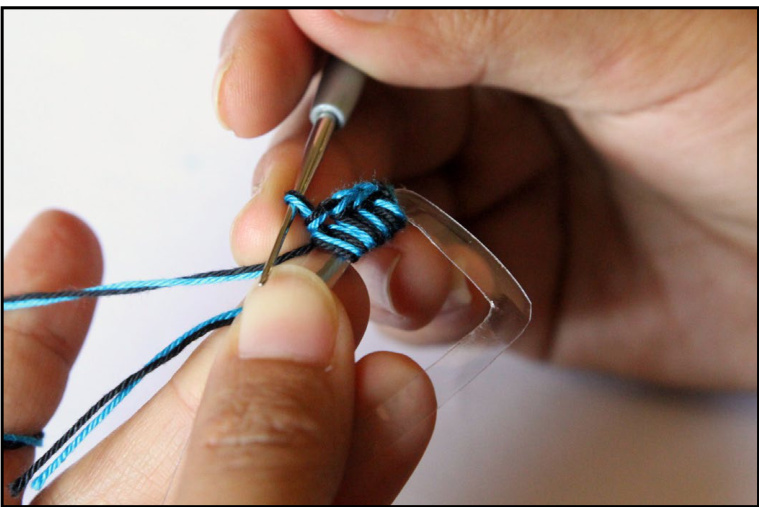
Step 33 - One by one ..
Step 34 - Once the second round is finished, and the threads have been fastened off.
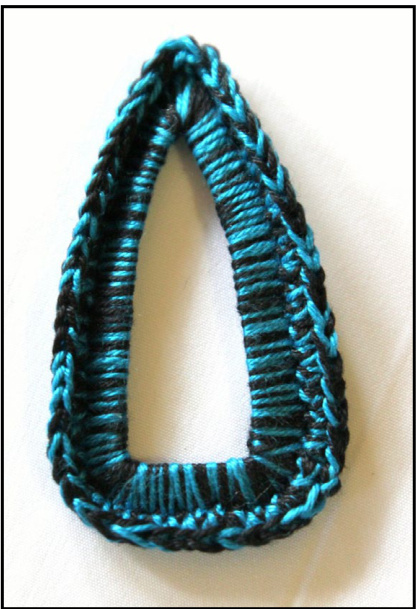
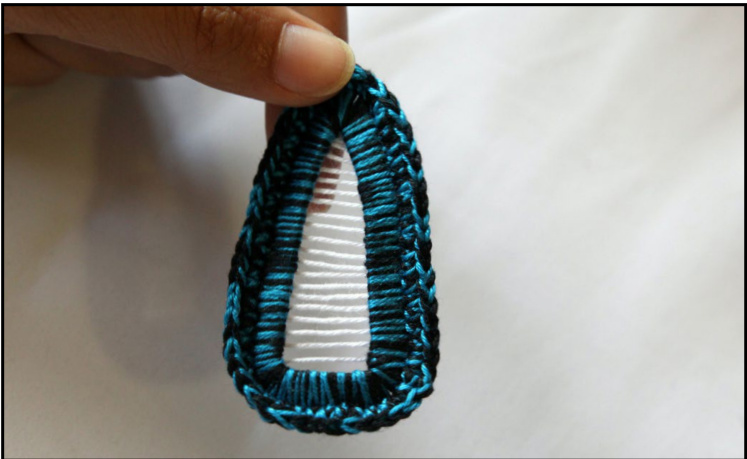
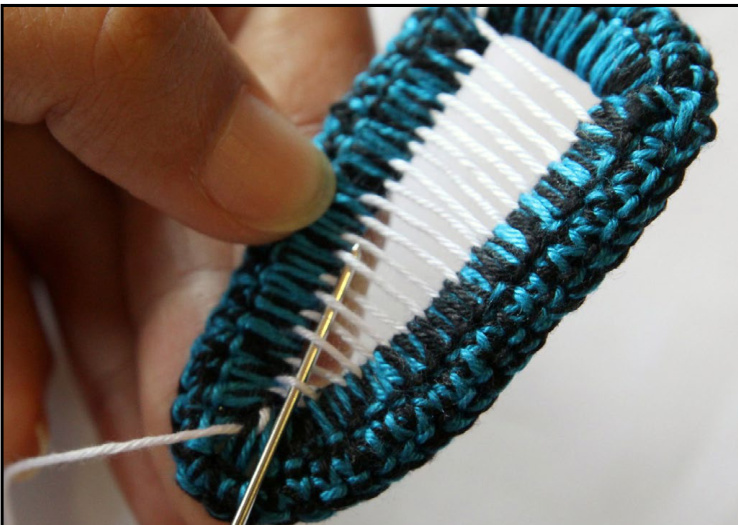
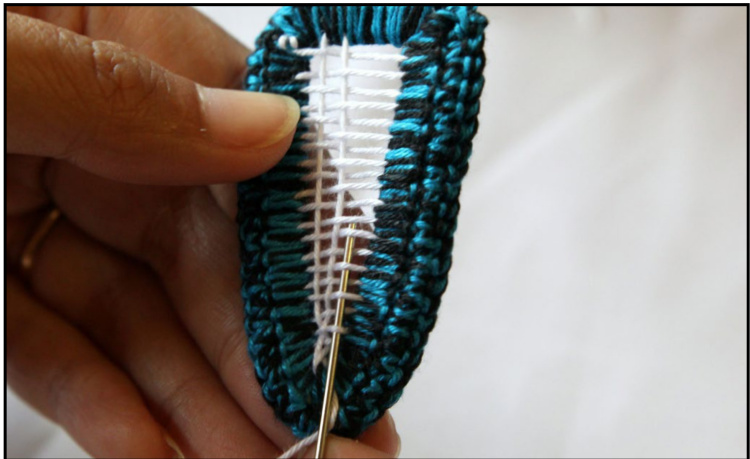
Sewing the Middle
The final step in making this crochet, is creating the grid in the middle of the thread - you can use one or more colors to make it (Ill be using White here). To make the grid, we'll simply sew the thread from side to side, horizontaly, following by sewing it from top to bottom.
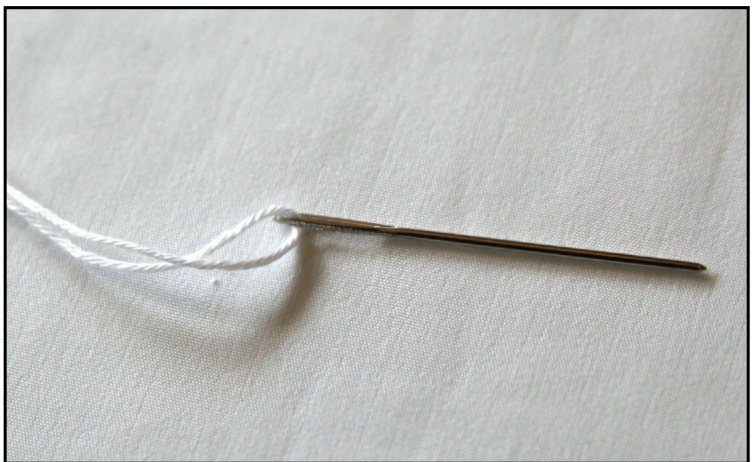
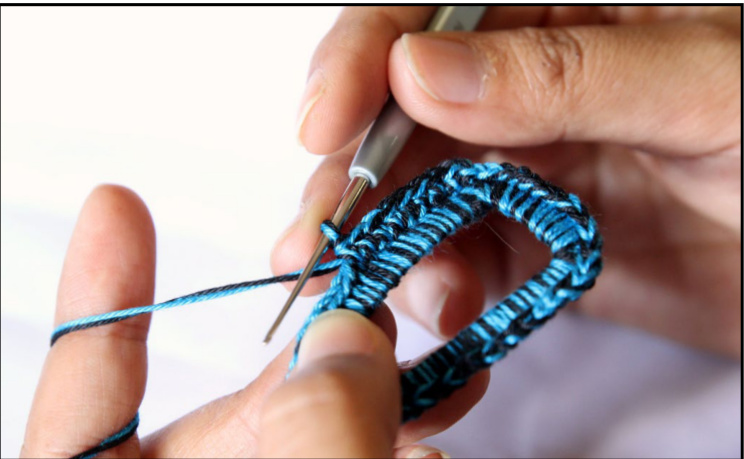
Step 35 - Use a tapestry needle, match it to the thread you're using.
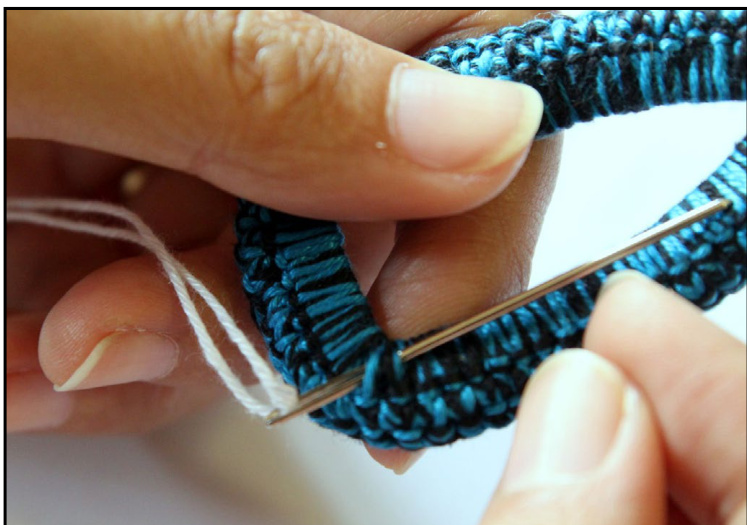
Step 36 - Add the thread at the back of the earring, at one of the bottom corners.
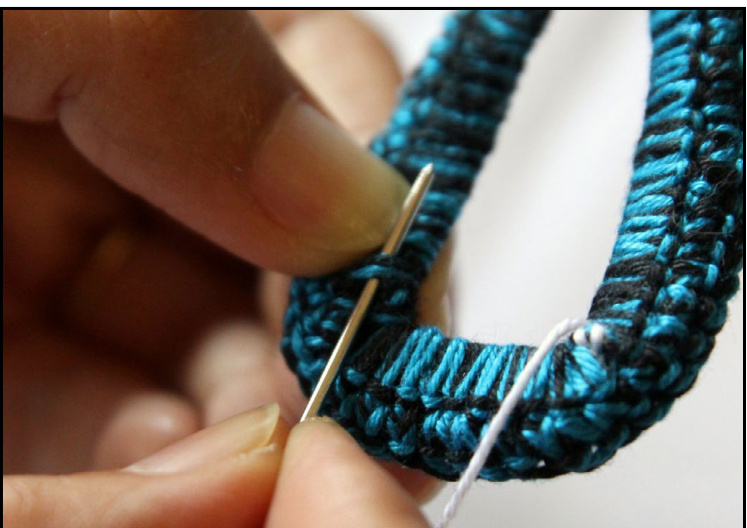
Step 37 - And head to the other side, keeping the thread tight.
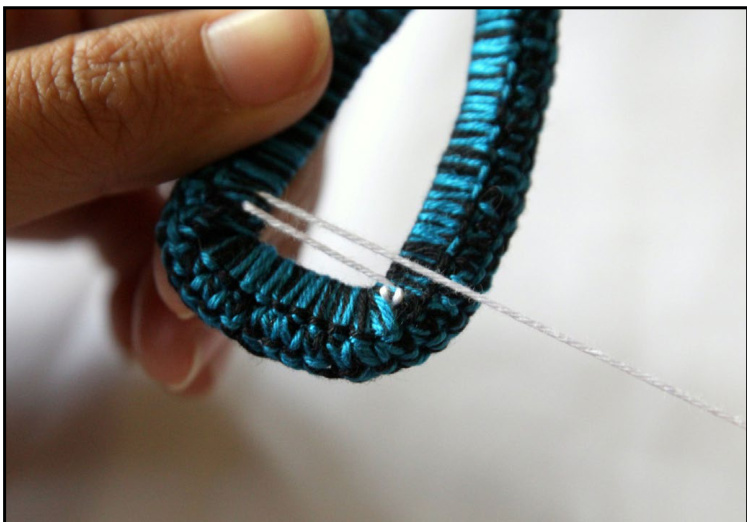
Step 38 - ... and back to the other side, keep the threads parallel.
Step 39 - Repeat steps 37-38 all the way up, keeping the threads parallel and at the same vertical distance.
Sewing the Middle (#2)
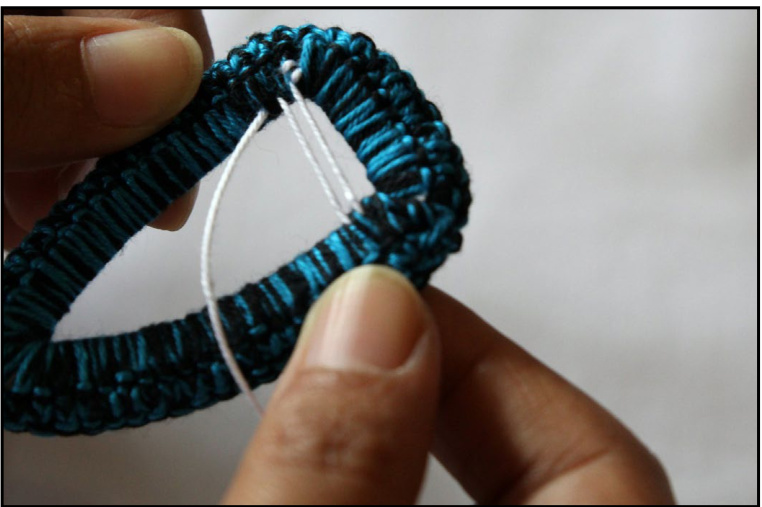
Step 40 - Once all horizontal lines are done.
Step 41 - Next, we'll do the vertical lines, the amount of lines is up to you - I'll show here four lines.
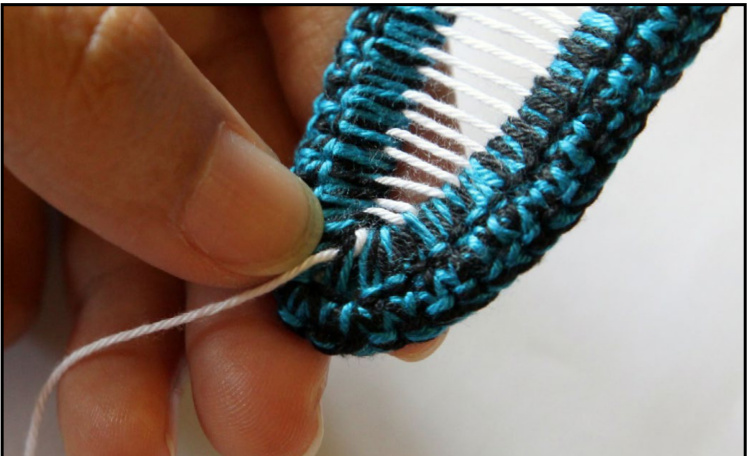
Step 42 - When you head down, sew thruogh the horizontal lines - in an above-below-above-below fashion.
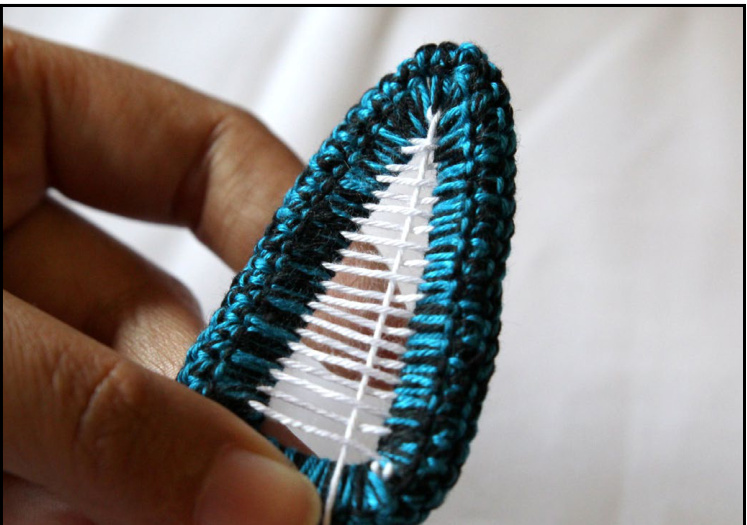
Step 43 - .. All the way down.
Step 44 - Sew through the bottom base, and again to the point where you want to start head up.

Step 44 - Head up in the same fashion you headed down.
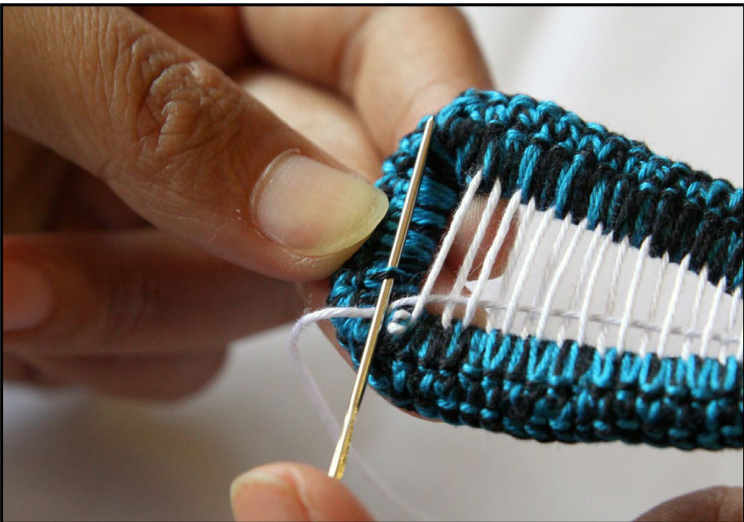
Sewing the Middle (#3)
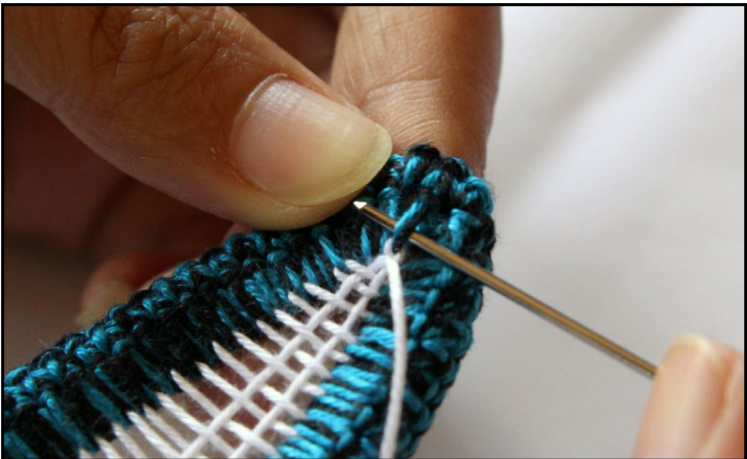
Step 45 - At the top, sew at the same spot you started heading down.
Step 46 - And head back down.

Step 47 - Finish the earing with another line up ..
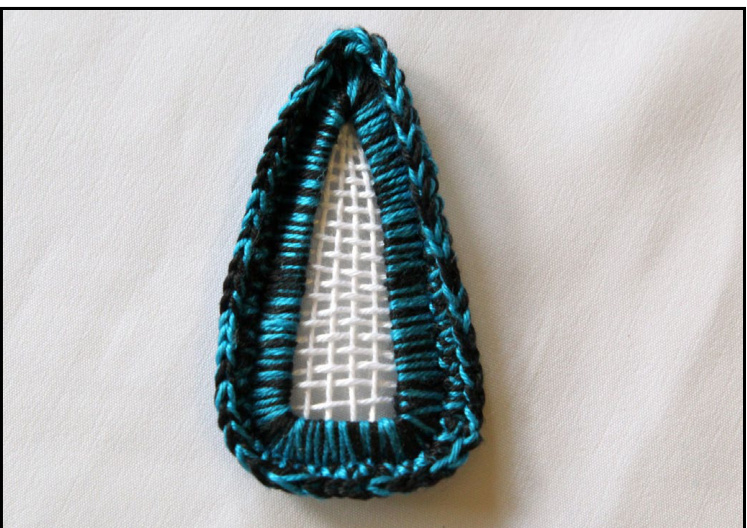
Step 48 - And we're done! :)

Step 49 - Add a Jump Ring to the top loop of the earring, attach another jump ring, and lastly the Hook. That's it :) The Earrings are done. Since you cut the plastic bottle already, why not finish it and crochet 4 pairs more ? In different glorious color combos, make a pair for youself, your loved ones and your neighbour! :)
I really hope you enjoyed making this earring. If you have any question, please let me know and I'll do my best to help. Thanks and enjoy crocheting! Happy Patty :)
Copyright Notice / Terms of Use
This Pattern is my original and unique design, please do not resell, redistribute, copy or rewrite this file, its text content or the included patterns/photos. Feel free to include the finished flower in any project that you want, either for private use or for sell. If you choose to sell the flower, please include a link to my shop and credit Happy Patty Crochet as the original designer. Thank you for understanding!
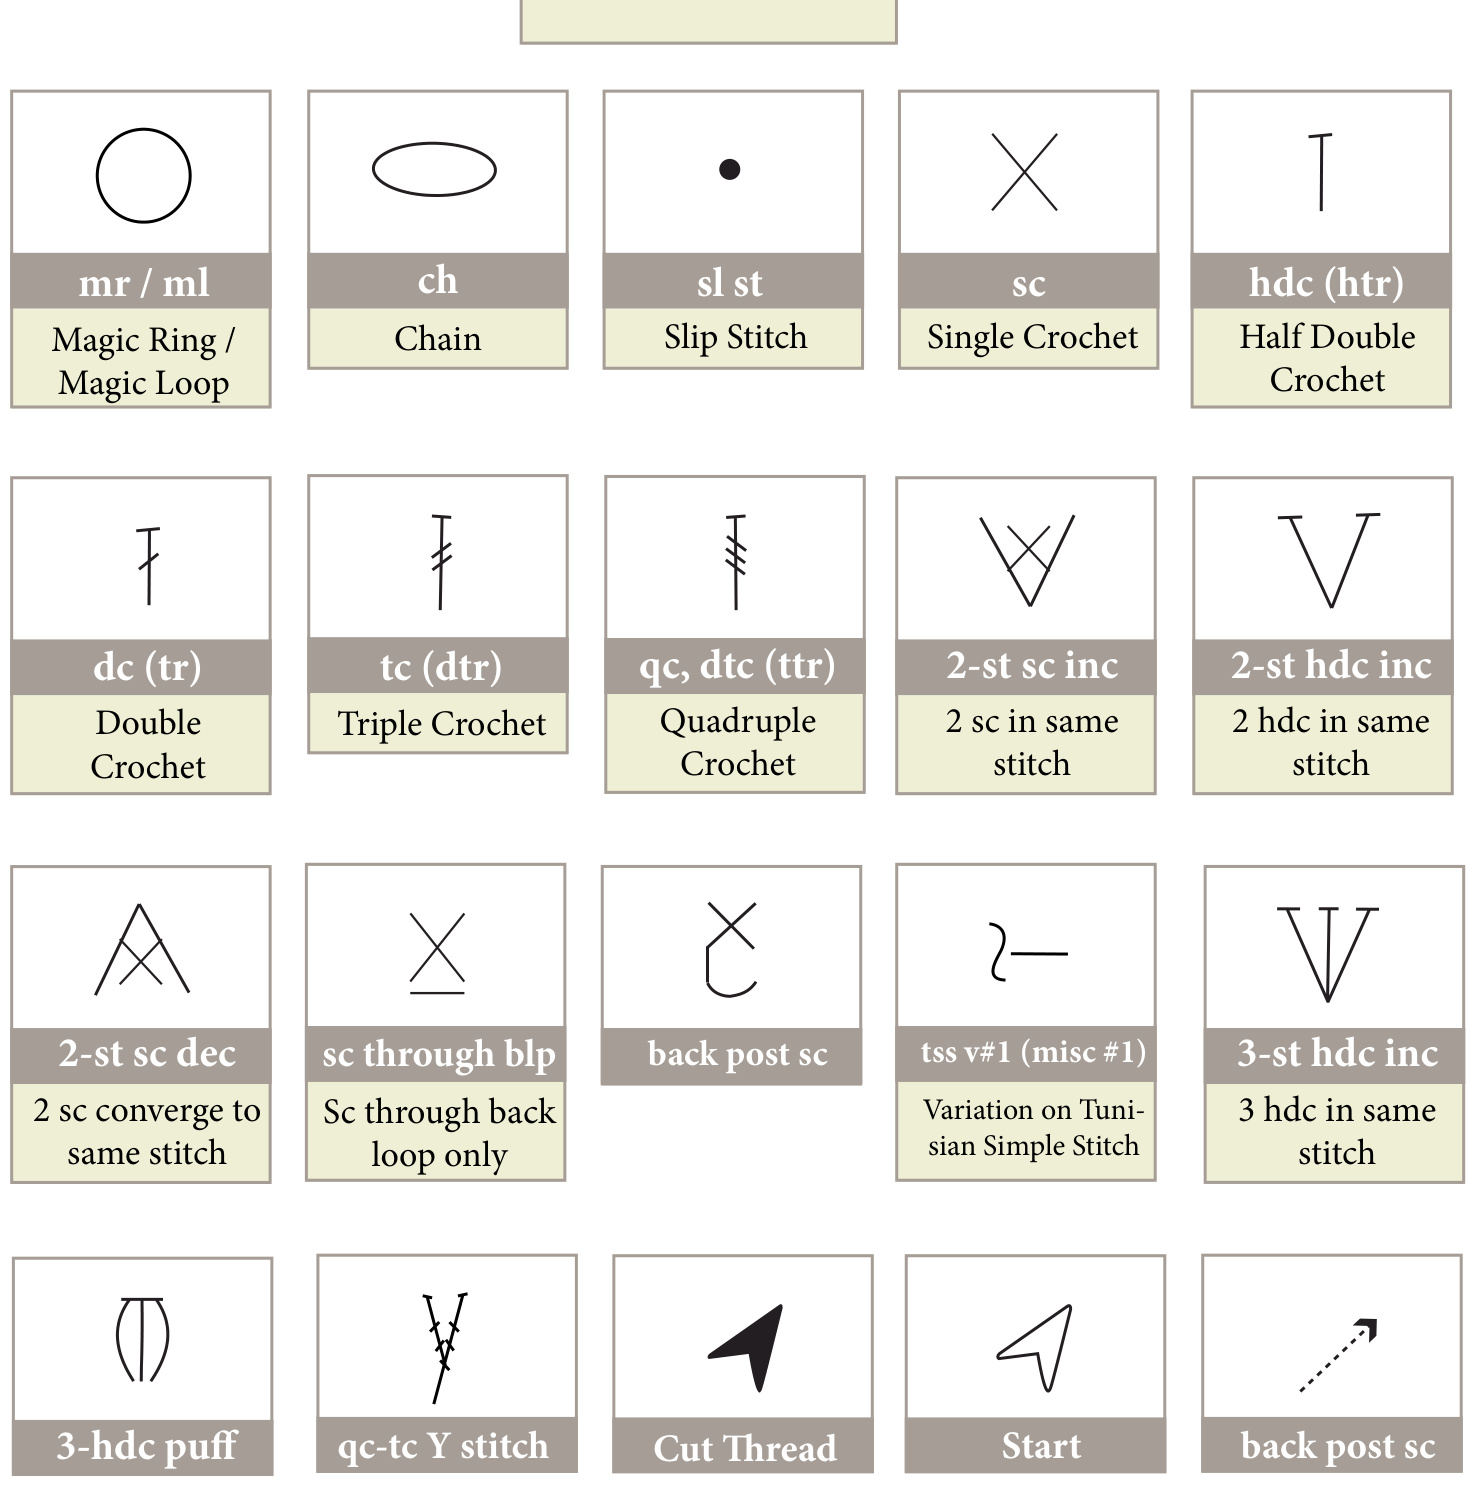
Appendix Crochet Symbols and Abbreviations
| Crochet Symbol |
| abbr (UK term) |
| Short description (if needed) |