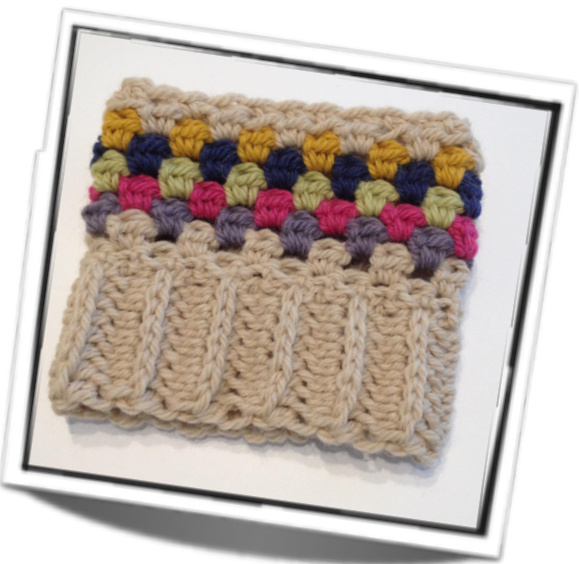
Cotorfut boot Cuffs Pattern Design by Stacey &eighty
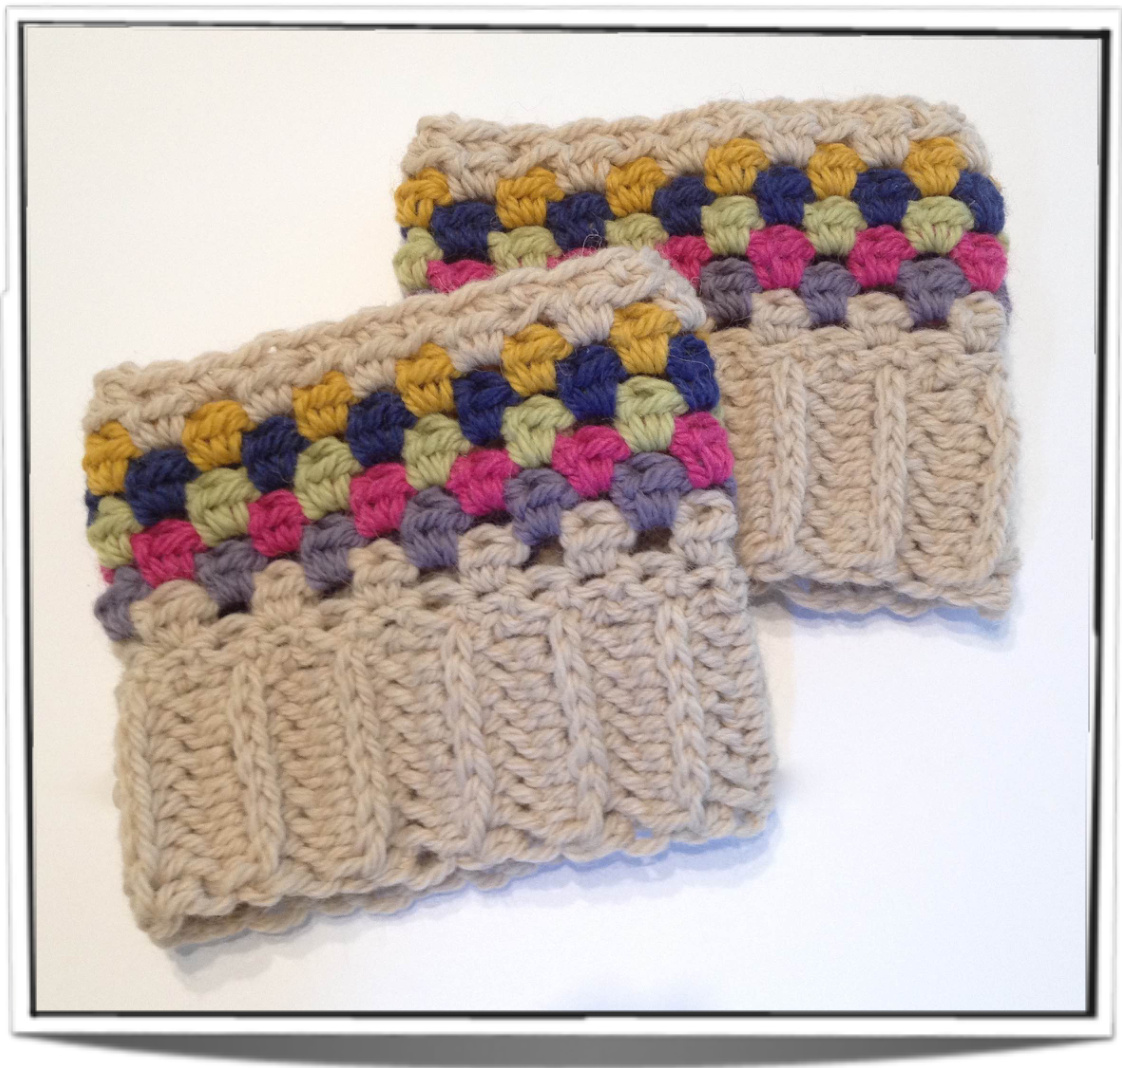
Cotorfut Boot Cufts Pattern
Materials:
· Drops Nepal Yarn: 1 skein of the Primary Color (PC): Light Beige Mix (0206) Approximately 1/5 skein (15 meters) of each the Complimentary Colors (CC): CC1: Grey/Purple (4311) CC2: Pink (6273) CC3: Pistachio (1477) CC4: Royal Blue (6790) CC5: Goldenrod (2923) · 5mm (H/8) hook . Yarn needle Gauge: Not critical for this pattern. My finished boot cuffs were approx. 5" long. The width will vary depending on the size of your calf. Skill Level: Easy
Abbreviations used:
· Chain (ch) . Complimentary color (CC) · Foundation half double crochet (Fhdc) ·Half double crochet (hdc) · Primary color (PC) · Single crochet (sc) · Skip (sk) · Slip stitch (ss) · Stitch (st) Pattern Notes: The boot cuff is worked in two sections. First, the band is created in rows and then slip stitched together. Then the top of the cuff is worked in the round. The pattern is easily adjustable by working fewer or more rows on the cuff (being sure to use an even number of rows). There is some stretch to the cuff, so it should be approximately 1"-2" smaller than your calf. (lf your calf is 15", the cuff circumference should be 13"-14").
Band:
Row 1: With PC, 8 Fhdc, ch 1, turn. If you would like to see a tutorial on this (both video and photo), Moogly Blog has a great one: http://www.mooglyblog.com/foundation-halfdouble-crochet/ Workeaftth where you would Rows 3-30\*: Repeat Row 2. \*The number of rows worked for the band can be easily modified. Simply work the number of rows you need for the band to go around your calf. You should, however, work anEVEN number of rows. After your final row, make sure you have a ch 1. Then, ss the last row worked to the foundation row. To create a ribbing on the other side, work your ss into both loops of the last row and the bottom loop (not the back loop) of the foundation row. (See pictures 7-8 on page 5 for more details). Your boot cuff is now inside out. Keep it this way while you work the cuff until the directions say to turn it right side out. Round 1: Ch 1, sc evenly around band, ss into the 1st sc of the round (30 sc). If you modified the number of rows for your band, make sure you do that many sc for this round. IMPORTANT: Make these sc's very loose. If you work them too tightly, the cuff will pucker in and look strange. Round 2: Ch 2 (counts as hdc here and throughout), hdc in same st as ch 2, sk a st, \*2 hdc in next sc, sk a st,\* repeat from \* until end, ss into the top of ch 2, fasten off. Round 3: Join CC1 with a ss in any space between hdc clusters, ch 2, hdc in same space as ch 2, sk 2 hdc, \*2 hdc in following space (between hdc clusters), sk 2 hdc\*, repeat from \* until end, ss into top of ch 2, fasten off. (See pictures 9-13 on page 6 for more details on how I join new yarn and work the first hdc cluster). Rounds 4 - 7: Repeat Round 3, with CC2 - CC5 Round 8: Repeat Round 3 with PC, but do not fasten off yarn at the end. Round 9: Ch 1, turn the boot cuff right side out, sc in each st around, ss into 1st sc of the round (or do an invisible join), fasten off and weave in ends. second cuff following the same pattern & enjoy your pair of boot cuffs! Page 3
Pictures
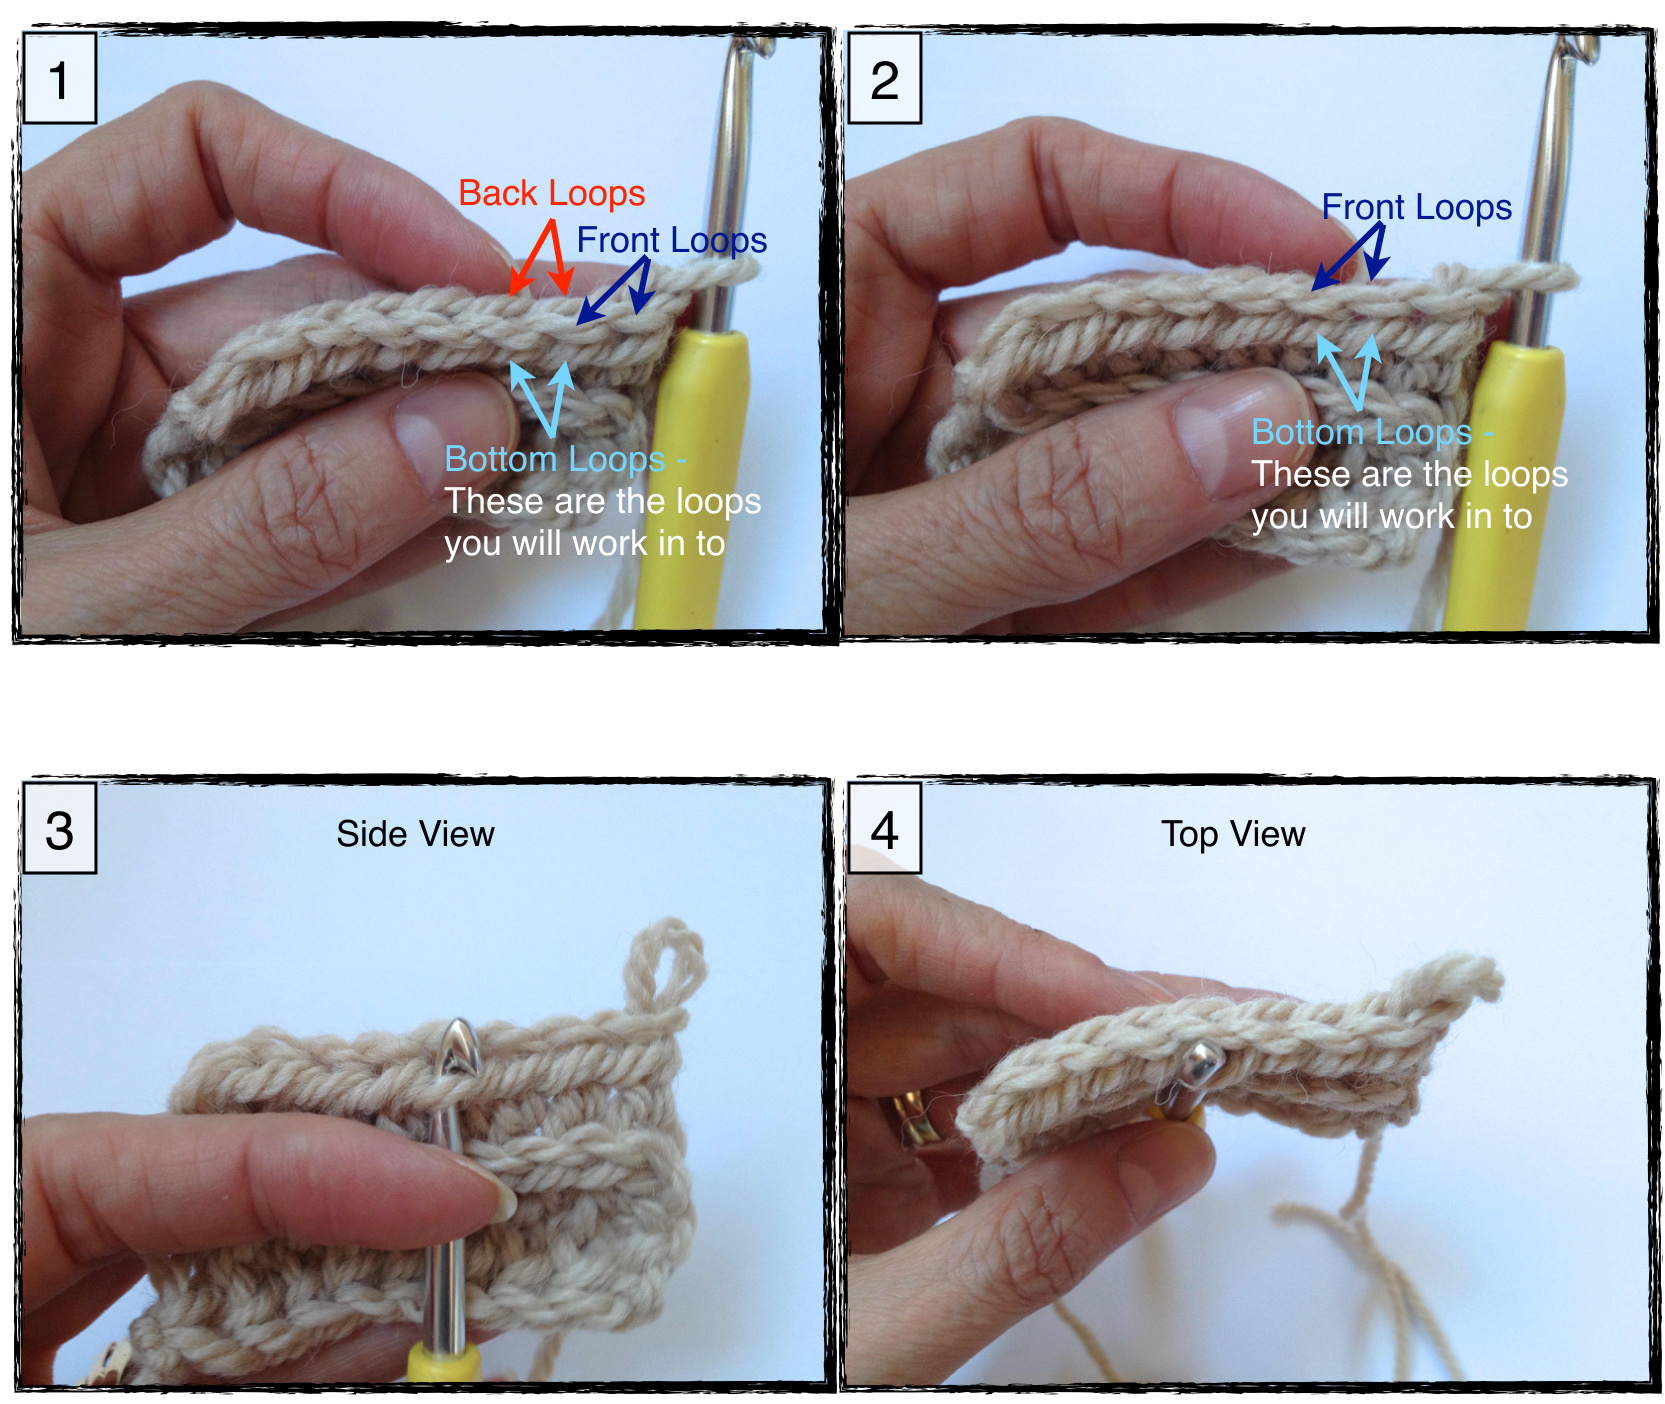
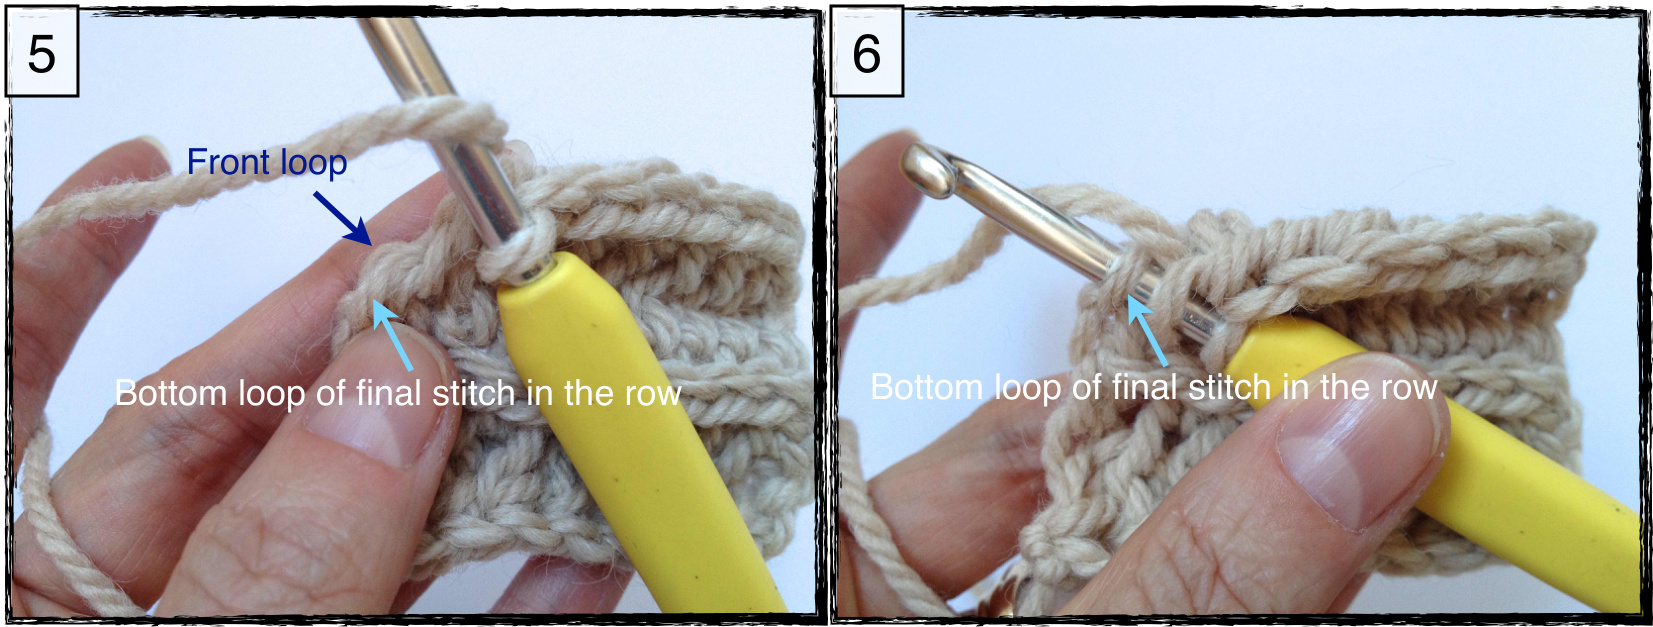
Pictures 1 - 4: Show the loops you should work your hdc's into for the band Pictures 5 - 6: Show the bottom loop of the final stitch in the row. Be careful when you get to the end of each row; the front & back loops have by this time have been pushed to the front of the fabric.
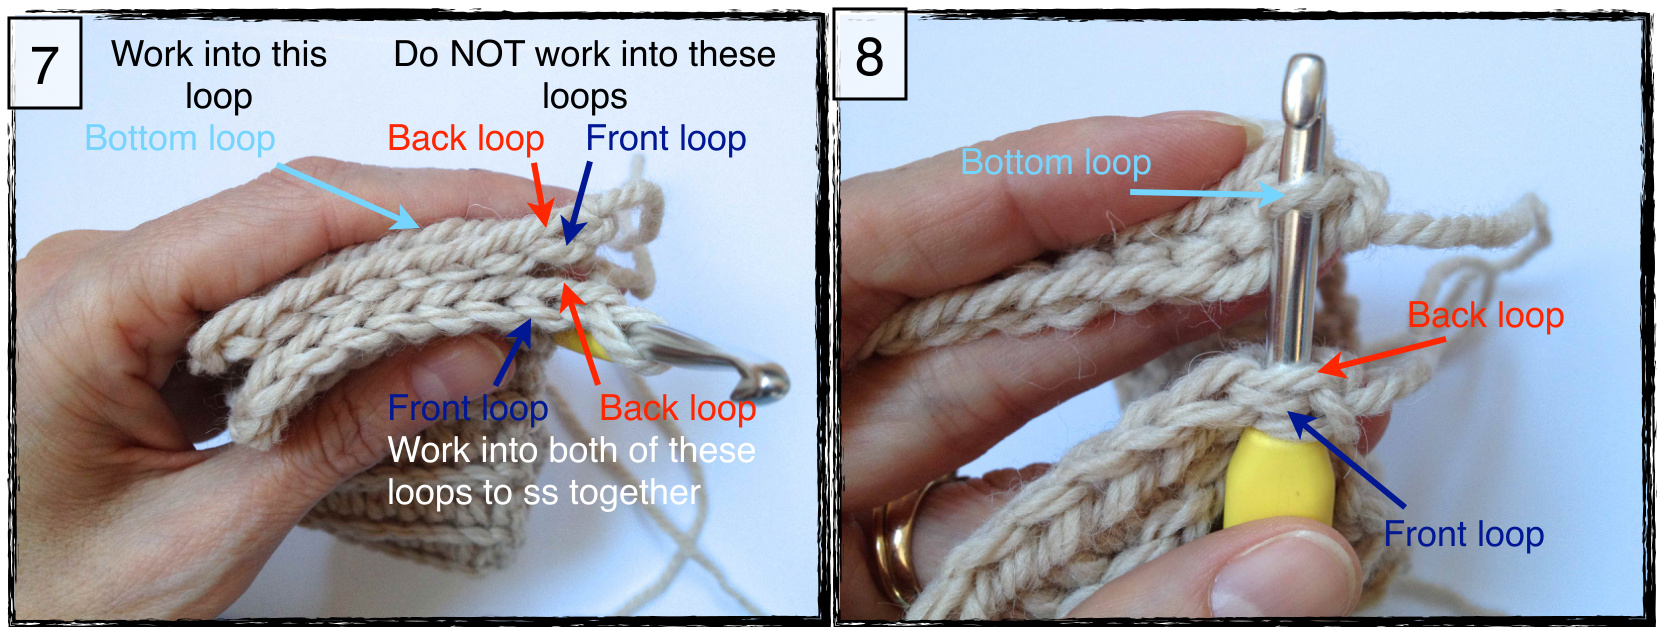
Pictures 7 - 8: Show the loops you should slip stitch into to join the band together. Slip stitch into both the front and back loops of your final row and the bottom loop of your foundation row.
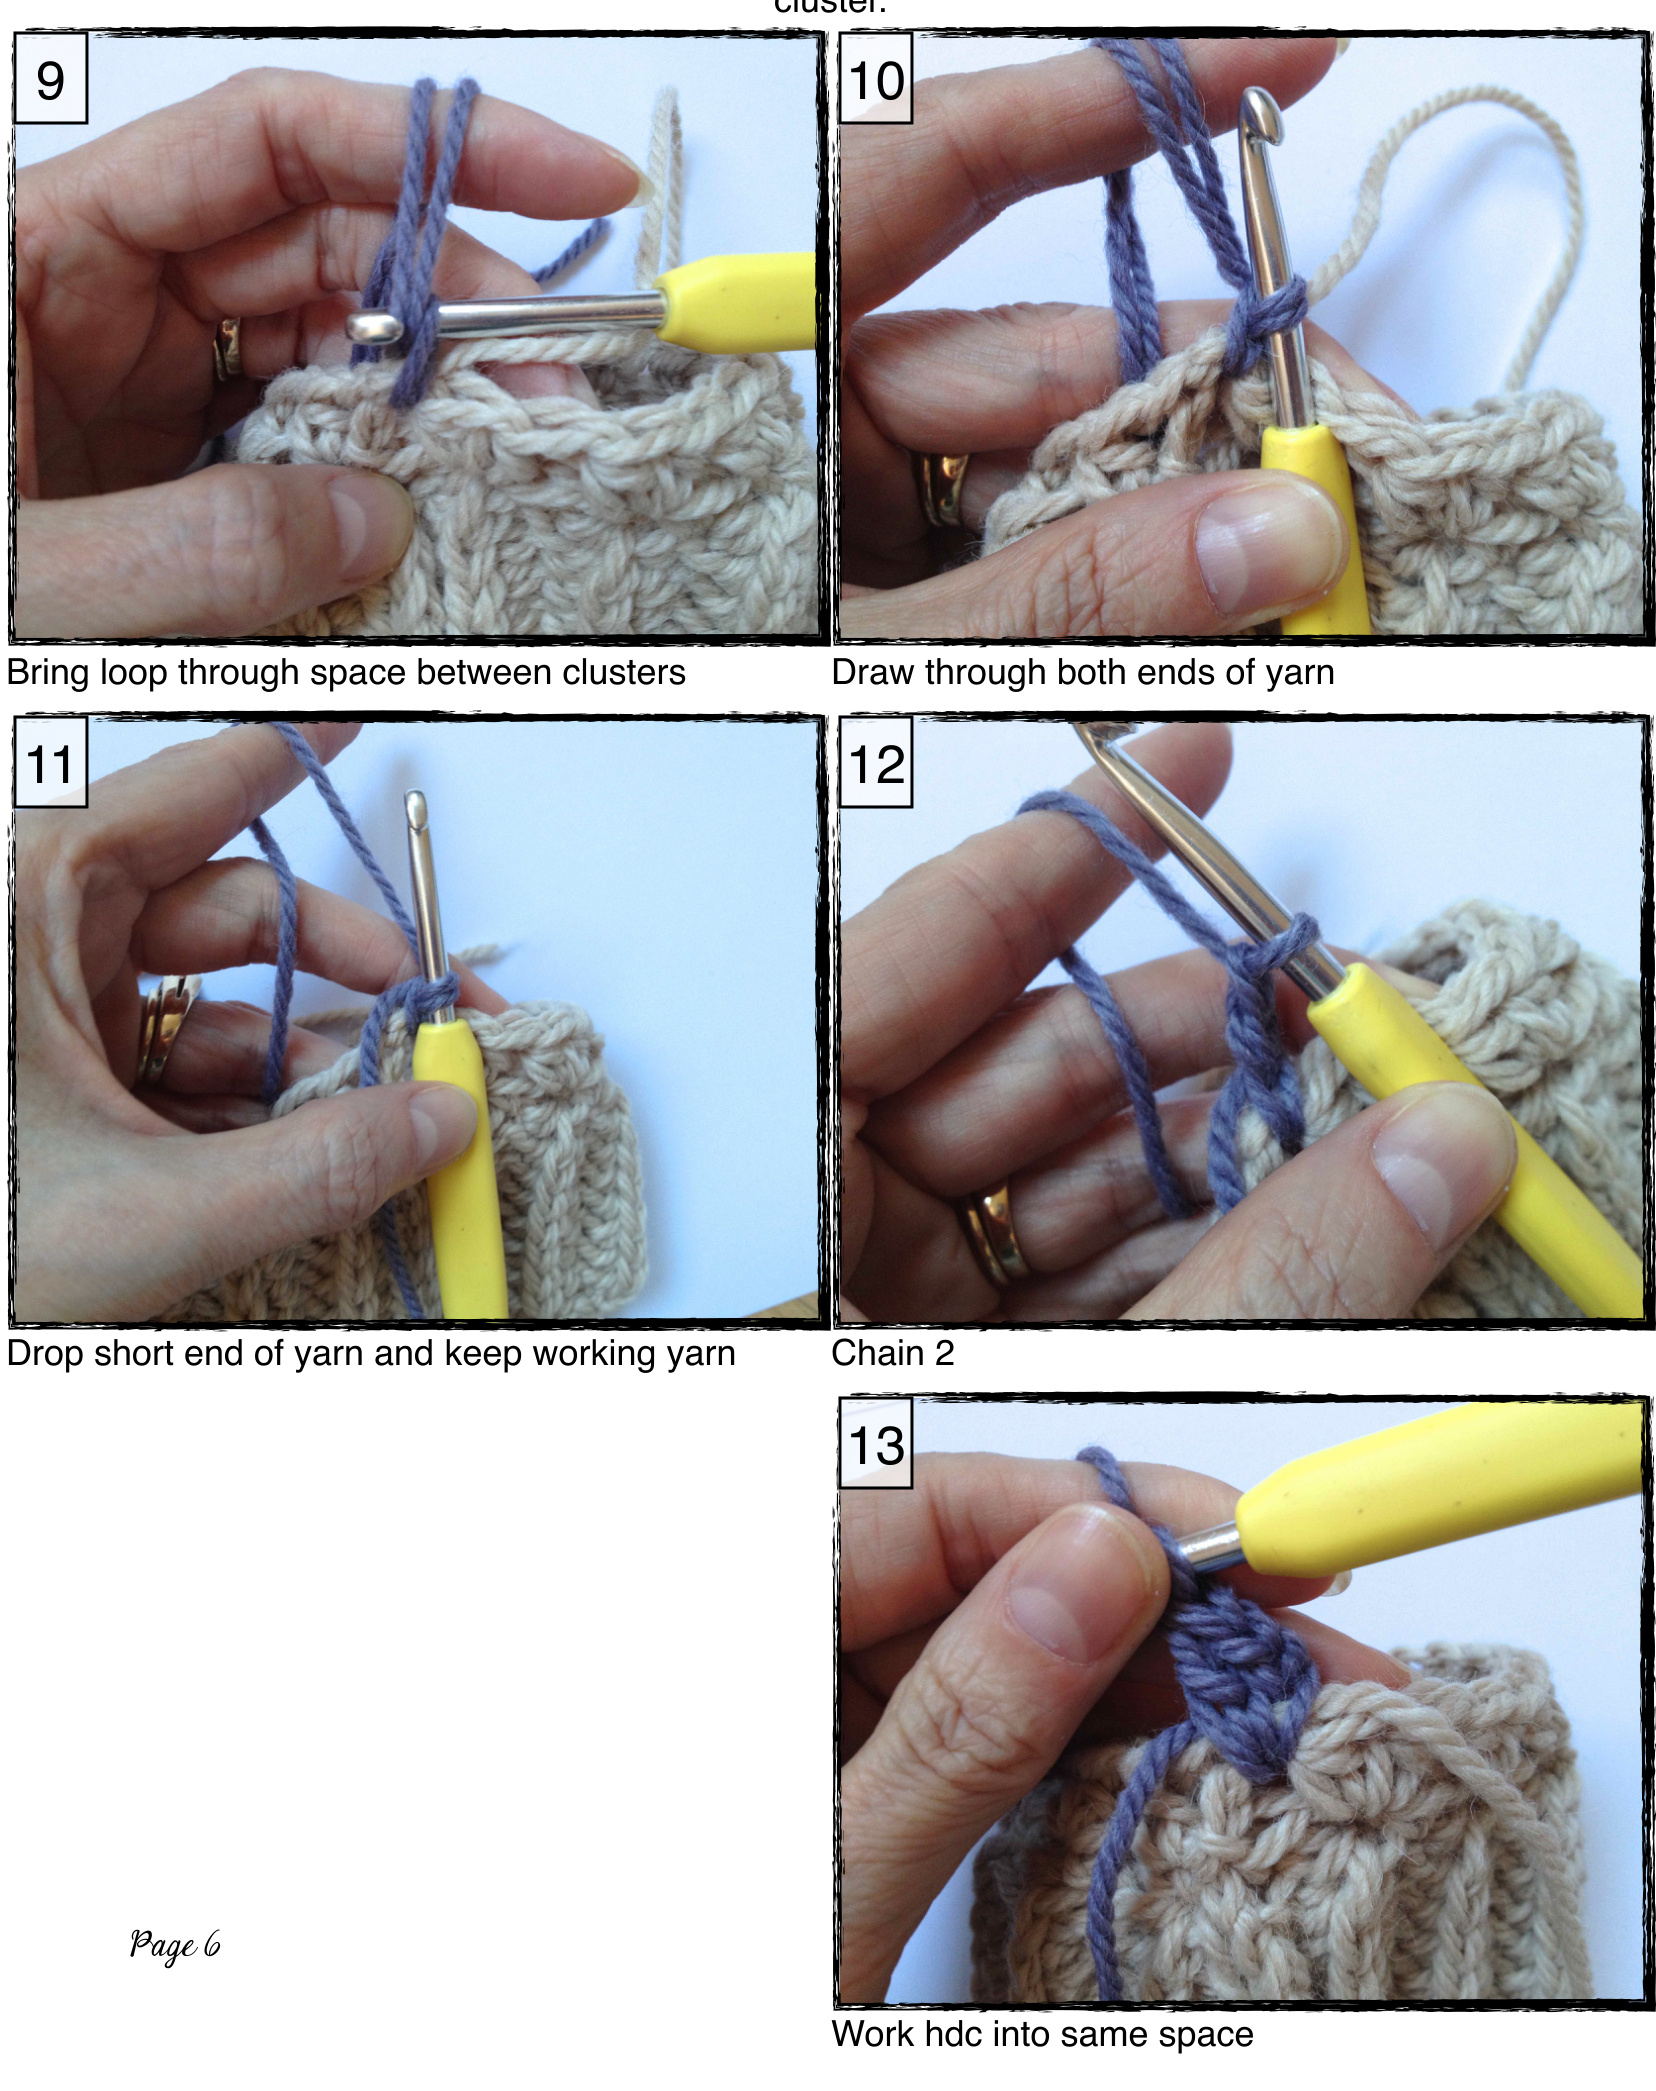
Pictures 9 - 13: Show my method for joining a new color and working the first hdc


