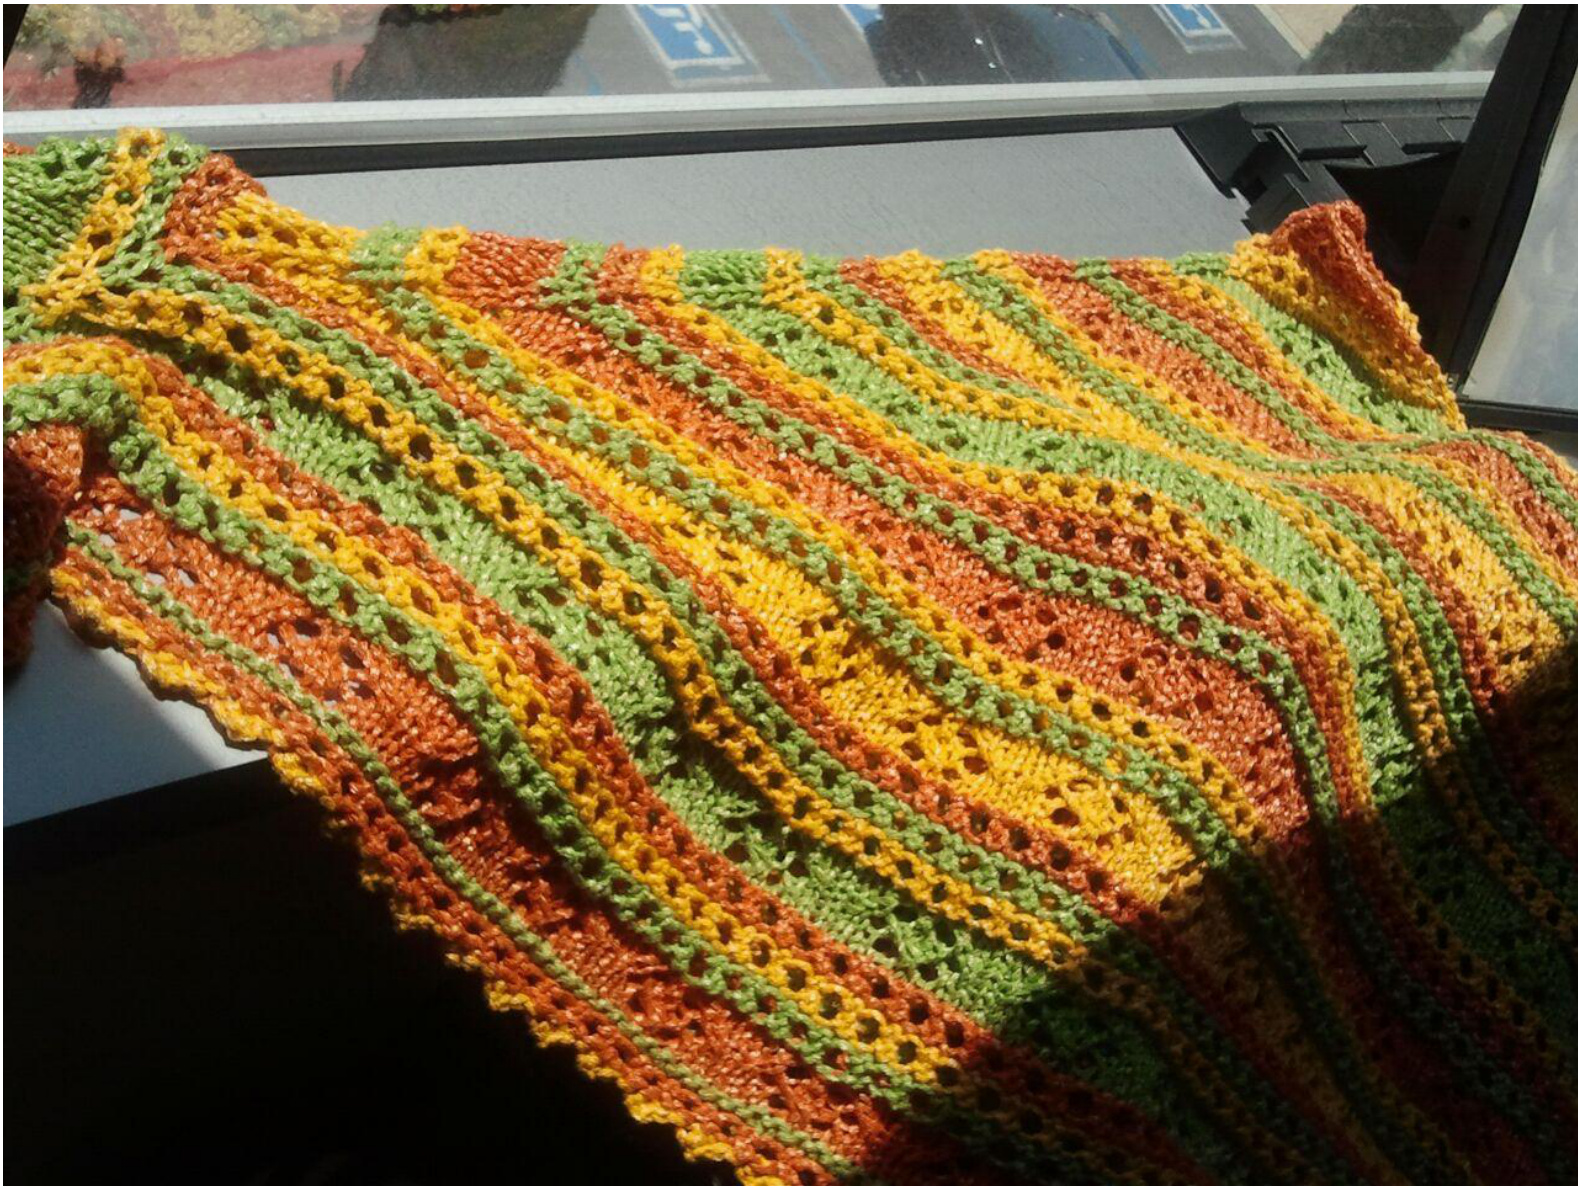
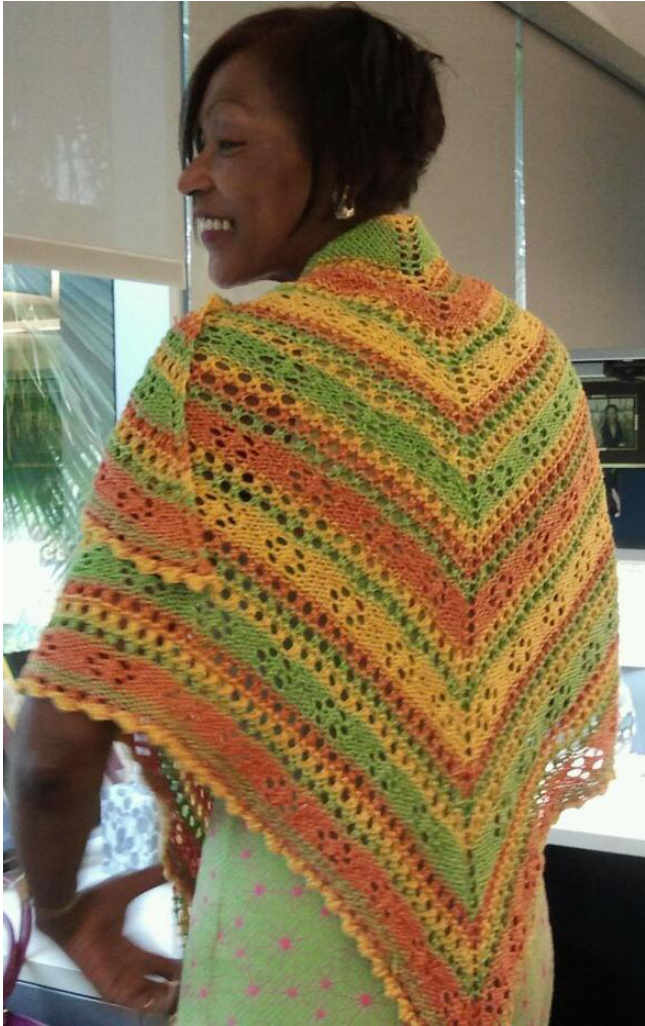
Citrus Shawl
I used 4 balls each of Ornaghi Filati Vanity cotton yarn in Lemon, Lime and Orange. The shawl starts from the center and grows by yarnovers on the center line and at the edges. The first and last 2 stitches are knit on every row to keep the edge flat. Slip the first stitch of every row to keep a clean edge. Alternate the flower pattern with eyelet pattern; most times do the eyelet pattern in all 3 colors separated by the flower pattern, but you may do only 2 eyelet rows occasionally to break up the pattern. I deliberately used the colors randomly so that it was not too uniform, just making sure to alternate colors between patterns. Continue until the shawl is the desired size. I kept going until I ran out of yarn.
Pattern:
Cast on 5 stitches Row 1: k2, yo, place marker, k1, place marker, yo, k2 Row 2: sl1, k1, p1, slip marker, p1, slip marker, p1, k2 Row 3, sl1, k1, yo, k1, yo, sm, k1, sm, yo, k1, k2
Row 4: sl1, k1, purl to marker, slip marker, p1, slip marker, purl to marker, k2 Change colors and work the Eyelet pattern a couple of times, changing colors between repeats. Be sure you have 13 stitches on each side between the yarnovers before working the Flower pattern.
Flower Pattern:
Row 1 (Right Side): sl1, k1, yo, [k3, k2tog, yo, k1, yo, sl1, k1, psso] repeat to marker, yo then slip marker, k1, sm, yo, [k3, k2tog, yo, k1, yo, sl1, k1, psso] to last 2 stitches, yo, k2 (Note: for these rows, be sure you have a yarnover after the first 2 stitches, on either side of the center point, and before the last 2 stitches. You will not necessarily have the right number of stitches to complete the pattern exactly and it is not important to the overall pattern to have it come out exactly right. I tried to make the center symmetrical, so if I had 2 stitches at the end I started the other side with 2 stitches, etc.) ow 2: sl1, k1, purl to marker, slip marker, p1, slip marker, purl to marker, k2 Row 3: sl1, k1, yo, [k3, k2tog, yo, k3, yo, sl1, k1, psso] repeat to marker, yo, sm, k1, yo, [k3, k2tog, yo, k3, yo, sl1, k1, psso] repeat to last 2 stitches, yo, k2 Row 4: sl1, k1, purl to marker, slip marker, p1, slip marker, purl to marker, k2 Row 5: sl1, k1, yo, [k5, yo, sl1, k2tog, psso, yo] repeat to marker, yo, sm, k1, yo, [k5, yo, sl1, k2tog, psso, yo] repeat to last 2 stitches, yo, k2
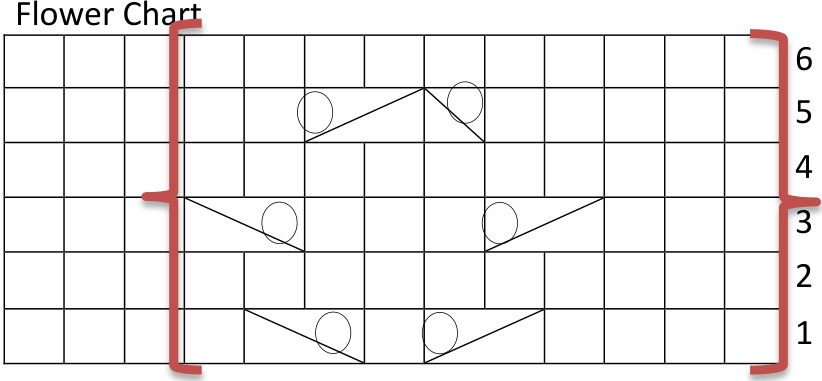
| Knit | ||
| Yarnover | ||
| Knit 2 together | ||
| Sl1, k1, psso | ||
| Sl1, k2tog, psso | ||
Eyelet Pattern:
Row 1 (Right Side): sl1, k1, yo, knit to marker, yo, sm, k1, sm, yo, knit to marker, k2 Row 2: sl1, k1, knit to marker, sm, p1, sm, yo, knit to marker, k2 Row 3: sl1, k1, yo, [k2tog, yo] to marker, sm, k1, sm, [yo, k2tog] to last 2 stitches, k2 (Note: for these rows, be sure you have a yarnover after the first 2 stitches, on either side of the center point and before the last 2 stitches) Row 4: sl1, k1, knit to marker, sm, p1, sm, yo, knit to marker, k2.
Pointed cast off:
I am sure I am not the first person to make this up, but it was done without a reference. It is based on an edging stitch worked lengthwise, and incorporated into the cast off. 1. In first stitch, k1, yo, k1, 2. Turn and purl these 3 stitches, purling the next stitch on the needle along with the first new stitch. 3. Turn and cast off the first 2 stitches (k2, pass first stitch over). 4. Knit the 3rd stitch with the next stitch ready to be cast off and cast off the 3rd stitch. 5. Pass the last stitch on your needle over the next stitch waiting to be cast off. You have cast off 3 stitches and have one point. Repeat, beginning with k1, yo, k1 in the stitch you passed over in step 5. There will be a lot of ends to work in due to all the color changes.