Rainbow Fairy 2: Amber the Orange Fairy
Stitches used:
Sc Single Crochet Dc Double Crochet Hdc Half Double Crochet SIst Slip stitch MR Magic ring BLO Work in back loop only
Darling little Rainbow Fairy!
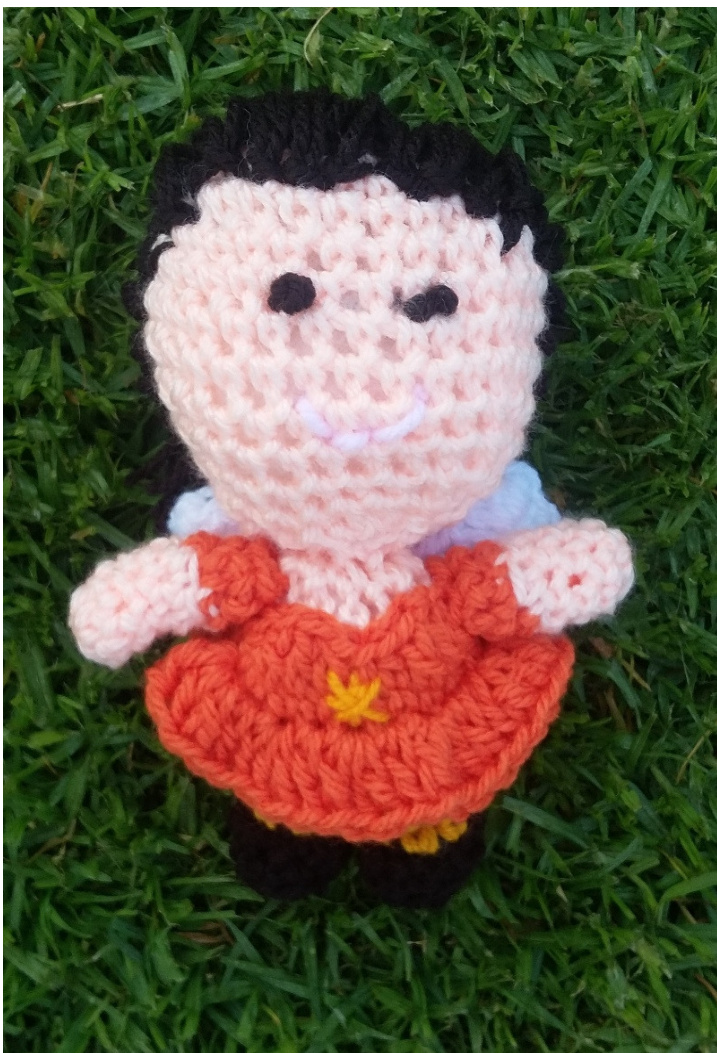
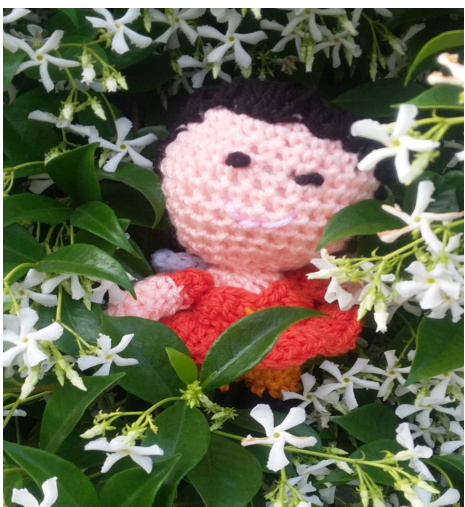
Meet Amber, the Orange Rainbow Fairy! She loves the colour orange, of course, as well as counting oranges in the garden! Amber's fairy dust is orange and smells of citrus fruits. She is quite a cheeky little fairy with her boots and thights! She and her sisters bring colour and joy to nature. Finished size: 20cm in height DEC Decrease a stitch by working two together INC Increase a stitch by working two stitches in one previous stitch
Hook and yarn:
3.5mm hook
50g DK yarn in dark orange, light orange, skin tone, yellow, dark brown, pink and black. I used only very small amounts for this little fairy.
Extras needed:
Tapestry needle Scissors Fiber Fill
Instructions:
Legs (make 2)
Amber looks super stylish in her boots! We will crochet that onto the foot. Do not chain 1, work in continuous rounds. Starting with DARK BROWN yarn Round 1: SC 5 in a MR Round 2: Increase in each stitch around, place a marker to mark the end of your round and move marker up as you go along.(10) Round 3: BLO sc in each stitch around (10) Round 4: Sc in each stitch around (10) Change to LIGHT ORANGE YARN of your choice by ending the last sc in Round 4 by pulling the new colour through both brown loops on the hook. Round 5: Sc 2, dec, sc2, dec, sc 2 (8) Round 6: Sc around (8) STUFF LEG F/O first leg only, weave in ends. For second leg keep working yarn attached! with second leg continue on: Round 7: Sc 4 on leg 2, sc 8 on leg 1, sc 4 on leg 2 (16) Round 8 - 10: Sc around (16) Change to skin tone of your choice by ending the last sc in Round 10 by pulling the new colour through both orange loops on the hook. RoUnd 11: (sC 2, deC) x4 START STUFFING!! Round 12- 13: Sc around (12) Round 14: (sc, dec) x 4 (8) Finish stuffing and finish off, weave in any ends.
Head (make 1 only)
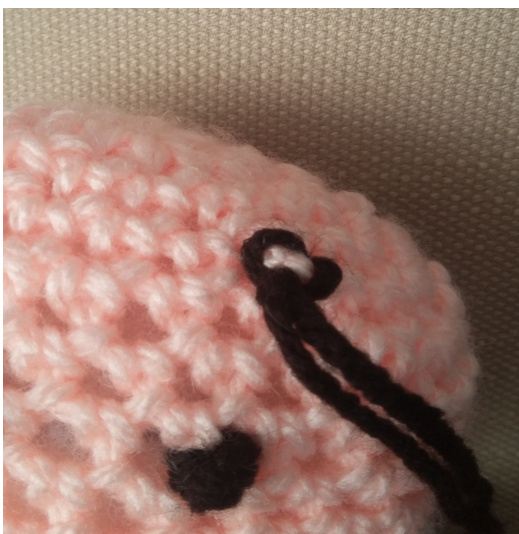
Using the skin tone colour. Do not chain 1 or join, work in continuous rounds. Round 1: Sc 8in a MR (8) Round 2: Increase in each stitch around, place a marker to mark the end of the round, move marker up as you proceed. (16) Round 3: Inc, sc5, inc, sc, inc, sc5, inc, sc (20) Round 4: Sc, inc, sC6, inc, sc2, inc, sC6, inc, sC (24) Round 5: Sc 2, inc, sc7, inc, sc3, inc, sc7, inc, sc (28) Round 6: Sc 2, inc, sc8, inc, sC4, inc, sc8, inc, sc2 (32) Round 7 - 9: Sc in each stitch around (32) Round 10: Sc2, dec, sc8, dec, sc4, dec, sc8, dec, sc2 (28) Round 11: Sc2, dec, sc7, dec, sc3, dec, sc7, dec, sc(24) Start stuffing the head, continue stuffing as you finish off. Round 12: Sc, dec, sc6, dec, sc2, dec, sc6, dec, sc (20) Round 13: Sc, dec, sc5, dec, sc, dec, sc5, dec (16) Round 14: Dec in each stitch around (8) Finish stuffing, slip stitch to first sc and F/O leaving a long tail. Weave tail through the 8 stitches to close the opening. Leave the long tail and attach the head to the body with this long tail by sewing to thebody. Using black embroider two eyes on about row 7 of the head with French knots. Using a small amount of pink embroider a mouth for your Fairy.
Arms (make 2)
Using the skin tone colour. Do not join or chain 1, work in continuous rounds. Round 1: Sc 6 in a MR (6) Place a marker to indicate the last stitch, move marker up as you Continue. Round 2 - 5: Sc around (6) CHANGE TO DARK ORANGE for the sleeves of the dress! Change by pulling a orange loop through the last two loops of stitch 6 of round 5. Round 6: BLO sc around (6) Round 7: Sc around (6) Finish off, leaving a long tail for sewing to the body, stuff lightly. Attach both arms to the body by folding the cast off edge flat and sewing through both layers of the arm into the body.
Hair
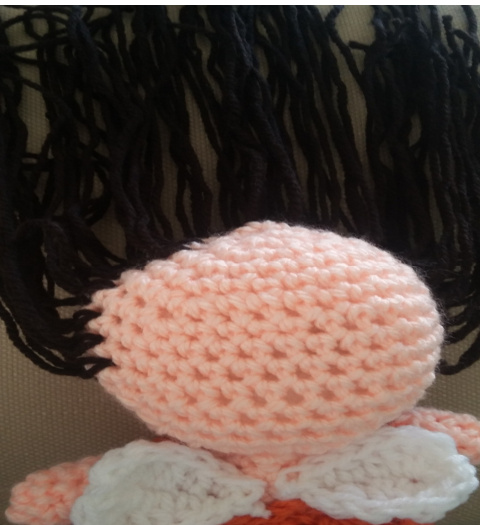
Using dark brown yarn, take a thick book and wrap the yarn around the book length wise. Wrap quite a few times, I think I did about 40 wraps, then cut the yarn on each end of the book. Now you have perfect hair pieces, all the exact same size! Attaching your hair is easy, Amber sports a small ponytail, we basically just want to cover enough of her head to give the impression of a full head of hair while not sitting days threading and knotting. ;) Start on the forehead between the eyes. Insert your hook through this stitch on row 5, pull through a piece of yarn and knot it. Continue down each side in a slight curve, inserting a piece of yarn in each stitch on each row till about row 11. Insert yarn pieces down the sides, about 3 rows in, till you get to the neck part. Insert yarn around the back of the head, only about 2 rows in. Gather all the hair, straighten and neaten it and fasten by tying with a piece of yarn. Cut to desired length.
Small knot in front is the Fairy's eye. The knot at the top shows the first hair knot made.
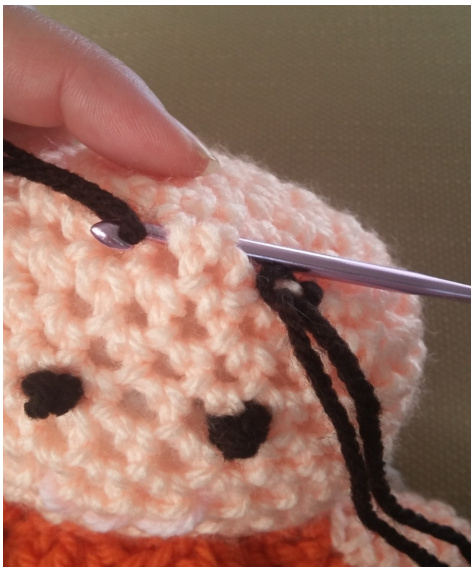
Continue with the knots in a line across the Fairy's forehead.
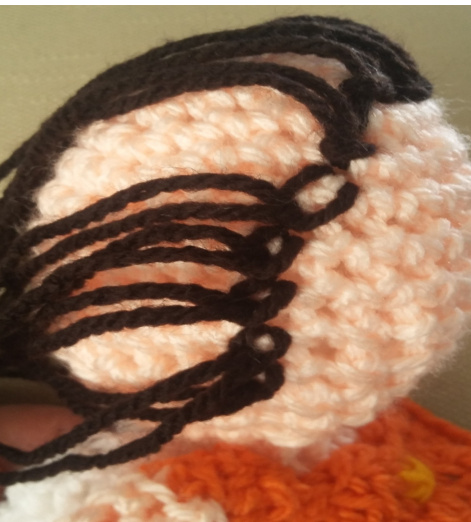
Continue all the way down to the Fairy's neck.
Add more rows of hair and cover the back of your Fairy's head up until the halfway point.
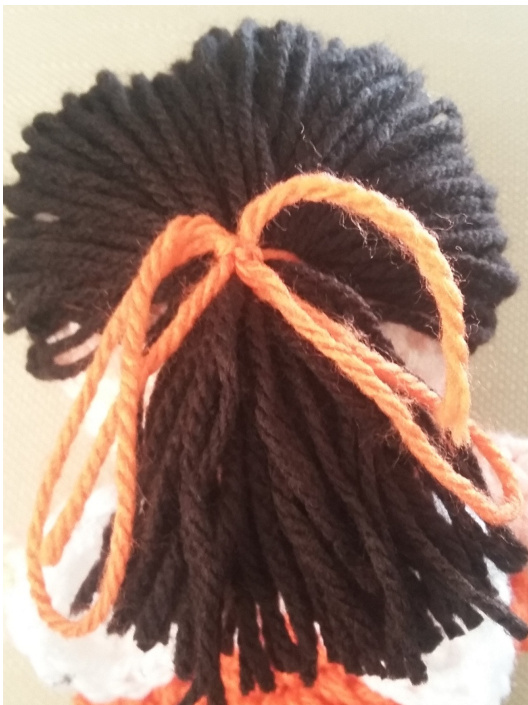
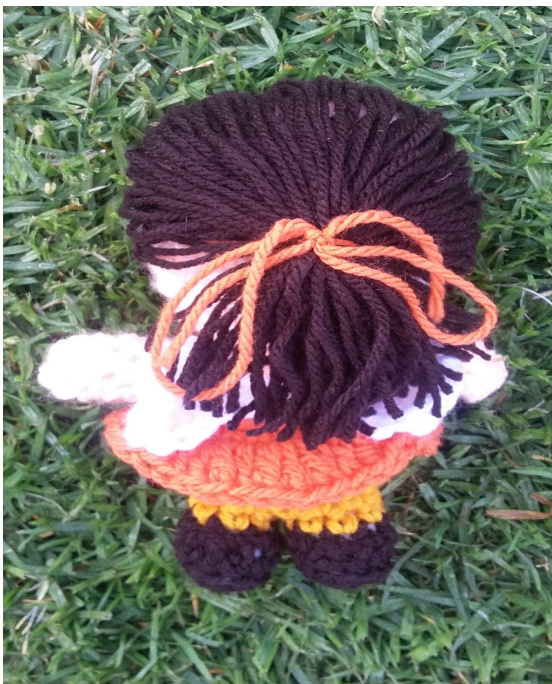
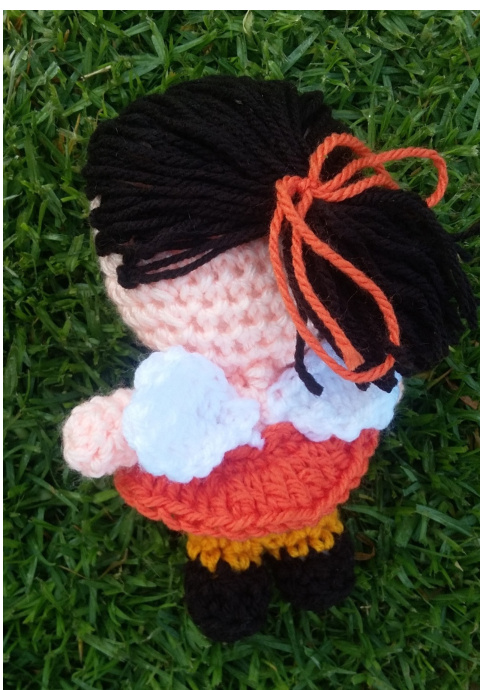
Finish by tying in a ponytail, braiding or making two ponies, trim to desired length.
Dress
Using dark orange yarn chain 20, slip stitch in first chain to close loop, take care not to twist the loop. Round 1: Chain1, sc in same and in next 19, sl st, chain 3 Round 2: Dc in same stitch as chain, (3 dc in the next, dc in next) around. Finish off and weave in all ends. Turn the skirt around and work into the other side of the foundation chain for the bodice part. SIst 8, chain 3, dc 2, hdc, sl st, hdc, dc2, hdc, sl st to end. F/ O leaving a long tailto sew to body. Attach the dress to your Fairy, by dressing the Fairy in the dress and sewing the bodice to the top of your Fairy's body, line up the bodice with the sleeves on the arms. Using light orange yarn embroider a basic star on the bodice.
Wings (make 2)
LEAVEALONGTAILATTHESTARTORSEWINGTOYOURFAIRY'SBODY! Using white chain 7, 3dc in third chain from the hook, dc, hdc, sc, slst in last. Now turn your work and work into the other side of the foundation chain, slst, sc, hdc, dc, 3dc in last stitch, join with a slip stitch to the first stich, finish off and attach to the Fairy's back with the long tail. Weave in ends.
Your Fairy is done! Enjoy some cuddles with her!
Copyright: Tru Designs 2015
Please feel free to sell any items made from this pattern, we all need to feed and fund our yarn addictions! Please do not share this pattern or resell it, kindly link back to my shop. You can contact me with any questions at funwithmouse@gmail.com.


