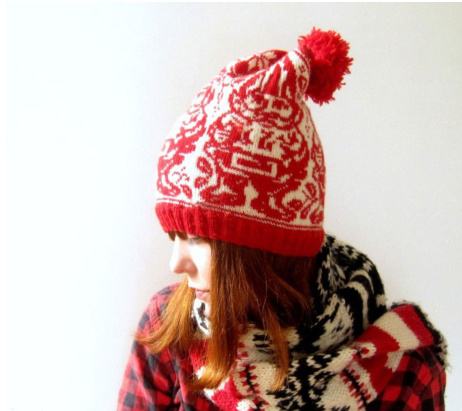
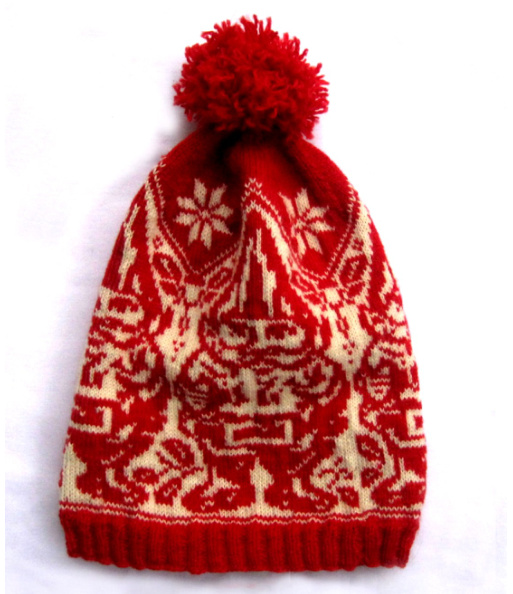
Garden Gnome Hat
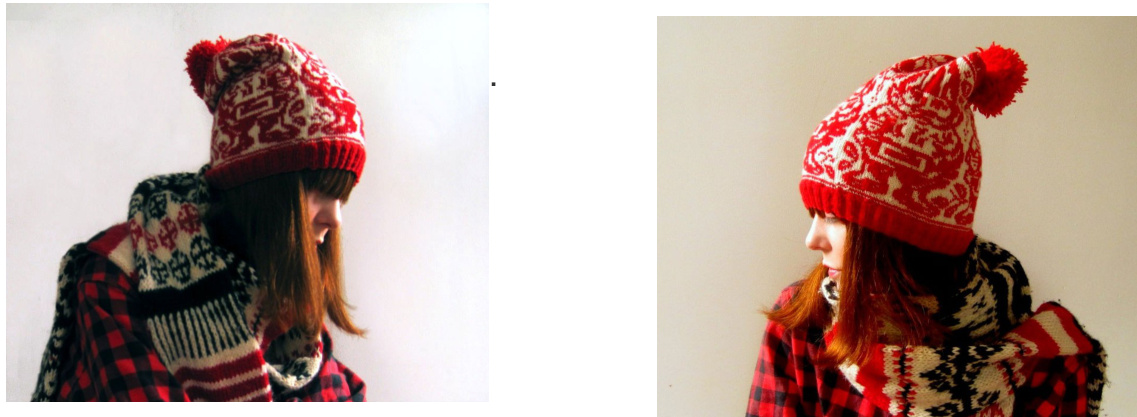
Cozy woolen ski hat, featuring traditional Scandinavian motifs blended with some very nontraditional, painfully cute and (maybe!) mildly diabolical garden gnomes. Knit in the round, ribbed edge, serious pompom. Extra long length- suitable for flipping off to one side a bit, as you tromp though the mountains to the chalet. Four gnomes, altogether.. separated by bits of foliage.. cause that's how they like it. Tools: one 16 inch size 1 (2.25mm) circular needle, set of 4 size 1 (2.25mm) double pointed needles, optional stitch markers ( 8) needle to weave in ends (note: you could work the entire hat on DPNs according to your preference). Some scrap cardboard and scissors (to make pompom), or a commercially available pompom maker. Materials: 2 balls of Knit Picks Palette, or other fingering weight yarn. I used: one ball of Serrano (color A) and one ball of Cream (color B). Each ball is 230 yards and 50 g. The entire weight of the finished hat is 78g. You may need extra of color A, depending on the.. intensity of yourpompom. Gauge: 39 st and 40 rows = 4 inches in Knit Picks Palette. Con un ganchillo mas grande en este caso 4.0Omm montar15 cadenetas.
Pattern technique:
Wrapping: In traditional fair isle knitting, one only carries the unused yarn color behind the knitted work for a few stitches. There are parts of this pattern that require you to carry the unused color behind the knitted work for longer stretches. This can create long “floats" of unused yarn behind your work. Long floats, when incorrectly handled, can screw up your tension causing the fabric to buckle, and can get caught on things. We will avoid having dangling floats by using a wrapping method. When to use the wrapping method: whenever a float is going to be more than about 4-6 stitches long. (this is more often than I would suggest for other items, because this is a hat.. but do what feels comfortable to you.) When done carefully, there is no show-through of the unused color. This technique works best if you stagger the wraps so that they don't occur in the same Spot. How to create the wrap: put your right-hand needle into the next stitch as if to knit. Wrap the unused color once over the used color, then knit the stitch color as normal. Tug the unused "wrapped" yarn gently up toward the top and right-hand side of the work. What direction do I wrap the yarn? The wrap works best if you bring the yarn over the top of the used color. However, if you wrap only in one direction, the yarn can become tangled- so sometimes bring the yarn up from underneath. Increase: in this pattern, increases are made by knitting one stitch through the front and back loop. To do it: knit into the front loop as normal, but do not slip the stitch from the left needle. Working into the back loop of the same stitch, insert the right-hand needle from front to back through the back loop of the stitch on the left-hand needle. Knit through the stitch and then slip the stitches (you now have 2) onto the right hand needle.
Abbreviations:
CO Cast on DEC decrease INC increase K Knit K2, P2- knit 2, purl 2 K2TOG knit 2 together P purl PM place mark SI slip SSK slip, slip, knit St Stitch PM place mark
Directions for Hat:
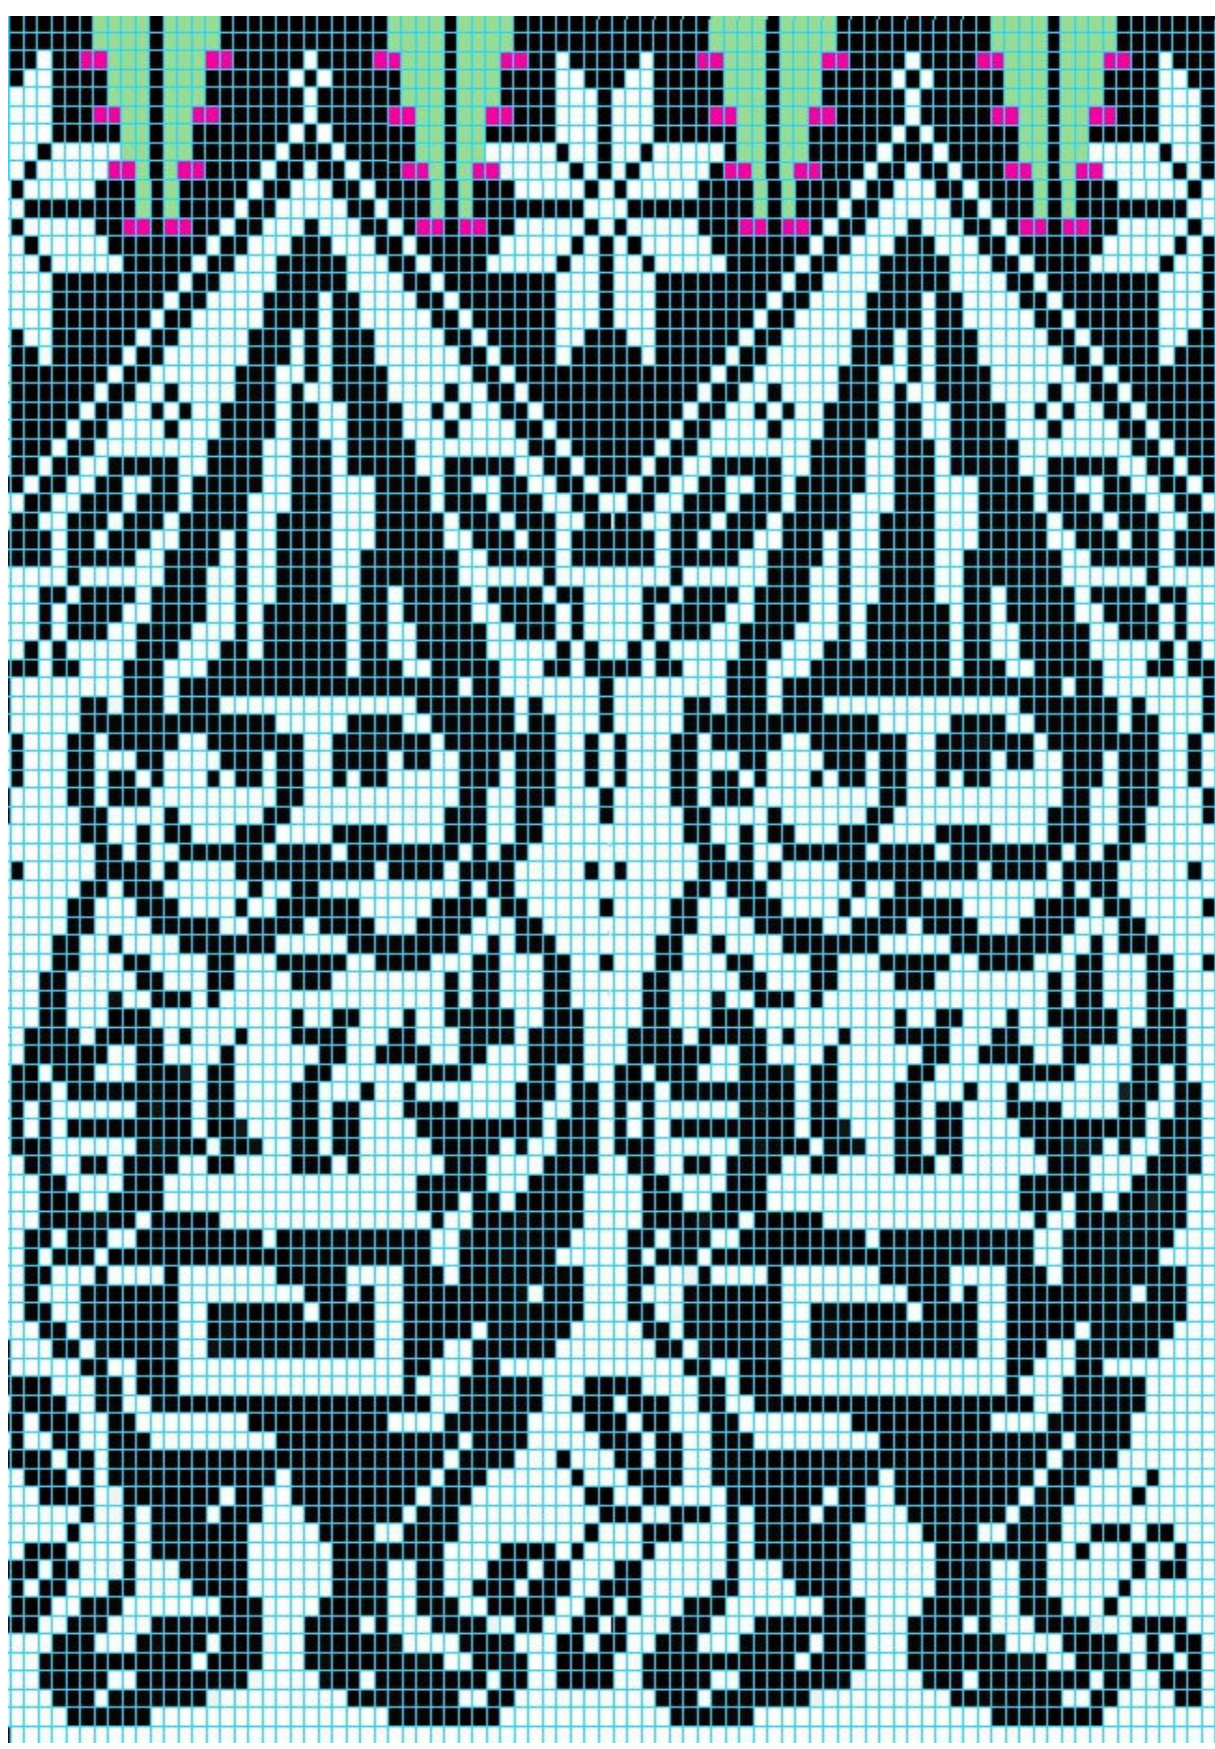
Using size 1 circular needle and color A, CO 152 stitches. Join, being careful not to twist. PM for beginning/end of round. Work 1.25 inches in K2P2 ribbing. K one row. As you go, increase 20 sts evenly around (about once every 7 sts).172 sts total. Join Color B. K one row. K one row in color A. Work 2 repeats of Gnome Chart( including decreases as marked- use the color coded key and detailed instructions below). The stitch in-between the two pink decrease stitches is the seam stitch. The directions below assume that you have placed a marker to the left of this stitch. Detailed Decrease Instructions: Decrease Rows: begin at row 83 of gnome chart Row 1:\* ssk, k to within 3 sts of marker, k2tog, k1, sl marker.\* repeat from \* to \* 7 more times (16 sts dec). Row 2: k all sts. Row 3: k all sts.

Repeat these three rows until there are a total of 23 sts (you will continue your decreases beyond what is shown in the chart). Switch from circular needle to DPNS when required. Next row: k 1. k1, k2tog around (16 sts). K 2 rows. Repeat these two rows again. Break the yarn, leaving tail about 10 inches or so. edle and draw it through the remaining stitches. Pull the stitches tighi Weave in any ends.
To make pompoms : Get a couple of pieces of cardboard. Cut 2 circles, each a little smaller than 3 inches in diameter (these do not have to be perfect or neat at all). Next, cut a smaller circle in the middle of each larger circle. Two cardboard donuts. < the donuts on top of each other, so you have one double-decker don Get a big yarn needle, and thread it up with color A. To make this more efficient, the best way to do this is to thread the needle doubled up- take a long piece of yarn, fold it in half, then thread the whole thing through the eye of the needle- that way you are using 4 strands at once. Wrap your yarn all around your little cardboard donut, till it is completely covered, with multiple layers of yarn. There should be enough yarn wrapped around the donut that it is hard to push the needle through the center of the donut.
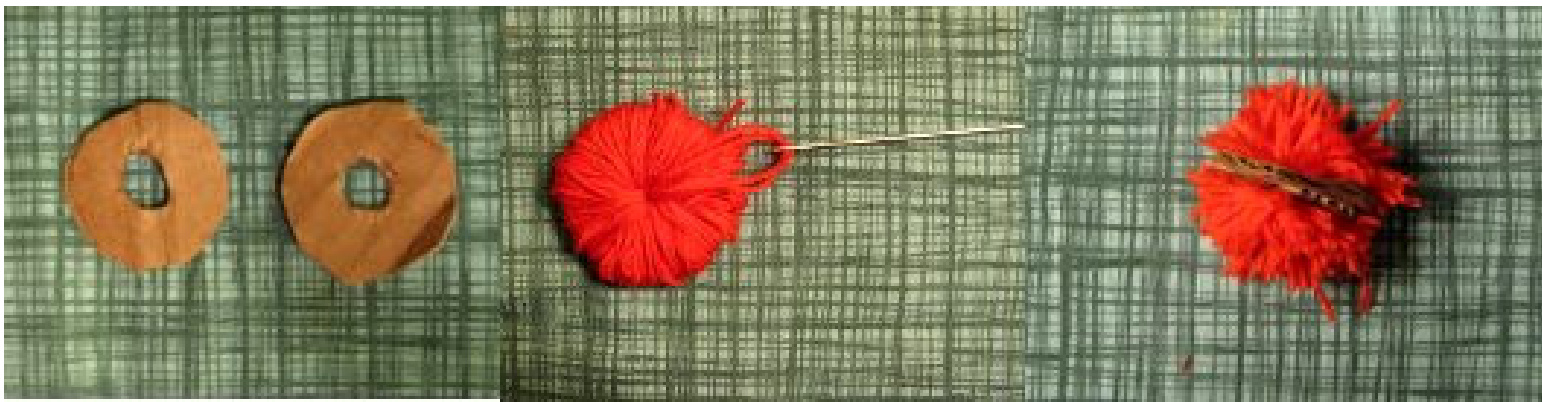
Take some scissors, and insert them between the donuts- cut all the yarn around the outside edge, as pictured. Next, secure the pompom in the middle like this: take a piece of yarn, and tie it tightly between the donuts- making a little bundle. Leave a tail- you can use this to attach the pompom to the hat.

Carefully pull the cardboard off the yarn. Fluff it out and trim it so it looks neat. Use the tail to securely attach the pompom to the center/top of the hat. Chart: