Sydney
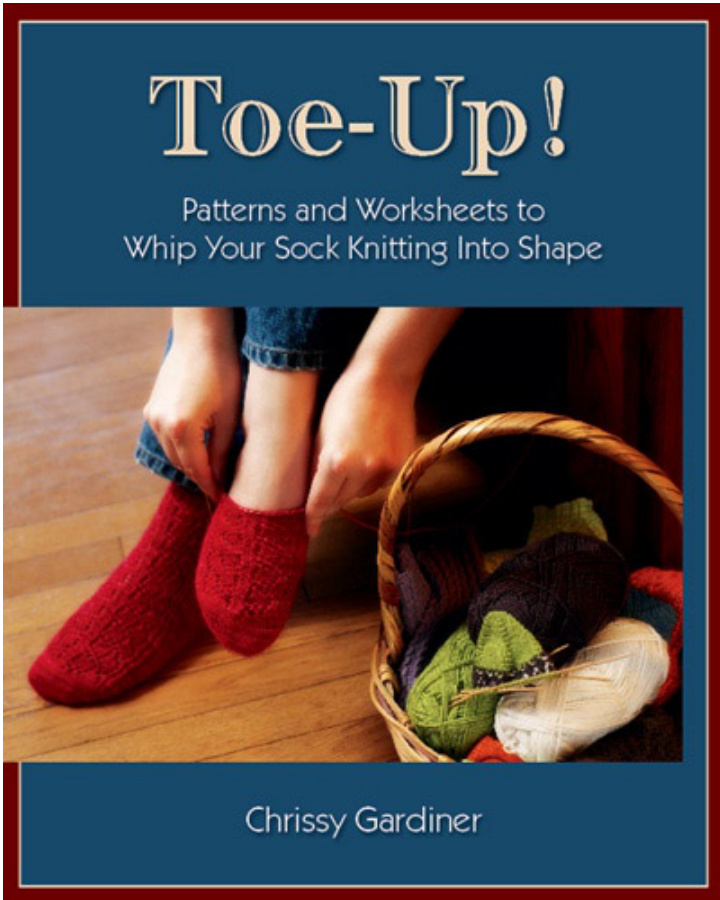
a free preview pattern from Chrissy Gardiner's new book, Toe-Up!
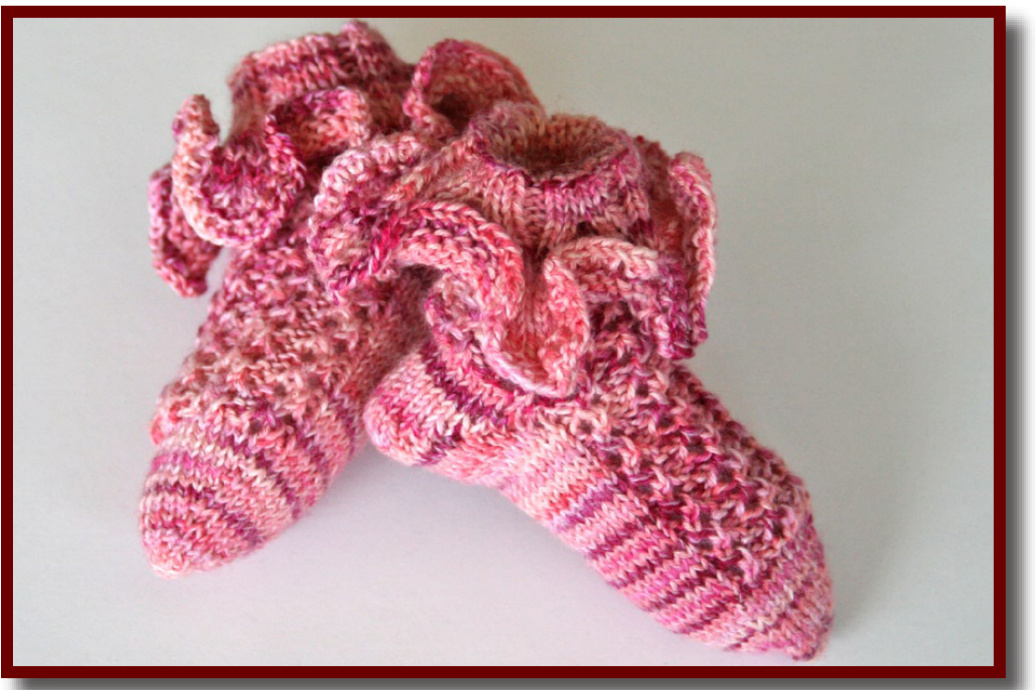
This preview pattern includes the newborn size, which knits up lightning fast and is incredibly cute. If you enjoy this pattern, you can get it in five more sizes along with 14 other toe-up sock patterns and a wealth of toe-up sock knitting information in the book Toe-Up! Patterns and Worksheets to Whip Your Sock Knitting Into Shape by Chrissy Gardiner, which will be available starting in August 2009. For more information, please visit http://www.sydwillowpress.com.
Materials:
Approximately 150 yards of fingering-weight yarn Sample uses SWTC Tofutsies ( $50\%$ superwash wool, $25\%$ Soysik, $22\,^{I}\!/\!/\%$ cotton, $2\,^{l}\!/\!/\,\%$ chitin) in color #731 - Ten Foot Tall. USO (2mm) needles or size needed to obtain gauge
Gauge:
10 stitches/14 rounds per inch in stockinette stitch
Sizes:
Foot circumference $=$ approximately 4"
Toe
Using your favorite toe-up method and leaving $16^{\circ}$ tail, cast on three instep stitches and three heel stitches. Knit each stitch with both the working yarn and the tail, ending with 12 loops on the needles (each tail loop is counted as its own stitch). Divide these 12 stitches over your selected needles and place a marker at the start of the instep stitches to indicate the beginning of the round. Round I: $^{\ast}\mathrm{K}3$ , place marker; repeat from \* to end of round. Round 2: $^{*}\mathrm{K}$ -fb, knit to next marker; repeat from \* to end of round. 16 stitches. Round 3: Knit. Repeat Rounds 2-3 an additional 6 times. 40 stitches.
Foot
There are now 40 stitches on the needles. Begin working the instep stitches in Eyelet Rib from the written instructions below while continuing to work the heel stitches in stockinette stitch. Work until the foot from the tip of the toe to the needles measures approximately $1^{\circ}$ less than the desired total length, ending with Round 3 of pattern.
Eyelet Rib:
(over multiple of 4 stitches and 4 rounds) Round I: Pl, $^{\ast}\mathrm{k}2$ . p2; repeat from \* to last three stitches, k2, p1. Round 2: P1, \*k2tog, YO, p2; repeat from \* to last three stitches, k2tog, YO, pl. Round 3: Repeat Round 1. Round 4: P1, $\mathrm{{}^{\ast}Y O}$ SK, p2; repeat from \* to last three stitches, YO, SSK, p1.
Heel
Work across instep stitches in Round 4 of pattern. The heel will be worked back and forth on the 20 heel stitches.
Shape Bottom of Heel
Row I (RS): Knit to last stitch on needle, W&T. Row 2: Purl to last stitch on needle, W&T. Row 3: Knit to stitch before wrapped stitch (do not knit across any wrapped stitches), W&T. Row 4: Purl to stitch before wrapped stitch (do not purl across any wrapped stitches), W&T. Repeat Rows 3 & 4 an additional 5 times - there are now 7 wrapped stitches on either side of 6 unwrapped center stitches.
Shape Top of Heel
Row I (RS): Knit to first wrapped stitch (do not knit across any wrapped stitches), lift wrap RS, turn. Row 2 (Ws): Sl1, purl to first wrapped stitch (do not purl across any wrapped stitches), lift wrap WS, turn. Row 3: Sl1, knit to next wrapped stitch (just past the stitch unwrapped on the previous RS row), lift wrap RS, turn. Row 4: Sll, purl to next wrapped stitch (just past the stitch unwrapped on the previous WS row), lift wrap WS, turn. Repeat Rows 3 & 4 an additional 4 times - a single wrapped stitch remains on either side of heel. Next Row: Sl1, knit to last wrapped stitch, lift wrap RS, but do not turn. You should be at the beginning of the instep stitches. Next Round: Work instep stitches in pattern as established; lift wrap RS, knit to end of heel stitches. Leg Continuing in the round, work Eyelet Rib across all stitches for $1\,^{1}/{_{2}}^{>}$ from top of heel.
Cuff
Round $I{\boldsymbol{:}}^{*}[\mathrm{K}1,\mathrm{p}1]$ three times, k2tog, pl1; repeat from \* an additional three times, [k1, pl] twice. 36 stitches. Round $2\!:^{\ast}\mathrm{Kl}$ pl; repeat from \* to end of round. Repeat Round 2 for $^1/{_2}^{>}$ , then knit one round. Turn sock inside out - the rest of the rufle will be worked with the wrong side of the sock facing you and in the opposite direction of the body of the sock.
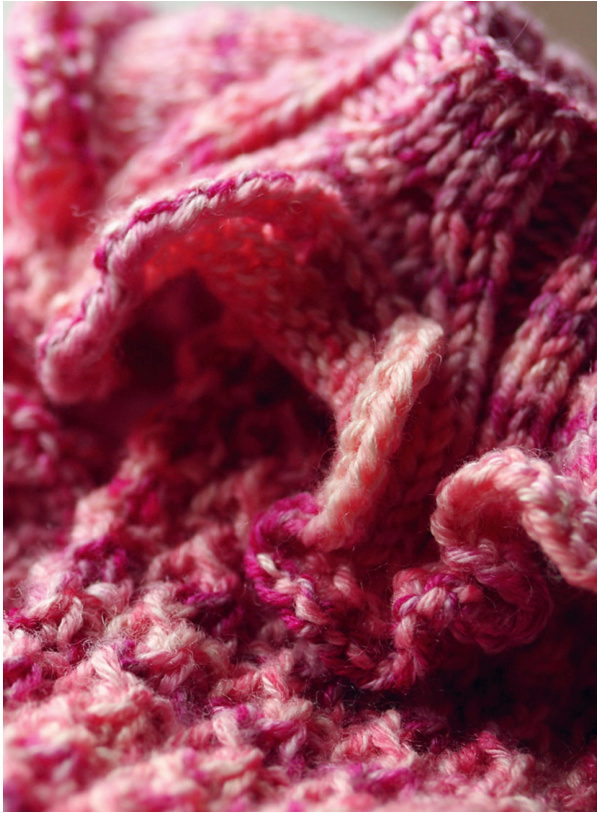
Ruffle
Round I: Sll1, k3, p2, $^{\ast}\mathrm{k4}.$ p2; repeat from \* to end of round. Rounds ${\bf2}=6{\bf:}^{\ast}\mathrm{K4},$ p2; repeat from \* to end of round. Round 7: $^{\ast}\mathrm{K}2$ . YO, k2, p2; repeat from \* to end of round. 42 stitches. Round 8: $^{*}\mathrm{K}5$ p2; repeat from \* to end of round. Round 9: $^{\ast}\mathrm{K}2$ YO, k1, YO, k2, p2; repeat from \* to end of round. 54 stitches. Round 10: $^{*}\mathrm{K}7$ P2; repeat from \* to end of round. Round Il: $^{\ast}\mathrm{K}2$ YO, k3, YO, k2, p2; repeat from \* to end of round. 66 stitches. Round 12: $^{*}\mathrm{K}9$ p2; repeat from \* to end of round. Round 13: $^{\ast}\mathrm{K}2$ , YO, k5, YO, k2, p2; repeat from \* to end of round. 78 stitches. Round 14: $^{*}\mathrm{K}11$ p2; repeat from \* to end of round. Round 15: $^{\ast}\mathrm{K}2$ YO, k7, YO, k2, p2; repeat from \* to end of round. 90 stitches. Round 16: $^{*}\mathrm{K}13$ p2; repeat from \* to end of round. Round 17: $^{\ast}\mathrm{K}2$ YO, k9, YO, k2, p2; repeat from \* to end of round. 102 stitches. Round 18: $^{*}\mathrm{K}15$ p2; repeat from \* to end of round. Round I9: Purl all stitches. Round $2\pmb{0}:^{*}\mathrm{K}1$ , YO; repeat from \* to end of round. Bind off all stitches using the p2tog bind-off as follows: P2tog, \*slip stitch from right needle to left needle and purl it together with the 2nd stitch on the left needle; repeat from \* until all stitches have been bound off. Break yarn and weave in ends.
Techniques
Note: These are abbreviated text-only versions of the technique descriptions found in the book. Feel free to use a different method if you prefer.
W&T: Wrap and turn is a technique used in short-row heel and toe shaping to help prevent holes in the sides of the heel. There are a number of different methods of wrapping and turning - this is the one I use for my socks. Unless otherwise indicated, all stitches should be slipped as if to purl (without twisting). Wrap on RS of work: Leaving yarn in back, slip next stitch to right needle. Bring yarn between needles to front of work. Slip stitch back to left needle wrapping the yarn around the base of the stitch. Bring the yarn to the back of the work between the needles to complete the wrap. Turn the work to begin working across the WS. Wrap on WS of work: Leaving yarn in front, slip next stitch to right needle. Bring yarn between needles to back of work. Slip stitch back to left needle wrapping the yarn around the base of the stitch. Bring the yarn to the front of the work between the needles to complete the wrap. Turn the work to begin working across the RS. Lift Wrap RS: Lifting wraps hides them and completes the short-row process. To lift a wrap on a RS row or round, use the tip of the right needle to pick up the wrap from the front side and lift it onto the left needle next to the stitch around which it was wrapped. Knit the wrap and its corresponding stitch together through their back loops. Lift Wrap ws: To lift a wrap on a WS row, use the tip of the right needle to pick up the wrap from the back side (RS of work) and lift it onto the left needle to the left of the stitch around which it was wrapped. You may be able to get a good result by simply purling the stitch and the wrap together. If you find, however, that the sides of your heel are looking significantly different, try a SSP with the wrap and the stitch (slip the stitch as if to knit, then slip the wrap as if to knit, slip them both back onto the left needle and purl them together) to make it more symmetrical. Judy's Magic Cast-On: You can find instructions for this great toe-up Cast-On on Judy's website, www.persistenillusion.com.
Abbreviations
k: Knit k2tog: Knit two stitches together k-fb: Knit in front and back of stitch p: Purl p2tog: Purl two stitches together RS: Right side sl: Slip stitch as if to purl SSK: Slip next two stitches one at a time as if to knit, insert left needle tip into front of stitches and knit them together W&T: Wrap and turn ws: Wrong side yO: Yarn over
About This Pattern
We'll admit it - this free pattern is all about shameless self-promotion. We're hoping that it will put you on the path towards total toe-up sock knitting addiction and you will feel compelled to check out Chrissy's book. You can find preview pictures for a few of the patterns along with info on how you can get your hands on your own copy at http://www.sydwillowpress.com
What You Can Do With This Pattern
This pattern is meant to be shared! Feel free to print it off and hand it out, e-mail it to all of your best friends, post a link to it on your website or blog, make a gazillion little Sydney socks for all your friends - you can do ALMOST anything youd like with it! This applies to you as well, yarn shops - you can print this and hand it out to your heart's content, teach classes from it, or e-mail it out in your shop newsletter. We want you to share the toe-up sock knitting love with everyone you can!
What You Can't Do With This Pattern
Please dont modify this pattern from its current format. This means no cutting and pasting into a different document or posting the text to your website. You can post a link for sure, but we require that all of the text remains inside this pdf document, with all of our contact and copyright info intact, so that people can find out how to get their hands on the rest of our patterns
About The Designer/Author
Chrissy Gardiner is a reformed toe-up skeptic who just finished her first book about toe-up socks. You may have seen her designs around - she has published patterns in Interweave Knits, Knitscene, Knitter's, Creative Knitting, a whole slew of books, Knitty and Twist Collective. She also has a line of indie patterns that she publishes under the name Gardiner Yarn Works. You can find out more about Chrissy and her designs at www.gardineryarnworks.com.


