Amy's Basic Socks by Amy Detjen
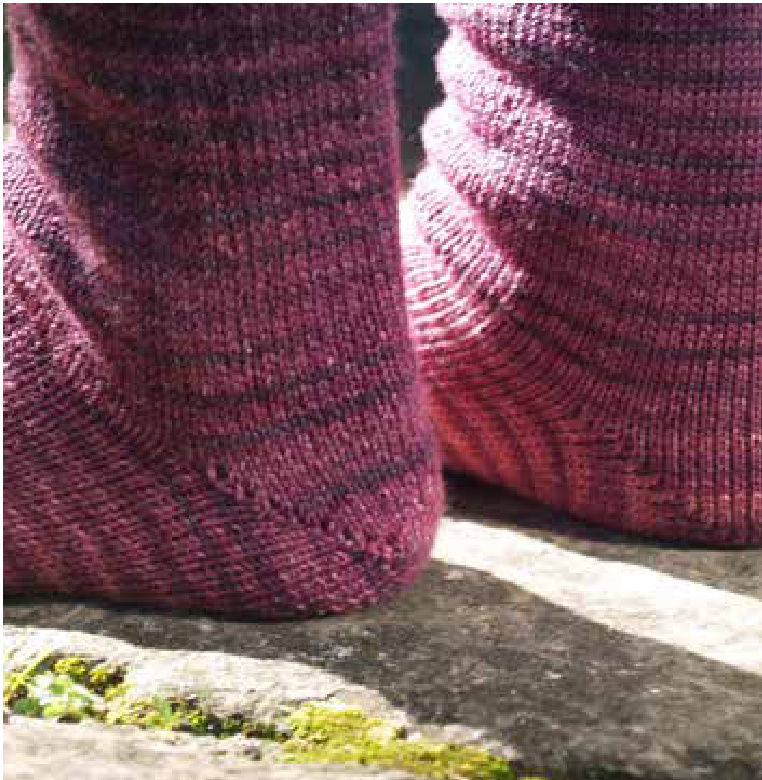
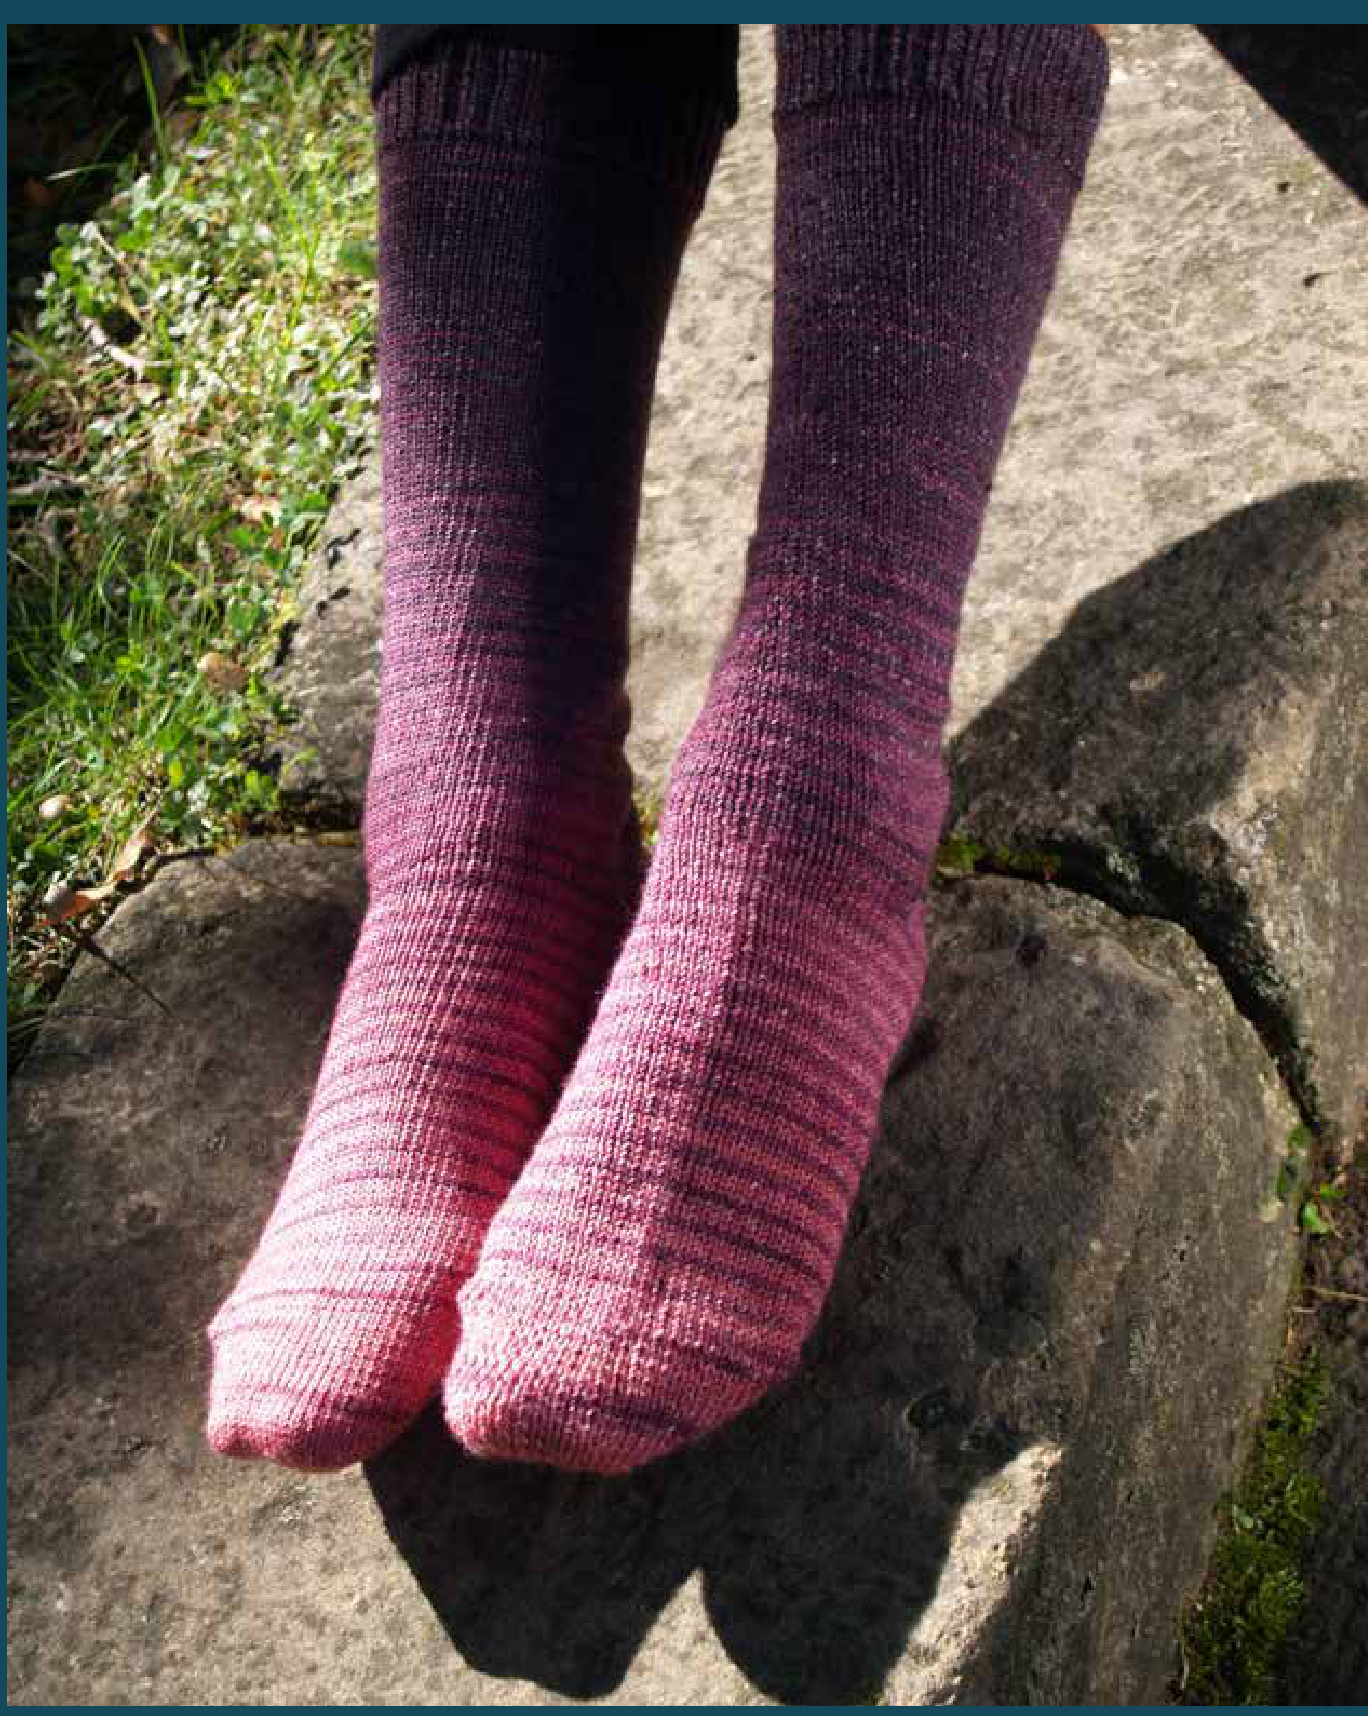
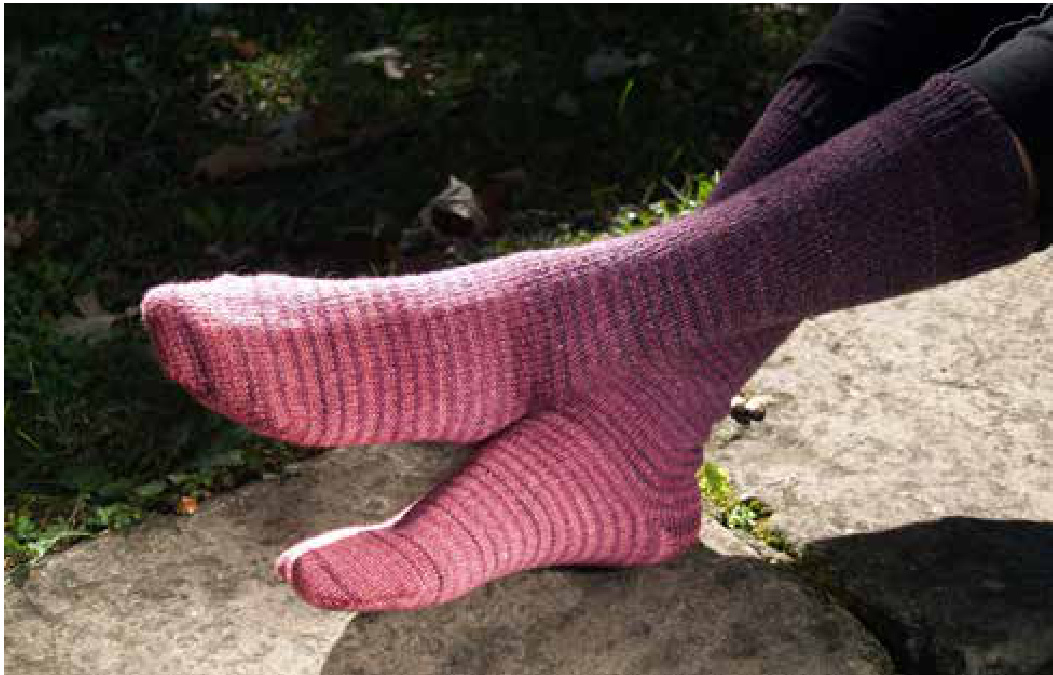
This simple, top-down sock pattern is just a basic recipe that you can knit as written, or use as a template to create your own design. It has a bit of ribbing at the top, a shortrow heel, and a fold-over toe. It is designed specifically for Knitcircus Matching Socks Sets, so that the gradient (or gradient stripes) are uninterrupted! Adjust as you like! Skills needed CO, knit, purl, short row w&t, Kitchener Gauge 32 sts and 44 rows = 4" (10 cm) in Stockinette stitch in the round. Women's One Size. Finished Measurements Toe to end of heel: 9" Cuff edge to heel: 11" Yarn Knitcircus Greatest of Ease Gradient Stripes Socks Set (80% Superwash Merino, 20% nylon), 400 yds /366m per 2 50g cake, 1 set. Color: Vampire Boyfriend Gradient Stripes CYC weight #1 Fingering Needles 1 set of US size 1 (2.25mm) dpns or small circular needle Supplies 1 stitch holder, optional Yarn needle Safety pin marker Instructions Cuff Directions are given for double-pointed needles; if you're using another method, place markers to indicate the different sections. Loosely cast on 64 sts onto 1 needle. Redistribute over 3 needles as follows: Needle 1 (N1) has 32 sts, Needles 2 and 3 (N2 and N3) each have 16 sts. Join for circular knitting, being careful not to twist the stitches. Work K1, P1 Rib for 2 inches (Every round: kl, p1 to end of round). Change to Stockinette stitch (every round: knit all sts) and work for about 9 inches, or desired length to heel. I recommend making these this long so that you make sure you get all the colors of the gradient in your sock.
Heel
\*Leave sts for N2 and N3 on the needles (or transfer to a stitch holder) and continue working back and forth on Needle 1 only: Row 1: K31, w&t. Row 2: P30, w&t. Row 3: K29, w&t. Row 4: P28, w&t. Continue in this manner (leaving one less stitch on each row) until 12 sts remain. You now have 10 wrapped sts on each side, and 12 sts in the center - 32 sts onN1
Turn the Heel
Row 1: Knit 12, knit the next st, along with its wrap. Turn. Row 2: Slip 1 purlwise, p12, purl the next st together with its wrap. Turn. Row 3: Slip 1 purlwise, k13, knit the next st together with its wrap. Turn. Row 4: Slip 1 purlwise, p14, purl the next st together with its wrap. Turn. Continue in this manner until there are 31 sts on the Needle 1, ending after a knit row. One wrapped st remains on the right-hand side of your work. Knit across N2 and N3.\* Place safety pin marker in the last stitch - leave it in that stitch as you continue knitting (don't move it on subsequent rounds).
Foot
Knit the first st of N1 together with its wrap, then continue in Stockinette stitch until foot measures 5 12 inches from the safety pin, or 2 inches shorter than desired finished foot length. Remove safety pin.
Toe
Repeat instructions for the heel from\* to \*. Knit the first st of N1 together with its wrap, then continue across N1. Transfer the sts on N3 to N2 so that you have 32 sts on N1 and 32 sts on N2. Kitchener the foldover toe sts to the body of the sock. The Kitchenered seam is on the top of the sock. Note: If you want the toe seam on the bottom of the sock, make the toe as follows: Alternate Toe (seam on bottom) Knit across N1 and leave these stitches on hold. Use one needle to knit across N2 and N3 - giving you 32 sts on N2. Repeat instructions for heel from \* to \*. Darn in ends. Block as needed.
Finishing
Weave in ends and block if desired.
beg begin, beginning bet between BO bind off CC contrasting color cm centimeter cn: cable needle CO cast on cont continue dec decrease dpn double point needles EOR every other row or every other round est established foll following inc increase or increasing k knit k2tog knit 2 together as one kfb knit into front and back of a single stitch (in-crease) kwise knitwise, as if to knit LC left cross (cable) M1 Make one: pick up the strand bet 2 sts and k tbl ndl Needle (4 stitches increased) pfb purl into front and back of same st. pm place marker psso pass slipped stitch(es) over pwise purlwise, as if to purl RC right cross (cable) in pattern, Sm2, (Knit to 1 stitch before the next marker, KFB, Sm1, knit to the next marker, Sm1, KFB), knit to the end RH right-hand Round 1: (Knit to 1 stitch before the next marker, KFB, Sm1, knit to the next marker, Sm1, KFB), knit to the center panel, Sm2, work RS right side (public side) 151stitches sm slip marker ssk slip, slip knit: sl 2 sts kwise one at a time, then k them tog tbl ssp Slip, slip, purl: [Wyif, sl 1 kwise] 2 times; ret 2 sts to LH ndl, then p2tog tbl, inserting RH ndl through bottom st first St St Stockinette Stitch tbl through the back of the loop WS wrong side (private side) wyib with yarn in back


