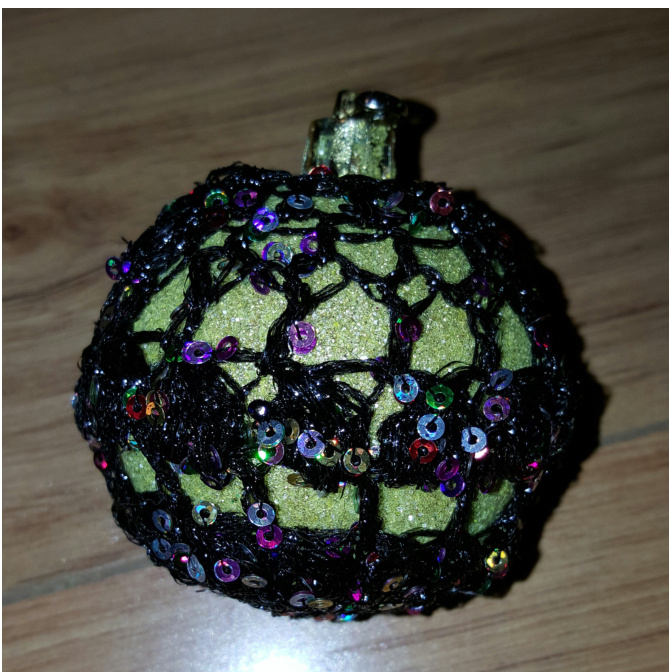
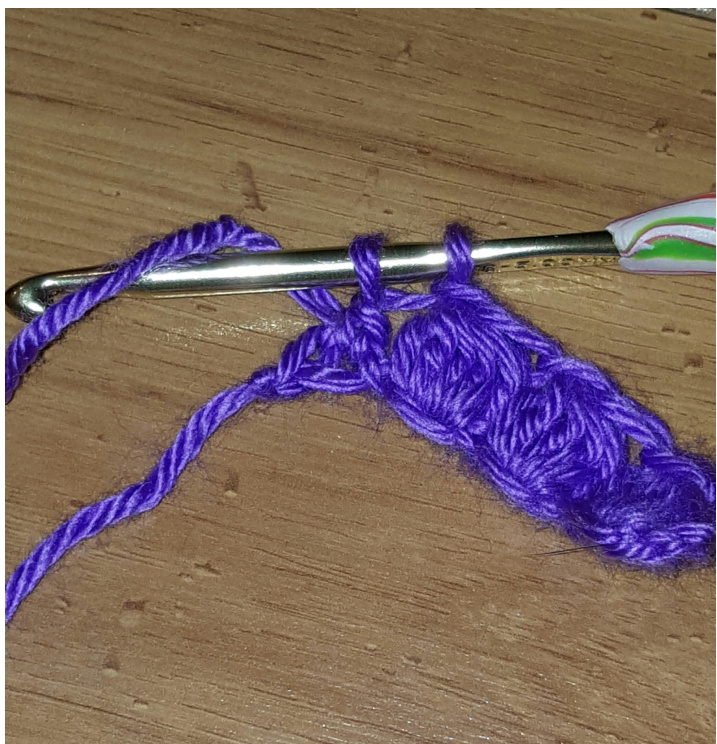
Hufflepuff Inspired Crocheted Ornament Cover by Nerdy Creations This pattern will fit a 2.5 in (6.35 cm) diameter ornament when using an F size (3.75 mm) hook and crochet thread, doubled. To make a larger cover, use worsted weight yarn and an H size (5.00mm) hook. The resultant cover will fit a 3.5 in ornament. Materials and tools: \*2.5 in (6.34 cm) Ornament- I used a shatterproof one that I reglittered using yellow glitter to make it Hufflepuff colors. \*Black Crochet Thread or Yarn- I used one that has sequins worked into it at intervals and doubled it up to give it the correct thickness. {Be warned, the sequined thread is difficult to work with.} \*Size F /3.75mm Hook- to make the cover larger, use a larger hook to match the yarn \*TapestryNeedle \*Scissors Procedure: Round 1: Magic Circle (or CH4 and slip stitch to join into a ring). Ch2 (or three to get the height of a DC, does not count as a DC in this round) and Double Crochet (DC) 15 into the resultant ring. Slip Stitch (S1 St) to join. -15 DC Round 3: Ch2 (or three) and Puff Stitch into the same stitch. To Puff Stitch, yarn over as if to DC, insert the hook and draw up a loop. Yarn over and pull through 2 loops but do not complete the DC. Instead, repeat these steps until there are 6 loops on your hook. Then yarn over and pull through all 6 loops. CH1 to lock it in place. Be sure to CH1 very loosely. See the following pictures.
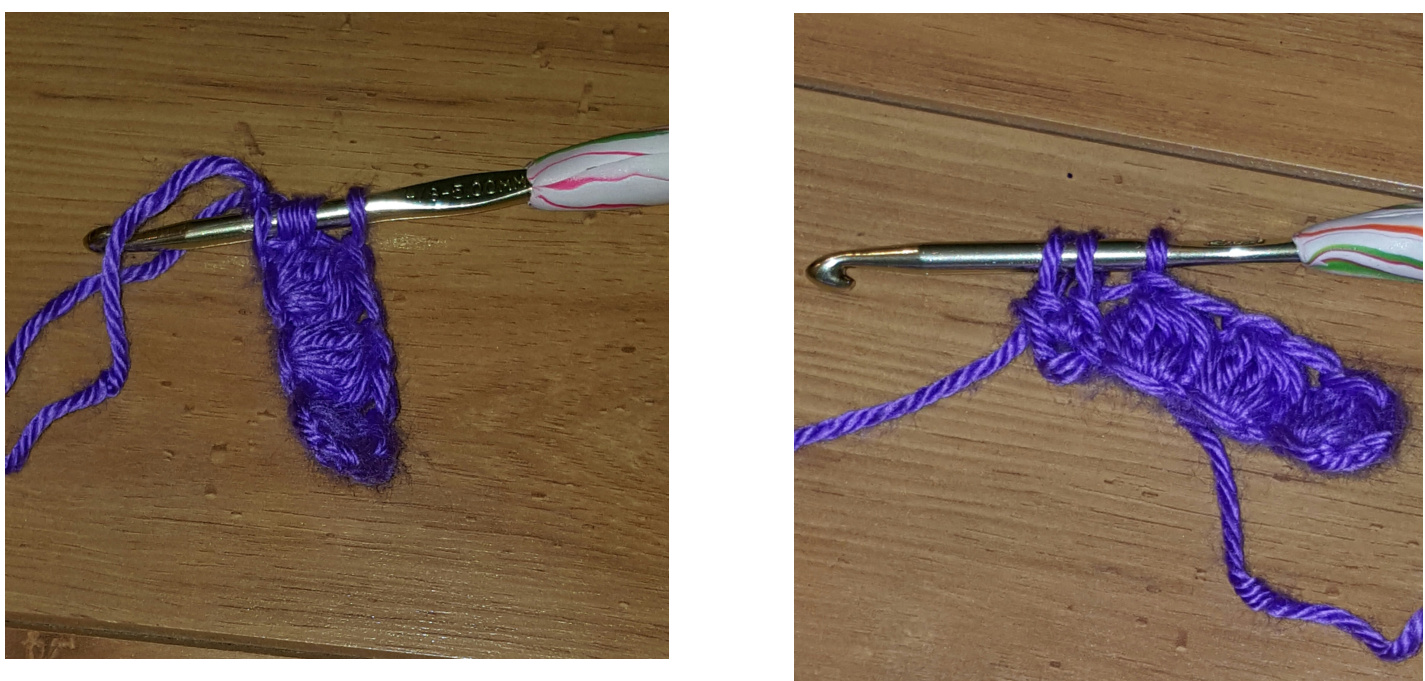

Repeat the following pattern. Puff Stitch, CH1 to lock it in, skip the next stitch, Puff Stitch in the next stitch and CH1 to lock it in place again. Repeat around to the beginning. There is a YouTube video showing just how I completed this on my channel Nerdy Creations. To finish, Slip Stitch to join. -15 Puff Stitches, 15 CH1 Round 4: CH5. (This acts as a DC and CH2). DC in the space left between two Puff Stitches. CH2 and DC in the next space between Puff Stitches. Repeat around. -15 DC, 15 CH2 Round 5: CH2 and Puff Stitch into the same CH2 space. CH1 to lock it in. Puff Stitch in the following CH2 space. CH1 to lock. Repeat around. -15 Puff Stitches, 15 CH1 Round 6: This is repeat of Round 4. CH5. (This acts as a DC and CH2). DC in the space left between two Puff Stitches. CH2 and DC in the next space between Puff Stitches. Repeat around. -15 DC, 15 CH2 Round 7: This is a repeat of Round 5. CH2 and Puff Stitch into the same CH2 space. CH1 to lock it in. Puff Stitch in the following CH2 space. CH1 to lock. Repeat around. -15 Puff Stitches, 15 CH1 Round 8: CH2 (does not count as a DC for this round), DC into the same spot. CH1. DC into the space between the Puff Stitches. CH1 and DC into the next space between Puff Stitches. -15 DC, 15 CH1 \*Alternate Round 8: CH2, DC into the same spot. DC into the top of the Puff Stitch (in the CH1). DC into the space between Puff Stitches. Continue putting DCs in the top of the Puff Stitch and in the space between. -30 DC \*This will make the top of the cover more solid and thereby reducing how much of the ornament will be visible. Round 9: CH2, DC in the same spot. Skip the next stitch and DC into the following. Repeat this around. Before completing the round, place the ornament into the cover. Finish the round with the ornament in place -15 DC Fasten off and work the tail into the work. At this point you can work the tail into the tops of the last round's stitches to draw the opening tight. I did not do this as it seemed unneccessary. Add a ribbon or an ornament hook and you are done. Optional: Add the Hufflepuff Crest to the ornament. This can be made from shrink plastic, embroidered, or drawn on paper. The choice is up to you. I will be using shrink plastic at a later date. For now, it is an understated inspiration piece. Hufflepuff House and Harry Potter are copyright J.K. Rowling. No infringement intended. This is just an inspiration piece. All rights reserved. Also, if you make this, give credit to the designer. This allows me to keep my patterns free.


