The K-Method for no-sew square slippers
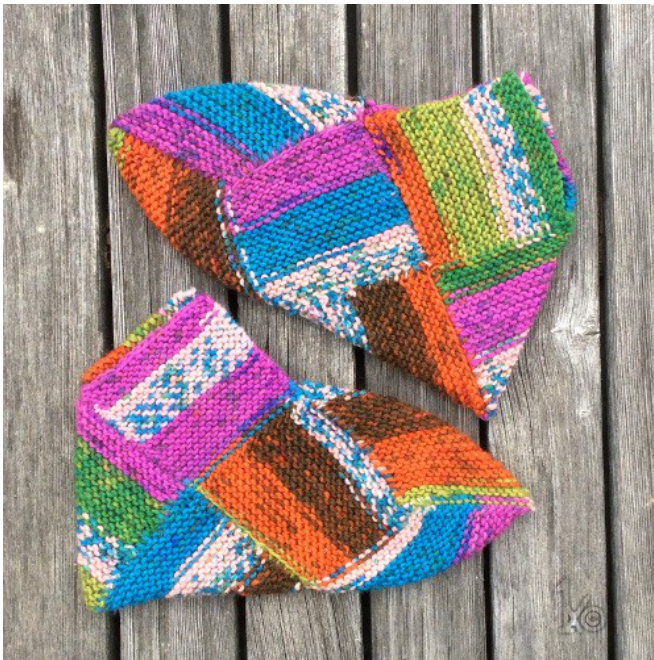
The model slippers were made with 3.5mm needles out of about half a skein of GB super socks 6-fadig jacquard 150g/390m.
NB:
Knit ALL row-initial stitches throughout. When you pick up stitches for a new square, you may fudge a bit and use the last live stitch as a one of the start up stitches, if needed. Additional notes can be found at the end of the pattern.
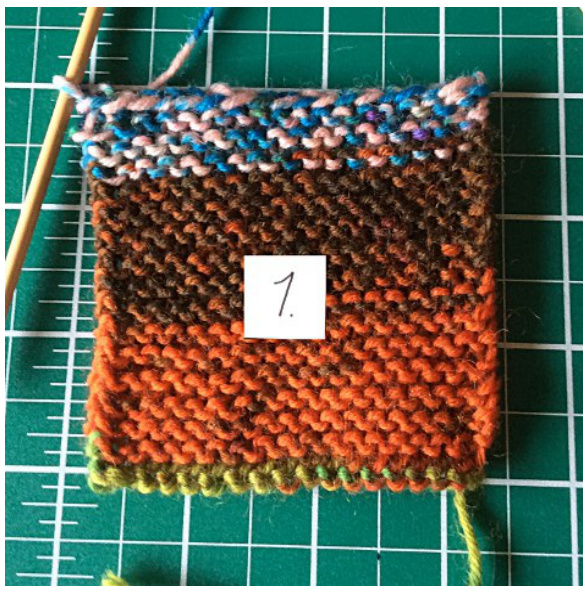
Square 1
1. Make 18st, knit garter stitch until you have a square (34-36 rounds) 2. Bind off the top edge, leave last stitch live (image I).
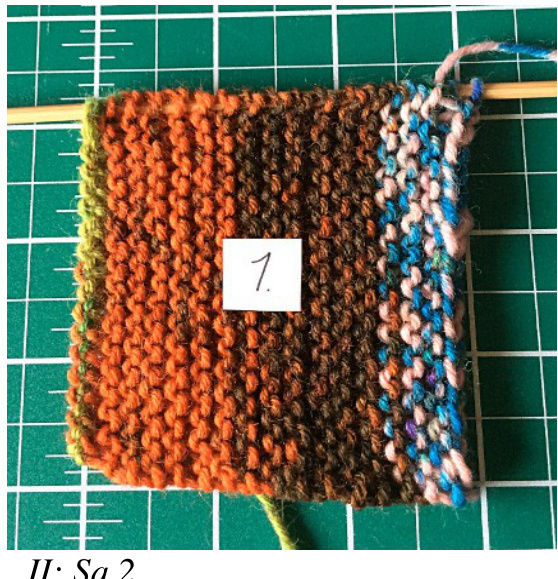
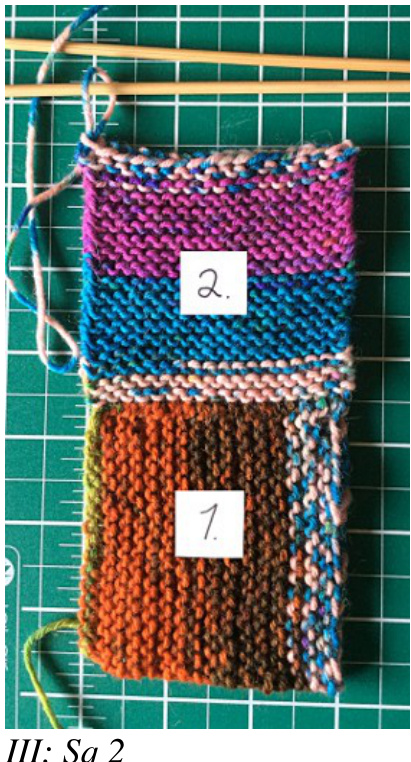
Square 2
3. Pick up 18 stitches from adjacent side (image II). Connect the live stitch to the first stitch you knit. 4. Knit another square into the picked up stitches. 5. Bind off, leave last stitch live (image III).
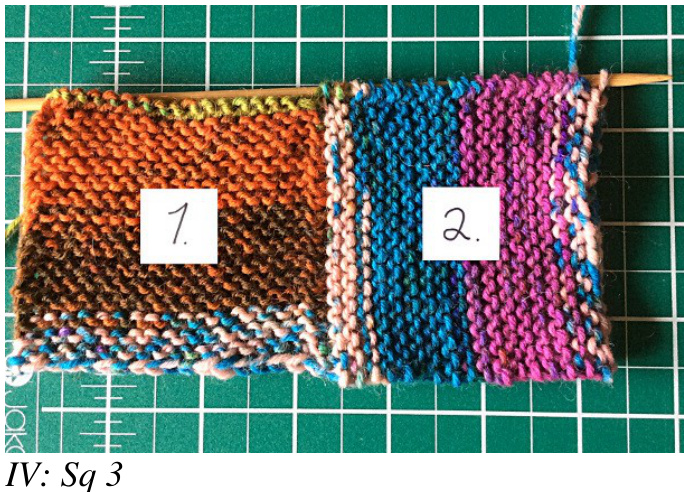
Square3 6. Repeat steps 3 and 4 don't bind off (image IV)
Square 4
7. Make 18 st, adjacent to Sq 3 (image V). 8. Knit a new square, connecting the last stitch of the new square (4) with a stitch from the edge of square 3. To avoid puckering, do this by lifting the old stitch over the new stitch without knitting. If this seems too loose, you can twist either the lifted old stitch or the last knit stitch. (image VI). 9. Bind off so that you end up with 1 live stitch at the edge of the old square.
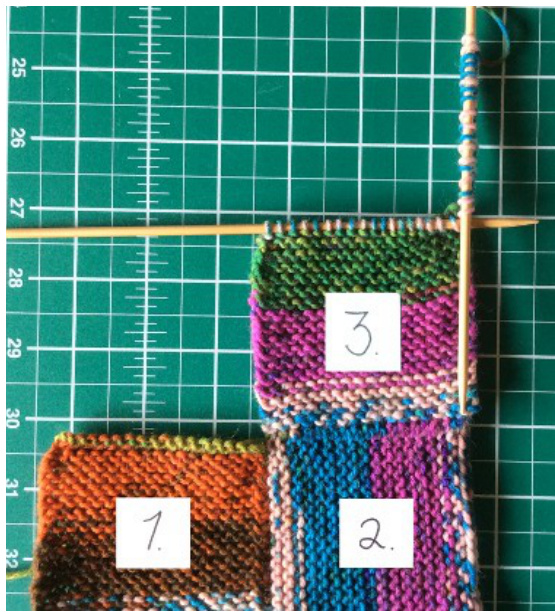
V: Sq 4
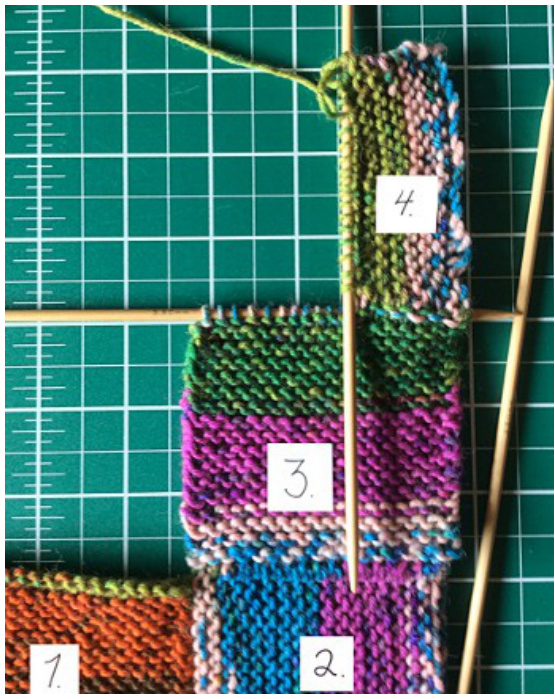
VI: Sq 4
Square 5
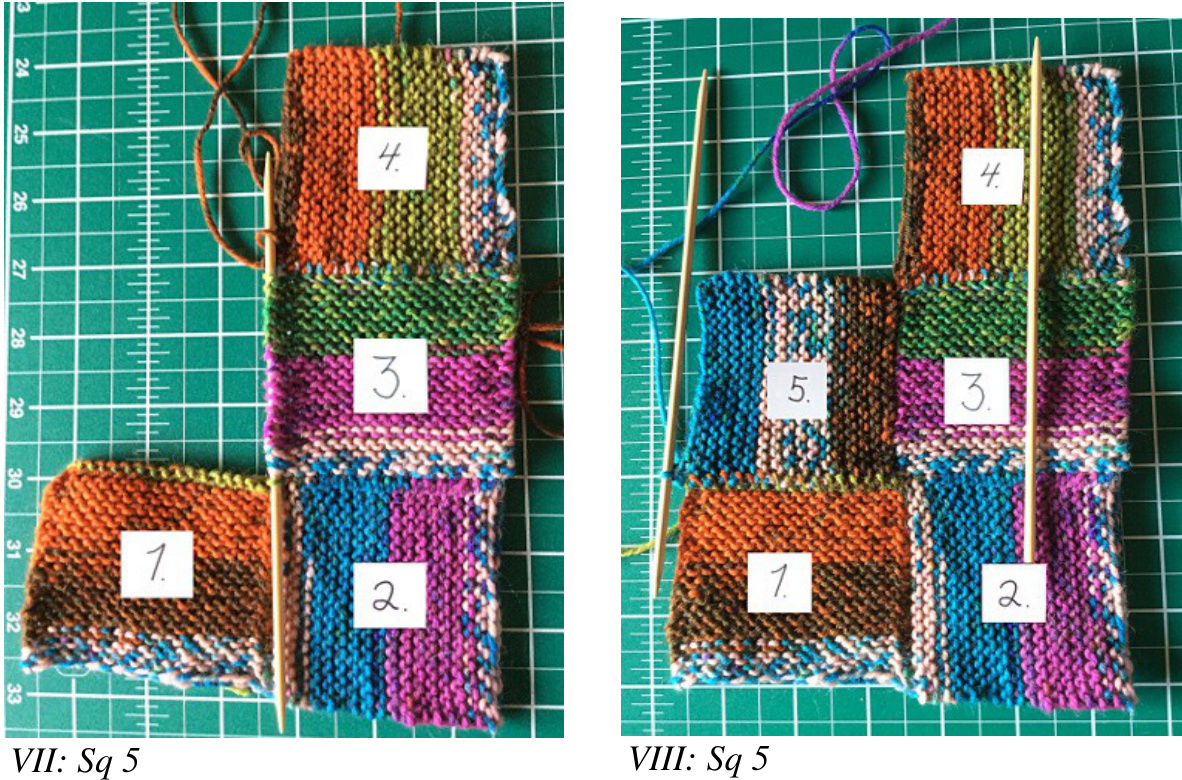
10. Pick up 18st along the side of sq 3 (image VIl). 11. Knit along as with square 4, combining the new square (5) to the edge of sq 1 as you go. Only this time you'll be picking up stitches from an edge, rather than knitting onto live stitches. 12. Bind off, leave last stitch live (image VIll).
Square 6
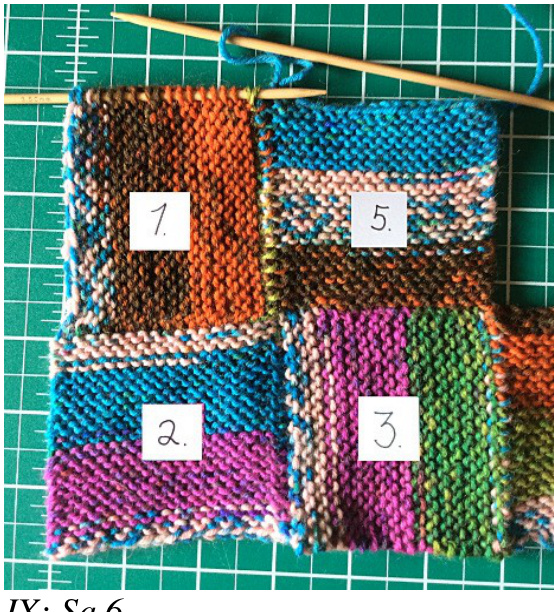
13. Pick up 18st along the edge of square 1. Knit 34-36 rounds. Bind off towards Sq5, leave last stitch live (image IX).
Interlude
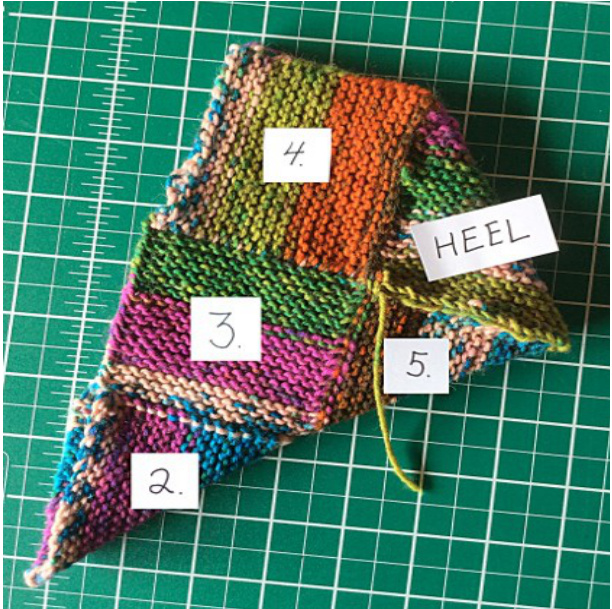
Now you should have a set of squares that looks like stairs (or a stealth bomber, as I prefer to think of it, image X). This is the base structure, 2 more squares are needed to finish off the slipper. Both of those squares need to be attached to other squares on 3 sides, the last open edge is closed with a three needle bind off. The arrows in the photo mark the knitting directions of each square.
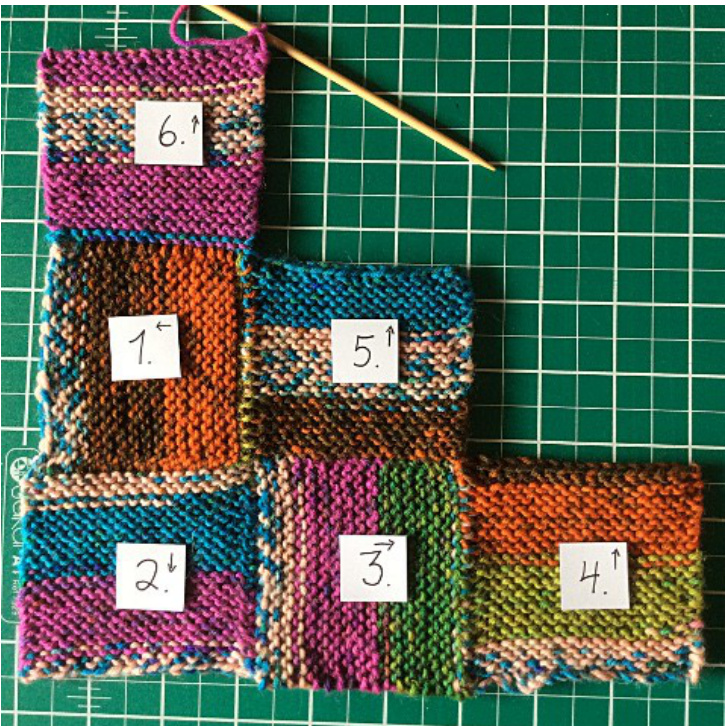
X: Slipper base
Heel
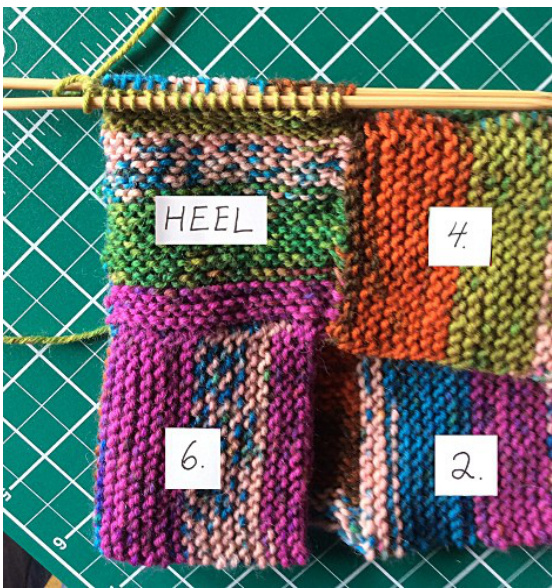
14. Pick up 18st along the side of sq 6. Knit a square, which you combine to the edges of squares 4 and 5 as you go (images XI, Xll).
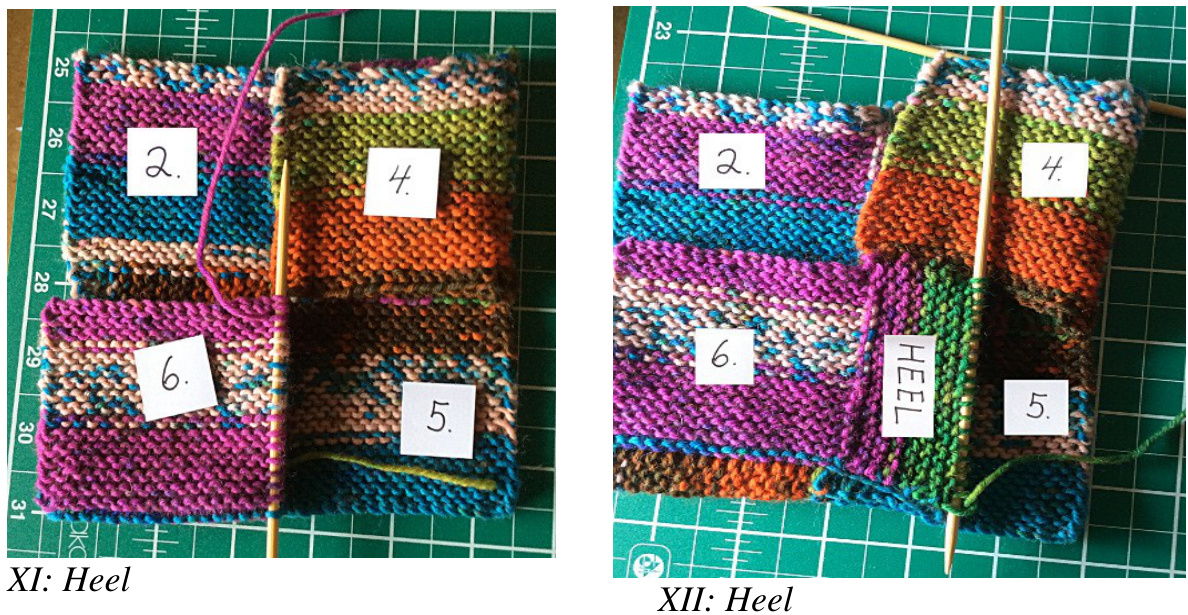
15. Once this square is done, bind it off together with the last open edge of square 5 with a 3 needle bind off. If the picked up stitches are too tight, you can knit them once with the live thread, then start the bind off from the other edge (images XII, XIV). Break yarn.
XIII: Heel bind off
XIV: Finished heel
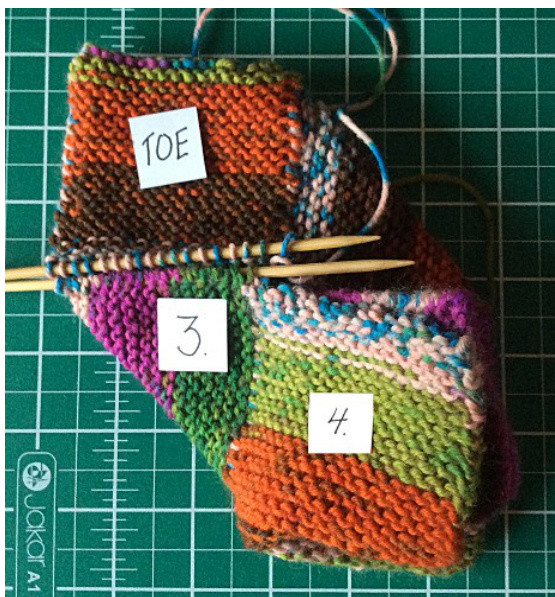
Toe
16. Pick up 18st along an open edge of sq 2, so that your knitting direction will be perpendicular to the direction of sq 2 (imageXV). 17. Knit the last square combining both edges as you go with the last open edges of squares 1 and 2 (image XVI).
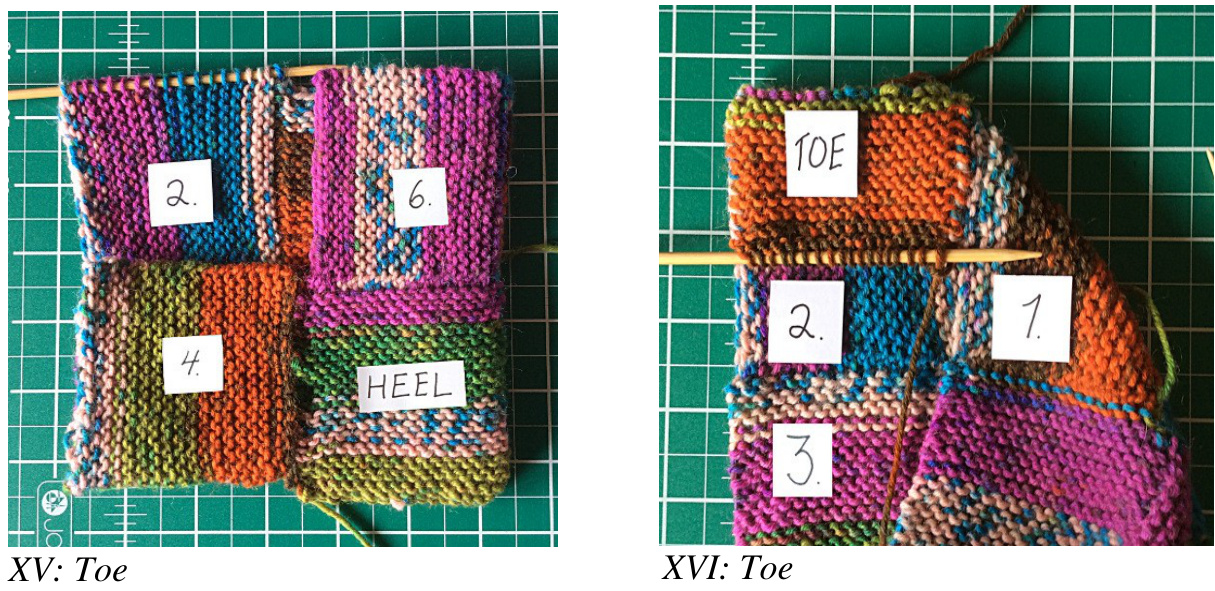
18. Pick up 18st from the last open edge of square 3. Bind off the open stitches from the toe square with the stitches picked up from the edge of square 3, using three needle bind off (image XVIl).
XVIl: Toe bind off
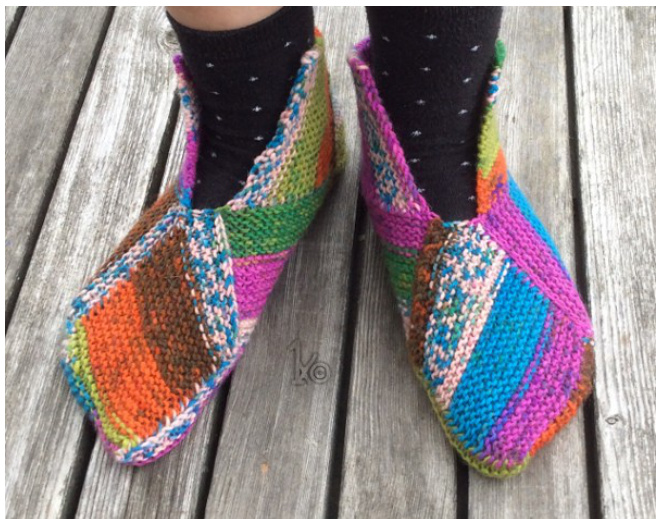
XVIll: Front view
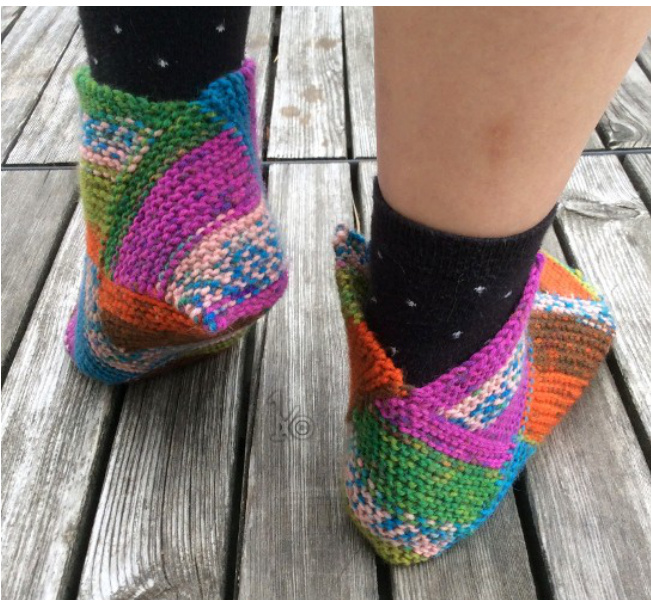
XX: Heel
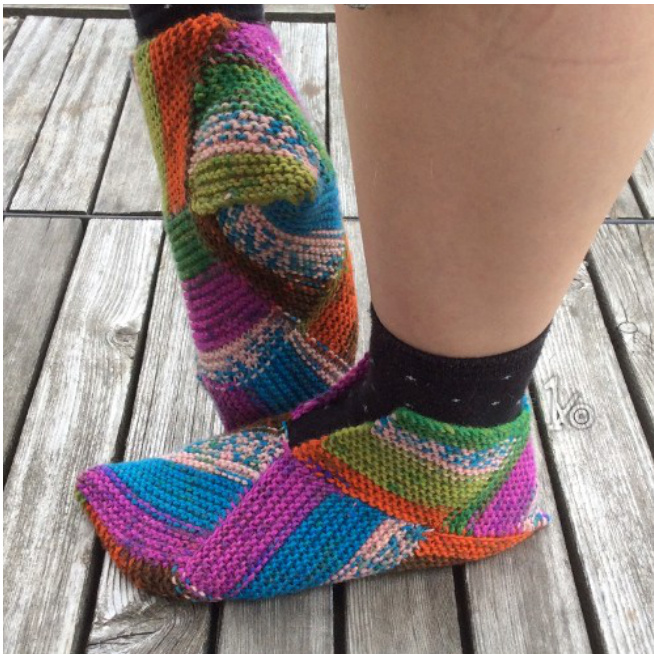
XIX: Side and bottom view
Additional notes
The size of the slippers can be changed either by varying the amount of stitches per square, or by changing needles and yarn. The length of the slipper is twice the width of one square, when measured across from one corner to the opposite one. A sample square will help in estimating how large the finished slipper will be. However, this slipper style is quite stretchy and rather malleable, so it's better to make them a bit too small than a bit too big. The toe and heel squares may seem awkward and confusing in the instructions, but they become much more clear when one is actually handling an unfinished slipper. If keeping track of what's going on seems tricky, a striped or otherwise multicoloured yarn may help. If the methods for picking up stitches and combining squares together don't seem ideal, it's perfectly feasible to replace them with something one is more comfortable with. The most important thing is that the seaming is tidy, doesn't pucker up or gape and feels smooth against the foot. When making the first pair, it's a good idea to feel the seams every now and then, to make sure the slippers are comfortable to wear. When binding off squares, it's a good idea to avoid making the edges too loose. Many of the bound off edges are later used for picking up stitches and if the bind off is very loose, it may result in a gaping seam. The bound off edges themselves don't need to stretch very much sideways. Hope you enjoyed the instructions and I hope you enjoy your slippers more! Happy knitting!


