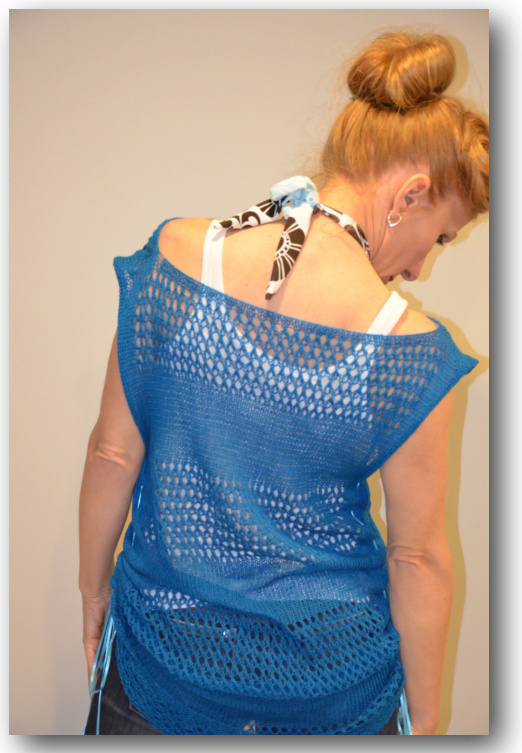
Jump into Summer by Myrna Batten
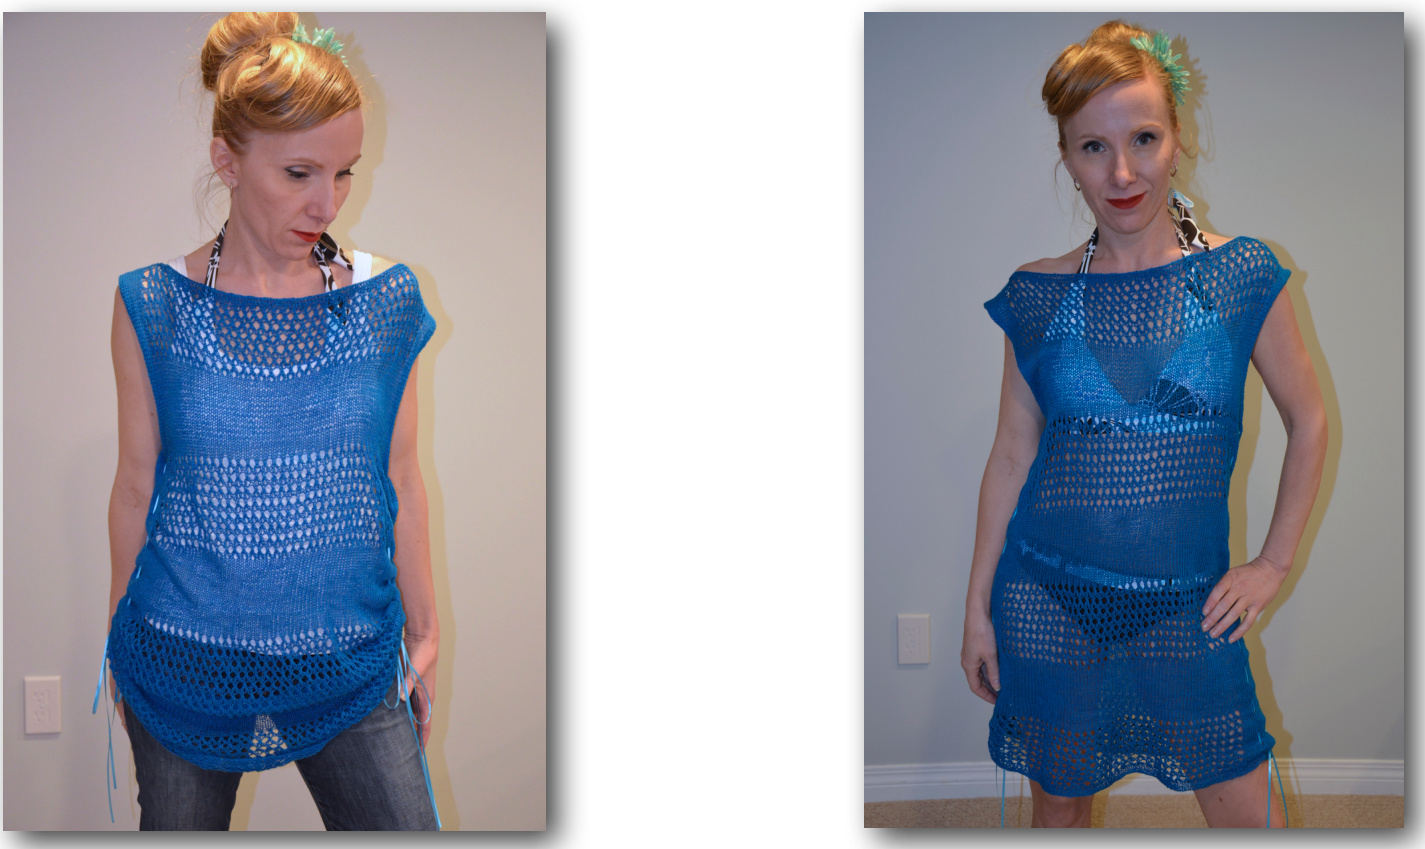
This lightweight summer cover-up is pretty and versatile, with the option to wear full-length as a beach dress or to cinch up the sides and wear as a lace tunic over a tank top. The design allows the natural drape of linen and lace to do all the shaping, making it an easy knit and a great introduction to a simple lace pattern. Size: As there is no shaping for this garment, I recommend you choose your size based on your widest measurement (Hips or bust). Intended to be worn with 0-10 cm (4") positive ease. Shown in 91.4 cm (36 inches) with zero positive ease for hips and 10 cm (4 inches) of positive ease for chest
Finished measurements
Circumference:
91.4, (101.6, 111.8, 121.9, 132.1) cm; 36, (40, 44, 48, 52) inches.
Length:
80 (80, 80, 90.2, 90.2) cm; 31.5 (31.5, 31.5, 35.5, 35.5) inches. Length can easily be modified by adding or omitting sections from the bottom edge (to ensure the uppermost section remains a lace section). Each stockinette panel is 10 cm (4") and each lace panel is 11.4 cm (4.5")
Materials:
Yarn:
2 (3, 3, 3, 3) skeins of Diamond Yarn, Luxury Collection Pima Lino Lace, 60% cotton, 40% Linen, 424 m (464yd), 50 g (1.76oz). Shown in colour 7750 (French Navy) Note on yarn for the smallest size. I used almost ALL of the yarn listed for this size. I recommend you purchase an additional skein to be sure that you have enough yarn to complete the project.
Needles:
3.5 mm (US size 4) circular needle 80 cm (32") (or size required to obtain gauge)
Notions:
6 stitch markers stitch holders (optional) tapestryneedle two lengths of thin ribbon or cord (length is dependent on size: each approximately 162.6 cm (64") for smaller sizes or 183 cm (72") for larger sizes Gauge: Washed and carefully blocked (do not stretch). Stockinette: 22 sts x 32 rows = 10 cm (4") Lace panel: 20 sts x 28 rows = 10 cm (4")
Abbreviations:
k: knit p: purl pm: place marker sm: slip marker rs: right Side of garment ws: wrong Side of garment k2tog: knit two stitches together (decrease one stitch, right slant) ssk: slip 2 stitches knit wise one at a time, then slip both of these stitches back to the left needle and knit them together through the back loops (decrease one stitch, left slant) yo: yarn over sl2-k1-psso: slip two stitches as though doing a k2tog, knit the next stitch and then slip the 2 slipped stitches over the stitch just knit and off the right needle (centered double decrease)
Instructions:
Body:
Cast 0n 194 (214, 238, 262, 282) stitches. k 8 rows (garter stitch) Place marker to denote the start of round and join stitches to knit in round being careful not to twist your stitches. \* \*alternatively, you may chose to join the round immediately after casting on, however, I find it easier to join, without the worry of twisting stitches, once the foundation of garter stitches is complete (and no purling for a few rounds, which is always a bonus) \*
Begin body. Set up round:
\*k13 (13, 15, 17, 17), pm, k71 (81, 89, 97, 107), pm, k13 (13, 15, 17, 17)\* pm; repeat \*\* once. You should have six stitch markers: one at each side seam and four to mark the front and back lacesections. d images copyright 2013: Myrna Batten (mdbatten@shaw.ca). Pattern is for personal use onl,
For sizes 91.4, (101.6 & 111.8) cm; 36, (40 & 44)" only
Lace Section:
Round 1: \*k6 (6, 7), yo, k5 (5, 6), ssk, sm, (k2 yo) repeat O to last stitch before marker, k1, sm, k2tog, k5 (5, 6) yo k6 (6, 7),\* sm; repeat \*\* for other half Round 2: and all even rounds: k, slipping markers as you come to them Round 3: \*k13 (13, 15), sm, k1 (yo, sl2-k1-psso), repeat O to next marker, sm, k13 (13, 15),\* sm, repeat \*\* for other half Round 5: \*k13 (13, 15), sm, (k2, y0), repeat O to one stitch before marker, k1, sm, k13 (13, 15),\* sm, repeat \*\* for other half Round 7: repeat round 3 Round 8: k, slipping markers as you come to them These 8 rounds form the lace pattern in the body of the dress. Repeat these 8 rounds three times more to complete the first lace section. (32 rounds, total, per lace section)
Stockinette Section:
In this section the front and back panels will be worked in stockinette while continuing the eyelets at the side seams. Round 1: \*k6 (6, 7), yo, k5 (5, 6), ssk, sm, k to next marker, sm, k2tog, k5 (5, 6), yo, k6 (6, 7),\* sm, repeat \*\* for other half Round 2 - 8: k, slipping markers as you come to them. Repeat the above 8 rounds, three times more (32 rounds, total, per stockinette section) You have now completed a lace section and stockinette section. Continue to alternate sections as follows: lace, stockinette, lace. Then begin another stockinette section, working only the first 6 rounds. You will now be dividing the back from the front for the arm holes. For sizes 121.9, (132.1) cm; 48, (52)' only
Stockinette Section:
Round 1: \*k8, yo, k7, ssk, sm, k to next marker, sm, k2tog, k7, yo, k8,\* sm, repeat \*\* for other half Rounds 2-8: k, slipping markers as you come to them. Repeat the above 8 rounds, three times more (32 rounds, total, per stockinette section)
Lace Section:
Round 1: \*k8, yo, k7, ssk, sm, (k2 yo) repeat O to last stitch before marker, k1, sm, k2tog, k7, yo, k8,\* sm; repeat \*\* for other half Round 2: and all even rounds: k, slipping markers as you come to them Round 3: \*k17, sm, k1 (yo, sl2-k1-psso), repeat O to next marker, sm, k17,\* sm, repeat \*\* for Other half Round 5: \*k17, sm, (k2, y0), repeat O to one stitch before marker, k1, sm, k17,\* sm, repeat \*\* for other half Round 7: repeat round 3 Round 8: k, slipping markers as you come to them These 8 rounds form the lace pattern in the body of the dress. Repeat these 8 rounds three times more to complete the first lace section. (32 rounds, total, per lace section) You have now completed a stockinette section and lace section. Continue to alternate sections as follows: stockinette, lace, stockinette, lace. Then begin another stockinette section, working only the first 6 rounds. You will now be dividing the back from the front for the arm holes.
Back/Front ALL sizes:
Note: All sizes have the same depth of armhole (22.9cm; 9"). The Front/Back are worked separately, flat (back and forth). Next row (ws): remove start of round marker, turn, k3, p to 3 sts before other side marker (slipping the panel markers as you come to them) k3. (you may either leave the other half on the circular needle or move them to stitch holders to be worked once the first half is complete) Next row (rs): k, slipping panel markers as you come to them. Next row (ws): k3, p to last 3, k3 (slip panel markers as you come to them) Repeat the above two rows 11 more times
Next row (Lace Panel)
to marker, sm, (k2 yo), repeat O to one stitch before marker, k1, sm, k to end. row 2 (ws): k3, p to last 3sts (slipping panel markers as you come to them) k3 Row 3 (rs): k to marker, sm, k1 (yo, sl2-k1-psso), repeat O to next marker, sm, knit to end. Row 4 (ws): repeat row 2 Repeat the above 4 rows 6 times more
Neck and Shoulders
Row 1 (rs): k to marker, remove marker, k6, pm, knit to 6 sts before next marker, pm, knit to marker, remove marker, knit to end. Row 2 (ws): k3, p to marker, sm, k to next marker, sm, p to last 3 sts, k3 Row 3 (rs): k to end, slipping markers as you come to them. Repeat rows 2 & 3, two times more. Leave these stitches on a stitch holder (or on the circular needle) and return to reserved stitches. Join yarn and repeat instructions from dividing point.
Bind off
Once both sides are complete, turn the garment inside out so that the right sides are together. You will be doing a three needle bind off for the shoulders. Bind off 19 shoulder stitches using a three needle bind off, bind off front stitches (to next marker). Join yarn and repeat from other direction for other half
Finishing:
Seam the small opening at the bottom garter band. Weave in ends, wash and block to finished measurements. Take a length of ribbon (you will need two the same length) that is approximately 162.6 cm (64") for the smaller sizes and 183 cm (72") for the larger sizes and loosely weave the ribbon through the eyelets on each side of the top (you may choose to tack the middle of the ribbon to the centre seam under the arm hole if desired). This ribbon may be used to cinch the top to make it shorter.